What's new

archived grow articles

A

alpinestar

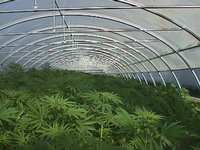
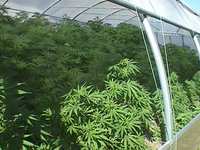
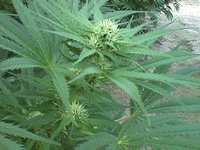
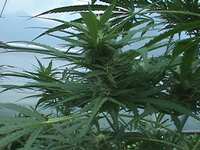
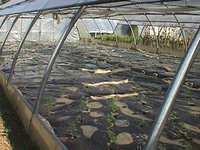
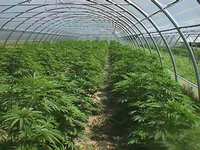
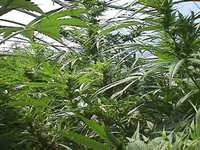
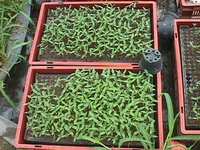
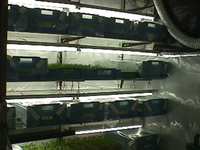
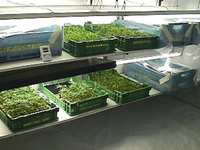
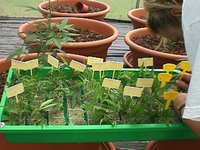
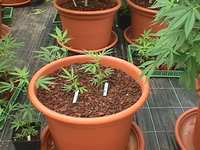
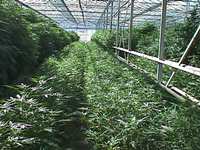
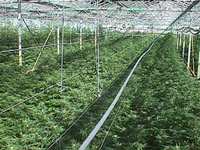
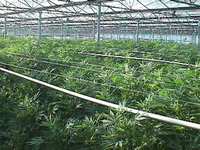
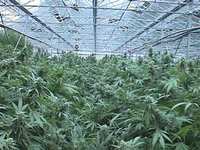
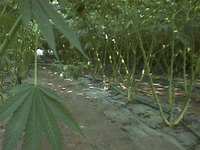
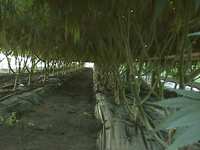
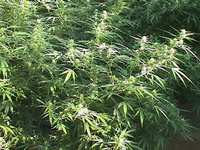
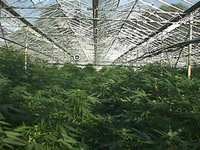
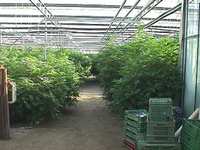
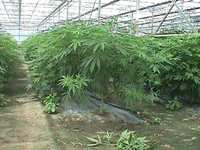
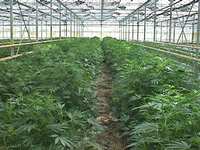
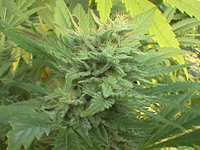
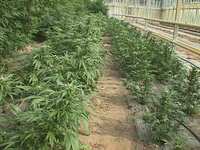
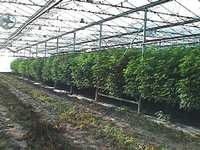
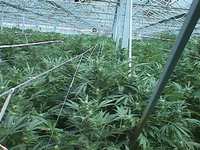
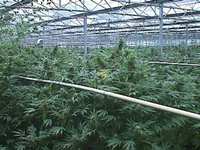
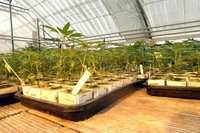
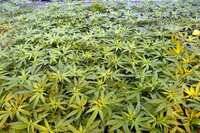
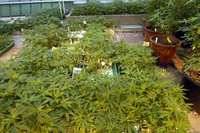
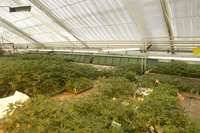
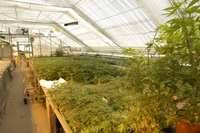
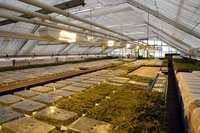
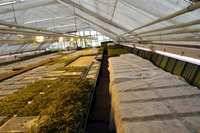
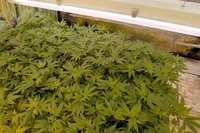
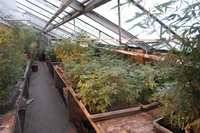
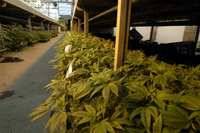
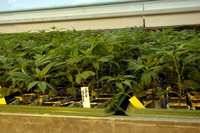
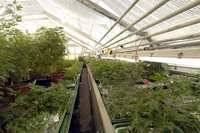
does anyone know where i can find the old overgrow articles on the (once legal) swiss farms?
its been years, but some one has got to have it archived!


thanks
 

Hlava

Member
yes , on my PC :)))

Jorge Cervantes first article in a monthly series that will appear on the home page of Overgrow.

Swiss Greenhouse Tour
by Jorge Cervantes - June 1, 2004


This is my first article in a monthly series that will appear on the home page of Overgrow. I am very happy to be able to participate at this level with the members of Overgrow, the absolute number one cannabis grow site in the world.

Cyberspace has given way to advanced instantaneous communication between growers. Something we did not have some 20 years ago when I started publishing marijuana books and articles. The management and members of Overgrow have taken cannabis cultivation and use to new highs. The influx of information is more mind-bending than an exquisite Haze. Keeping up with everything is next to impossible considering there are more than three million posts on Overgrow alone!

Information on Overgrow is most often top quality, thorough and instantaneous. The members are the most knowledgeable on the web. The new Strain Guide database is truly outstanding. This site has virtually everything for the grower!


My question is what can I add to this outstanding site? How can I do the most with this column for the members of Overgrow? Please let me know (private message box???) ([email protected]).

My feeling is to use this column to share Overgrow information with those that do not know about it and add more information to Overgrow. Below is a list of 22 cannabis magazines and websites. There is a lot of grow information in these magazines and sites. I write for ten of the magazines listed below. I want to use this position to bring more information to everybody. The list is not complete, but it is a good start. Check these sites out. Much information is in English on the foreign language sites. Don’t forget to tell them about Overgrow when visiting.

1. Cañamo, Spain http://www.canamo.net/
2. Cannabis Culture, Canada http://cannabisculture.com/
3. Cannabis Culture, Germany http://www.cannabus.de/
4. Essensie, Holland http://www.essensie.nl/
5. Grass Times, Germany http://www.megamultimedia.com/
6. Grow, Germany http://www.grow.de/
7. Hanf Journal, Germany http://www.hanfjournal.de/
8. Hanfblatt, Germany http://www.hanfblatt.de/
9. Heads, Canada http://www.headsmagazine.com/
10. High Life, Holland http://www.highlife.nl/
11. High Times, USA http://www.hightimes.com/
12. High Times, Grow America, USA http://www.420.com/
13. International Cannagraphic, UK http://www.icmag.com/
14. Redeye Express, UK http://www.theredeyeexpress.co.uk/
15. La Maria, Spain http://www.highlife.nl/beurs_barcelona/
16. Soft Secrets, Dutch http://www.highlife.nl/frame_ned.html/
17. Soft Secrets, English http://www.highlife.nl/frame_eng.html/
18. Spannabis, Spain http://www.spannabis.com/
19. Weed World, UK http://www.weedworld.co.uk/
20. Yerba, Spain http://www.megamultimedia.com/yerba/
22. Pure Weed, UK

Please check out the article on growing with half as much light (Yield of Dreams) in High Times Grow America, May/June 2004. The grower I interviewed several times did his homework and harvests more than 0.7 grams per watt of light every 30 days of flowering. Higher harvests have been recorded, but I have not seen them. However, all the results I saw were very heavy!

There is never enough information about growing herb! You can check out many foreign sites for some great photos and information. Also, tell them about Overgrow. For example, in Spain, two sites, SoloCannabis and CannabisCafe are teaching the Latin world the fine points of growing. Marijuana growing has exploded in Spain with help from these sites.

Page 2


European crops have grown by leaps and bounds in the last few years. Let’s go on a trip through a few European gardens, both large and small. The tour will give you an idea of what has been going on around here. One of the best tours is through the Swiss greenhouses.

In the late 1990s a lawyer pointed out a loophole in Swiss cannabis law. Cannabis (rope) and cannabis (dope) were not distinguished. Cannabis becomes a “drug” when it is processed by rolling into a cigarette, stuffed into a pipe or concentrated into hashish. Until that point it was considered hemp.

The first few years were wild. Growers contracted farmers to plant fields of cannabis, much of which was mediocre at best. Growers started planting better seeds and making clones wholesale. Then growers started planting three crops a year in greenhouses. Others set up large indoor installations. Others just grew in Mother Earth.

Swiss authorities cracked down on large-scale growers two years ago and have continued to keep up the pressure. Their entry into the United Nations caused the open marijuana production to come under scrutiny. Politicians forced police to shut down large-scale growers and stop grow stores from producing and selling clones. They also stopped stores from selling small quantities of marijuana.

The ingenious Swiss found many loopholes in the legal system. They sold 10-gram bags of buds as “herbal smelling bags” or larger amounts of whole dried buds as “dry flower arrangements.” One by one the loopholes were closed and growing has gone partially underground. To further complicate the Swiss scene, laws are enforced differently in each of the 25 cantons, similar to states or provinces.

Here are 54 shots of a greenhouse given to me by a good friend that should remain anonymous for now. The images are truly outstanding and were taken during the entire 2000 growing season. The varieties range from White Shark to California Orange. There are also many unnamed crosses. Seedlings and cuttings both were transplanted directly into the soil floor in the greenhouses. The water table was high and the greenhouses had been used for so long that leached out fertilizers had built up in the moist soil. The grower watered plants for the first two weeks until they got established. He never watered or fertilized after that! Check out the show!


The photos in this file speak for themselves. The greenhouses are huge. Some are poly tunnels and others are heated glass houses. They are all top quality and truly amazing. The amount of cannabis in these greenhouses is impressive.


The images came from one of the best growers in the southern Italian-speaking canton of Ticino, Switzerland. The climate is so mild in the valleys of the Swiss banana belt that palm trees grow outdoors. This is where some of the most prolific fields and greenhouses of cannabis salted the countryside.


There are a several greenhouses in the pictures. The images will show you the basics of what is happening. The scope of production was immense. To dry and process the harvest from the pictured greenhouses, the growers purchased a four-story building. It had a freight elevator big enough to accommodate half a truck trailer.


thx Hlava
 
Last edited:

Hlava

Member
page 3

There are some basic principles that should be noted. First, note the health of plants in the photos where plants occupy one third of the grow room and air the rest. They are much healthier because they have enough “breathing room.” The air is able to change quickly enough if it is in the right proportion. Remember plants are giving off moisture and the sunlight outdoors helps increase humidity and temperature inside the greenhouses. All this stuff has to be dealt with. If the greenhouse has a buffer zone of air, there is a place for the exchange of air to take place.

The soil in the greenhouses was exceptionally interesting. It was rich volcanic bottomland. They watered and fertilized seedlings and clones for the first two weeks until they were established. After that they left them alone. The water table is so high in the Swiss valley where the greenhouses are located that they did not need to water. The greenhouses had been used for so long that nutrient salts had built up in the ground water. Since cannabis is a good accumulator plant, no water or fertilization was used! Each growing situation is different. The important thing is to realize the differences


As the photos will show, some of the greenhouses were heated by galvanized steel pipes that run around the beds. The heat is delivered around the plant zone. The soil is not heated. Since these are production greenhouses, clones are preferred over seedlings and are planted directly in the soil


They work the soil with a rototiller driven by a small tractor. The implement tills the top 4-6 inches of the soil. Once tilled, planting by hand is easy. Tilling moves weed seeds up to the top where they sprout and grow.


They cover the soil with black plastic Visqueen mulch. This really holds in the moisture and prevents weeds from sprouting. Once the Visqueen is in place and anchored down, they cut holes where they plant small cuttings or seedlings. Notice the holes are large. This is to keep the plastic from touching the plant stem the first few weeks. The plastic heats up to above 100 degrees F. If a stem touches it early in life, it could cook. Once plants are big enough to shade plastic mulch, the danger is over. Black plastic mulch also holds extra heat in the top layer of soil. The extra heat speeds root growth and plant development. Since they do not need to water, no added complications from irrigation delivery systems results.

There was a lot of outdoor growing going on in Switzerland too. They would plant rows of cannabis in between corn or other crops. But much of the time, they would plant small 1-5-acre patches of cannabis. Some of the plots were much bigger.

Much of the outdoor harvest was made into hash. They prefer to smoke hash in Switzerland. Ice hash is just catching on, but they still prefer sieved pollinator hash. The harvest from one of the outdoor farms I visited was 50 metric tonnes. You can make a lot of hash with that!

One of the biggest problems in greenhouse growing is how to keep plants cool and well ventilated. Big fans are located at the end of the greenhouses to move air directly through the growing area. This is why it is so important to have a bank of air above the plants to let the exchange take place. Moving the air in and out of greenhouses is the key to a healthy problem-free harvest.


If conditions for botrytis (bud mold) growth were good – humidity over 70 percent and dense clusters of buds – this grower used a sulphur evaporator to disperse a small amount of sulphur in the greenhouse atmosphere. Botrytis is unable to grow in this environment. I was really amazed at how well the sulphur worked to prevent mold.
 
Last edited:

Hlava

Member
page 4

...“a field of marijuana is like a bank without walls.”

More sophisticated glasshouses have vents in the top of the roof to let air out where it is needed. Most of these systems are set up on a mechanical relay system controlled by a simple atmospheric controlling device. Home greenhouses can use a simple device to open and close vents that is sold at greenhouse supply stores. It is a cylinder full of paraffin or similar substance. When the sun heats it up, it expands causing a mechanical ram to open a vent. As the substance closes and contracts the ram pulls the vent closed.

A hammock is in one of the photos. A grower with a cell phone would sleep at the greenhouse because of rip-offs. The outdoor fields were a lot more venerable to theft. The thieves post sentries to swoop in and steal plants when guards are on the other side of the field. They keep in touch with cell phones and are quite difficult to catch.


Thieves are a reality in Switzerland. As Bernard Rapaz, the most well-known Swiss activist said to me (www.valchanvre.ch) “a field of marijuana is like a bank without walls.” We met at a restaurant and he said that just before we arrived he had two calls about thieves raiding plants from one of his gardens.

Many of the growers keep guard dogs. Believe me they work. One friend got a call in the middle of the night by his security company informing him of a break in. When they arrived, the guard dog had one of the perpetrators pinned to the floor and the other against the wall. He was trained to hold the bad guys rather than bite them. Both of the thieves had wet their pants and couldn’t wait to go to jail!

The smell and aura are amazing when you are in one of the greenhouses full of ripe marijuana. The smell is intoxicating, the atmosphere euphoric and the feeling smug. A greenhouse full of a crop of clones, all the same size, all with the same aspect, all with the same aura, a special moment.

Three crops a year are harvested from many greenhouses in Switzerland. They use darkening material to “black out” greenhouses to give plants uninterrupted 12 hours of darkness. In fact, I have seen growers cover entire fields of marijuana with a dark tarp. They drive steel arches into the ground, over which a line of people pulls a very large piece of plastic. The wind caused the biggest problems. They had to anchor the plastic down with soil, water and other heavy objects.

Since this is an interactive site, Please send me your questions and I will do my best to reply to them in an updated article.

The photos are typical of the volume of production in Swiss greenhouses. In future columns, I can show you some more Swiss shots. Just let me know.


Some growers concentrated on flowering and others on producing clones. I know one clone producer that generated more than 500,000 clones three years ago. There were at least 6 very large custom clone producers.


Hlava

Member
This greenhouse is very interesting but I had just a few minutes to take the shots because of prior engagements. I ran through the greenhouse shooting images and was unable to ask any questions. I have been to the greenhouses before and can give you a basic idea of what is going on.


The grower produces up to 20,000 clones a week. Growers put in their order about a month before. The grower then makes the specified clones. They keep a good supply of different mothers for growers to select clones from.


You can see they use different clone making techniques, spraying overhead with water and humidity domes.

A tour around a few Swiss greenhouses always makes me think, “why is this beautiful plant illegal?”


Written by Jorge Cervantes. Jorge Cervantes is the author of the ALL NEW (2002) Indoor Marijuana Horticulture: The Indoor Bible, with 200 ALL NEW color photos, Marijuana Indoors: Five Easy Gardens, Marijuana Outdoors: Guerilla Growing and countless articles. His works are published in Dutch, English, French, German and Spanish.

Thats all folks , want more articles ???

Hi Hlava :rasta:
 

radvancan

Active member
ICMag Donor
Veteran
Hi, my Czech friend........ :joint:
Good information and photo of Swiss cannaculture.
 
Last edited:

Hlava

Member
Thanks for puttin those OG articles up for us all :yes:

..hey OKey a do more , now is here a ...

From OG's Archives: Here's how to get a first-class buzz from your old trim leaves. This series will help you make the ultimate quality finger hash from rubbish you would normally throw away

Making the Best Finger Hash
by Oldtimer1 - April 1, 2004


"Here's how to get a first-class buzz from your old trim leaves. This series will help you make the ultimate quality finger hash from rubbish you would normally throw away." - Oldtimer1

In the first installment of the OT1 series, we will concentrate on the easiest method of procuring the precious glands for kip, using a standard shop purchased machine from Holland. At the end of this article you'll find detailed plans to build your own similar motorized hash tumbler.

The design is very simple, it has proven reliable in use nearly continuously over the last two and a half years! It's comprised of a curved base box with a variable speed motor driven shaft running through it and a fine mesh covered drum that drops into the box. The drum is driven round by the shaft rotating on the drum rims.

Lightly fill the drum with trim leaves and lightweight bits of bud not worth smoking. Screw the cover on and place the drum into the rotating box. Turn it on low and let it spin for an hour.

This is called the first shake-- real connoisseurs only only do the first shake for 10 to 15 minutes-- just enough for a joint or a small bong. In practise we've found that it's hard to tell the difference when the first shake is run for up to an hour. Its just devastating stuff!

It's important that the trim leaves are not to dry otherwise they will start to break up when they are tumbled. If they start to crumble to dust, put them in a plastic sack with a handful or two of fresh leaves and let them rehydrate for a few hours.

"There is also a myth that near freezing temperatures are best for skuffing! Not true if you want a high quality product."

Freezing material is great if you want quantity quickly and a low quality result. There have been a lot of dubious practices like this going on in Holland recently, so now the better dealers will offer you a 10x magnifier to look at the quality of their product.

picture.php
An overview of the gear used to produce first-quality skuff.

picture.php


The machine's drum is filled with trimmings.
picture.php


Drop the drum into the machine and get it started. Run your own tests and determine how long you prefer the first shake to go.
picture.php


The first shake is stopped, and the resin is gently scraped into the collecting tray using a rubber spatula or a soft brush. These are the purest and finest quality resin glands.
Quick JumpPg 1 - Hash with Oldtimer1Pg 2 - More Premium Hash NEXT: More Premium Hash
 
Last edited:

Hlava

Member
page 2

"The first shake will look like a creamy light brown sugar. It can be used as it is-- in a pipe, a joint or a bong... just as you would use hash."

It was a little cold the day this lot was tumbled and a few non glandular tricomes were just starting to come through. We get the best quality when the room temperature is between 60 and 70f as a base guideline. As you can see there is no sign of any leaf particles or other contaminants, just golden tricomes ready to smoke!

If you want, the skuff can be made into finger hash by hand rubbing. The small piece in the photo was made with mainly sativa skuff, which is less oily than Indica and makes a harder hash, but it is still dynamite!

A small amount of fresh skuff is poured into the palm of the hand and worked until it starts to come together. It is then rolled and pressed between the palms. If you don't rub long enough, it will crumble easily without warming. Some people like it worked down until it is half the size and very dense-- this will need warming with a flame to make it crumble up for smoking.

For the second shake, the drum is then returned to the machine and run for a further 3 to 4 hours. This will still give you a far better quality product than the best Nederhash you can buy in Amsterdam!

This is some second shake lightly rubbed by hand until it is starting to come together. It was formed into a rough slab shape, wrapped in film and warmed in a microwave for a few seconds. Then a little light pressure with a board on a table and you have a nice piece of hash. The piece in the picture is cut from a slab of lightly pressed #2 shake for my personal testing! Mmmm and yes it's good!

If you want a third shake can be done leaving it to run overnight, the quality won't be in the connoisseur class with less capitate trichomes, more non-glandular/bulbous trichomes and small leaf particles. But even so, warmed and worked in the hands it will come together. Then if it is treated as with the second shake but warmed more and pressed harder you still have hash equal to any commercial Moroccan or Lebanese.

"For every 20 sq ft of plants you should get between 1/4 and 1/3 of an ounce of first shake!"

Later runs will yield between 1/3 and 1/2 of an oz. of second shake and if you do a long third shake another 1/2 oz. If you grow resinous Indica-dominant strains, the yield will be slightly higher, and the hash darker and stickier! So don't waste that trim get skuffing and puffing along with Ot1!

picture.php


Approximately seven grams of first shake skuff; looks pretty good, doesn't it?
picture.php


The steps from raw skuff to hand pressed hash are amazing to watch!

picture.php


The hash done by pressing on a table after warming.

Written by Oldtimer1.

Find the answers to your questions in the FAQ

--------------------------------------------------------------------------------

Hashish and oil

Discuss it in the Forums

Hashish & Oil: One of the best results from growing is the high quality hash and tinctures.
Go to the forums now

Related Articles

Ot1's Homebuilt Hash Press - Know what to do with all of that skuff you made with your bags or tumbler? Press it like the pros to keep it fresh!
DIY: Skuff Tumbler - Make hash from trash! Build your own skuff collector from hardware store parts.

Overgrow the Magazine recent articles
--------------------------------------------------------------------------------

Soil vs Hydro by Smoothy 08-01-04
Mildew: That White Powder by Leaf 07-01-04
Swiss Greenhouse Tour by Jorge Cervantes 06-01-04
Basics of Internet Security by jackerspackle 05-01-04
Making the Best Finger Hash by Oldtimer1 04-01-04
Overgrow Awards Intro by F.T. Hemp, The White Rabbit, MarvinM92, Snoofer 11-25-03
Win a FREE trip to the Cup! by admin 09-16-03
Judging the Finest Marijuana by Jason King 07-19-03
Marijuana Harvest: 3 Ways by BIB, FTHemp & Reaper 05-11-03
Swiss Marijuana Madness by Shipperke 03-21-03

picture.php


..fotoz i editel letter , nex is a "Marijuana Bubbler Garden "

Thx our Hlava
 
Last edited:

Hlava

Member
scs07 and one Q , hey thannx and wait a moment a show all from my archive , rad2an a sensi23 jeste sem dosypu nejake veci co mam a pak si hodom dovcu asi po deseti letech , jsem moc podrazdenej na vsechny a fakt to potrebuju , matky me proste par let nepustili , doufam ze tady nezvlčite , cau Hlava , ps : nechte si to pro sebe :)))
 

Hlava

Member
Marijuana Bubbler Garden.....is ready :))) :joint:

Simple and Efficient, the Bubbling Growroom


In my part of the U.S. grow rooms are busted on a weekly basis. Most of these growers were busted with over 100 plants, which is very dangerous legally. As a rule, I stay under 50 plants total at any time including clones, seedling, and mothers. Bubblers help me keep plant numbers down and yields up without sacrificing speed or quality.

I was always looking for a growing system that better suited my needs and living situation. After three years of growing in soil, I decided to try new hydroponic systems. I was tired of lugging shopping carts of soil into my house every three months. When I saw Highgrade’s deep water bubbling bucket, I was impressed. I first tried a single bubbling bucket along with my soil garden. The speed and yield was so impressive that I quickly did a full garden of bubblers. After experiencing how much work it was to manually take care of a bubbler garden, I designed a system similar to the General Hydroponics Waterfarm controller system.


The system is easy to build and maintain. After it's built, you only need to buy nutrients, pH down, and airstones. I'm positive that after one crop it will be clear that the bubbling bucket is one of the easiest growing systems ever. I have setup pure beginners with this system and made them look like pros. One friend pulled 24 ounces of quality bud from a 1000-watt Hortilux on his first try. This article will take you through a production garden based on Highgrade’s bubbling bucket.

I like growing and smoking a variety of strains. Currently I’m working with Positronics Northern Lights, Sensi Star, Cinderella, Sweet Tooth #3, and AK-47. Growing one strain at a time (monocropping) is always more productive, or with the recommended number of 6 to 8 plants per 1000-watt, you can grow one strain per bucket and have an amazing selection


Page 2


Plant Numbers and Yield


These are recommendations for the amount of buckets to run in the system, based on two weeks of vegetative growth. The actual number of buckets will vary depending on the size and yield of the strain you are using. The average yield of a plant in this system is 3.5 to 4 ounces. A higher yielding strain will easily produce more-- I have yielded around 30 ounces using 7 plants and a 1000-watt Sunmaster Warm Deluxe metal halide.


For your first run of the system I recommend you start with less plants (5 to 6 per 1000 watts). Recently I've been able to yield 5.5 to 6.6 ounces per bucket when running less plants and using better pruning.


1000 watts: 6 to 7 buckets
600 watts: 4 to 5 buckets
400 watts: 3 to 4 buckets
250 watts: 2 to 3 buckets


Building The System

The instructions will cover the setup of a 7-bucket system for a 1000-watt light. The methods are not the only way to run the system, but what I have found to work through experience.

Parts List:

8 - black or white buckets
8 - lids (Home Depot or other local hardware store)
2 - rolls of Aluminum tape or other tape for blocking light. If you found black buckets buy 1 roll of tape.
14 - straight 1/2" barbs. (hydro store or Home Depot)
14 - 1/2" rubber grommets (hydro store)
7 - airstones (Wal-Mart or pet store). I usually buy twice as many.
40ft - 1/2" black vinyl tubing (hydro store)
1 - 7/8" wood cutting drill bit
7 - dual outlet airpumps. (Wal-Mart or pet store)
7 - 6" Orchid pots or other suitable net pot. (hydro store)
Geolite or hydro clay. Enough to fill all 7 net pots.
Silicone tubing 1/4". Amount will vary depending on placement of airpumps.
1 – reservoir large enough to hold 32 gallons. I use a 45-gal Rubbermaid tub.
1 - Water pump. I recommend a pump with a rating higher than 300gph. A faster pump will drain the buckets much quicker. I currently use a Mag Drive 9.5 (950gph). I've also used a Maxijet 1200 which took 12 to 15 minutes to drain the buckets.


page 3


Bucket Construction

Use this template to cut a 5" hole in your lids. This will fit a 6" Orchid net pot perfectly. Print the circle, cut the circle out, and trace it onto the lid. Alternatives to net pots are the small 4” plastic pots from Home Depot. Drill lots of small holes in the bottom of pots and they work just as well. Don't forget to drill a ¼” hole for the airline in the top of the lid.


Take your 7/8” wood cutting drill bit and make a hole near the bottom of the bucket. Make sure the hole is smooth and free of any plastic shavings. If any plastic remains take a razor blade and carefully cut them away, but do not make the hole any larger. Failure to do this could introduce tiny leaks.


Insert the ½” rubber grommet into hole. Sometimes a little water on the grommet helps to ease it in. Now push the ½” straight barb about half way through the rubber grommet.


The Controller


The controller bucket needs seven holes drilled in bucket the same way as shown above. The holes are spaced about a ½” apart. Now that all the barbs and grommets are in place, it’s time to connect the buckets. Before connecting the buckets you should map out a 5 x 5 foot space where the buckets will fit. Place each bucket in its final position where it would be at the end of flowering. Connect all the buckets to the controller with the ½” vinyl tubing. Make sure there’s enough slack on the tubing so you can move the buckets later. I usually make a few adjustments to the tubing before filling them with water. It’s a big pain to fix things later when all the plants are in.


Airstone Weights


This part is optional as everyone has their own way to keep the airstone at the bottom. I prefer not to use anything metallic in my buckets. You’ll need some ½” tubing and glass beads that can be found at Wal-Mart in the crafts section.

Cut a 3” piece of ½” tubing. Drill a ¼” or 5/16” hole in the middle of the tubing. Take the glass beads and push one into each end of the tubing.

page 4

High Volume Air Pump


Left: My garden uses a single air pump (The Pump 40) to provide air for 19 buckets. Air is pumped around the grow room via ½” PVC pipe and split into ¼” air lines by four dripper manifolds.

Middle: The parts for the dripper assembly. All parts can be found at Home Depot in the irrigation section.

Right: The dripper dividing air to the controlled buckets. Normally used for water, it works just as well to portion the air around the system.


Nutrient Formulas

For nutrients I use General Hydroponics Flora series. I suggest using these nutrients for your first run to avoid any problems.

There are two nutrient formulas to use in your bubblers. I currently recommend the Lucas nutrient formula for use in bubblers. The advantages are more Mg, more overall available nutrients, less mixing, and less nutrient changes. Bud density seems to have also improved.

The pH is initially set at 5.2 to 5.8 and usually fluctuates up to 6.3 with no problems. When using the Lucas formula, change the nutrients after two weeks. Always top off with plain pH adjusted water during the two weeks. All measurements are per gallon!

Lucas Nutrient Formula

Vegetative growth
Micro - 5ml
Bloom - 10ml

Bloom

Micro - 8ml
Bloom - 16ml

For those who wish to use Highgrade's formula. This formula also works well, but nutrients should be changed every 7 to 10 days and topped off with the same strength nutrient solution. You could also use a TDS meter to keep your nutrients within the proper concentration...not recommended for newbies.

Highgrade Nutrient Formula

Vegetative (3-2-1)

Grow – 5ml
Micro – 3.3ml
Bloom – 1.65ml

Transition (2-2-2)
Grow, Micro, Bloom – 3.3ml

Bloom (1-2-3)

Grow – 1.65ml
Micro – 3.3ml
Bloom – 5ml


page 5

Healthy Clones

I can’t stress this enough: you must have healthy and well-rooted clones before placing them into the bubblers.


I root my clones in small cups of a 50/50 vermiculite and perlite mix. Sometimes I use Schultz Soil Conditioner when vermiculite is hard to find. It works just as well and washes off easier. After they’re rooted (7 to 10 days) I place them in 16-ounce plastic cups with the same vermiculite and perlite mix. I veg the clones for 7 to 10 days under fluorescents while feeding them with the recommended GH clone formula (1.25ml/gal grow, micro, bloom). Usually I cut my clones three weeks before my current crop finishes to ensure they’re ready on time. Eventually I’ll root my clones in a bubble cloner or something similar, but for now this works just fine.


Loading the Bubblers


Before loading the clones you’ll need to fill all the buckets with nutrient water. Also check for any leaks, airstone, pump, and, arrangement problems.

Take your clone and gently loosen as much perlite and vermiculite off the roots as possible. Then rinse the roots in a bucket of water to get the remaining particles off. There will be some perlite and vermiculite remaining between the roots…don’t worry about it.

Now lay down one layer of geolite in the bottom of your net pot. The reason for one layer of geolite is so the roots grow past them and into the water faster. Get your clone and gently spread out the roots over the geolite so they’re not clumped together. Gently fill the pot with geolite so no roots are damaged. Place the net pot in the lid and pour some nutrient water from the bucket over the geolite to make the roots happy.

page 6


Filling and Draining


All filling and draining happens through the controller. To fill the system I first fill the Rubbermaid tub with 32 gallons of water where nutrients and pH down are mixed in. A waterbed faucet attachment with a garden hose is used to fill the tub. From there, water is pumped into the controller.

To drain, place a pump in the controller and pump all the nutrients into a bathtub or sink. There’s usually ½”-1” of water remaining after draining that has no noticeable problems on the plants. When draining you should turn off the lights and air pumps. The roots are going to be without water for a few minutes so this will minimize stress on the plants. I have a certain strain that goes limp after the first and second water changes until they get a larger root system. If this happens, keep the lights off for 30 to 60 minutes. They usually pick back up within an hour and finish fine with no problems throughout the grow.


Initial Water Level

Through experimenting I found that keeping the water level ½” below the net pot encourages the roots to grow out faster. The roots will be kept moist from the splashing of the bubbles. Roots should be growing out of the net pot and touching the water in 3 to 5 days. Once the roots are in the water the plants will begin to take off. After a nice set of roots are in the water (approximately 7 to 10 days after transferring) bring the water level ½” to 1” above the bottom of the net pot.


Running the System - Veg to Bloom

I usually veg my plants for 2 weeks max. On average they will be around 10 to 12” tall before going into flowering and finish at 3 to 3.5 feet. If you let them get too tall before flowering they will probably stretch past 4 feet so be careful and know your strain well.


Vegetative week 1-2: Start with the given veg formula and leave the water in for the full vegetative cycle. The plants will have hardly used any nutrients after the first week so it’s ok. As the plants use the water you will need to top off with plain water. When the water level drops 3 to 4” below the bottom of the net pot you should top off with a 5-gallon bucket of plain pH water. pH the plain water according to the pH in your bubblers. For example if the average pH in your buckets is a low 5.2 you would pH your plain water at 5.8 to 6.2 and vice-versa if it's high.


Flowering week 1-8: On day 1 of flowering change the nutrients to the Bloom formula. By week 4, you'll probably be topping off 3 to 4 times a week with plain water. A smart grower will want to install a float valve in their controllers to keep the water always topped off.

Experienced growers should use an EC or TDS meter and adjust accordingly. I change to plain water the last 3 to 5 days of flowering to clear the plants of excess nutrients


page 7

Tips for a Successful Bubbler Garden


- Check your airstones at least ONCE a week. Air output should always be like a new airstone.
- Keep air temperature below 84 F and relative humidity under 66%.
- Rotate plants once a day. If you see a weak branch turn it towards the light. Move the smallest two plants directly under the light and the largest to the edge of the garden. I do this until the stretching has stopped.
-To support your plants, build a square frame around your grow area out of 3/4" PVC and run a trellis across the frame. Secure all branches to trellis using green wire plant ties. Obviously the plants have to be in their final positions before doing this.
- For maximum pH and nutrient control you can pump nutrients from the controller to individual buckets using 1/4" dripper lines. This will give you a recirculating system.
- Install a float valve to keep the water always topped off. Hydro shops and usually hardware stores will stock float valves.
- Learn how to optimally prune your strain.

Growing with bubblers in this system is a breeze. Check your airstones, change your nutrients on time, keep up the maintenance, and your plants will reward you. Whenever you’re in doubt about a nutrient problem just change the water with freshly mixed nutrients. After you've successfully completed a grow in this system you can start tweaking the garden to your own personal needs. Everyone have fun growing and stay safe.


Written by train1.
 
Last edited:

radvancan

Active member
ICMag Donor
Veteran
scs07 and one Q , hey thannx and wait a moment a show all from my archive , rad2an a sensi23 jeste sem dosypu nejake veci co mam a pak si hodom dovcu asi po deseti letech , jsem moc podrazdenej na vsechny a fakt to potrebuju , matky me proste par let nepustili , doufam ze tady nezvlčite , cau Hlava , ps : nechte si to pro sebe :)))

:muahehe:
tak to přeji hodně dlouhu, nikím a ničím nerušenú dovolenů. Uži jsi ji do sítosti. Myslím že nezvlčíme, aspon čo se týka mě a Sensiho.

ra2ncan
 

Hlava

Member
...and next is , soil vs hydro by by Smoothy - August 1, 2004 , big respekt 2u , Hlava ...

A growing reference (a simple how to guide for dirt and hydro) sheding some light on which, if either, method is superior.

Soil vs Hydro
by Smoothy - August 1, 2004


Abstract

The purpose of this experiment is to compare the two different growing methods using clones from one mother. The soil and hydro plants are being grown simutaneoulsy in the same chambers to that they are exposed to the similar conditions of light, heat, humidity and temps. The many details of the grow will be explained as we go...lets get started.


History

The seeds used are all F-1 C-99's purchased from Heavens Stairway in June of 2002. This was a time when Bros Grimm were no longer producing the seeds and their quantity was limited. The Canadian HS branch was out so the order was forwarded to the British HS outlet. Compared to other seeds, these were smaller and appeared to be at the bottom of the 'f1 barrel' and I have a feeling that these were among the last to be sold. Three of the initial seeds were planted. One of them died and the other two turned females. Clones were taken from each and several generations of plants were grown. It was determined that one female was superior (yield, overall vigour, the high was the same) to the other and these clones came from her.


The Clones

The clones were done in peat pots sitting on a bed of perlite. Two cake domes (clear, plastic cake covers that bakeries use) were stacked on top each other to create a humidity dome. Inside the dome, the cuts/peat pots were placed along with a jar of water with an air stone in it. This helps keep the humidity up. The entire thing was placed in a nice, warm, happy spot. This cloning method works but, in my opinion, the cuts (my fault) were kept to wet and rooting was delayed. A total of 7 cuts are used for this experiement, 3 in dirt and 4 in hydro. The following pics show the root development prior to being planted in their growing medium. Only 4 of the clones are shown, all 7, however, exhibit roughly the same root development.


Soil Vegging

The clones were placed in soil to officially begin vegging on 3-29-03. In the past, I have simply put the rooted clones directly into the soil and let them go. They seemed to grow slowly as it took awhile for roots to develop and the plant to get used to its new home. More recently, I have tried a new method that seems to facilitate root growth and help the plant veg faster.


Planting a rooted Clone

Basically, just put a divit in the soil that is about 2 x the size of the peat pot (or rockwool cube). Then, fill the bottom of the divit with several table spoons of Perlite. Place the peat pot on the perlite and then fill all around it to snugly place the rooted clone. See attached photo.


Soil Mix

This is a very basic one. Did not want to get all high-tech here with either method as the purpose of this is to esablish a baseline grow for your basic grower.

4 gallons of Wallmart Continuous Feed Formula Soil
3 Quarts of Perlite
4 oz Blood Meal
6 oz Bone Meal
1.5 tablespoons of dolomitic lime
This batch of soil was mixed the same day that planting occured (3-29)


Pot Size

The clones were put directly into 1 gallon pots. The pots have several large holes in the bottom as drainage is key. Also, the bottom of the pots are filled with about an 1" or coarse gravel. This keeps soil from clogging the holes and further helps facilitate drainage. Upon planting the clones, the top of the soil was covered with about 1/2" of Spagnom Moss.

page 2

The Veg Resevoir

The veg resevoir is simply an 8 gallon rubbermaid tub with two holes cut in to top. Each tub will house two plants. The tubs are completely light proofed with tin foil (dull side out) and duct tape. Algae has never grown in the tubs.

The pots are 6" heavy duty orchid pots. The rooting medium inside the orchid pots is coarse, inert washed gravel. It is free in my area and readily available. The clay balls (hydroton) are cleaner, more inert and superior to the gravel but I am a cheap son of a bitch so there...

In the bottom of each resevoir are 2 6 inch air stones that lie directly underneath the orchid pots. Each resevoir also has its own dual outlet air pump. According to the box the pump came in, each out let (if both are open) pumps out 650 cc per min. for a total of 1300 cc air per res per min.


The Water

In this area, we have very hard water. Out of the tap, the water has a pH that hovers between 7.0 and 7.2. The water is consistemtly 300 ppm. According the the our local water dept analysis, 75% of the hardness is (not surprisingly) due to Calcium.


The Nutes

The nutes used for the entire process will be General Hydroponics (GH from now on) hard water series nutes. They are mixed using the following method:

Place micro nute in 2 gals of water and dump in res.
Place grow nute in 2 gals of water and dump in res.
Place bloom nute in 2 gals of water and dump in res.
Check res ph, add ph down to 1 gal of water and dump in res.
Never mix the nutes full strength, always dilute them.


Nute Strength

I tend to use fewer nutes than most folks around here. For freshly planted seedlings, I generally use the following mix:

Micro: 1.25 ml per gal
Veg 1.25 ml per gal
Bloom 1.26 ml per gal
ph (see note below): 2.5 ml of Sulfuric Acid per gallon.


pH

pH can be a tricky thing for some. Having hard water, it is a stuggle to keep the ph down. In the past, I have continually added pH down in a vain attempt to stabilize it at 5.8. In the end, it was always to much and would poisen the plants.
These days, I find that with hard water, it is far easier to set the res pH to 5.7 (5.6 to 5.8 is fine) and just let it slowly drift up until the res is changed again and then re-set it back to 5.7. In the end, the pH will drift to 6.4 or so...it is probably not optimal but it is far easier on the plants than continually adding ph down.

Phosphoric acid is superior to sulfuric but it is self buffering and, with hard water, a ton of it has to be added to get to 5.7. So much, in fact, that it is hard on your plants. Sulfuric acid dissociates much easier in water than does phosphoric and because of this is better (IMHO) for hard water users.


Planting

The rooted clones are placed in the gravel. The water level at the beginnig of this stage is critical. To high and the plant will be swamped and not grow roots fast enough. Too little, and the plant will quickly dry out. The water level should be just below (like 1") the bottome of the peat pot. A better way is to make sure that a portion of the longest roots are in the water...Then the rest of the roots will want to go that way too.

The pic is of a freshly planted clone in it's orchid pot and the last shot is a photo of the entire garden after everything (soil and hydros) had been planted. The photo was taken on 3-29 and each plant (rooted clone actually) was roughly 1.5 to 2 inches tall.


Soil and Hydro

Both the soil and hydro plants seem to be neck and neck. Hydro plants # 1 and 2 are the most vigorous as are soil plants #1 and 2. Soil plant #3 is slightly smaller but is larger than both hydro # 3 and 4.


Photo #1 = soil plant #2
Photo #2 = hydro plant #1
Photo #3 = side by side shot of Soil 2 and Hydro 1
The remaining shots of of hydros 3 and 4 and soil 3

It is early in the game yet but so far all the plants are growing at very similar rates. Also, the plants are all identical in stucture (ie, they are just sticks with leaves at this time and they all look about the same).


Here are a few more photos.
photo #1 = Hydro 2
photo #2 = Hydro 3 and 4
photo #3 = 4-8 garden shot

On 4-8 the hydro resevoir was changed. A 40% mixture of GH nutes (up from 25%) was used. Here is a nute breakdown

Rooted Clones 10 days of Veg
Micro 1.25 4.0
Veg 1.25 6.0
Bloom 1.25 2.0
the number represents ml per gal of nutrient used.


Growth Rates

The plants have been vegging for 10 days now. Generally, it seems like plants do not do much for the first few days (they are growing roots instead of visible leaves). Then, once they have a established a root system, they seem to take off.

The best plants are both 7" tall and started out at 2" inches, so, in 10 days, we have a total of 5" of new growth. That, for both soil and hydro, translates to 1/2" of new growth per day.

page 3

Light

The veg light is a 500 watt sun system with a big hood. Under the hood (l love saying that) is a 250 hps and a 250 MH. To date, I have been very happy with this light. The 250's don't put out a lot of heat but, because there are two lights and a relatively large hood, you get a lot of cover. Anyway, that is that.

Well, to date we have some very predictable results. In the first week of veg, the plants were on equal footing as they developed their root systems. In the second week of growth, the hydros just flat out took off.

Hydros 1, 2, and 3 are all hovering around 12" in height (a little taller) but are very bushy and contain far more plant mass than any of the dirt plants. I would bet that the best hydro has somewhere between two and three times the mass of the best dirt plant.

Here is the nute mix used for the Hydro's:

Gh hard water nutes

Growth 7.5 ml per gallon
Micro 5.0 ml per gallon
Bloom 2.5 ml per gallon

Here are some pics to comapare the two methods.

Pic 1 is soil plants 1, 2 and 3
Pic 2 is soil 1, 2, 3 with a reference
Pic 3 is soil 2 and 3 tops


Pic 4 is Hydro 1, 2 and dirt 1 and 2 tops
Pic 5 is Hydro 1 and 3.


All of the plants were topped and the tops used as clones.

One problem I see coming up is when to put the plants in flower. The hydros, since they are so much bigger, will out produce the dirt plants in a huge way. I think it will be best to put the hydros in 12/12 earlier and let the dirt plants catch up. It is obvious, so far, that Hydro plants veg far faster than dirt plants. Any grower who has tried the two methods already knows this but some of you may not.

Here are some more photos comparing the plants

Pic 1 is Hydro 1 vs Soil 2
Pic 2 is Hydro 2 vs Soil 1
Pic 3 is Hydro 3 and 4


Pic 4 is Hydro 3 and 4 top view
Pic 5 is a garden shot with the lights off

The hydros will go into 12/12 and the soil plants will remain in veg. It is obvious that, if they were all to go into flower right now, the hydro plants would win big time for yeild. This is becuse they developed so much faster (2 to 3 times as fast) as the dirt plants. I guess you could say that, in this test, conclusion #1 would be that hydro is far faster than growing in soil. Another obvious conclusion.


So far, the hydros are kicking some major ass over the soil plants.

I am sure there are those out there that can grow soil plants faster, but still I cannot fathom anyone that can grow a plant in soil as fast as they can in hydro.

The 4 hydros went under the big light (1000 w HPS with Hortilux bulb) in 12/12.

Since the soil plants are lagging so far behind, I thought that it would be a good idea to let them veg for a week or two more...maybe they will catch up to the hydros.

As it stands, I do not see how the soil plants can match the hydros with respect to speed and yield.....They are not even in the same league. I think the only hope for the soil plants is their taste...it is a growers personal preference whether he/she wants to have higher yeilds or better taste.

The hydros were put in bubblers with 1/2 strength GH bloom. That is, normally, the directions call for grow=1, micro=2 and bloom=3. At half strenght, it works out to g=0.5, m=1.0 and bloom=1.5 teaspoons (7.5 ml) per gallon of water.


Pic 1 is hydro 1 vs soil 2
Pic 2 is hydro 1 soil 2 top view


Pic 3 is hydro 2 vs soil 1
Pic 4 is hydros 1 and 2 and all the soil plants, top view.

page 4

The hydros have been in 12/12 for 38 days and have probably 14 days to go.

They will keep getting nutrients (60 % of the GH reccomended formula for flowering) until 6-6. At that point, they will be in the flush mode and their only source of sustenance will be ph adjusted water. They are looking nice and hopefully will put on some more weight...they do not look as fat as the last crop.

The soil plants have been in 12/12 for 24 days and are looking good. They all had a huge growth spurt as compared to the hydros and are every bit as big with many bud sights. Initially, I thought that the hydros were going to blow the doors of the soil plants but now it is looking like it will be a close call...my bet is still on the hydros but just by a little.

Here are some pics...Obviously, they hydros are the more developed of the plants (they are 2 weeks ahead of the soil plants).


All of the cindy plants were harvested within a day of June 24th. Basically, that means that they were in 12/12 for a full 63 days.

Here are a few facts regarding the harvest and subsequent cure:

Total Yeild was 14.12 ounces for 4 plants.
Average yeild: 3.53 oz per plant.
Plants began 12/12 at 10"

Anyone that has tried my pot can testify that i am an average to agressive trimmer (ie i do not leave many leaves and trim stems to a minimum. Also, the bud was bone dry when it was weighed.

As far as trim is concerned, there was 418 grams (14.75 oz) of trim that was worthy of the bags. I ran 2 batches at 209 grams each then combined them both and ran the whole lot thru again. The trim is put in the freezer wet immediately and sits there till there is enough to make it worthwile to make bubble. The weight is wet trim weight.

Here is the method used: Stir each batch on med/low speed with a drill for 15 minuets each then run thru the bags. Collect (very carefully) all the hash from each bag (i do not seperate hash by screen size) and press into one ball.

Total bubble hash yield: 13.3 grams
Avg: 0.90 grams of hash per Oz of trim.

Here are some pics of the plants during harvest. All are hydro plants. I will not specify which is 1, 2, 3, or 4 as they were all very uniform in size, shape and yield.


Veg Specs: Clones were placed in veg resevoir on 3-29-03. They were allowed to grow until 4-15-03 at which point they were topped. After topping, they were allowed 7 days to recover and vegged until 4-22.

At this point, the plants were big, bushy, about 10 inches tall and ready for action. They had been in veg a total of 24 days. This is a bit longer than the usual veg time. The loss is attributed to the fact that the initial root development of the clones was not adequate and the plants, i believe, required a few extra days to get caught up.....That is how it goes.

Plants were vegged under a 250 HPS and a 250 MH. Air temps averaged around 72 deg F and they had an oscillating fan on them at all times. The plants were vegged using a 20/4 schedual.

GH nutes were used for the entire process.

Flower Specs: Plants were placed in 5 gallon bubblers on 4-22-03. They were allowed to flower until 6-24-03....a total of 63 days.

The plants were flowered under a 1000 w HPS Hortilux bulb (air cooled hood) and temps in the flower room averaged 80 degrees. There was never a large fluctuation of temperature and the plants were never burned.

GH Nutes were used for the entire process.

Yeild: 14.12 ounces
Avg per plant: 3.53 oz per plant.
Here are a few more shots


The soil plants finally have finished up and here is a brief summary of their lives:

Four plants (rooted clones) were planted in soil on 3-29-03. They vegged until 5-6-03 (38 days). At this point, they were put in the flower room alonding side the hydro plants.

The soil plants were in flower for a total of 66 days and were harvested on 7-13-03.

Here are a few pics of the dirt plants during the harvest.


After a 10 day drying period, the buds were trimmed of the stems of the soil plants, bagged and weighed.

Final Dry Weight: 5.85 oz or 1.46 oz per plant.
Trim Weight: 90 grams (wet, frozen trim)
Bubble Hash (from trim): 2.66 grams
Avg hash: 0.85 grams hash per oz of trim

Here are some dried shots


page 5

First off, we'll just go over the final numbers and then following that, there will be a short discussion to attempt to explain them.

Hydro Plants
Total Yield: 14.12 oz
Yield per plant: 3.53 oz/plant

Total Veg time: 24 days
Total Flower time: 63 days

Total Trim :14.75 oz
Trim perplant: 3.68 oz/plant
Total Bubble hash: 13.3 grams

Soil Plants
Total Yield: 5.85 oz
Yield per plant: 1.95 oz/plnt

Total Veg time: 38 days
Tot Flower time: 65days

Total Trim: 3.17oz
Trim per plant: 1.0 oz/plant
Total Bubbble hash: 2.66 grams

Well, there you have it. Obviously, they hydro plants out performed the soil plants under the same conditions. The yeild of the Hydros was 81% more than that of the soil plants. I attribute this drastic increase to the fact that hydro plants, in this system, grow to be very bushy and are full of dense, lush growth. On the other hand, the soil plants tend be be about 1/3 the size (just a visual comparison) of the hydros. Basically, the hydros are bigger, bushier plants and the soild plants tend to be a little spindly and more "tree" like.

Another important detail regarding the hydro plants is that, not only are they far bigger, but they also grow much faster than the soil plants. Basically, the hydros were roughly three times the size (same height, just bushier) as the soil plants. They hydros grew to this size 14 days sooner than the soil plants.

I feel (and this is an opinion) that the soil plants could have done better under a differnt soil mix. The mix used in this experiment was Wall Mart continuous feed with some other additives. This soil, in my opinion, is either to "hot" for plants or somehow it is not chemically balanced for the plants. Either way, i feel that a better soil mix (like pro mix or sunshine 4) with added nutrients (pure blend, dyna grow) would greatly add to the bushiness and yeild of the soil plants. But, even if the soil was improved, it is doubtfull that the plants would out perform the hydro plants. Plants, in soil, just do not seem to grow as fast or as bushy...an experienced grower (i.e. not me) can get a bushy soil plant, but i feel that it is much easier to do with hydro.


Written by Smoothy.
 
Top