What's new

The Stealth Dresser grow: in the making.

pontiac

Pass That S**t!
Veteran
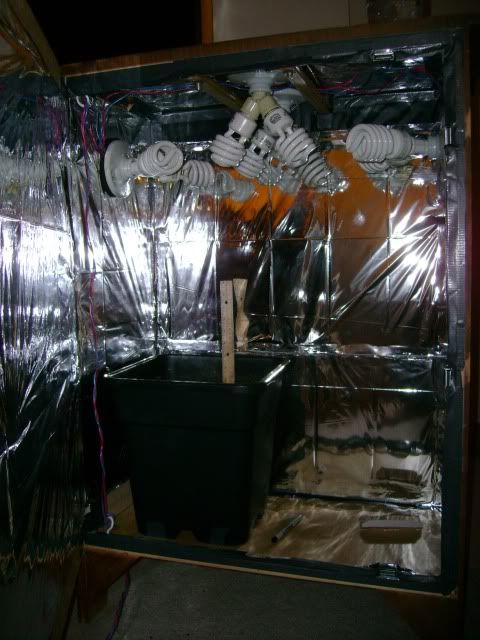
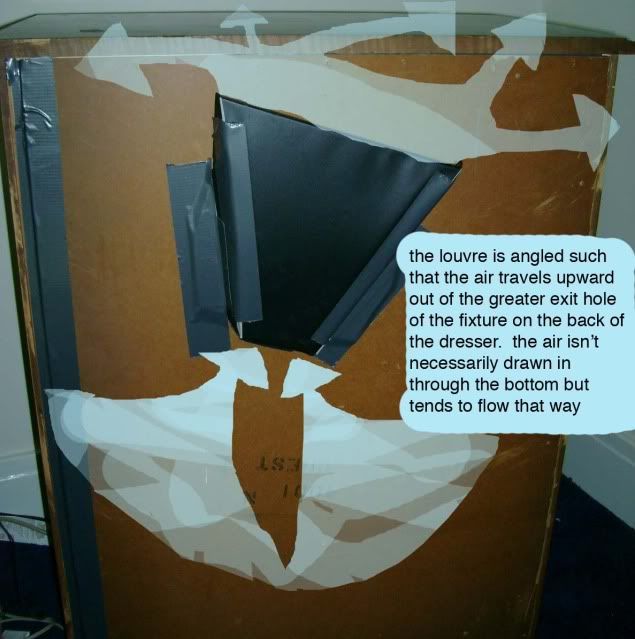
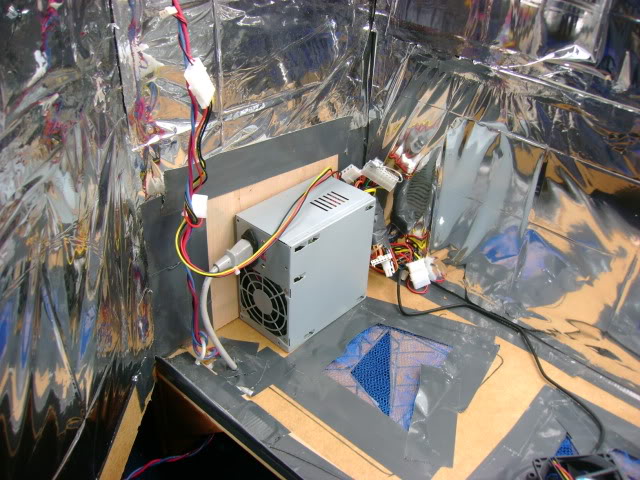
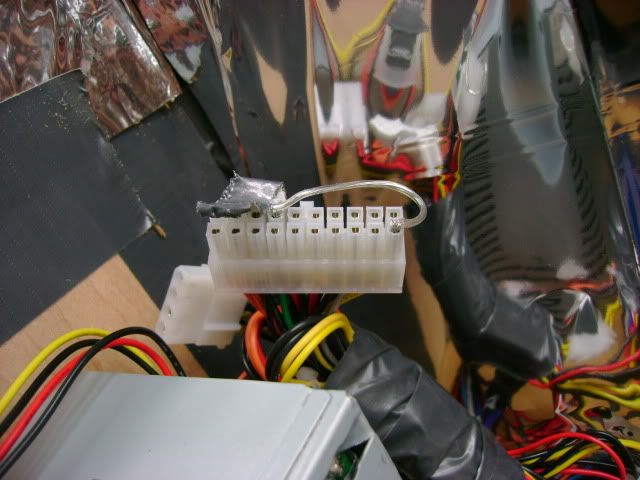
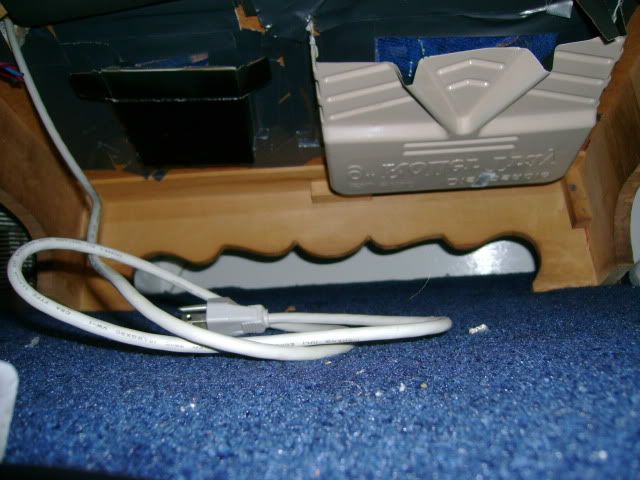
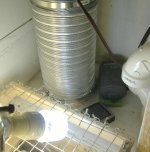
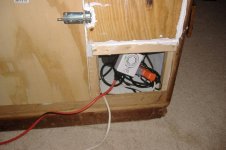
Do you think it would save me in the case that hot and neutral rubbed against eachother until they one day made contact? would it trip then and stop sparks from flying or not really? (I've checked my wiring while doing it and after and see no reason to believe this will happen, but anythings possible) I'm just curious.

I'm a fire safety/grow safety fanatic so I'll definitely get that.

If hot and neutral ever touched each other or arc'd, a short would occur, which would cause your circuit breaker or fuse to trip. Sparks may fly within that moment... If you're worried about arcs, you can get an AFCI.

But if you periodically check your wiring, this will never occur.
 

Anti

Sorcerer's Apprentice
Veteran
Anti, you're totally confusing. First you say no intake then say double intake?
If I can figure a way to keep in darkness properly i'm going to do double intake I guess.

I said no intake FANS, but double the amount of intake holes.

So... you have one FAN exhausting... and that fan has a hole cut to allow the fan to exhaust the air.... make your intake hole double the size (or two holes the same size of) your exhaust hole.

But still, no intake fans. Just an exhaust fan.

Still confused? :joint:
 
Haha, Sorry Anti. I effed that up. I guess I never read enough stealth grows up until this point (or enough about ventilation) to understand passive intake the first time. I'll do that. Either one or two exhaust fans.. I'll install one and see how it moves air and if I'm not happy i'll pop another in. theyre 80mm computer fans at around 35 cfm each. Not alot of air, but 2 should be adequate.

I'm waiting on a PC power supply at this point and will work on installing that next week if I get it
 
C

Cozy Amnesia

Oh, and as far as wiring your lights... if that gangly contraption doesn't work out for you, you can easily wire all your lights up with a $2 extension cord and some $1.50 ceramic or plastic or porcelain light fixtures:

Thats how I wired mine up too, except mine doesn't like as clean as yours. :confused:


As for those light setups, I was looking at those at a hardware store and was trying to figure out how they wire them up (series or parallel) and how you get those wires connected into a pronged outlet plug? (maybe they sell pre-spliced proung outlet males?)

You couldn't wire them up in series even if you wanted to. I tried that a while back and they all flicked real crazy and didn't get very bright. I guess this is where I could apply that crap I learned in physics - in series the resistance adds up really fast, which will cause the voltage potential to drop drastically. In parallel, the resistance is much less.
 

one Q

Quality
Veteran
Looks good, nice and clean. For me, I'd of put a vertical 100w hps/cmh in that thing though. But keep up the good work.
 
Thanks Cozy, I figured I'd go all the way and wire it as decent as possible. I may still even put mylar over the revealed blue and red wires so it acts as a better reflector shield around the bulbs

19inch.jpg


Also I heard some things about different CFL light angles.. I feel the angles on the middle ones will provide good coverage to the canopy instead of doing the all horizontal mount like Anti and Cozy's Setups

My canopy should still recieve the entire angled bulbs' horizontal plane

Also that's just how it was easiest to design it :-D

The ceramic pieces were cheap - $1.50 per one x 4 =$6 .. for some reason the equivalent type plastic-version of them was more expensive despite feeling like it was going to break and the contacts in it for the bulbs were alot cheaper than in the cermic


I got the "masscool" 80 mm sleeve bearings at newegg.com (10 of the fans for 11 bucks shipped. ) 33cfm each.. I'll take a picture in a bit. you can check it out masscool dot com to see things they manufacture
 
Very good, Peanut Butter :p

One Q, I was totally going to go the 150 HPS route but as mentioned in pages 2-3 I'm just on too short of a budget for this operation. I also noted that I'll likely move up to a 150 in the future when I can afford proper ventilation aswell as the light setup itself!

So I'm online looking and find this

11367.jpg


This louvre will help reduce light into the fan hole and direct air into the direction of a near window or away from my bedroom door. I'm also going to use a black-painted aluminum paint tray to act as a light stopping device on the inside of the dresser as I saw in a video of a refrigerator construction

All in all the dresser is approaching ready.
The remaining steps to do are as follows:

--> buy CFGI adapter plug
--> buy louvre and aluminum paint tray
--> install fans and Power supply
--> buy seeds
 
P

phr3d0m2gr0

Any updates? Just wondering how you ended up doing your ventilation.
 
Any updates? Just wondering how you ended up doing your ventilation.


Hey phred, thanks for the interest.

Unforunately when I did my ventilation setup, I had no batteries and I just did all through every step without pictures (wish I did step by step photos like I did on the rest of the setup but oh well.)

Here we can see the type of fan used. it is a 33 cfm axial computer fan. I ordered 10 off of newegg.com for 11 bucks including shipping (believe it or not to order 2 wouldve costed 12 bucks after shipping, so 10 was cheapest. and I have plenty incase one goes down or gets noisy down the road)

DSC01211.jpg


next is the thumbnail of the louver from a down angle view.. almost imposs to see. its a bad picture even in full resolution.
th_DSC01212.jpg


Next we can see the back of the dresser. I put on an external piece that not only guides air up but serves as anti-light leak device. Although I have put into effect countless preventative measures (probably more than enough) I'd rather be safe than sorry in getting hermies.
DSC01216.jpg


Here's a better downward shot where we can see the louvre
DSC01217.jpg


from the inside, I used a 2 dollar paint roller tray for a baffle. (I cut off the end to allow airflow, then painted the entire inside of the paint roller tray black with 1 dollar can of black spray paint.
DSC01219.jpg

DSC01220.jpg


powering my fans is a 100 watt ( I think) PSU.
DSC01222.jpg

With the wiring designated by the other post in this forum I had troubles where my fans would auto shutoff after a certain period of time. Someone thought this was faulty but I'm fairly certain it's an energy saving mechanism made for when a computer has not been used in an hour. Here is the redone wiring that works fine after days of testing
DSC01224.jpg


holes were cut into the bottom of the dresser to allow airflow in I used an old bathroom sud-sponge thing to prevent spiders or large pests from getting in
DSC01226.jpg

DSC01227.jpg


underneath we can see more baffles (one is a paint tray one is a baffle made from cardboard.) Both of their insides were painted black to rduce light leaking in or out
DSC01230.jpg


my final lightleak measure are two flaps that hang down on the backside of the dresser to stop major light from reflecting off the wall and getting in.
DSC01231.jpg


any questions feel free to ask!
 
What I like seeing about these is how soon people switch to larger systems once they find out that what is produced is not what they expected. Great for the learning curve mind you, but I really wish people would jump in with both feet at the start. Would save lots of time, money and frustration in the long run.

Have fun with it. It should help with setting yourself up larger in a few months down the road. :)
 

ItsAllOver

Devil's Advocate
So I'm online looking and find this

11367.jpg


This louvre will help reduce light into the fan hole and direct air into the direction of a near window or away from my bedroom door.

It will also drastically (think 70%) reduce the airflow into your passive intakes. Just keep that in mind. You will need to at least double the number of intake holes than what you originally planned

Keep it real!
 

TerryCider

New member
heres a dresser i made....

its 48"h 36"w 20"ish d

somebody was throwing this away so i took it.

everything is completely air tight and light proof.

i usually run a 150w hps but im using that for something else right now.

temps stay below 80 with the hps in there.

i have a stanley blower fan connected to that tube, and the air goes outside (but inside) the dresser thru the air filter.
(the air filter is behind the cords coming out)

i have 90 degree PVC elbows acting as passive air intakes. painted black inside so no light reflects out.

with the blower it restricts space to grow, but you gotta have fresh air. this is going to be my mother cab since i dont need much space them.

right now i just have a bubbleponics machine with 1 blue cheese growing
 

Attachments

  • DSCF1173.jpg
    DSCF1173.jpg
    70.9 KB · Views: 32
  • DSCF1174.jpg
    DSCF1174.jpg
    51.4 KB · Views: 30
  • DSCF1175.jpg
    DSCF1175.jpg
    36.1 KB · Views: 31

TerryCider

New member
heres a few more
 

Attachments

  • DSCF1177.jpg
    DSCF1177.jpg
    79.1 KB · Views: 35
  • DSCF1178.jpg
    DSCF1178.jpg
    46.5 KB · Views: 37
  • DSCF1176.jpg
    DSCF1176.jpg
    44.9 KB · Views: 34
What I like seeing about these is how soon people switch to larger systems once they find out that what is produced is not what they expected. Great for the learning curve mind you, but I really wish people would jump in with both feet at the start. Would save lots of time, money and frustration in the long run.

Have fun with it. It should help with setting yourself up larger in a few months down the road. :)


Thanks for the comment, Outport.
In actuality my first ever setup was much larger scale. Although never posted on this website (before I ever considered using internet to post my illegal pictures which I still may not do), I had a 400 watt HPS and 250 MH grow with nearly a whole side room and 12+ female plants. If you didnt read the reasons for doing this I'll reiterate.. in an apartment with other strangers there is no possibility of doing a larger grow and risking smell or light leak or detection. Anyway I have no closet space to use otherwise It would have been a closet grow. In the future it will probably serve as a baby station where I start my seedlings before putting them into a pure-flowering only closet where I can grow perpetually.
I believe you have overlooked some situations where this dresser is an advantage, although you did list one reason - good experience in growing.


Where have you been, Sativa? Inactive for almost two months and I have questions about the efficiency of those fans! :(

Sorry happyguy. I have sort of discontinued the idea of growing buds in there for time being as I've just got a girlfriend who I spend alot of time with. There is a great possibility I will try tomatoes or Sunflowers in there in a month or so.. Or eventually marijuana if I really decide its worth some risk.

Is there any way I can test it for you without plants that isn't too difficult? maybe light an incense in it? something like that?


As far as the louvre, Itsallover, I custom cut out parts of it to increase its airflow ability. That was one thing I didn't want to sacrifice but did for the sake of lightleak. I may get a bigger louvre in the future.

Nice dresser, TerryCider!! Hope it works for you and I'm curious to see what grows up in there!
 
Top