What's new
  • Happy Birthday ICMag! Been 20 years since Gypsy Nirvana created the forum! We are celebrating with a 4/20 Giveaway and by launching a new Patreon tier called "420club". You can read more here.
  • Important notice: ICMag's T.O.U. has been updated. Please review it here. For your convenience, it is also available in the main forum menu, under 'Quick Links"!

VERMICOMPOSTING FOR BEGINNERS (Composting worm bins)

Vandenberg

Active member

NEW GROWERS :this initial post covers the basics and will then proceed to get more advanced in nature as this thread and your new grower knowledge continues to expand.​

A home "Vermicompost bin" is a great way for a person to do something interesting and perhaps even good for some fun while you help the worms craft a high quality, super-duper, premium quality vermicompost that will go on to make your plants feel very special and loved. :cool:

Charles Darwin, best known for his theory of evolution, studied worms for 38 years.
He even published a book on them in 1881 with his findings, just before he died.
In this book he suggested earthworms are the most important creatures on Earth.

Vandenberg :)

fig11.jpeg

Vermicomposting for Beginners -

This article is an excerpt from Rodale Institute’s
A Simple Guide to Vermicomposting.”

Solid waste generation in the United States continues to rise at a steady rate. According to the US Environmental Protection Agency, Americans generated about 254 million tons of trash in 2013, which is the equivalent of 4.40 pounds per person per day.
Yard debris and food waste combined account for nearly 30% of the materials disposed in US landfills. These materials can be easily composted in municipal and backyard composting systems and fortunately, composting collection programs have been increasing with increasing waste generation. However, backyard composting may not be an option for many individuals that wish to divert their materials from the landfill because they lack yard space, time or energy or else live in a rental unit; therefore, vermicomposting becomes an attractive alternative. What’s more, vermicomposting can be a powerful educational tool for teaching children about decomposition, microbiology, earthworms and the importance of managing organic residuals such as food waste at home.

Why vermicompost?​

Vermicompost is the product of earthworm digestion and aerobic decomposition using the activities of micro- and macroorganisms at room temperature. Vermicomposting, or worm composting, produces a rich organic soil amendment containing a diversity of plant nutrients and beneficial microorganisms.
There are several benefits for vermicomposting but the two most popular are (1) diverting organic residuals from the landfill and reducing trash collection fees and (2) creating resources from waste materials.
Vermicomposting can be a fun activity for school children, and vermicompost can be utilized in gardens to promote plant growth. Vermicompost can be mixed with potting media at a rate of 10% by volume or else added directly into your soil; both options will provide plants with valuable organic matter, nutrients, and a diversity of beneficial microbes.

Earthworm biology​

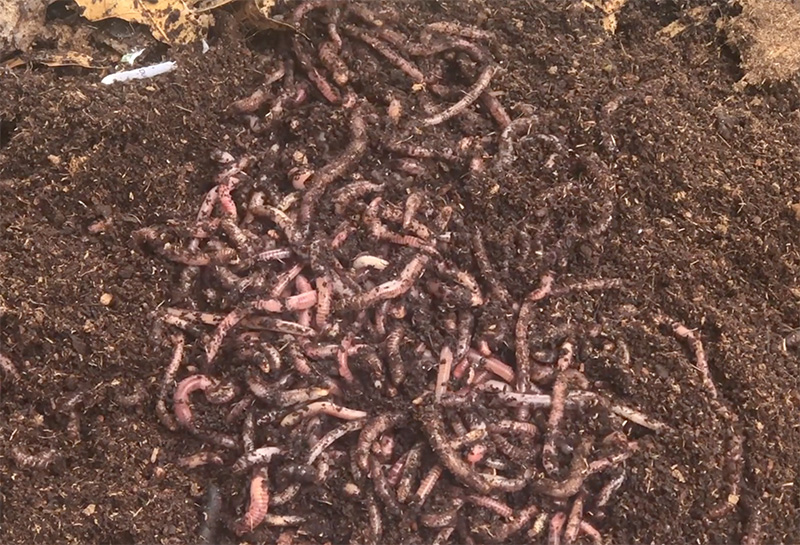
Typical earthworms that you find in your garden are not suitable for vermicomposting. These are soil-dwelling worms that do not process large amounts of food waste and don’t reproduce well in confined spaces. Instead, worms commonly known as redworms or red wigglers are preferred because they reproduce rapidly, are communal and tend to remain on the surface while feeding.
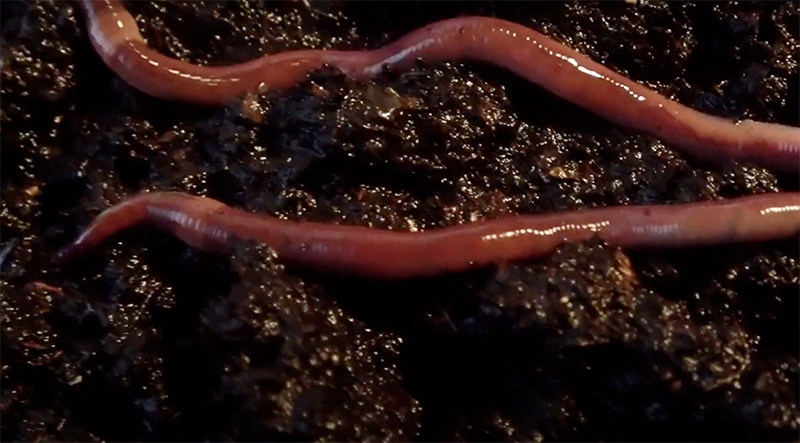
There are several species of vermicomposting worms but the most common are Eisenia fetida and E. andrei. Red wigglers are hermaphrodites having both male and female reproductive parts; however, it still requires two worms to mate with each worm donating sperm to the other worm.
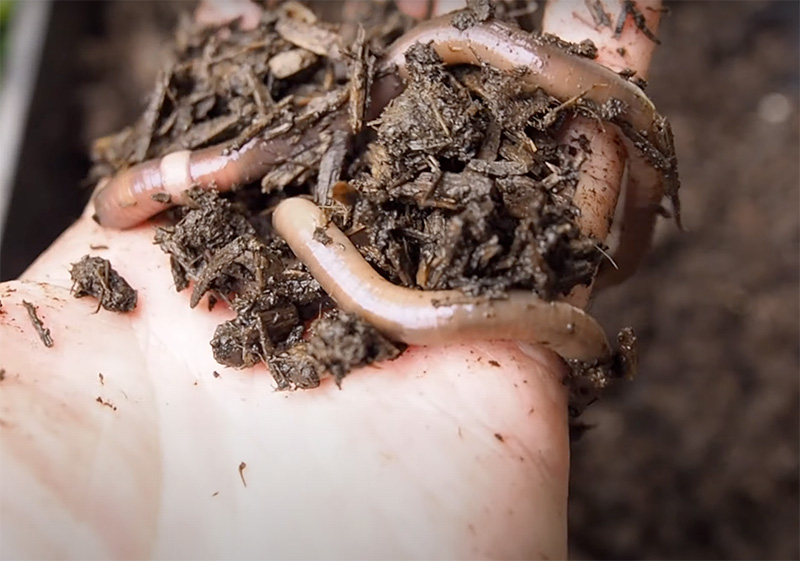
Under ideal conditions, a worm bin population can double about every 2 months (4-6 weeks from cocoon to emergence and 6-8 weeks from emergence to maturity). The “band” around a worm, known as the clitellum, indicates maturity and is reproductively active. Cocoons are about the size of a match stick head, turning pearly white to brown as they develop until one to several baby worms hatch.
Red wigglers require similar conditions as humans for growth – they prefer room temperature (55-85°F) and adequate moisture. The population of a worm bin is controlled through nutrient/food availability and space requirements.

Building a worm bin​

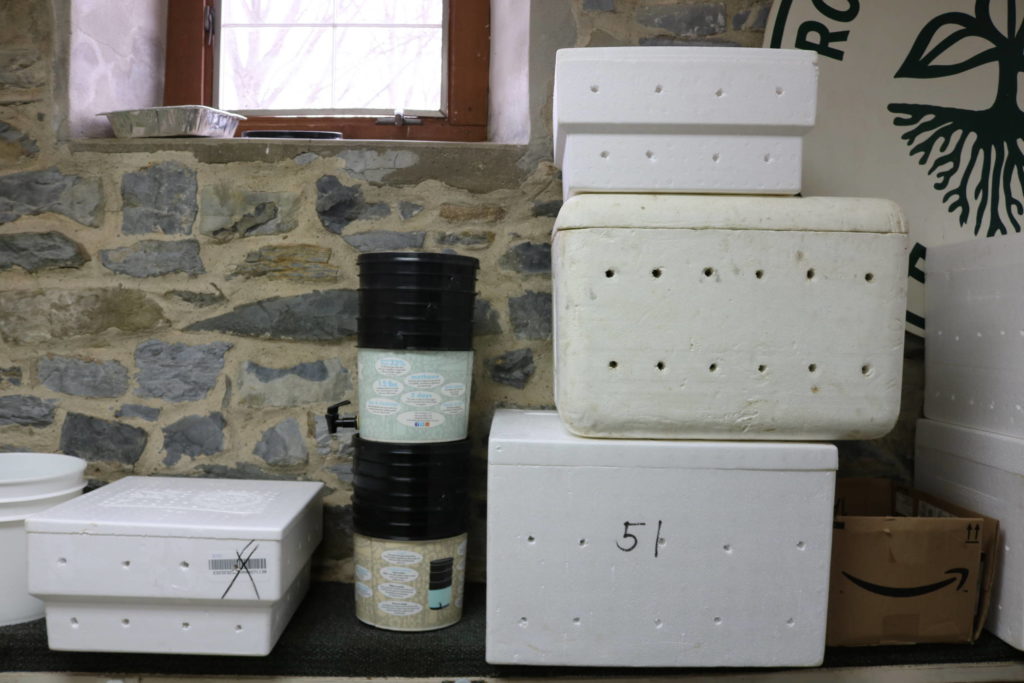
There are a number of bins that can be used to raise earthworms, some of the more common are plastic bins of various sizes. Worm bins can be made of wood but cedar should never be used as it contains antimicrobial properties. Commercial bins can also be purchased online. Bins made from 1-2 inch thick Styrofoam have proven to be a suitable alternative to plastic bins with the added advantage of better insulation and can be acquired for free from fish/pet supply stores. Smaller bins are fitting for those just starting out but will restrict population growth while larger bins, usually 18 inches wide, 24 inches long and 18 inches deeps are typical for larger worm populations.
Vermicomposting-11-1024x683.jpg
You can build a “worm bin” for vermicomposting from a variety of types and sizes of container
Bins should be well ventilated, containing numerous holes on the bottom and at least two rows of holes along the bottom half and middle of the bin. Larger holes can be cut in the lid of the bin but should have a piece of cloth taped over top to discourage fruit flies. Worm bins should be raised off the ground with long stakes so that air may flow under the bin.
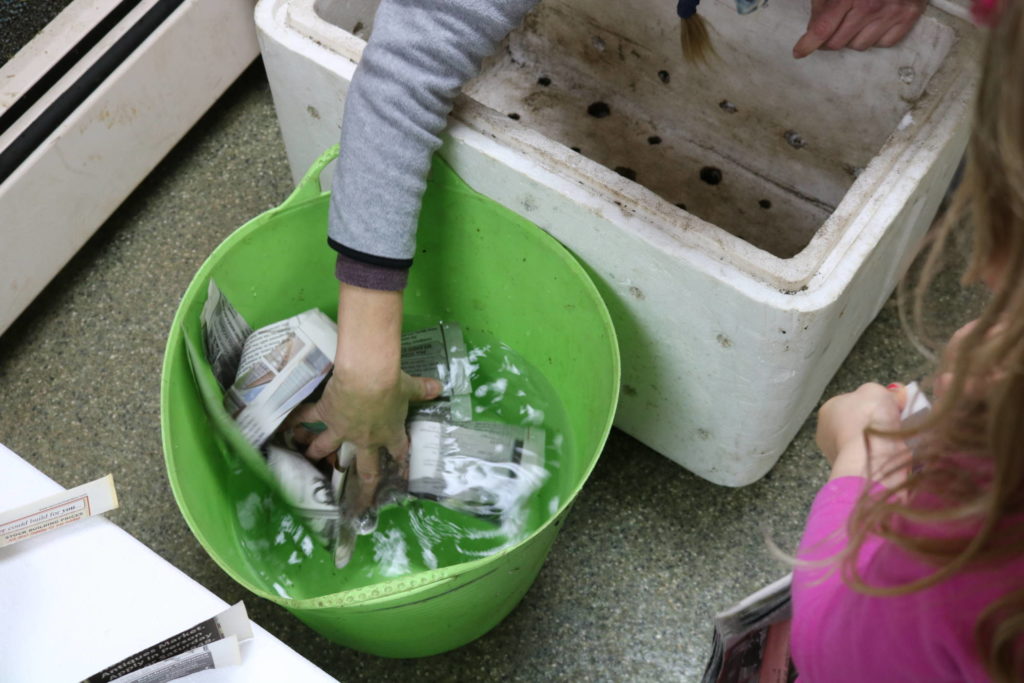
Fill about half of the bin with moist, shredded newspaper to use as bedding and then add a handful of garden soil, which will inoculate the bin with microorganisms and sand that the worms use in their gizzard to grind food.
Now add the worms! Worms can be purchased online. Beginners can easily get away with 1,000 worms for new bins but need to remember that smaller populations will take more time to digest food waste. Place the bin in a cool dark location with minimal temperature fluctuations, will not freeze or become excessively hot during the summer. Basements are typical locations but under a kitchen sink is also suitable.

Managing a worm bin​

Worms benefit from the fewest disturbances as possible – kind of like beneficial neglect. For instance, worms dislike light, and each time the lid opens the worms will stop feeding and seek shelter below the surface. With that said, they still require food and water. Moisture is often supplied with food waste. More moisture can be added if needed using a spray bottle.
Vermicomposting-16-1024x683.jpg
Soak shredded newspaper in water, squeeze it out, and use it to fill your bin halfway
Feed worms leftover fruits and vegetables and other kitchen prep waste. Place the food under the shredded newspaper. One tip to prevent overfeeding is to feed smaller amounts every 1-2 weeks, with each amount placed in a different location in a circle around the bin. This will allow you to see how well the worms are digesting the food from the previous feeding.
Be sure to observe what food materials are preferred so that you can customize the feed. Do not feed worms meat, dairy, fatty, oily, or fermented products as these will attract pests, harmful bacteria, foul odors and cause worms to leave the bin. In general, worms will consume a wide variety of food materials but be sure not to provide too much of one material at any one feeding.
Moist, shredded newspaper will need to be replaced throughout the life of the worm bin so that the food waste is always covered. This will prevent fly nuisances and reduce issues with odors.
As the worms consume food waste they excrete dark, almost black casts, or worm poop, which is the product of vermicomposting. Castings are dense in nutrients and microorganisms and are highly regarded for plant production. At some point the bin will become overwhelmingly full of castings and will need to be harvested.

Harvesting your compost​

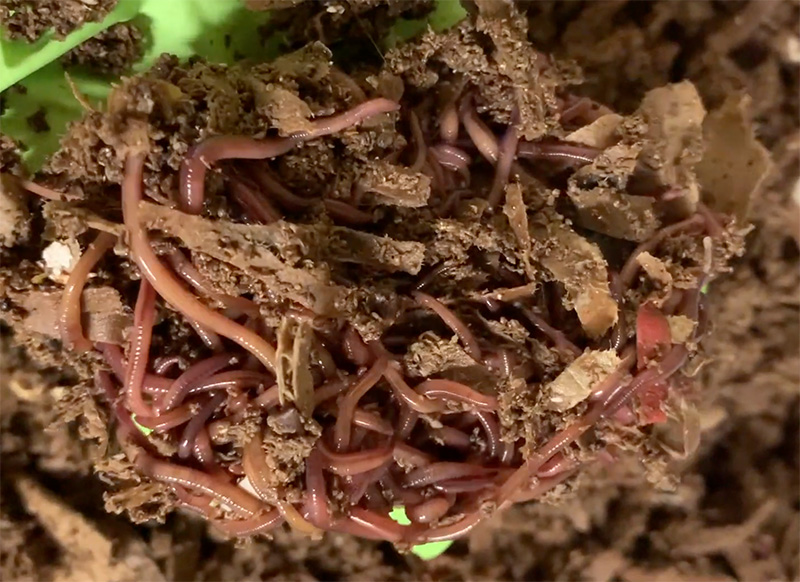
A simple method for harvesting castings and separating worms from castings is to use the “dump and sort” method. Dump the contents of the bin on a tarp under a lit environment, separate undigested material from finished material and place the finished material in several small cone-like shapes. Overtime the worms will flee from the light and migrate to the center of the cone. Slowly scrape away worm-free castings from the top and sides of the cones until worms are visible again. Eventually, the worms will have migrated to the bottom middle of the cone and you are left with a small pile of worms. Put the worms back in the bin and begin feeding again.
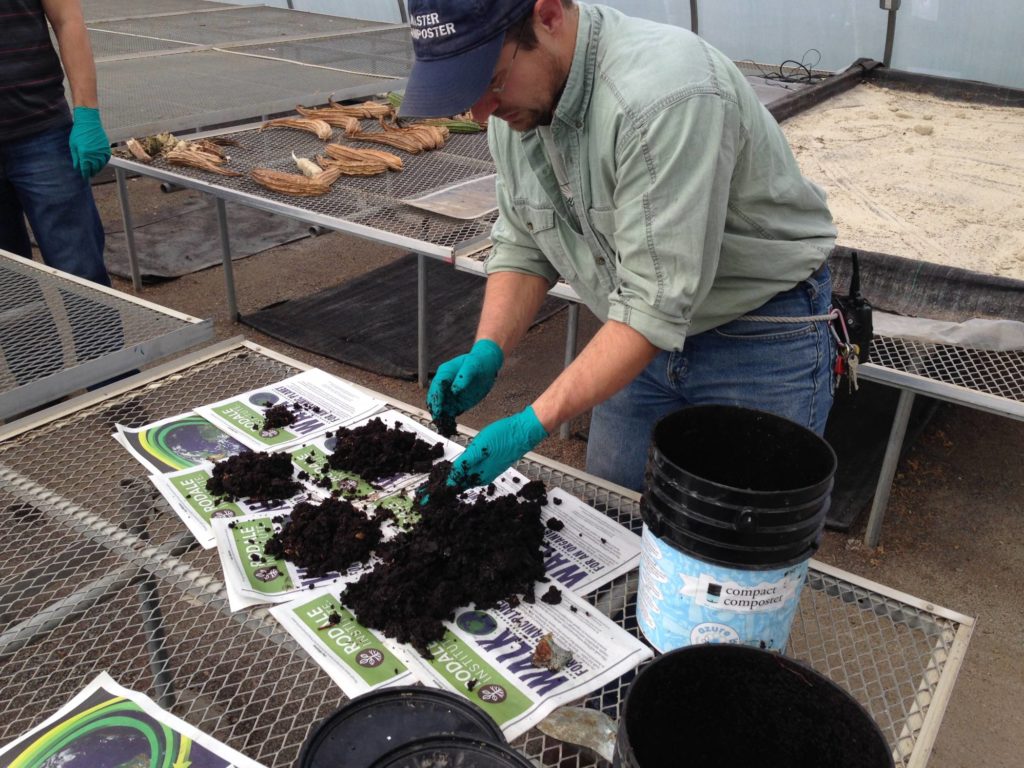
Vermicomposting-for-beginners-3-1024x768.jpg
Harvesting worm castings

Troubleshooting​

It’s not uncommon for experienced vermicomposters to lose a colony of worms from time to time. A number of causes can lead to worm losses, foul odors, and pest and fly nuisances; but anticipating issues and quickly troubleshooting back to a balanced worm bin will ensure success.
Bins that are too wet may generate foul odors as food materials are being decomposed anaerobically or else encourage fruit fly outbreaks. Bins that are too dry will reduce worm feeding and growth. Shredded newspaper, moist or dry, can be used to control the moisture content of a worm bin. Choosing food waste that is either wet or dry can also help control moisture. Food that is left uncovered is sure to promote fruit flies, which will be a nuisance at home but can be easily controlled using fruit fly traps – a small container with a tablespoon of apple cider vinegar and a reversed conical lid with a small hole cut at the bottom of the cone. Lastly, avoid overfeeding and especially food materials that should not be put into a worm bin (see above).


Enhancement of the micro biology and the nutrient profiles in the castings is another discussion and we will have that here as this thread proceeds.

Vandenberg :)
 

Attachments

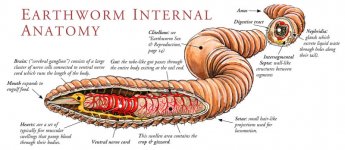
  • nature_worms_anatomy1-800x348.jpg
    nature_worms_anatomy1-800x348.jpg
    130.5 KB · Views: 60
Last edited:

Vandenberg

Active member
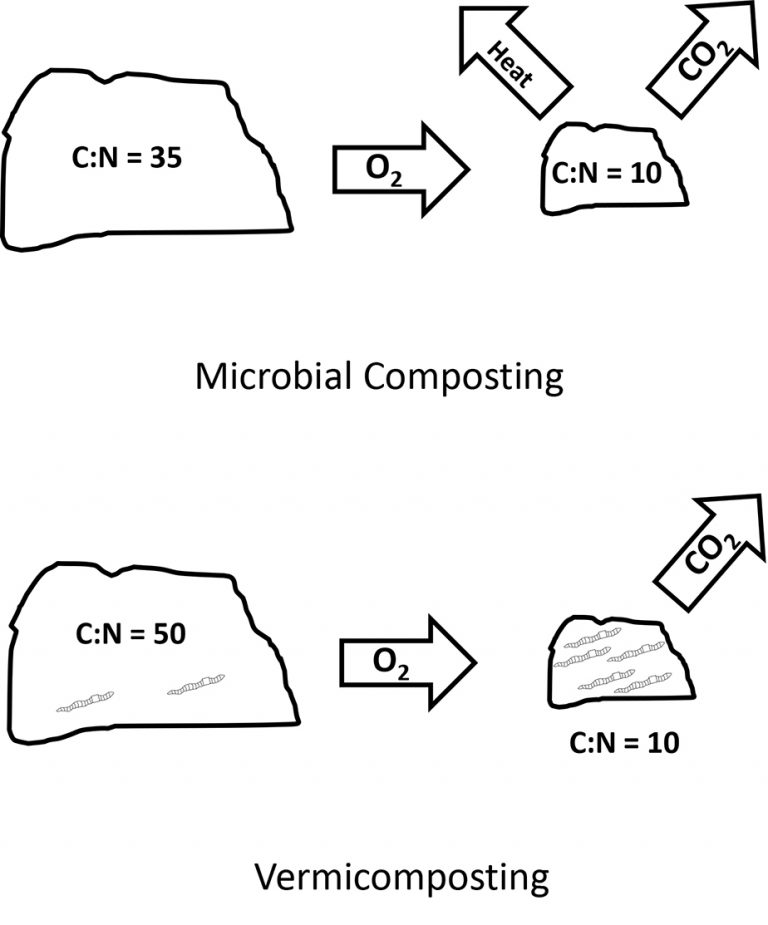
Vermicomposting is a fun and rewarding way to create high quality soil amendments on both a small and large scale. Making compost from worms differs from microbial composting in that vermicomposting works best when initial C:N ratio is high, pile temperature is kept low and moisture content is high. How your system operates depends on what end products is to be optimized. If the goal is to raise worms to sell to others, raise the worms in beds of old compost and feed a special worm fattening diet. If selling vermicompost, feed worms whatever organic matter is available. Feeding directly to the worms is called primary vermicomposting. Letting the material go through a heating cycle in a microbial composting pile before feeding to the worms is called secondary vermicomposting. Whether practicing primary or secondary vermicomposting, composting worms prefer a feedstock with a slightly higher carbon content (C:N ~ 50) than traditional composting.

How do you harvest worms and vermicompost?​

Large-scale worm farmers using worm beds generally use harvesting equipment to separate worms and castings. In-vessel “continuous flow” systems are generally designed to produce vermicompost. They rely on the surface-feeding tendency of red worms to incorporate a casting harvest mechanism on the bottom of the system, below the active feeding area. Food and additional bedding are added to the top, encouraging the worms to continue feeding upwards.

Smaller scale worm bins are harvested in a variety of ways. In all cases, harvesting should begin when the bedding and consumed food has turned a rich dark brown, with a consistency of coffee grounds. Waiting longer can result in a sludgy material that is difficult to harvest and may become anaerobic and odorous.

One commonly used method of harvesting is to dump the bin onto a tarp in bright light, allowing the worms to burrow down to escape the light. Castings can then be separated by slowly scraping them away, pausing periodically to let the worms burrow further. Eventually, you are left with a pile of worms.

Some will harvest by placing new bedding in one half of the bin, and feed exclusively on that side. Eventually (sometimes over a period of several weeks) most of the worms will move to the side with the new bedding, and the finished compost can be harvested.

One simple method is to place a large amount of food in one area of the bin. Within a few days to a week, this should become a writhing mass of feeding worms. By turning a plastic bag inside out over your hand, you can then “reverse harvest” the worms by simply grabbing the mass of worms and turning the bag right-side out. You then have enough worms to start your bin again. Some worms and egg cases will be left in the castings. This should be no problem if the castings are used soon for indoor potted plants. Castings should be cured before outdoor use.

Harvested castings can be mixed into potting soil soon after harvest for best effect on indoor plants. If they are to be stored or used for outdoor plants, they should be cured in an aerobic environment to dry, eliminate the potential to introduce new species and prevent mold.

Vandenberg :)
 
Last edited:

Vandenberg

Active member
There are more than 6,000 species of earthworms, but not all of them are created equal when it comes to composting. The ideal earthworm for composting is known as the epigeic earthworm, which is native to Europe and North America. These earthworms live near the surface of the soil and feed on dead leaves and other organic matter. As they consume this material, they help to break it down into smaller pieces that can be used as nutrients by plants. In addition, epigeic earthworms also produce casts or manure, that is rich in nitrogen, phosphorus, and other essential plant nutrients. As a result, these earthworms play a vital role in the composting process and can help to create a healthy and productive garden.

What Type of Earthworms Are Suitable For Composting​

Earthworms can be divided into three classes based on how they burrow and the environment that habitat. These include anecics (no capacity for expansion), endogeics (able to expand within their base), or epigeic (inhabit Karstic limestone).


Endogeic​

Endogeic earthworms are a type of earthworm that burrows through the top layer of soil in search of food. Unlike other types of earthworms, endogeic earthworms do not create vertical tunnels. Instead, they create horizontal tunnels that help to aerate the soil and promote drainage. Endogeic earthworms also play an important role in decomposing organic matter, making them an essential part of the composting process. While all types of earthworms can be used for composting, endogeic earthworms are particularly well-suited for the task. Their horizontal tunnels help to aerate the compost pile and their appetite for organic matter helps to speed up the decomposition process. As a result, endogeic earthworms are an excellent choice for anyone looking to start a compost pile.

Anecic​

Anecic earthworms are a type of earthworm that burrows deep into the ground, forming tunnels that help to aerate the soil and improve drainage. Anecic earthworms are also sometimes known as “nightcrawlers” due to their nocturnal habits. These worms are an important part of the ecosystem, and they can be beneficial for gardens and lawns. However, anecic earthworms are not suitable for composting. This is because they do not consume organic matter, instead, they only eat mineral-rich soil. As a result, anecic earthworms will not break down compostable materials such as food waste or garden Waste. If you’re looking for a worm to add to your compost bin, you should choose a different type of earthworms such as a red wriggler or a tiger worm.

Epigeic​

Epigeic earthworms are worms that live on the surface of the soil. They are often found in gardens and compost bins, where they help to break down organic matter. These worms are particularly well-suited for composting, as they are able to thrive in moist environments. Furthermore, they help to aerate the compost, which is essential for healthy plant growth. While epigeic earthworms are beneficial for gardeners, it is important to note that they should not be used as bait for fishing. These worms are an important part of the ecosystem and their removal can cause serious damage to the environment.


Common Worm Species for Vermicomposting​

There are a number of different worm species that can be used for worm composting. The most common types of worms include Red wigglers (Eisenia fetida), European nightcrawlers (Eisenia hortensis), African nightcrawlers (Perionyx excavatus), Indian or Malaysian Blue (Perionyx excavatus), The Alabama or Georgia Jumper (Amynthus gracilus).

1. Red wigglers​

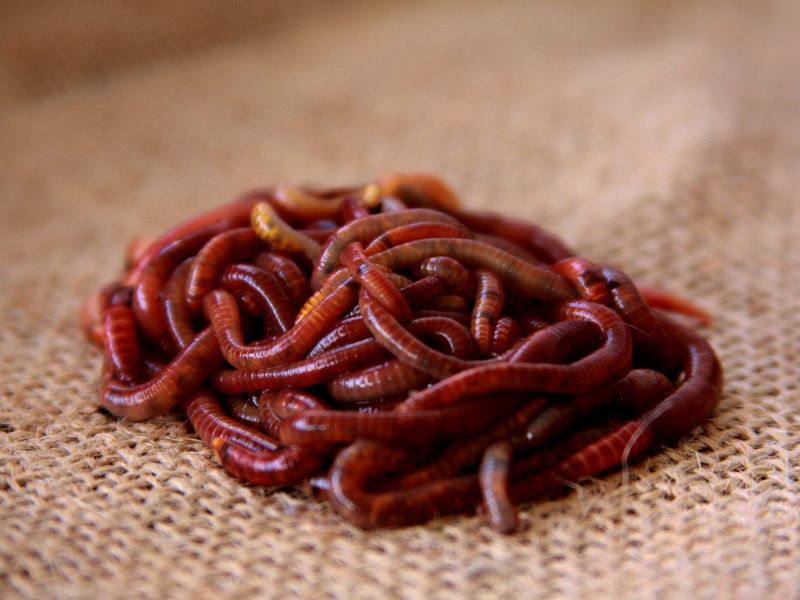
Red Wigglers for composting

Red wigglers (Eisenia fetida): They are well-suited for this purpose because they are able to break down organic matter quickly and effectively. In addition, red wigglers are relatively easy to care for, and they do not produce offensive odors. As a result, they are a popular choice for those who want to compost at home.

2. European nightcrawlers​

European nightcrawlers for composting

European nightcrawlers (Eisenia hortensis): These worms are larger than red wigglers and have a grey or brown coloration. European nightcrawlers are typically found in forested areas where they help decompose leaves and other organic matter. These worms are also good for worm composting as they are able to reproduce rapidly and tolerate a wide range of temperatures and moisture levels.

3. African nightcrawlers​

African Nightcrawlers for composting

African nightcrawlers (Perionyx excavatus): These are a type of earthworm that is native to sub-Saharan Africa. They are commonly used as bait, but they also have a number of other uses. African nightcrawlers are often added to compost piles because they help to aerate the soil and break down organic matter. They are also used in worm composting. African nightcrawlers are well-suited for composting because they can tolerate a wide range of temperatures and moisture levels.

4. Indian or Malaysian Blues​

Blue Worms composting

Indian or Malaysian Blue worms (Perionyx excavatus): These are species of earthworm that is native to Southeast Asia. These worms are often used for composting, as they are very efficient at breaking down organic matter. The worms are also relatively easy to care for, and they reproduce quickly. However, there are some drawbacks to using these worms for composting. One issue is that the worms are adept at escaping from their enclosures. This can be a problem if the worms get into the wrong environment, as they may not be able to survive. Additionally, these worms prefer warm climates, and they may not do well in cooler regions. Overall, blue worms can make excellent composters, but it is important to be aware of their potential drawbacks.

5. Alabama Jumpers​

Alabama Jumpers Composting

Alabama Jumper Worms (Amynthus gracilus): These earthworms are native to the southeastern United States, and they are well-suited for composting. They are tolerant of a wide range of temperatures and moisture levels, and they consume a variety of organic matter. Alabama jumpers reproduce quickly and can achieve high population densities. However, these worms have the poor burrowing ability, so they may not be ideal for all composting applications.


Why Red Wigglers Are The Best Choice For Vermicomposting​

Red wigglers are one of the most popular choices for worm composting, and it’s easy to see why. These small worms are incredibly efficient at breaking down organic matter, and they reproduce quickly. As a result, they can turn a small amount of food waste into rich compost in a relatively short period of time. In addition, red wigglers don’t require a lot of space or special care. They can be easily maintained in a small container, and they don’t mind being around other animals or children. As long as they have access to food and moisture, red wigglers will happily live and work in your home. For these reasons, it’s no wonder that so many people choose red wigglers for their vermicomposting needs.

Conclusions​

There are a lot of different types of worms that can be used for vermicomposting, but red wigglers are definitely the best. They’re easy to care for, they don’t take up much space, and they’re incredibly efficient at breaking down organic matter. If you’re looking to start worm composting, be sure to get yourself some red wigglers! You won’t regret it.

Vandenberg :)
 

Vandenberg

Active member

From wikipedia:​

A biofertilizer is a substance which contains living micro-organisms which, when applied to seeds, plant surfaces, or soil, colonize the rhizosphere or the interior of the plant and promotes growth by increasing the supply or availability of primary nutrients to the host plant.​

Biofertilizers add nutrients through the natural processes of nitrogen fixation, solubilizing phosphorus, and stimulating plant growth through the synthesis of growth-promoting substances.​

The micro-organisms in biofertilizers restore the soil's natural nutrient cycle and build soil organic matter.​

Through the use of biofertilizers, healthy plants can be grown, while enhancing the sustainability and the health of the soil.​

Biofertilizers can be expected to reduce the use of synthetic fertilizers and pesticides, but they are not yet able to replace their use.​

Since they play several roles, a preferred scientific term for such beneficial bacteria is "plant-growth promoting rhizobacteria" (PGPR).​


Bokashi Vermiculture​


The wonders of earthworms & its vermicompost in farm production:​

Charles Darwin’s ‘friends of farmers’, with potential to replace destructive chemical fertilizers​

Earthworms and its excreta (vermicast) promises to usher in the ‘Second Green Revolution’ by completely replacing the destructive agro chemicals which did more harm than good to both the farmers and their farmland.
Earthworms restore & improve soil fertility and significantly boost crop productivity. Earthworms excreta (vermicast) is a nutritive ‘organic fertilizer’ rich in humus, NKP, micronutrients, beneficial soil microbes—‘nitrogenfixing & phosphate solubilizing bacteria’ & ‘actinomycets’ and growth hormones ‘auxins’, ‘gibberlins’ & ‘cytokinins’.
Both earthworms and its vermicast & body liquid (vermiwash) are scientifically proving as both ‘growth promoters & protectors’ for crop plants.
In our experiments with corn & wheat crops, tomato and eggplants it displayed excellent growth performances in terms of height of plants, color & texture of leaves, appearance of flowers & fruits, seed ears etc. as compared to chemical fertilizers and the conventional compost.
There is also less incidences of ‘pest & disease attack’ and ‘reduced demand of water’ for irrigation in plants grown on vermicompost.
Presence of live earthworms in soil also makes significant difference in flower and fruit formation in vegetable crops.
Composts work as a ‘slowrelease fertilizer’ whereas chemical fertilizers release their nutrients rather quickly in soil and soon get depleted.
Significant amount of ‘chemical nitrogen’ is lost from soil due to oxidation in sunlight.
However, with application of vermicompost the ‘organic nitrogen’ tends to be released much faster from the excreted ‘humus’ by worms and those mineralised by them and the net overall efficiency of nitrogen (N) is considerably greater than that of chemical fertilizers.
Availability of phosphorus (P) is sometimes much greater.
Our study shows that earthworms and vermicompost can promote growth from 50 to 100% over conventional compost & 30 to 40% over chemical fertilizers besides protecting the soil and the agro ecosystem while producing ‘nutritive and tasty food’ at a much economical cost (at least 50 75% less) as compared to the costly chemical fertilizers.

Vandenberg :)
 
Last edited:

Vandenberg

Active member
I was listening to a podcast with 2 growers, "Clackamas Coot and Da guy from kisorganics. During the interview coot bought up the topic of worm farming and had some different ideas on the topic compared to the general textbook approach of veggiescaps and browns. Coot went on to say that adding adding a supplement of malted barley into the bedding increased worm size by 20 +% in commercial setup with manure as food And on top of that adding in kelp meal, comfrey, aflala and neem cake also have a great impact from his observations.

Your basic , standard issue 16% Chicken layer feed crumble that is spread out and then spray moistened with h20 is a commonly used technique to fatten up commercially produced compost worms for retail sales, according to the university of Oklahoma's worm specialists.

Vandenberg :)
 
Last edited:

Vandenberg

Active member

How to Solve the Most Common Worm Farm Problems​

Quite a few worm farm problems happening here! Overfeeding, too many carbs, no bedding, rotting food, some friendly pests and probably a foul smell...
Quite a few worm farm problems happening here! Overfeeding, too many carbs, no bedding, rotting food, some friendly pests and probably a foul smell…
Many worm farm problems that occur are avoidable through proper worm farm maintenance. This includes:
  • Adding the right foods and avoid overfeeding. Do not add meat, dairy, greasy or oily food, pet feces, or too much acidic food.
  • Keeping the carbon-to-nitrogen ratio at least 1:1 or higher – when in doubt, add more paper.
  • Regulating the worm bin temperature between 59° – 86° Fahrenheit or 15° – 30° Celsius. Always remember that worms like the same temperatures as humans.
  • Make sure your worms are always comfortable. Provide sufficient worm bin bedding and ensure the moisture level of worm bin is moist (but not too moist!!!).
When I first started my worm farming odyssey, I learned the hard way through a series of trial and error. I hope you can forgive me. As a male, I’m not hard-wired to read the manual until something goes wrong.

Here’s a list of the most common worm farm problems and possible solutions to resolve them. All of which I wish I knew when I first started worm farming.

Worm Farm Problem #1 – Too Hot​

Worms will try to migrate to cooler spots in the worm farm such as the base when it starts to get too hot.
This worm farm problem is a real challenge in the Summer heat.
When your worm bin starts to get too hot, your worms will migrate to cooler areas (or trays). They will also eat less food and slow down reproduction.
Worms will likely suffer and die if temperatures exceed 95° Fahrenheit or 35° Celsius.

Solutions:

On hot days freeze a water bottle, wrap it in some newspaper and bury it deep in your worm farm.
  • Place your worm bin so that it is not in direct sunlight (e.g. under a tree). Limit exposure to the sun when its impact is most strong (morning or afternoon). Also try setting up some shade cloth for sun protection.
  • Cover the worm bin with light-colored materials such as second-hand carpet. You can also build a custom cover for your worm bin (e.g. a polystyrene box that you can place your worm bin in).
  • Move the worm bin to a cooler place such as indoors. Be mindful that many garages exceed 95° Fahrenheit or 35° Celsius.
  • Keep the bedding moist. Be careful not add too much water as this can boil them. Soggy bedding can heat up much more than dryer bedding. Use a watering can or spray bottle to keep the bedding wet.
  • Don’t put too much food scraps in the worm bin. Excess food will decompose and heat up the bin.
  • A low carbon to nitrogen ratio increases the temperature in the worm bin. Add some more carbon to offset the nitrogen (e.g. cardboard, shredded paper, eggs cartons etc…).
  • On hot days freeze a bottle of water, wrap it in some newspaper and bury it deep in your worm farm to create a cool zone. Replace the bottle as it defrosts. You can also try adding a large ice block on top. The worms will congregate upstairs to stay cool. The ice block should take several hours to melt completely.
  • Drape a damp cloth or hessian over worm farm so it acts as evaporate cooling.
  • Paint your worm farm a light color so it reflects more heat.
  • Apply lots of bedding respite (mix in some compost with worm castings). Extra bedding will act as an insulator against extreme temperatures and offer protection.
Find out how to regulate worm bin temperature.

Worm Farm Problem #2 – Too Cold​

In extreme conditions, worms like humans will not survive the cold.
If your worms are too cold, they will crawl a lot and eventually mass together in a ball to keep warm. The worms will also eat less food and slow down reproduction.
If conditions get too cold, your worms may go into a bit of a survival mode, causing them to reproduce in a hurry. In extreme cold (i.e. 40° Fahrenheit or 4° Celsius), your worms will likely perish.

Solutions:

  • Add nitrogen rich foods, like grass clippings, as this will generate heat as it breaks down. This means fewer fruits and more legumes and vegetables.
  • Insulate the worm bin, wrap it in wool, cardboard, fabric etc…, to trap the heat in. Be careful not to wrap too tight restricting ventilation.
  • Move the worm bin to a warmer place (e.g. near external exhaust vents of heating system)
  • Add a heat source such as a heat lamp or a spotlight
  • Add some pre-soaked newspaper on top of your worms bedding
  • Refrain from opening your worm bin lid as this will let the cold in
  • Bury your worm bin partially in the ground
  • Add dry leaves, straw or grass on top
  • Make your worm bin floorless to let your worms burrow deep into the ground to stay warm

Worm Farm Problem #3 – Too Wet​

Too much moisture can drown your worms. The bedding in your worm bin should be as moist as a wrung-out sponge. If you can squeeze water out of a fistful of bedding, or if you see puddles, then your worm bin is too wet.
If your worm bin becomes too wet, it can become anaerobic (meaning no oxygen) with rotting food and produce a foul odour. Worms will naturally aerate the compost.
If your worms are becoming pale in color, or are skinny rather than nice and fat and healthy, your worm farm moisture levels are probably too high.

Solutions:

  • Add some fresh dry bedding material such as straw and paper. This will soak up some of the moisture.
  • Make sure you are not overfeeding the worms as this can cause excess moisture. Stop adding food for a bit so the bin can dry out a bit more.
  • Reduce food scraps that are high in water content (e.g. cucumber and lettuce are 96% water).
  • Stop watering for a while
  • Check the drainage of your worm bin to ensure there are no blockages

Worm Farm Problem #4 – Too Dry​

Worms need moisture to breathe. If a worm bin is too dry, they will suffocate.
All worms breathe through their skin. If a worm’s skin dries out, they will die.
If your worm farm isn’t producing any worm tea, then it’s a sign that the moisture level is going the other way. An ant infestation is usually a sign that your worm bin bedding is too dry.

Solutions:

  • Add some water using a spray bottle until you have the correct moisture level
  • Add more organic waste with a higher water content

Worm Farm Problem #5 – Too Acidic (Low pH Levels)​

Another common problem is worm bin acidity. A good worm farm should smell earthy. If your worm bin smells rotten and vinegary, then it’s most likely that your worm bin is too acidic. Correct pH levels help worms to digest larger quantities of food waste. Worms are quite tolerant of acidic conditions.
pH, the potential of hydrogen, is a numeric scale between 0 and 14 used to specify acidity or alkalinity. 7 is neutral where lower values are more acid and higher values more alkaline. For example, lemon juice is at pH 2, pure water is neutral and seawater is at pH 8. A good pH level for a worm farm is between 6 and 7.
Some foods are more acidic than others (e.g. citrus fruits). Acidity is also produced through microbial fermentation. Excess amounts of acidic fruits, such as oranges, can contribute to a worm farm with low pH levels.
If your worms become deformed, discolored or dismembered, they may have protein poisoning (also known as sour crop or string-of-pearls). Protein poisoning is a direct result of overfeeding which creates a toxic environment.

Solutions:

  • Add pH neutral minerals such crushed eggshells, garden soil, dolomite, and crushed lime.
  • There are some worm farm conditioner products you can buy. Sprinkle a light even coating of powder across the top surface of your worm bin. This will help to neutralize and balance the pH levels.
  • Add some fresh bedding to offset the pH level
  • Get some clean air to your worms. Gently aerate the bedding by lifting and turning it.
  • If there is excess food waste, then it will decompose and create a toxic environment.
  • Remove any uneaten food which may be fermenting in the worm bin.
Here’s an article which covers worm bin acidity and protein poisoning in detail.

Worm Farm Problem #6 – Unwanted Pests​

While some pests can become a big worm farm problem, many other inhabitants are harmless. Most pests pose no threat unless their population spirals too high.
The most effective prevention is to ensure your worm bin is well maintained. And make sure the worm bin lid is securely on to keep the pests out!
Remove Centipedes found in a worm farm by hand.
Earwigs are harmless in a worm farm. Leave them there.
I hate Fruit Flies in a worm bin. Whenever I open the lid they whack me in the face! Make sure you cover up your food with some bedding.
Try cutting back on water, food and reduce acidity in the worm bin to get rid of Mites.
Add some bread soaked in milk to catch Potworms in a worm farm.
Try cutting back on water, food and reduce acidity in the worm bin to say goodbye to Springtail bugs.
Remove slug in worm bin by hand.
Avoid overfeeding worms to reduce the number of insects attracted to rotting foods and keep the bin moist.

Solutions:

  • Potworms – Large populations of these tiny white worms can be reduced by placing some bread oaked in milk in the bin, then you can discard the bread after a few hours. Hopefully some of potworms go with it
    🙂
  • Springtails & mites – Try cutting back on water and feed. Add some calcium carbonate to raise the pH levels (reducing acidity)
  • Fruit flies in worm bin – Cover fruit with some bedding. Try custom traps to reduce the population. Wash produce before consumption to remove eggs. Try microwaving or freezing food waste before adding it to the worm bin (letting the food waste return to room temperature of course).
  • Slugs, snails, centipedes – Remove by hand.
  • Spider in worm bin – Spiders like dry conditions and prey on insects. Avoid overfeeding worms to reduce the number of insects attracted to rotting foods and keep the bin moist.
  • Ants – Ants are a sign that your worm bin is not moist enough. A good splash of water usually fixes it. Do not use insecticide. If your worm bin is on legs, place each leg in a dish of water to stop the ants getting in. Try sprinkling ground cinnamon wherever the ants are. You can also move the worm bin somewhere else.
  • Blowflies & house flies – Do not add any meat, greasy food waste, or pet feces as feed. A well maintained worm farm should not stink, which is what attracts flies.
  • Earwigs, beetles, millipedes, soldier flies, sow bugs & pill bugs – Do not worry about these – they are harmless.
  • Maggots or larvae – Eggs are laid on the surface of nitrogen rich material. Cover and bury nitrogen rich food waste. Add leaves, dry grass and shredded paper on top. Try putting a window screen over any holes in the bin.
Vandenberg :)
 

Latest posts

Latest posts

Top