What's new

Cheap DIY easy refill carbon scrubber

ScrogMonster

Active member
Veteran
I made this carbon scrubber to be used with a 6” Vivosun duct booster type axial fan rated at 240cfm, dialed down on a speed controller. It could be made almost any size or shape to fit bigger or smaller fans I imagine. It’s very simple and basic with a few cool features.

I started by measuring how much room I had length wise in the top of my cabinet inline with the fan, I had plenty of room to make the filter around 19 1/4” long. Which was the full length of the metal screen I had cannibalized from a regular 6” can filter. Of course if you don’t have old filters laying around for the metal screen and fine fiberglass mesh you can use things like 1/4” hardware mesh from Lowe’s or Home Depot and panty hose or fiberglass window screen.

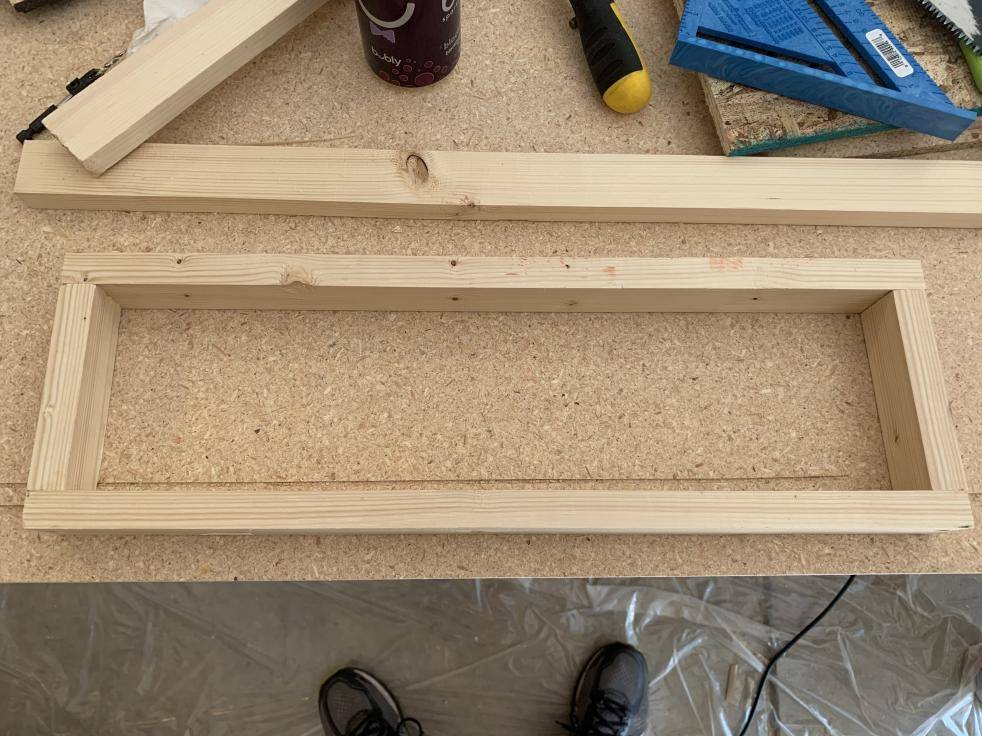
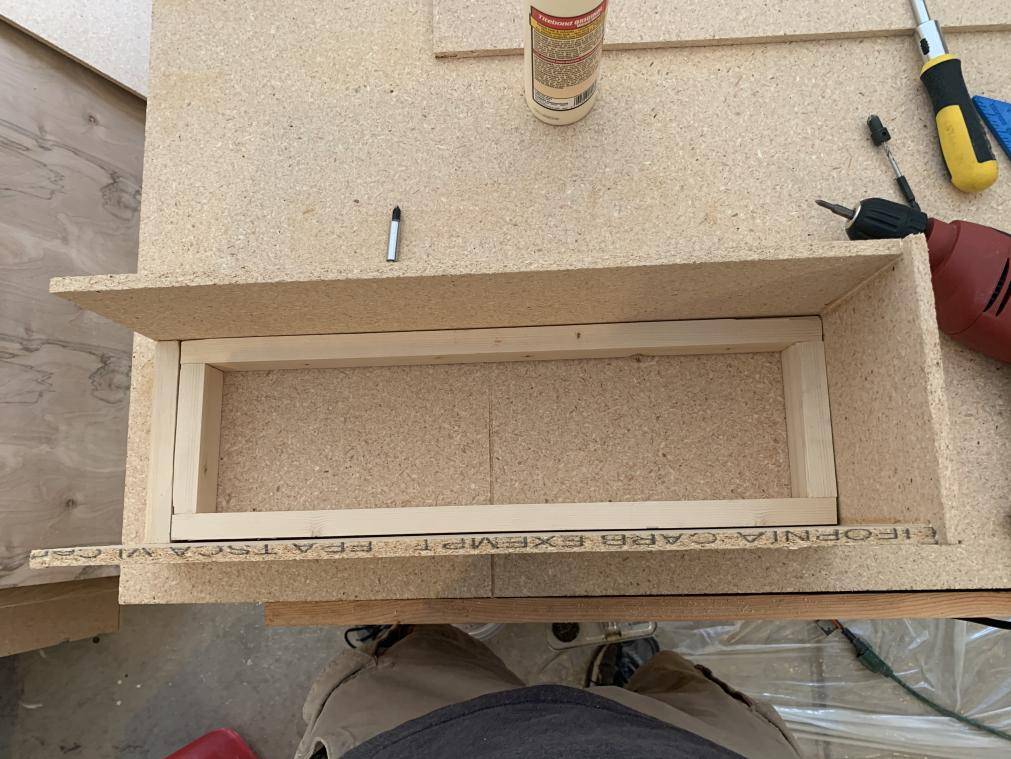
First make the frame for filter part, I used 1x2 boards, screws and wood glue.
picture.php


When you have that basic frame you can measure for some wood pieces to cut to build the box that the filter will sit in. I used scrap 2/3” particle board that I had laying around from building the cabinet the filter is going in. 4x8 sheets of this particle board only costs about $10-11. It shouldn’t be hard to find scrap wood or free cheap beat up furniture locally you could cut apart if you’re really on a budget.

picture.php


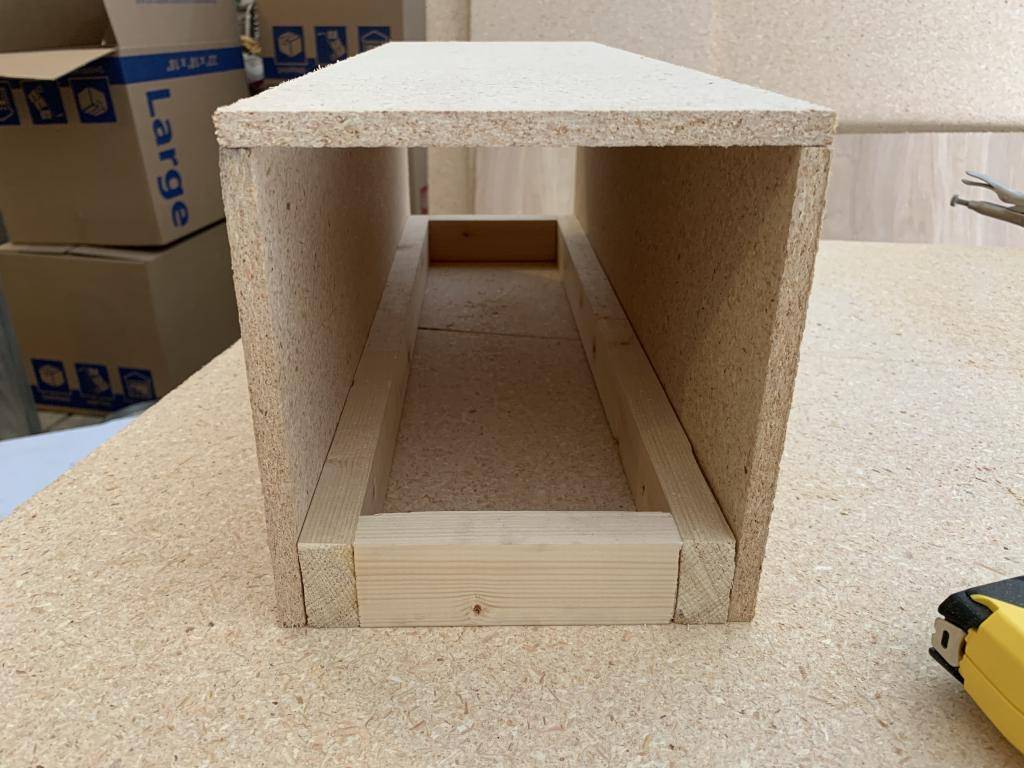
Cut the top and sides of the filter box long enough so that one side of the filter frame is flush with the ends, and the other side is short enough for a piece of 1x2 or similar board that will used to secure the duct to. The flush end will be capped off and the end with the price of wood will be open and connect to duct from the fan. Also make sure that the top of the filter box as well
As the “end cap piece” is cut to a width that will have the box sitting over the frame with just the slightest bit of wiggle room.

picture.php


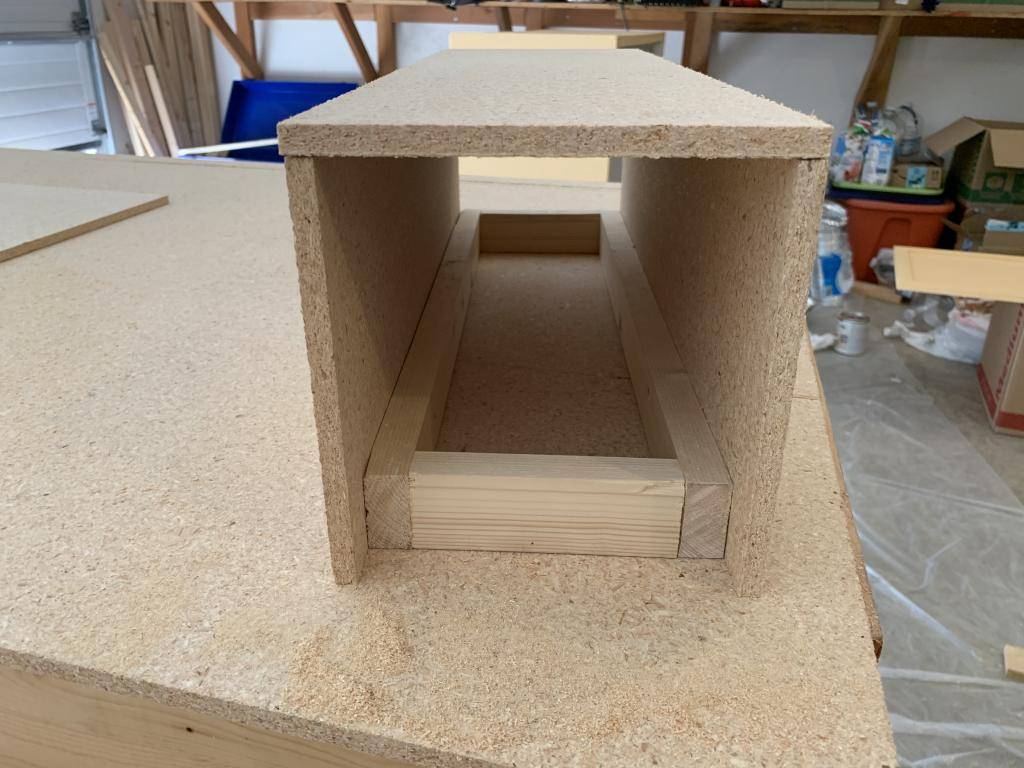
Here’s that end capped and piece of 1x2 on the open end.

picture.php


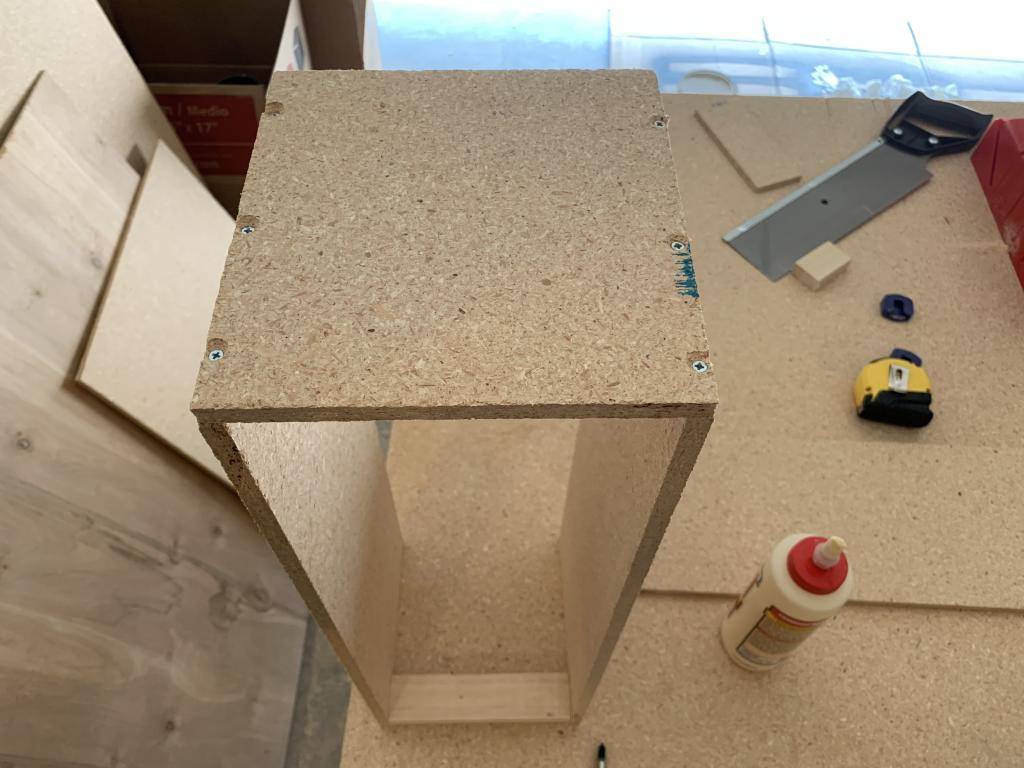
Another view of where we’re at so far.
picture.php
 
Last edited:

ScrogMonster

Active member
Veteran
Now we’ll secure that top part of the filter box with screws and glue.
picture.php


Another of view of where we’re at, you can see how it’s shaping up.

picture.php


So let’s take that filter frame out and build the filter. First put the permanent fine fabric mesh and hard metal screen on one side. Cut the materials to size, either from an old carbon filter or hardware screen and some fine fabric mesh like panty hose or compost tea bag, paint filter, window screen might work too but that mesh is slightly larger. Make sure it’s all taught and staple them down nice.
picture.php


picture.php


Turn her over and pour in some carbon! I filled it with used carbon from the filter I was taking apart, it’s maybe year old carbon but I figured I’d see if it’s still good and this filter has been working fine while my plants are starting week 7 and quite smelly. Of course you can order bulk carbon from amazon or pay too much for some pet store carbon.

picture.php
 

ScrogMonster

Active member
Veteran
Fill the carbon to be flush with the wood but not bulging out. Shake it down make sure it’s nice and full. Then put the fine fabric mesh and metal screen on. We’ll secure this side down with washers and screws so we can unscrew thus side to refill the carbon once it’s spent.

picture.php


Okay so the filter is built and will sit at the bottom of this box, let’s install some cabinet door magnet catches so we can easily set the filter in the box and pull it out when we need to. I cut some pieces of 1x2’s to size
for the screen to rest on in place where we want it to sit. We want the frame of the filter to protrude at least a half inch if not 3/4” out of the filter box so we can put some weather stripping around the protruding frame to seal things up. Okay now we’ll take those catches and place the metal squares onto the magnet catch and position them in some good spots, tape the magnet catch with the screw holes to the side of the filter box and tape the metal squares to the filter. Use a fine sharpie to outline the position of the catches on the side of the filter box, and outline the screw holes as well.

Here is a catch prepped with tape for positioning.

picture.php


A view of this progress.
picture.php


Once they’re all positioned you can take the filter out of the box and screw the squares into the filter frame, notice this is done on the permanent side of the filter, not the refill side.

Screw right through the tape so they stay where they need to be, then remove the tape after.
picture.php


picture.php
 
Last edited:

ScrogMonster

Active member
Veteran
Line up the catches with the outlines you just drew, pre drill some pilot holes in the middle of the screw holes that we outlined, this way the screws go in easier and right in the middle so the catches can be adjusted if needed.

picture.php


Now put the filter in place and test that catches are aligned so that they catch those metal squares good and filter sits right, and turn the box over and test that the catches hold the filter in place. Make any adjustments if necessary. If you positioned, outlined and placed everything carefully hopefully no adjustments are needed. Then wrap some weather stripping around the side filter frame so the edge sits snug against the filter box.

picture.php


picture.php


Turn over test! Yay it works, you might notice that the weather stripping has a slight gap on the right side in this picture, that’s because I put it on while the filter box was sitting on the table when turned over the filter ended up shifting just a bit revealing a gap, so I had to remove sections and put new stripping on once I hung the filter box in the cabinet. So hang the filter box first so the filter is the final position or clamp the box to a workbench so you can put in the weather stripping on while the box is the position it’ll be used in.

Because I used particle board for the filter box I decided to put a coat of paint+primer on it as it’s loaded with urea some poison glue whatever meldahide. So you wanna seal it off... if you use plywood or hardwood you can skip that.

Look inside the finished product
picture.php


Finished product hung in place (with 3 screws through the top of the filter box)

picture.php


I cut a piece of Honeywell pre filter fabric to pre filter the carbon. It just kinda sticks to the inside of the weather stripping, I didn’t bother taping it down,

I used some cut pieces of nylon straps and screws and washers fastened to the side of the filter box wrapped slightly snug under the filter... just incase it we’re to fall out some how so it wouldn’t crush my precious flowers.
 

ScrogMonster

Active member
Veteran
Here’s a picture of the filter in use all hooked up to the fan with some plants growing under it, you see those safety straps I just mentioned.
picture.php


I hope you enjoy this build and that some
One gets some use out of it!!

Happy Growing!! :good:
 

f-e

Well-known member
Mentor
Veteran
Like the box filter. The magnets are a nice touch. Anyone wanting to copy you should consider anything between 20mm and 50mm carbon bed depths. 20-30mm being hobby depth and 50mm being standard. Some over size beds of 60mm and 100mm are available. Being a panel design you can add more quite easily.

Plants look nice. It's amazing what can be done with about 100w now.
 

ScrogMonster

Active member
Veteran
Like the box filter. The magnets are a nice touch. Anyone wanting to copy you should consider anything between 20mm and 50mm carbon bed depths. 20-30mm being hobby depth and 50mm being standard. Some over size beds of 60mm and 100mm are available. Being a panel design you can add more quite easily.

Plants look nice. It's amazing what can be done with about 100w now.

Good to know and thank you :) The 1x2’s are an 1 1/2” wide so that’s 38mm. I didn’t really try to figure any ventilation math out, I just made the filter as long and wide as I could and figured 1 1/2” or 38mm carbon depth aught to do it.
 

Latest posts

Latest posts

Top