
-
Happy Birthday ICMag! Been 20 years since Gypsy Nirvana created the forum! We are celebrating with a 4/20 Giveaway and by launching a new Patreon tier called "420club". You can read more here.
-
Important notice: ICMag's T.O.U. has been updated. Please review it here. For your convenience, it is also available in the main forum menu, under 'Quick Links"!
You are using an out of date browser. It may not display this or other websites correctly.
You should upgrade or use an alternative browser.
You should upgrade or use an alternative browser.
Cannabis Seed Storage
- Thread starter acespicoli
- Start date
acespicoli
Well-known member
welcomeThanks for your work. I'll begin reading it in earnest today. I like the chronological way you are approaching. Obliged

Home-Grown
Active member
`
Last edited:
acespicoli
Well-known member
Vintage Mexican, Seed germination and Micro propagation techniques.
So I see a lot of people on here that have old seeds and don’t know how to get them to germinate. So I thought I would shed some light on this and bring the topic up again. I’d also like to throw in some techniques I’ve learned along the way. If you’re wondering what the vintage Mexican is...
www.icmag.com
if I said this was a great thread it wouldn't describe it sufficiently
Mystic Funk uses everything ...but goat piss
to germ seeds,,, lots of nice photos as well
Last edited:
acespicoli
Well-known member
Diagnosing Hemp and Cannabis Crop Diseases
Hemp and cannabis, both belonging to Cannabis sativa, have emerged as some of the most valuable crops because of their multiple functionalities - industrial, medicinal, and recreational uses. Like all other crops, they are at risk of diseases and pests. In certain cases, an entire hemp field can...
www.google.com
edited wrong thread,,,
Last edited:
acespicoli
Well-known member
Bio Protoc. 2021 Jan 5; 11(1): e3875.
Published online 2021 Jan 5. doi: 10.21769/BioProtoc.3875
PMCID: PMC7952943
PMID: 33732764
Author information Article notes Copyright and License information Disclaimer
See "Transient expression of the β-glucuronidase gene in Cannabis sativa varieties" in Plant Signal Behav, volume 15, 1780037.
Go to:
Keywords: Cannabis sativa, Rapid germination, Hydrogen peroxide, Seed sterilization, Seedling development
Go to:
Go to:
Results
In this study, we have described a rapid and efficient seed germination protocol for Cannabis sativa. The brief description of this protocol has been reported in Sorokin et al. (2020) . In the current study, we have standardized the optimum concentration of hydrogen peroxide (H2O2) solution media for efficient sterilization and rapid germination. We have tested various concentrations of H2O2 solution as well as sterile water control (H2O, 1% H2O2, 3% H2O2, 5% H2O2, or 10% H2O2) for sterilization and germination efficiency. All three steps of germination (seed sterilization, germination, and seedlings development) were carried out in various concentrations of H2O2 solution and seeds were kept in liquid media for four days. Hydrogen peroxide presents several significant advantages over mercuric chloride or bleach sterilants, which require additional seed washing, and separate germination/seedling development step in Murashige and Skoog (MS) agar medium ( Sorokin et al., 2020 ). The 1% H2O2 solution showed rapid and higher germination than higher H2O2 concentrations solution and water control at day 1 (Figure 1). On day 1, 1% H2O2 solution exhibited 82.5% germination as compared to 22.5% germination for 3% H2O2 group, 17.5% germination for 5% H2O2 group and 47.5% germination in water control group (Figure 1B). Interestingly, 10% H2O2 did not show any germination on day 1 due to its toxic effect (Figure 1). In 1% H2O2 solution, radicle appearance (germination) occurred within 24 h and seedling development (two fully developed cotyledons and two immature true leaves stage) occurred in 72-96 h (Figure 1A). In comparison to previous germination methods which take between 4-7 days for radicle appearance and 5-15 days for seedling development ( Wielgus et al., 2008 and references therein), our germination method resulted in radicle appearance in 1 day and allowed us to obtain cannabis seedlings in a very short period (3-7 days) with minimal efforts (Figures 1-2). Considering the possible toxic effect of H2O2 (since germinated seeds/seedlings stayed continuously in H2O2 solution for 4 days), we have checked further survival of germinated seeds/seedlings on MS media and soil (Figures 2-3). On MS media, 1% H2O2 solution seedlings survived better than other treatments (Figure 2). The water germinated seeds exhibited contamination and did not survive on MS media (Figure 2). Similarly, due to the toxic effect of higher concentration of H2O2, the 10% H2O2 germinated seeds did not survive on MS media (Figure 2). The 1% H2O2 solution seedlings also survived well on soil (Figure 3). Apart from this, we have also tested our method for more than 5-years old cannabis seeds with lower viability, which demonstrated that 1% H2O2 solution medium exhibited a very high germination percentage (~50%) as compared to water control (~10%) (Figure 4). In conclusion, we have developed a rapid and efficient method for C. sativa seed germination under sterile conditions for tissue culture and other sensitive applications.
[IMG alt="An external file that holds a picture, illustration, etc.
Object name is BioProtoc-11-01-3875-g001.jpg"]https://www.ncbi.nlm.nih.gov/pmc/articles/PMC7952943/bin/BioProtoc-11-01-3875-g001.jpg[/IMG]
Figure 1.
Germination of 6-month-old seeds of Blueberry variety in various concentrations of hydrogen peroxide solution and water control.
A. Representative photographs of germinated seeds/seedlings in the H2O2 solution of various concentrations or water control on day 1 to day 4. B. Comparison of germination percentage between the various concentrations of H2O2 solution or water control. Data are shown as mean ± SE (n = 4). In each replicate, 30 seeds were used.
[IMG alt="An external file that holds a picture, illustration, etc.
Object name is BioProtoc-11-01-3875-g002.jpg"]https://www.ncbi.nlm.nih.gov/pmc/articles/PMC7952943/bin/BioProtoc-11-01-3875-g002.jpg[/IMG]
Figure 2.
Representative photographs of growth and survival of H2O2 solutions germinated seeds/seedlings of Blueberry variety on MS media.
The Blueberry variety seeds were soaked in the H2O2 solution (germination solutions) for four days and thereafter, germinated seeds/seedlings were transferred from H2O2 solution to MS medium plates to observe the growth and survival of H2O2 solution germinated seeds/seedlings on MS medium. The photographs were taken at day 0 (just after transfer to MS medium plates), day 1 (after 24 h of the transfer to MS medium plates), and day 3 (after 72 h of the transfer to MS medium plates) on MS media.
[IMG alt="An external file that holds a picture, illustration, etc.
Object name is BioProtoc-11-01-3875-g003.jpg"]https://www.ncbi.nlm.nih.gov/pmc/articles/PMC7952943/bin/BioProtoc-11-01-3875-g003.jpg[/IMG]
Figure 3.
Representative photograph of Blueberry variety young plantlet growing in soil (Pro-Mix HP Mycorrhizae Growing Medium).
The Blueberry variety seeds were soaked in the H2O2 solution (germination solutions) for four days and thereafter, germinated seeds/seedlings were transferred from H2O2 solution to soil pot (Pro-Mix HP Mycorrhizae Growing Medium) to observe the growth and survival of H2O2 solution germinated seeds/seedlings on soil. The photographs were taken on day 12.
[IMG alt="An external file that holds a picture, illustration, etc.
Object name is BioProtoc-11-01-3875-g004.jpg"]https://www.ncbi.nlm.nih.gov/pmc/articles/PMC7952943/bin/BioProtoc-11-01-3875-g004.jpg[/IMG]
Figure 4.
Germination of 5-years old seeds of Finola and X59 varieties in 1% hydrogen peroxide solution and water control.
Comparison of germination percentage between 1% H2O2 solution media and water control. Data are shown as mean ± SE (n = 5). In each replicate, around 30 seeds were used.
Go to:
Go to:
Go to:
Readers should cite both the Bio-protocol article and the original research article where this protocol was used.
Go to:
2. Gaudet D., Yadav N. S., Sorokin A., Bilichak A. and Kovalchuk I.(2020). Development and optimization of a germination assay and long-term storage for Cannabis sativa pollen . Plants 9: 665. [PMC free article] [PubMed] [Google Scholar]
3. Sorokin A., Yadav N. S., Gaudet D. and Kovalchuk I.(2020). Transient expression of the β-glucuronidase gene in Cannabis sativa varieties . Plant Signal Behav 15(8): 1780037. [PMC free article] [PubMed] [Google Scholar]
4. Wielgus K., Luwanska A., Lassocinski W. and Kaczmarek Z.(2008). Estimation of Cannabis sativa L. tissue culture conditions essential for callus induction and plant regeneration . J Nat Fibers 5: 199-207. [Google Scholar]
Articles from Bio-protocol are provided here courtesy of Bio-protocol, LLC
Published online 2021 Jan 5. doi: 10.21769/BioProtoc.3875
PMCID: PMC7952943
PMID: 33732764
Development and Standardization of Rapid and Efficient Seed Germination Protocol for Cannabis sativa
Aleksei Sorokin,# Narendra Singh Yadav,# Daniel Gaudet, and Igor Kovalchuk*Author information Article notes Copyright and License information Disclaimer
See "Transient expression of the β-glucuronidase gene in Cannabis sativa varieties" in Plant Signal Behav, volume 15, 1780037.
Go to:
Abstract
Cannabis seed germination is an important process for growers and researchers alike. Many biotechnological applications require a reliable sterile method for seed germination. This protocol outlines a seed germination procedure for Cannabis sativa using a hydrogen peroxide (H2O2) solution as liquid germination media. In this protocol, all three steps including seed sterilization, germination, and seedlings development were carried out in an H2O2 solution of different concentrations; 1% H2O2 solution showed the fastest and the most efficient germination. This protocol also exhibited high germination efficiency for very old cannabis seeds with lower viability. Overall, this protocol demonstrates superior germination compared to water control and reduces the risk of contamination, making it suitable for tissue culture and other sensitive applications.Keywords: Cannabis sativa, Rapid germination, Hydrogen peroxide, Seed sterilization, Seedling development
Go to:
Background
Cannabis sativa, otherwise known as marijuana or hemp, is an annual primarily dioecious flowering plant in which male/female sex is determined by heteromorphic chromosomes (X and Y) ( Gaudet et al., 2020 ). Cannabis is grown for a variety of agricultural uses; nearly all parts of cannabis plant are used, seeds for food, stem for fiber, and flowers/leaves for medicine. Flowers produce a mix of cannabinoids and aromatic compounds valued for their therapeutic and recreational effects ( Chandra et al., 2017 ). Cannabis plants are propagated either clonally through cuttings or via seed germination. Seed germination is very important for researchers, breeders, and growers alike, especially since seeds from elite cultivars can be very expensive and valuable. Additionally, older seeds may have a reduced germination rate while bacterial and fungal contamination can compromise germination, especially when seeds are germinated for tissue culture propagation. To address these issues, we have developed a rapid, sterile, and efficient seed germination protocol using a 1% hydrogen peroxide (H2O2) solution. In this protocol, all three steps including seed sterilization, germination, and seedlings development were carried out in a 1% H2O2 solution. This presents a significant advantage over other sterilants, such as mercuric chloride or bleach, which require additional washing of seeds and a separate germination step on MS solid medium. Our protocol resulted in faster germination and increased seed germination percentage as compared to water control, with no bacterial or fungal contamination, making it suitable for tissue culture and other sensitive applications. In comparison to previous germination methods which take between 4-7 days for radicle appearance and 5-15 days for seedling development ( Wielgus et al., 2008 and references therein), our germination method resulted in radicle appearance in 1 day and allowed us to obtain cannabis seedlings in a very short period (3-7 days) with minimal efforts. This protocol is also very efficient for germination of very old cannabis seeds with lower viability.Go to:
Materials and Reagents
- Biological materials
- Cannabis sativa (Finola, X59, and Blueberry varieties) seeds
All seeds were harvested in our laboratory. Blueberry seeds were not older than 6 months, when employed in the experiments. Finola and X59 seeds were more than 5 years old.
- Cannabis sativa (Finola, X59, and Blueberry varieties) seeds
- Chemicals
- Hydrogen Peroxide 30% (Merck®, catalog number: 1072091000)
- Murashige & Skoog Basal Medium with Vitamins (PhytoTechnology Laboratories®, catalog number: M519)
- Sucrose (Sigma-Aldrich, catalog number: S0389)
- MES (Sigma-Aldrich, catalog number: M3671)
- Agar type E (Sigma-Aldrich, catalog number: A4675)
- MS solid media (1 L) (see Recipes)
- Plasticware
- Sterile empty 100 x 15 mm Petri plates (VWR International, catalog number: 25384-342)
- Sterile disposable 15 or 50 ml screw-cap centrifuge tubes (BD, FalconTM, catalog number: 352070)
Equipment
- Laminar flow hood (Microzone Bio Klone 2, catalog number: 30193-086)
- pH meter (Corning Model 430, catalog number: 475303)
- Sterile forceps and scalpel (sterilized by heat treatment using a Bunsen burner)
- Growth chamber (Sanyo MLR-350, catalog number: 859-600-06): 24 °C, 18 h light/6 h dark cycle, light intensity 200 μmol·m-2·sec-1
- Pro-Mix HP Mycorrhizae Growing Medium (Pro-Mix, catalog number: 20381RG)
Procedure
Seed germination assay- Soak seeds overnight in various concentrations of hydrogen peroxide solution (liquid germination media or germination solutions) as well as in sterile water control (H2O, 1% H2O2, 3% H2O2, 5% H2O2, or 10% H2O2) in 15 or 50 ml screw-cap (Falcon tube). Falcon tubes with submerged seeds in various germination solutions were kept in the dark at room temperature.
- Next day, record the percentage of germinated seeds in germination solution (appearance of radicle is considered as germination event) and add fresh respective germination solution after removal of old solution simply by pouring out.
- Keep seeds soaked in the same solution for 3 more days in the dark at room temperature and record the percentage of germinated seeds every day.
- Thereafter, germinated seeds/seedlings were transferred with or without seed coats from H2O2 solution to MS medium plates to observe the growth of H2O2 solution-germinated seeds/seedlings on MS medium. To transfer, first germinated seeds/seedlings were poured together with H2O2 solution from the Falcon tube to the empty petri plate. Then seedlings were transferred to sterile paper by using forceps to remove excess H2O2 solution. Finally, the germinated seeds/seedlings were transferred to MS media plate by using forceps. The whole transfer process has been carried out in the laminar flow hood.
- Parafilm sealed MS medium plates with germinated seeds/seedlings are then transferred to the growth chamber (24 °C, 18 h light/6 h dark cycle and light intensity 200 μmol·m-2·sec-1) for 3 days to observe the growth and survival of H2O2 solution germinated seeds/seedlings on MS medium.
- The H2O2 solution-germinated seeds/seedlings growth was also observed in soil. Pro-Mix HP Mycorrhizae Growing Medium used for soil experiment. The cannabis seeds were soaked in the H2O2 solution (germination solutions) for four days and thereafter, germinated seeds/seedlings were transferred from H2O2 solution to soil pot (Pro-Mix HP Mycorrhizae Growing Medium) to observe the growth and survival of H2O2 solution germinated seeds/seedlings on soil. The soil pots were transferred to the growth chamber (24 °C, 18 h light/6 h dark cycle and light intensity 200 μmol·m-2·sec-1). The photographs were taken on day 12.
Data analysis
Mean seed germination percentage under various concentrations of H2O2 solution as well as water control were calculated in an excel sheet. Data were shown as mean ± SE.Results
In this study, we have described a rapid and efficient seed germination protocol for Cannabis sativa. The brief description of this protocol has been reported in Sorokin et al. (2020) . In the current study, we have standardized the optimum concentration of hydrogen peroxide (H2O2) solution media for efficient sterilization and rapid germination. We have tested various concentrations of H2O2 solution as well as sterile water control (H2O, 1% H2O2, 3% H2O2, 5% H2O2, or 10% H2O2) for sterilization and germination efficiency. All three steps of germination (seed sterilization, germination, and seedlings development) were carried out in various concentrations of H2O2 solution and seeds were kept in liquid media for four days. Hydrogen peroxide presents several significant advantages over mercuric chloride or bleach sterilants, which require additional seed washing, and separate germination/seedling development step in Murashige and Skoog (MS) agar medium ( Sorokin et al., 2020 ). The 1% H2O2 solution showed rapid and higher germination than higher H2O2 concentrations solution and water control at day 1 (Figure 1). On day 1, 1% H2O2 solution exhibited 82.5% germination as compared to 22.5% germination for 3% H2O2 group, 17.5% germination for 5% H2O2 group and 47.5% germination in water control group (Figure 1B). Interestingly, 10% H2O2 did not show any germination on day 1 due to its toxic effect (Figure 1). In 1% H2O2 solution, radicle appearance (germination) occurred within 24 h and seedling development (two fully developed cotyledons and two immature true leaves stage) occurred in 72-96 h (Figure 1A). In comparison to previous germination methods which take between 4-7 days for radicle appearance and 5-15 days for seedling development ( Wielgus et al., 2008 and references therein), our germination method resulted in radicle appearance in 1 day and allowed us to obtain cannabis seedlings in a very short period (3-7 days) with minimal efforts (Figures 1-2). Considering the possible toxic effect of H2O2 (since germinated seeds/seedlings stayed continuously in H2O2 solution for 4 days), we have checked further survival of germinated seeds/seedlings on MS media and soil (Figures 2-3). On MS media, 1% H2O2 solution seedlings survived better than other treatments (Figure 2). The water germinated seeds exhibited contamination and did not survive on MS media (Figure 2). Similarly, due to the toxic effect of higher concentration of H2O2, the 10% H2O2 germinated seeds did not survive on MS media (Figure 2). The 1% H2O2 solution seedlings also survived well on soil (Figure 3). Apart from this, we have also tested our method for more than 5-years old cannabis seeds with lower viability, which demonstrated that 1% H2O2 solution medium exhibited a very high germination percentage (~50%) as compared to water control (~10%) (Figure 4). In conclusion, we have developed a rapid and efficient method for C. sativa seed germination under sterile conditions for tissue culture and other sensitive applications.
[IMG alt="An external file that holds a picture, illustration, etc.
Object name is BioProtoc-11-01-3875-g001.jpg"]https://www.ncbi.nlm.nih.gov/pmc/articles/PMC7952943/bin/BioProtoc-11-01-3875-g001.jpg[/IMG]
Figure 1.
Germination of 6-month-old seeds of Blueberry variety in various concentrations of hydrogen peroxide solution and water control.
A. Representative photographs of germinated seeds/seedlings in the H2O2 solution of various concentrations or water control on day 1 to day 4. B. Comparison of germination percentage between the various concentrations of H2O2 solution or water control. Data are shown as mean ± SE (n = 4). In each replicate, 30 seeds were used.
[IMG alt="An external file that holds a picture, illustration, etc.
Object name is BioProtoc-11-01-3875-g002.jpg"]https://www.ncbi.nlm.nih.gov/pmc/articles/PMC7952943/bin/BioProtoc-11-01-3875-g002.jpg[/IMG]
Figure 2.
Representative photographs of growth and survival of H2O2 solutions germinated seeds/seedlings of Blueberry variety on MS media.
The Blueberry variety seeds were soaked in the H2O2 solution (germination solutions) for four days and thereafter, germinated seeds/seedlings were transferred from H2O2 solution to MS medium plates to observe the growth and survival of H2O2 solution germinated seeds/seedlings on MS medium. The photographs were taken at day 0 (just after transfer to MS medium plates), day 1 (after 24 h of the transfer to MS medium plates), and day 3 (after 72 h of the transfer to MS medium plates) on MS media.
[IMG alt="An external file that holds a picture, illustration, etc.
Object name is BioProtoc-11-01-3875-g003.jpg"]https://www.ncbi.nlm.nih.gov/pmc/articles/PMC7952943/bin/BioProtoc-11-01-3875-g003.jpg[/IMG]
Figure 3.
Representative photograph of Blueberry variety young plantlet growing in soil (Pro-Mix HP Mycorrhizae Growing Medium).
The Blueberry variety seeds were soaked in the H2O2 solution (germination solutions) for four days and thereafter, germinated seeds/seedlings were transferred from H2O2 solution to soil pot (Pro-Mix HP Mycorrhizae Growing Medium) to observe the growth and survival of H2O2 solution germinated seeds/seedlings on soil. The photographs were taken on day 12.
[IMG alt="An external file that holds a picture, illustration, etc.
Object name is BioProtoc-11-01-3875-g004.jpg"]https://www.ncbi.nlm.nih.gov/pmc/articles/PMC7952943/bin/BioProtoc-11-01-3875-g004.jpg[/IMG]
Figure 4.
Germination of 5-years old seeds of Finola and X59 varieties in 1% hydrogen peroxide solution and water control.
Comparison of germination percentage between 1% H2O2 solution media and water control. Data are shown as mean ± SE (n = 5). In each replicate, around 30 seeds were used.
Go to:
Recipes
- MS solid media (1 L)
4.43 g Murashige & Skoog Basal Medium with Vitamins
500 mg MES
30 g Sucrose
8 g Agar
Adjust pH to 5.7 with KOH and sterilize by autoclaving at 121 °C for 40 min. 25 ml of MS media on each Petri plate.
Acknowledgments
This protocol is derived from Sorokin et al. (2020). We thank the Natural Sciences and Engineering Research Council of Canada (NSERC) and MITACS for funding our work.Go to:
Competing interests
The authors declare that they have no competing interests.Go to:
Citation
Readers should cite both the Bio-protocol article and the original research article where this protocol was used.
Go to:
References
1. Chandra S., Lata H. and ElSohly M. A.(2017). Cannabis sativa L.-botany and biotechnology. Chandra, S., Lata, H. and ElSohly, M. A.(Eds.). Springer International Publishing: Cham, Switzerland. ISBN: 9783319545639. [Google Scholar]2. Gaudet D., Yadav N. S., Sorokin A., Bilichak A. and Kovalchuk I.(2020). Development and optimization of a germination assay and long-term storage for Cannabis sativa pollen . Plants 9: 665. [PMC free article] [PubMed] [Google Scholar]
3. Sorokin A., Yadav N. S., Gaudet D. and Kovalchuk I.(2020). Transient expression of the β-glucuronidase gene in Cannabis sativa varieties . Plant Signal Behav 15(8): 1780037. [PMC free article] [PubMed] [Google Scholar]
4. Wielgus K., Luwanska A., Lassocinski W. and Kaczmarek Z.(2008). Estimation of Cannabis sativa L. tissue culture conditions essential for callus induction and plant regeneration . J Nat Fibers 5: 199-207. [Google Scholar]
Articles from Bio-protocol are provided here courtesy of Bio-protocol, LLC
acespicoli
Well-known member
Accurately weighed 0.1 g HgCl2 reagent powders (Analysis pure) using a calibrated and zeroed electronic balance were poured into a 100 mL sterile beaker. We slowly poured a small amount of sterile ddH2O and stirred with a glass stick until the powder dissolved completely, and then poured the solution into a 100 mL volumetric flask. Next, took a small amount of the new sterile water rinse beaker and glass stirring bar, and combined the rinse solution into the volumetric flask. Repeated the rinsing step 3–4 times (the total volume of the liquid should be less than 100 mL). Finally, added an appropriate amount (depending on the situation) of sterile water to a constant volume of 100 mL. At this point, the 100 mL solution in the 100 mL volumetric flask was the 0.1% HgCl2 solution required for the experiment.
Mercuric Chloride has been shown to kill TMV on seed coat (you may find elite S1 seed contaminated)

Mosaic virus - Wikipedia
acespicoli
Well-known member
Levels of control over vertical transmission of viruses/viroids. Many pathogenic viruses invade the entire plant body but most cannot enter shoot apical meristems, gametophytes, gametes, and/or embryos/seeds. Experimental data and agricultural practice suggest the existence of meristematic and transgenerational antiviral protection systems that prevent vertical transmission to progeny. How these defense mechanisms work, and the conditions under which some viruses can bypass the barriers, remains poorly understood.
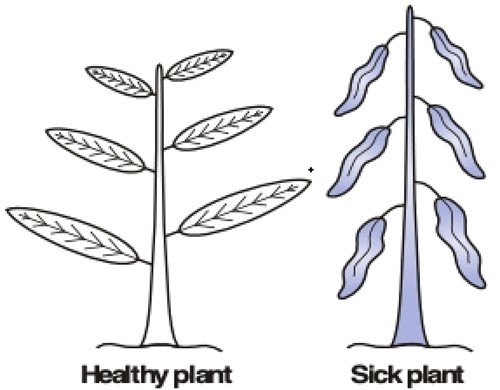
Under siege: virus control in plant meristems and progeny
We review what is known about the biological mechanisms regulating virus exclusion from—or invasion of—plant host meristems and progeny, including possible cons
 academic.oup.com

Volume 33, Issue 8
August 2021
Virus exclusion from the progeny
Vertical transmission of pathogenic viruses can be dangerous because (1) inoculum can easily travel worldwide with seed stocks, (2) inoculum can be distributed over fields where the seeds are sown, and (3) inoculum can survive in seeds from one growing season to the next (Sastry, 2013). However, more than a century ago, Allard (1916) studied tobacco mosaic disease caused by TMV and concluded that “a very efficient barrier guards against embryonic infection or the subsequent successful continuation of the disease from parent to seedling.” Considering the efficient spread of many plant pathogenic viruses within a host and horizontally to new hosts, the scarcity of their vertical transmission is indeed surprising, which was readily noticed by pioneer virologists (Bennett, 1940). More recent surveys have reported that around 18% of plant viruses are vertically transmitted on at least one host species (Mink, 1993). The reported studies were mostly conducted with crop species and covered the full spectrum of possible transmission rates, from 0.01% to 100% (Sastry, 2013). In addition, transmission rates vary within genera, and even species, for both host and virus (Bennett, 1969; Johansen et al., 1994; Maule and Wang, 1996). Several detailed analyses reported dramatic changes in transmission rates between host cultivars/varieties (Carroll et al., 1979; Wang and Maule, 1992; Cobos et al., 2019). Conversely, different virus and viroid isolates show remarkable differences in their transmission rates on the same host (Bowers and Goodman, 1991; Edwards, 1995; Johansen et al., 1996; Tsushima and Sano, 2018).Two cases of apparent vertically transmitted infection of seedlings by contact with infected seed coats after germination have been recorded only for TMV and southern bean mosaic virus (SBMV), but this phenomenon is believed to be rare (Johansen et al., 1994). Genuine vertical (or seed) transmission occurs when a virus infects an embryo during seed formation that will germinate into an infected seedling (Figure 3). Infection of the embryo can happen through infection of the gametes prior to fertilization or post-fertilization through viral movement from the maternal tissue into the embryo (Bennett, 1969; Johansen et al., 1994; Wang and Maule, 1997). These nonmutually exclusive modes of embryo infection have been suggested to correspond to two “windows of opportunity” for virus penetration, which are determined by the presence of open plasmodesmatal connections (Maule and Wang, 1996; Wang and Maule, 1997). The first window, leading to infection through gametophytes, is open during early flower development. As symplastic connections between the gametophytes and the parent plant appear to be interrupted early in gametophyte development (upon meiosis in the case of pollen) (Johansen et al., 1994; Sager and Lee, 2014), a virus must enter the gametophytes before this point in order to reach the gametes. This notion was confirmed for barley stripe mosaic virus (BSMV), which enters early developing barley female and male gametophytes before loss of symplastic connections, resulting in vertical transmission (Carroll and Mayhew, 1976a, 1976b). A second window is open after fertilization, when viruses can move into the embryo through the suspensor, as reported for pea seed-born mosaic virus (PSbMV) on pea plants (Wang and Maule, 1992, 1994; Roberts et al., 2003). However, insight into plasmodesmatal openings during gamete and embryo development in different species remains scarce, and potential changes in symplastic connections induced by virus infection remain to be investigated. Evidence for such changes is provided by the deposition of callose at plasmodesmata, which regulates their aperture during infection with different viruses (Roberts and Oparka, 2003), but such changes also need to be examined in reproductive tissues.
Figure 3
 and/or the progeny (vertical transmission). Vertical transmission mechanisms proposed here were extrapolated from the following papers: (A) (Amari et al., 2007; Amari et al., 2009; Matsushita and Tsuda, 2014); (B) (Matsushita et al., 2011); (C) (Matsushita and Yanagisawa, 2018; Matsushita et al., 2018).")
Open in new tabDownload slide
Schematic representation of experimentally observed virus/viroid infection routes during plant sexual reproduction. Virus-infected tissues are colored in violet. A, The virus invades all reproductive organs and is transmitted to the next generation, resulting in vertical transmission. B, The virus invades the reproductive organs only partially, with various temporal and spatial distribution patterns, except gametes and/or embryos. This is not vertical transmission sensu stricto but mimics vertical transmission to the seedling by post-germination mechanical inoculation of virions from the seed coat. C, A virus-infected pollen grain fertilizes a healthy plant and transmits infection to the mother plant (horizontal transmission) and/or the progeny (vertical transmission). Vertical transmission mechanisms proposed here were extrapolated from the following papers: (A) (Amari et al., 2007; Amari et al., 2009; Matsushita and Tsuda, 2014); (B) (Matsushita et al., 2011); (C) (Matsushita and Yanagisawa, 2018; Matsushita et al., 2018).
Vertical transmission through pollen has been reported for a number of viruses and viroids (Bennett, 1969; Johansen et al., 1994; Matsushita et al., 2018). Given the high mobility of pollen, this mode of transmission is potentially a successful dissemination strategy for viruses, although infection can negatively affect pollen performance (Yang and Hamilton, 1974; Amari et al., 2007). However, some pollen possesses effective antiviral barriers. In hop (Humulus lupulus), hop latent viroid (HLVd) is abundant in immature pollen but dramatically decreases during maturation and becomes undetectable in germinating pollen (Matousek et al., 2008). Interestingly, decreasing HLVd levels are correlated with an increase in RNAse activity, but not in the accumulation of vsiRNAs. A previous study showed that RNAse activity, particularly targeting dsRNA, was 150 times higher in developing tobacco pollen than in leaves (Matousek et al., 1994). PSTVd-infected petunia pollen tubes germinating in vitro contain abundant viroid RNA, while pollen tubes germinating in vivo on the female style were progressively cleared of PSTVd (Matsushita and Yanagisawa, 2018), indicating a further defensive barrier elicited by the female organs. While infected pollen can cause systemic horizontal infection of the plant it fertilizes (Hull, 2014; Matsushita et al., 2018), this does not guarantee efficient vertical transmission. In addition to the barriers mentioned above, certain strains of alfalfa mosaic virus (AMV), soybean mosaic virus (SMV), and SBMV are inactivated during seed maturation through unknown mechanisms (Uyemoto and Grogan, 1977; Bowers and Goodman, 1979; Bailiss and Offei, 2007).
Many attempts to identify the variables that determine whether a virus can be vertically transmitted have led to the consensus that there are many biotic and environmental factors at play (Bennett, 1940, 1969; Johansen et al., 1994; Maule and Wang, 1996; Sastry, 2013). Several reports have suggested that lower temperatures favor vertical transmission, while higher temperatures increase virus titers (Frosheiser, 1974; Tu, 1992). Infection at or after the onset of flowering does not result in vertical transmission, suggesting that a virus needs to be systemically established in the host and has access to the floral organs at very early developmental stages (Johansen et al., 1994; Maule and Wang, 1996). This observation is in agreement with recent studies correlating virulence and high speed of movement with seed transmission in Arabidopsis (Cobos et al., 2019; Montes et al., 2021). Genetic approaches toward host determinants have yielded very limited results, with vertical transmission being associated with one genomic locus for BSMV in barley (Carroll et al., 1979) and several loci for PSbMV in pea (Wang and Maule, 1994) that remain to be identified. However, a study of SMV seed transmission determinants in soybean(Glycine max) identified two genomic regions associated with vertical transmission that contain homologs of Arabidopsis DCL3 and RDR6 (Domier et al., 2011).
The most compelling data on the viral determinants of vertical transmission came from experiments with recombinant viruses—chimeras between transmitted and nontransmitted strains or variants with deletions of viral open reading frames. These approaches have identified HC-Pro of PSbMV (Johansen et al., 1996), 12K of PEBV (Wang et al., 1997), and γb of BSMV (Edwards, 1995) as key factors in determining seed transmission. γb of BSMV has been shown to be a VSR (Bragg and Jackson, 2004), while HC-Pro of PSbMV and 12K of PEBV are closely related to well-established VSR proteins (Kasschau and Carrington, 2001; Ghazala et al., 2008). Although HC-Pro and γb play multiple roles in viral infection (Carrington et al., 1989; K. Zhang et al., 2017a; Yang et al., 2018), the involvement in vertical transmission of at least three VSRs from different virus genera suggests that RNAi plays an important role in this process. Whether vertical virus transmission in nonplant model organisms is mechanistically related is not clear, but it should be mentioned that in Caenorhabditis elegans, ablation of the host gene Dicer related helicase 1 (Drh-1), which encodes an RNAi initiator, increases the rate of vertical transmission for vesicular stomatitis virus (Gammon et al., 2017).
additional reading for healthy crops

Diseases of Hemp
Common Names of Plant Diseases...J. M. McPartland, primary collator (last update 4/8/03) BACTERIAL DISEASES Bacterial blight Pseudomonas syringae pv. cannabina (Sutic & Dowson) Young et al. Crown gall Agrobacterium tumefaciens (Smith & Townsend) Conn Striatura ulcerosa Pseudomonas syringae pv...
 www.apsnet.org
Search
Pesticide Table for Hemp Pests
Much of the information below comes from the Oregon Department of Agriculture “Guide List for Pesticides and Cannabis” https://www.oregon.gov/oda/shared/Documents/Publications/PesticidesPARC/... (updated 6/22/22) For biological control...
B, The virus invades the reproductive organs only partially, with various temporal and spatial distribution patterns, except gametes and/or embryos. This is not vertical transmission sensu stricto but mimics vertical transmission to the seedling by post-germination mechanical inoculation of virions from the seed coat.
Attachments
Last edited:
acespicoli
Well-known member
acespicoli
Well-known member
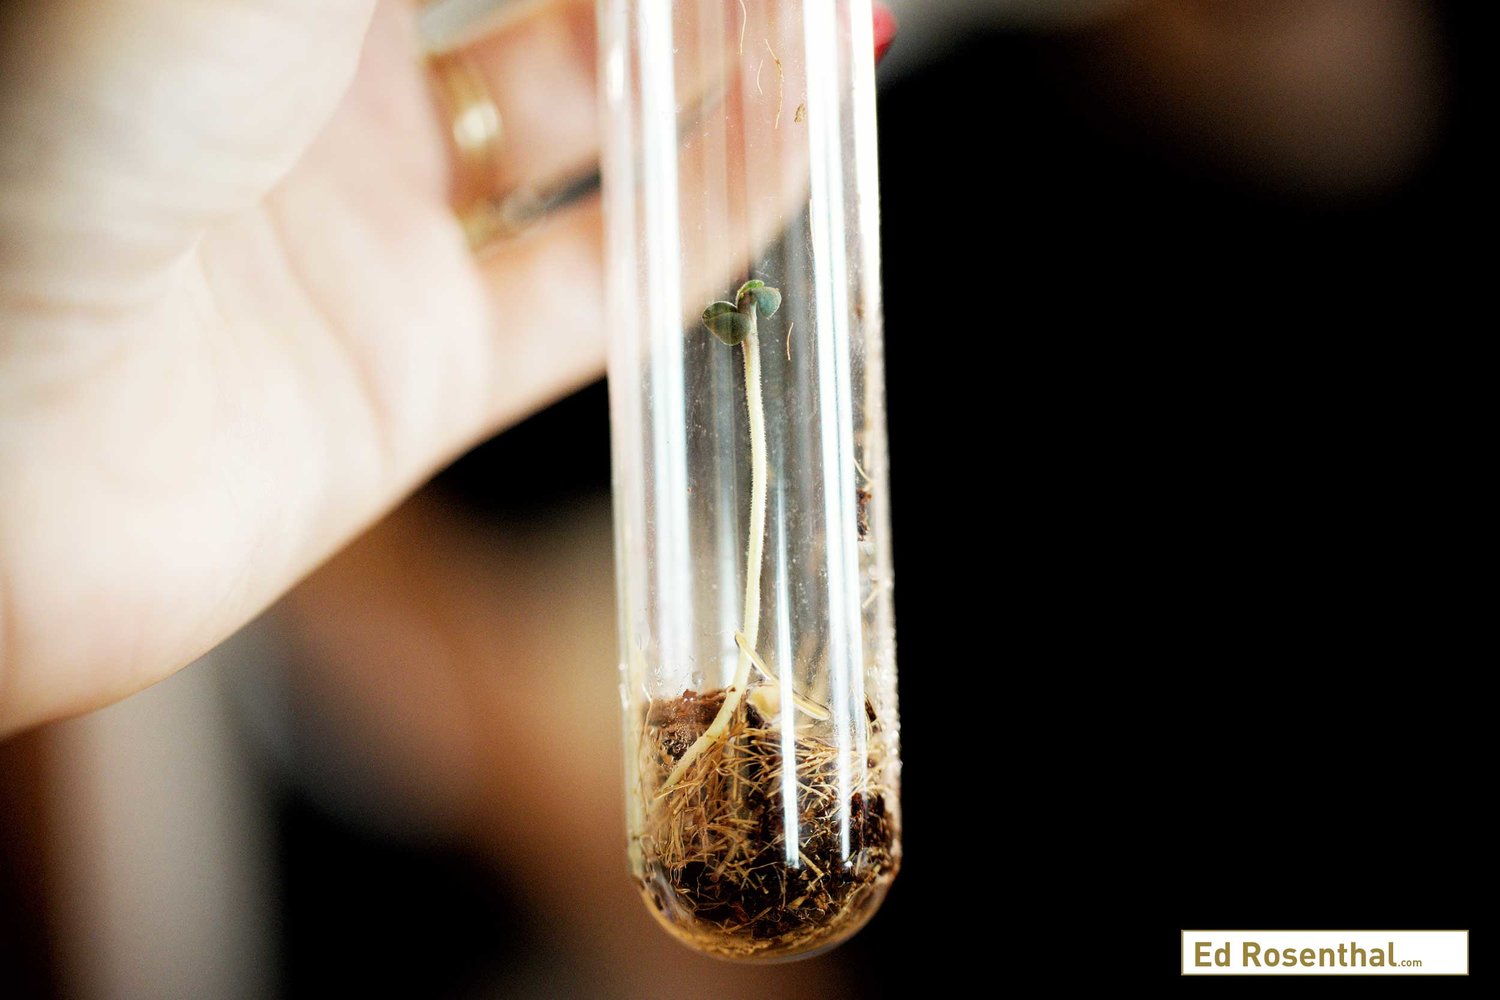
How we discovered a hidden world of fungi inside the world’s biggest seed bank
The idea that seed banks must be full of potentially helpful microfungi inside seeds was not a stretch, and yet no one had ever looked before.
This was the moment of truth. We’d spent countless hours meticulously sterilising seeds (1,710, to be specific), filling the lab with a cacophony of rattling as we shook them in bleach. We’d built a fungus city: great tower-blocks of petri dishes stacked on the lab workbenches, with different colours, textures and shapes of fungi all emerging inside. We’d extracted enough DNA that the freezer, stuffed full of tubes, threatened to revolt.
Finally the time had come for me to analyse all the data, and discover just what we’d managed to find after all these months of work. In the first study of its kind, to our knowledge, in a major seed bank, we found hundreds of fungi hidden inside seeds from the Millennium Seed Bank, some of which are likely to be species new to science and could be crucial for the future of plant health.
I can’t remember the moment when I first decided to study fungi. If only I had an anecdote about my time as a biology undergraduate looking down the microscope at some spores for the first time, overcome by their sheer majesty – but that would be fiction. For one thing, fungi barely appeared in my degree, and when they did it was usually in the negative context of causing disease.
Given that fungi are a whole kingdom of species which, alongside animals and plants, belong to the major domain of planet Earth’s multicellular life together called the “eukaryotes”, this is perhaps surprising. Yet this is the typical experience in both school and higher education (in the UK and the US at least) and, unsurprisingly, when you don’t teach students about fungi, they don’t go on to study fungi. Which leads to fewer researchers studying fungi that can teach students about fungi and … you get the picture. Long story short, fungi are incredibly understudied compared to their sister kingdoms of animals and plants.

The proportion of scientific papers published each year for animals, plants and fungi. Data from EuropePMC.
I really can’t emphasise enough how much of an oversight this is. The latest estimate of the total number of fungal species is 6.2 million. To put that in context, that would mean our planet is inhabited by 15 times more fungi than plants. Other recent estimates for fungal diversity have ranged widely from 2.2 million to 165 million species – but no matter which you go with, the numbers are all far greater than the 150,000 fungi which scientists have already found and described.
We’ve barely scratched the surface, and I mean that quite literally – countless fungi will be underground and inside other organisms. These microscopic fungi, or more simply “microfungi”, are invisible to the naked eye, and so for a long time have remained under the radar. But that doesn’t mean they’re unimportant. Quite the opposite.
Yes, some will be pathogens, which can cause disease in plants and animals. These tend to be the fungi that get the most attention, both in terms of public awareness and scientific research, and not without some good reason. With our increased global travel and trade, not to mention our contributions to climate change, we’re creating a perfect opportunity for new fungal pathogens to emerge and thrive.
But there’s so much more than just the pathogens. There are also the recyclers (“saprotrophs”), which break down organic matter and return nutrients to the soil in the continuous cycle of life and death. We live on a planet of finite resources, so it’s thanks to these little fungi doing the work to recycle them that our natural world can exist at all.
Countless fungi play key roles in modern society: they can be a source of medicines such as antibiotics and immunosuppressants, industrial enzymes for detergents and manufacturing and new biomaterials to replace plastics. Even the humble baker’s yeast, which underpins our everyday food and drink, can be used in the lab to study human genetics or modified to produce important compounds. And these are just the fungi we already know about – imagine the useful properties awaiting discovery in the fungi we are yet to find.
And maybe most famously there are the symbiotic partners known as mycorrhizal fungi, which form a relationship with plant roots, usually for mutual benefit: they can help the plant take up water and nutrients in return for carbohydrates. These fungi can form vast underground networks of nutrient exchange between plants, popularly known as the “wood wide web”. As if that wasn’t enough, mycorrhizal fungi also help to increase the amount of carbon stored in the soil, and so play an important role in regulating global climate.
Life as we know it would, quite simply, be lost without fungi.
Enter the endophytes
Which brings me to the fungi I study. Mycorrhizal fungi aren’t the only ones to be found when we look at plants. All plant tissues contain fungi, in much the same way that us animals have an array of microorganisms living inside us: our “microbiome”. These microfungi of plants are called fungal endophytes (endo=in, phyte=plant), and are defined by the fact that they live inside plants without causing any visible symptoms of disease.
Read more: Fungal microbiome: Whether mice get fatter or thinner depends on the fungi that live in their gut
The sequencing revolution, which has enabled us to detect otherwise imperceptible organisms from mere traces of their DNA, has transformed our awareness of these microscopic fungi. A single plant individual is capable of hosting countless different fungal species.
As always, however, it’s not all that simple. When we find fungal endophytes inside healthy plants, some may be latent decomposers or pathogens – in other words, they are in a dormant state, waiting for the plant to die so that they can decay it, or for an opportunity to cause disease. At the same time, there are other fungal endophytes which we know can actually help their plant host, for instance by improving germination and seedling growth. What we call the endophyte lifestyle is really more of a spectrum of interactions between plants and fungi, with both good and bad consequences for plant health.
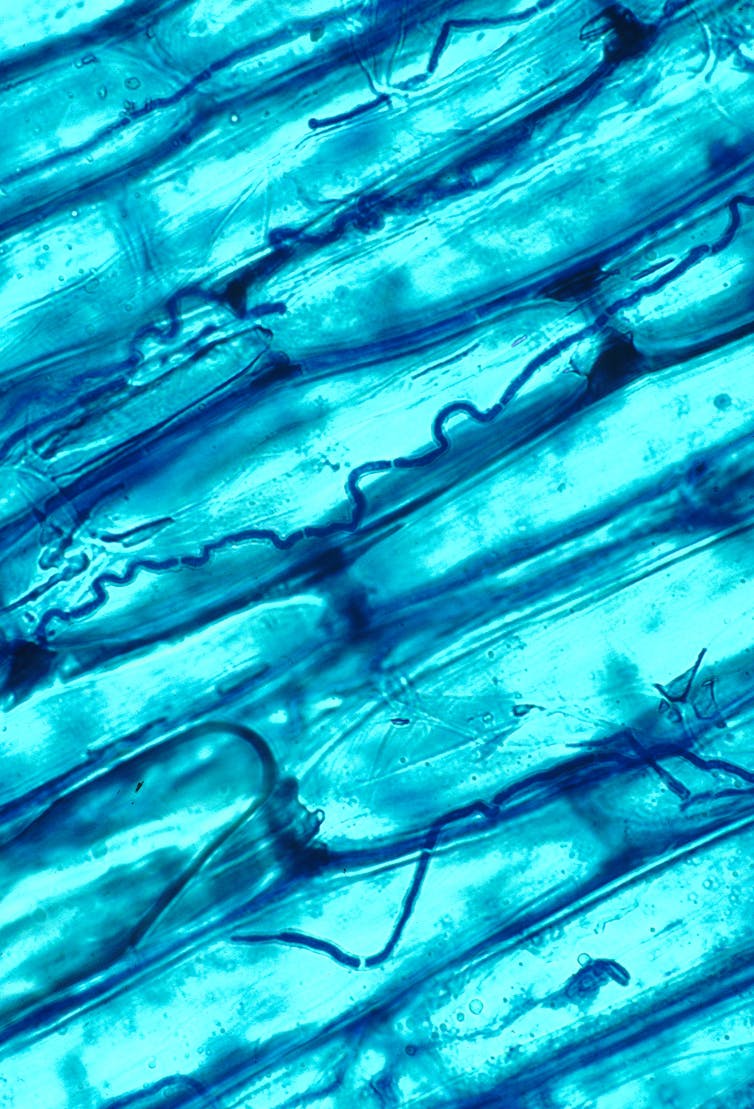
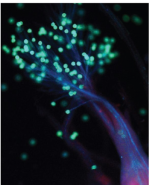
The fungal endophyte Epichloe coenophiala growing in between grass leaf cells. Nick Hill/USDA
It was these fungi, with all their mystery and potential, that captured my interest. Against the odds I did find my way to studying fungi, which started in earnest when I was lucky enough to get an undergraduate sandwich year placement at London’s Royal Botanic Gardens Kew with a senior scientist of fungal research, Ester Gaya. I’m still based there today, almost seven years later.
Many people don’t realise that Kew is more than its wonderful gardens; it’s also a major collections-based scientific research institution focused on the study of plants and fungi. In fact, it has the largest collection of dried fungi, known as a “fungarium”, in the world (1.25 million specimens).
And then there is the Millennium Seed Bank, which is also part of Kew. If anything, the term seed bank probably conjures up an image of the Svalbard Global Seed Vault: a vast concrete monolith emerging out of the Arctic snow like some sort of super-villain base.

Svalbard Global Seed Vault, Longyearbyen, Norway. Pål Klevan/Alamy Stock Photo
The Millennium Seed Bank, nestled in the grounds of Wakehurst Place in the UK countryside, is rather less imposing to look at, but perhaps even more impressive inside. Coordinated by Kew, the seed bank is both a physical building – the largest seed bank in the world with over 2.3 billion seeds from almost 40,000 species – as well as a global partnership dedicated to the collection and conservation of seeds worldwide.
Seed banks are just what they sound like – a place to store seeds long-term as insurance against potential crises. And crisis is on the horizon: thanks to climate change and our unsustainable use of the planet, two in five plants are estimated to be threatened with extinction. The mission of the Millennium Seed Bank is to find and preserve seeds of wild plants before they’re lost for good.
Seed banking is not just a backup for a hypothetical future scenario, as collections can already be put to good use – collecting seeds from different native communities, for instance, will be crucial for ecosystem recovery after wildfires and for successful reforestation.

Kew Millenium Seedbank, West Sussex, UK. Dave Stevenson/Alamy Stock Photo
A fungal perspective puts a whole new spin on the idea of seed banking. It may not have been the primary goal, but in the process of preserving plant diversity, seed banks are also preserving the fungal diversity inside seeds. Of course, scientists working in seed banking have been aware of fungi before now, but the context has been decidedly negative. The banking standards from the Food and Agriculture Organization of the United Nations always refer to fungi as a contamination, a problem to be removed, and actually recommend use of fungicides to kill any fungi present.
This approach is rooted in reason, as many fungi can and will cause disease in plants, and a seed bank needs to avoid becoming a vector for plant diseases. But we’re increasingly realising that the microorganisms in and around us influence the world far more than previously understood. As humans, altering the balance of microorganisms in our gut can have all sorts of negative health consequences and has even been connected to neurological disease. We know less about the microbiome of plants, but this will need to change if we are to successfully protect all the species at risk of extinction.
The idea that the Millennium Seed Bank must surely be full of these potentially helpful microfungi we call endophytes inside its seeds would not be a stretch to anybody who studies fungi or microbiology, and yet no one had ever looked before. This changed a few years ago, when Gaya first started to consider the question. But where to start, in such an enormous collection of seeds?
A look inside Kew’s fungarium.
The case study: banana wild relatives
Our opportunity came thanks to a fellow PhD student, Simon Kallow, who studies how to store the seeds of banana wild relatives long-term for conservation. As the name suggests, crop wild relatives are the close relatives of our cultivated crops. They’re interesting to scientists as they’re far more genetically diverse and so can provide a source of useful traits to breed into our crops, for instance to make them more resilient to climate change, pests or disease.
There’s another idea that the microbiome of wild relatives could also have a role to play in protecting our crops: that we can potentially introduce endophytes from wild relatives into crops to pass on useful properties, such as stress tolerance. Protecting wild relatives, and their microbiomes, can be seen as a safeguard for the future of the crops we all rely on for food.
Read more: The quest to save the banana from extinction
This is particularly relevant for bananas, which are not only an important cash crop – worth US$31 billion a year – but also a significant part of people’s diets in the regions where they grow. In an unfortunate case of history repeating itself, global banana crops are currently threatened by a fungal pathogen strain called Foc TR4, and so it’s doubly important to conserve their wild relatives.
Kallow was interested in what fungal endophytes might be inside his wild banana seeds, and if they could be playing a role in how well the seeds survived storage and went on to germinate. It was the perfect chance for us to have a first look at what fungi might be hidden inside the Millennium Seed Bank collections.

Kallow had noticed fungi growing from inside his wild banana seeds.
We used two approaches – we crushed up seeds and sequenced any fungal DNA from inside, but we also tried to grow the fungi from inside seeds, known as “culturing”. That way, we captured as much of the diversity that was present as possible but also built a collection of living fungal endophyte cultures that we can use in the future.
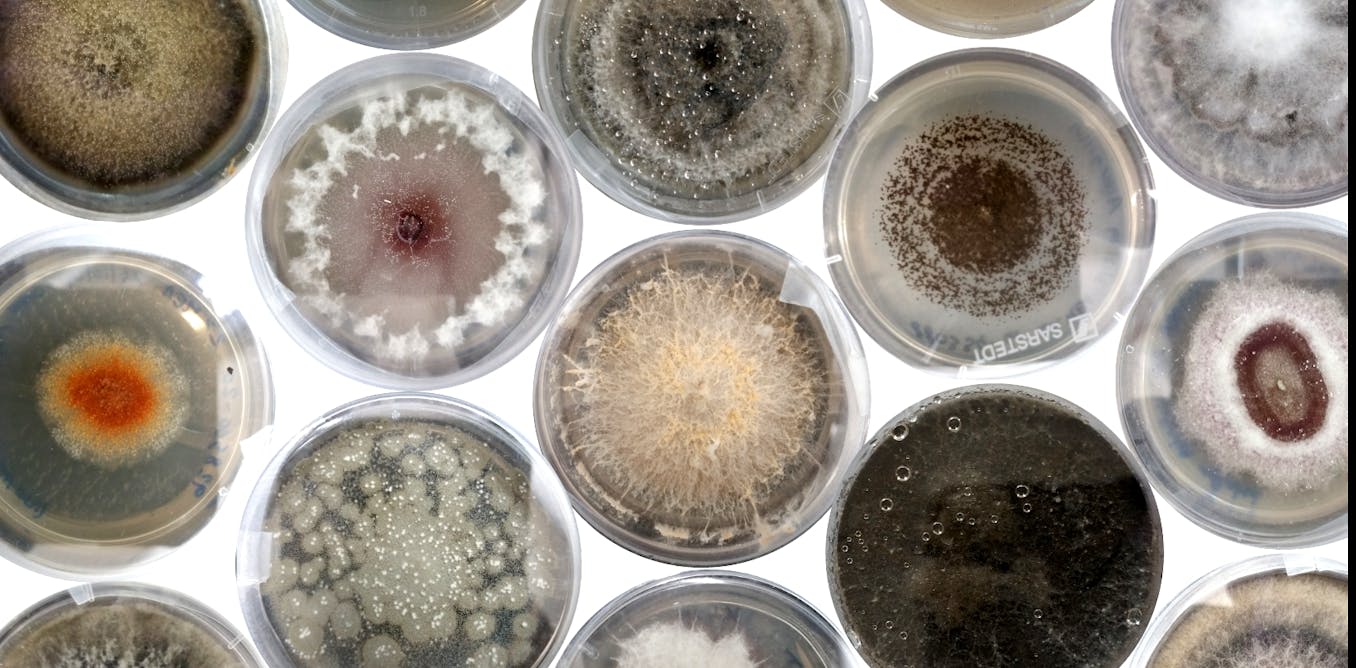
The reality of working with organisms that are too small to see can be a little anticlimactic – a lot of the time you’re just looking at tiny amounts of colourless liquid in tubes. So besides from being useful, growing some species in culture is also a little more exciting and provides a first glimpse at the incredible hidden diversity. I think they can be rather beautiful too.

Culturing fungi must be done under sterile conditions to make sure the cultures don’t become contaminated.
A hidden trove of fungi
In looking at just six plant species, we were able to find almost 200 fungal species. Extrapolate up to the Millennium Seed Bank’s 40,000 plant species and – even if assuming there is some overlap of fungal endophytes between different plant species – you can end up with a heady estimate of fungal diversity hidden in their collections, potentially reaching over a million species, some of which are likely new species to science.
Mining that diversity is intrinsically interesting in terms of studying the fungi themselves, but these are also species that may be important to the health of the plants they inhabit, and therefore crucial to the objectives of seed banking at large.
As we were able to grow some fungal endophytes in culture, we know that at least some species (mostly the very common ones) can survive the Millennium Seed Bank’s protocol of processing, drying and freezing seeds. There were other endophytes that we detected from sequencing their DNA, but which didn’t grow in culture – but these weren’t necessarily dead, as many fungi are more sensitive and don’t grow readily in the lab. In the future we will need to figure out the true extent of endophytes surviving the storage process in case there are important, rare species that are lost.
Our results support previous studies which suggest that fungi are usually mutually exclusive inside seeds. In other words, in most cases where we detected fungi inside the seeds, we only found a single species, suggesting that in the limited space of the seed one fungal species can often dominate and outcompete any others.
This raises an interesting question as to whether we can use this phenomenon to protect our plants from pathogens: if we can inoculate a plant with the “right” fungal endophyte, could it outcompete fungal pathogens that try to infect the seed? This idea needs to be tested in experiments, but it’s one example of why there is hope that we can use endophytes for a natural form of plant disease control.

One of the storage vaults of the Millennium Seed Bank, where over a billion seeds are stored in the dark. James King-Holmes/Alamy Stock Photo
We also found that the total number of fungal endophytes present in each set of seeds, as well as the specific combination of species, changed depending on the habitat that the seeds were collected from. This means that when researchers are working in the field, where they choose to collect seeds from can have unforeseen consequences on what microbiome will be preserved.
The proportion of seeds which were alive or germinated after storage also changed depending on habitat. Hopefully future experiments can confirm if the fungi themselves are contributing to this pattern. This is why it’s so valuable to have preserved living fungal cultures, as it allows us to use them in experiments to test many of these questions.
The future is fungal
As is so often the case in science, we emerged from this study with more questions than answers. But some of these questions, which have consequences for the way we protect seeds for the future, have never been researched before at the Millennium Seed Bank. Are we managing to preserve enough of the seed microbiome? How much will that matter for the plants’ health?
And then there are the questions about the fungi themselves – what can we learn from this previously unexplored gold mine of fungal diversity? There is so much yet to discover from the world of fungi, and so often it’s right under our noses. To rise to the challenge, in the first instance, we need to ensure people have the opportunity to learn about them – a different experience from what I had, barely hearing about fungi in university, and not at all at school.
In the summer of 2019 I helped to run the fungi stall at Kew’s Science Festival, an annual public event where visitors are invited to take part in activities and talk to scientists about why plants and fungi are so important to our lives. I will always remember the wide-eyed looks as I explained that the biggest organism in the world is actually a 400-tonne, 2,500 year old “humongous” fungus, or that some mushrooms glow in the dark to attract insects.
Fungi are strange and cool and interesting enough that really all you have to do is share them and fascination will follow. Children and adults alike would approach our stall knowing almost nothing about fungi, but by the end of the weekend, fungi were among the top mentions of what visitors enjoyed most at the festival.
You can find amazing things once your eyes are opened to this weird and wonderful kingdom.
Last edited:
acespicoli
Well-known member
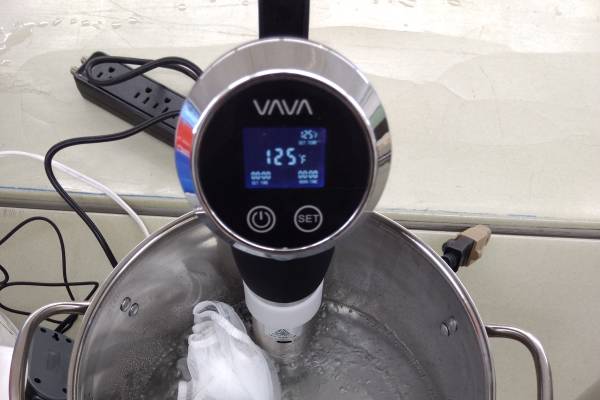
Hot water seed sterilization tool evaluation
Seedborne diseases can be treated with hot water, but the water must be heated and held at a certain temperature for specific times. Here we evaluate affordable options for hot water treatment.
 www.canr.msu.edu
Hot water seed sterilization tool evaluation
Benjamin Phillips, W. Garrett Owen and Will Jaquinde, Michigan State University Extension - March 26, 2020
Seedborne diseases can be treated with hot water, but the water must be heated and held at a certain temperature for specific times. Here we evaluate affordable options for hot water treatment.

Hot water seed treatments for vegetable crop species is a preventative management tool for seed-borne diseases. The goal is to heat and maintain water temperature for a specific amount of time. Seeds are soaked in warm water (100 degrees Fahrenheit) for about 10 minutes before going into the hot water for crop-specific times. After the time has passed, they are placed in cool water to rapidly remove the heat. They can then be planted right away, treated further with a fungicide or dried for storage. Specific recommendations have been developed by numerous organizations for certain species of vegetables (Table 1).
acespicoli
Well-known member
How to Professionally Germinate Cannabis Seeds: Award-Winning Seed Breeder’s Step by Step Instructions

Popped cannabis seeds by Purple Caper Seeds. Photo by Lizzy Cozzi.
Cannabis germination: Otherwise known as “popping seeds”
Germination is the process by which a new plant grows from a seed. The process of moving from seed to seedling is sometimes referred to in growing vernacular as “popping” seeds or beans.A grower’s germination rates (the % of seeds that yield a viable plant) vary based on a number of factors—these include:
- The quality of the cannabis seeds
- The conditions under which the cannabis seeds have been stored
- The process the grower uses to pop their seeds (Perhaps most important and often overlooked factor!)
Money and time.
Cannabis seeds aren’t cheap. Higher germination rates save growers money and time. The process a grower uses to germinate can have as much of an impact on their success rate as the seeds themselves.
To prove this, Frank from Purple Caper Seeds, an award-winning cannabis genetics breeder for over 25 years, gave us a tour of his cannabis genetics facility and showed us his unique method of popping seeds.
Purple Caper’s genetics can be found in the clones you find in major west coast dispensaries. Recently, Purple Caper’s 4G, was selected as “a Cola of the Month” by High Times.
This guy knows what he’s talking about.
Having just had an embarrassingly low germination rate with some 10-year old cannabis seeds of our own, we were anxious to learn what we could have done differently.
Here’s Frank’s step-by-step process for how to germinate cannabis seeds and maximize your germination rates

Frank completely sterilizes his hands with alcohol before working with any of the materials in the cannabis germination process. Purple Caper Seeds photo by Lizzy Cozzi.
Begin with a sterile environment and a methodical process
As anyone who has ever spoken to a group of cannabis growers knows, any process concerning this plant can be as simple or complex as the grower makes it.This method is a simplified technique, with the home grower in mind.
The bar we’re setting here is not unreasonably high, but if you’ve been germinating on the fly and in paper towels, this 12-step process will require more preparation and individual steps than you’re used to.
Trust us; it’s worth it!
With this in mind, lets first go over same basic housekeeping and best practices. Before beginning to work, be prepared to:
- Sterilize everything you are planning to work with, except for the paper towels.
- Prepare everything you will need BEFORE you start.
- Work quickly but accurately. The faster you work the less chance pathogens such as gray, blue, black and white molds will affect your seeds.
- Keep your work area clean and organized.
You want to create as close to a clean room as you can get:
Purple Caper Seeds’ genetics facility has six air purifiers, and Frank does all his cannabis seed germination work in a sterile room with a laminar hood.We’re going to assume not everybody has access to this kind of a setup. So as a stand-in practice, Frank recommends bleaching your bathroom clean and bringing in an air purifier.
Do your best to create a clean room. We used a kitchen island disinfected with 91% alcohol.

Materials needed to germinate marijuana seeds effectively. Purple Caper Seeds photo by Lizzy Cozzi.
The materials you’ll need to pop seeds:
- A gallon or more of distilled water.
- Peroxide 3% solution.
- Iso alcohol 91%.
- Nutrient Solution—We’ll describe how to make this in the steps that follow.
- Cal (Calcium) Mag (Magnesium) supplement – Frank recommends Cal-Mag Plus by Botanicare.
- General Hydroponic Flora Microbe Series. This series comes in 3 bottles: Grow, Bloom and Micro.
- PH Up or PH Down by General Hydroponics.
- Organic agave extract.
- PH meter —
- Test Tubes—Frank recommends laboratory quality glass. Cheap test tubes will break when you sterilize them. While all of these materials can be purchased at Home Depot it is possible to buy a quality tissue culture kit for under $150, thus saving yourself a lot of running around.. Microclone.com – produces good basic kit.
- Push Rod—Chopsticks work well.
- Yeast tube Caps – Available at Home Depot.
- Feeding Tube—Available at Home Depot.
- Coco Coir (prewashed and charged)—Coco Coir is a natural fiber extracted from the husk of coconut. Often used as a soil amendment it adds organic matter, aerates the soil and improves water holding capacity near the root zone.
- Small plastic cups with lids.
- Liquid waste container.
- Aluminum foil precut to size—You’ll use these to wrap the tubes.
- Plastic tube holder.
- Sterile plastic pipette—Make sure to open the plastic bag of pipettes only when you are ready to use them.
How to germinate cannabis seeds in 12 easy steps

A cannabis seed soaking in distilled water. Purple Caper Seeds photo by Lizzy Cozzi.
Step 1:
Clean the seeds and soak in distilled water for 48 hoursBring a gallon or more of distilled water to a complete rolling boil. You’ll use this sterile water in several steps in this process. (Contrary to what many believe distilled water is not sterile.)
Remove excess dirt from the seeds, cover them with the water and leave them to soak.
Step 2:
Make your nutrient solution- Start with a ¾ gallon of sterile, distilled water.
- Add 2 ml organic agave extract into the distilled water when it is still hot. Let it dissolve and cool.
- Add 2 ml Cal (Calcium) Mag (Magnesium) supplement – Frank recommends Cal-Mag Plus by Botanicare
- Add General Hydroponic Flora Microbe Series. This series comes in 3 bottles: Grow, Bloom and Micro. Add 1ml of EACH to your solution.
- Use your PH meter to test the solution. The PH should be as close to 6.0 as possible. If the solution is too acidic or basic adjust with PH Up or PH Down by General Hydroponics.
- Put the solution back in the distilled water container for easy transport to your clean room.
Step 3
Soak your seed in the nutrient solution for 48 hoursCover the seeds with the solution. Small, sterile plastic cups with lids are effective for this; they are easy to re-sterilize and reuse.
Once the seeds have sat in the nutrient solution for 48 hours, it’s time to move into the next phase of prep.
Step 4
Prep your tools- Sterilize the test tubes, yeast caps, feeding tube, push rod and the coco coir.
You can sterilize your equipment in two ways:- A simple, and often overlooked way to sterilize materials in your home is with the help of a pressure cooker.
- If you don’t have a pressure cooker, submerging the equipment in boiling water is another sterilization technique. Sterilizing with boiling water works for all material except the coco coir, which becomes hard to work with when saturated with water. Coco coir is pre-washed but not sterilized. Frank recommends sterilizing the coco coir by pressure cooker, if possible.
- When using a pressure cooker, begin with the coco coir. Put some coco coir in a petri dish and place it inside the pressure cooker.
- Start the pressure cooker. As soon as it reaches its max temperature, release the pressure. Open the cooker in your clean area to minimize contamination.
- Sterilize the other tools in the same way.
- Store all tools in a clean environment.
Step 5:
Prep yourself- Use a healthy dose of iso alcohol 91% and clean your hands. Take your time with this. Frank does not use gloves because he feels it gives him a better feel for working with the seeds.
- To further minimize contamination, it is recommended you wear a surgical mask while you work.

Alcohol and distilled water are necessary for cannabis seeds germination. Purple Caper Seeds. Photo by Lizzy Cozzi.
Step 6:
Prep your work area- Begin by cleaning all surfaces with the 91% iso alcohol. Keep in mind it takes about 20 seconds for alcohol to do its job so don’t assume all surfaces are immediately sterile after you wipe them clean.
- Set up all the tools you need.
- Wipe down the top and sides of the nutrient solution bottle with the iso alcohol.
Step 7:
Sterilize, sterilize, sterilize- Dip the test tube, the yeast cap, and pushrod in a solution of 3% peroxide.
- Let the peroxide sit in the yeast tube for several minutes.
- Discard the peroxide into the waste container and then flush and/or clean all items with the nutrient solution.

Sterilize everything you touch and use while you germinate your cannabis seeds. Purple Caper Seeds photo by Lizzy Cozzi.
Step 8:
Create the Coco-Plug- Take a pinch of coco coir and load it into a feeding tube. In this case, the feeding tube is used to keep the walls of the test tube clean when depositing the coir.
- Put the contents of the feeding tube into the test tube.
- Push the coco into the test tube with the push rod.
- Remove the feeding tube and rod leaving approximately ½” of coco at the bottom of the test tube.

Coco plugs inserted it into the feeding tube for Purple Caper Seeds cannabis germination. Photo by Lizzy Cozzi.
Step 9:
Soak the seeds in peroxide- Using tweezers, pick up a seed from the nutrient solution where it has been soaking for the last 48 hours. If using plastic cups with lids, open and close the lid before and after you remove the seeds.
- Drop the seed into the 3% peroxide solution.
- Soak for 15 seconds, NOT longer. The peroxide will damage the seed if you soak it for much more than 15 seconds.
- After removing it, clean the seed with the nutrient solution or with distilled water to neutralize the peroxide.
Step 10:
Prepare test tube- Using tweezers, drop the seed into the test tube. Ideally it should sit in the middle of the coco but it need not be perfectly centered; the seedling will grow against the glass.
- Cap the tube with a yeast cap.
- Open the bag containing the sterile pipettes . Remove the yeast cap and add 2 ml of nutrient solution to the test tube with the seed in it.
- Seal the tube again with yeast cap. Don’t close it all the way. Yeast tube caps control airflow. If you don’t push the cap all the way down it will allow for a little external airflow. Yeast caps are made to burp. By not fully pushing down the cap you are allowing only about 1/64th of an inch of airflow, thus risking some contamination. But Frank swears by this process. He explained to us that the process still works when the yeast cap is fully sealed, but in his experience, the seedlings seem happier when a little airflow is allowed.

Ready to germinate cannabis seedlings: capped test tubes filled with seeds and coco coir. Purple Caper Seeds photo by Lizzy Cozzi.
Step 11:
Wrap the capped test tube
- Wrap the test tube with a single layer of aluminum foil. Seedlings typically grow towards the light source. The goal here is to control the light, encouraging the seedling to grow north/south.
- Stack the sealed tubes in your tube holder.
- Continue until all seeds are used and all test tubes are placed in the holder.

Wrapping the test tubes in aluminum foil encourages the cannabis seedling to grow toward the light. This makes transplanting cannabis seedling easier. Purple Caper Seeds photo by Lizzy Cozzi.
Step 12:
Place the seedlings under a light sourcePlace under a florescent light in a 78F environment.
Check every other day on the progress

Close up of a newly sprouted cannabis seedling. Purple Caper Seeds photo by Lizzy Cozzi.
Don’t transplant the seeds immediately after germination. The optimum height for transplanting is about 1” in height, so use 1” as a guide. Ideally you don’t want to transplant too early or too late.
When the roots have generously filled the coco-plug, it’s time to transplant.
Part II: Transplanting your germinated seeds to soil

Beginning the process of transplanting cannabis seed into the coco coir. Purple Caper Seeds photo by Lizzy Cozzi.
Once the seeds pop, it is time to transition them into a starter growing medium.
The materials you’ll need to transplant your seeds:
- Tweezers
- Root Riot cubes
- Nutrient solution
- Pipettes
- Plastic containers—Root Riot cubes come with a 50 plug holding tray that works well.
- A plastic tray
Step 1
Remove the SeedlingsWhen the seedlings are ready, use tweezers to remove them. Ideally grab the coco substrate or root ball so as not to damage the seedling.

Moving the cannabis seedling to the rooting cubes. Purple Caper Seeds photo by Lizzy Cozzi.
Step 2
Create a Rooting Environment- Frank uses Root Riot cubes to start the seedlings. Break the cubes in half.
- Place the seedling roots on one half of the Root Riot cube.
- Place the other half of the cube top of the roots to create a “sandwich.” Put the rooting cube in a plastic container or holding tray.
- Add 2 ml nutrient solution to the cube using a pipette.

Placing the cannabis seedling in the rooting cube. Purple Caper Seeds photo by Lizzy Cozzi.
Step 3
Move the Cubes into a Wet Environment.- Put the plastic container in a plastic tray.
- Add a ¼ inch of water to the tray.
- Top off the tray with approximately ¼” water on top of each cube. This ensures the seedlings won’t dry out.

The cannabis seedling and rooting cube are placed in the tray. Purple Caper Seeds photo by Lizzy Cozzi.
Voila! You’ve successfully germinated in test tubes and transplanted. Your seedlings will need some time to recover from the transplant, but when they are robust enough, they’re ready to move to a larger container.
We think you’ll find this process, while slightly more effortful than casual germination methods, will yield higher germination rates and more robust seedlings.
Once you’ve done it a few times, perfecting your timing and experimenting with the gear and sterilization methods that are right for you, it’s a process that can be done often and with relative ease.

Popped cannabis seeds by Purple Caper Seeds. Photo by Lizzy Cozzi.
How to Professionally Germinate Cannabis Seeds: Award-Winning Seed Breeder’s Step by Step Instructions — Ed Rosenthal
Improve your germination rate by following Frank from Purple Caper Seeds’ step by step process for popping seeds in coir and transplanting seeds to soil after germination.
 www.edrosenthal.com
acespicoli
Well-known member
Seed Storage
Considering the complexities associated with Cannabis germplasm regeneration, much attention has been directed to efficient methods of seed storage. Duration of storage, temperature, and seed moisture content are all variables which can significantly affect the viability of Cannabis seeds (Small and Brookes, 2012; Parihar et al., 2014). Common practice for short-term seed storage is 4°C with a moisture content of 6% (De Meijer and van Soest, 1992; Small and Brookes, 2012; Mankowska and Silska, 2015), while for longer periods of storage >3 years, seeds are held at −20°C with ~4% moisture content (De Meijer and van Soest, 1992; Mankowska and Silska, 2015). Cannabis seed appears to have orthodox storage behavior, and the ability to withstand periods of up to 66 months after desiccation with minimal effects on seed viability (Small and Brookes, 2012; Parihar et al., 2014). Nevertheless, systematic evidence for the long-term viability of Cannabis seed is lacking. Given the variation in seed size amongst Cannabis germplasm (Piluzza et al., 2013), it is important to establish optimal periods for seed storage prior to multiplication.Desiccation and cold storage does not necessarily guarantee seed longevity: Only 61/276 species were found to exhibit a half-life >100 years at these conditions (Walters et al., 2005). Both orthodox and non-orthodox seed types may benefit from cryopreservation conditions (Li and Pritchard, 2009; Michalak et al., 2015; Perullo et al., 2015; Prada et al., 2015). Despite the absence of data supporting the long-term viability of seed storage at temperatures below −180°C, cryopreservation of seed has successfully been demonstrated as a proof of concept in a number of plant species (Li and Pritchard, 2009; Michalak et al., 2015; Perullo et al., 2015; Prada et al., 2015). Short-term cryopreservation of seed of several species, including black poplar (Populus nigra L.; Michalak et al., 2015), swamp pink (Helonias bullata L.; Perullo et al., 2015), and Barbados nut (Jatropha curcas L.; Prada et al., 2015), had no detrimental effect on germination. However, seed water content prior to immersion in liquid nitrogen can significantly determine seed viability (Michalak et al., 2015). Given the expense and propensity for genetic drift associated with Cannabis germplasm regeneration, as well as the potential orthodox storage properties of Cannabis seed, contemporary methodologies of seed storage should be explored to determine if they are compatible and economically feasible with long-term Cannabis ex situ conservation.
Few studies have attempted to monitor seed aging in Cannabis (Parihar et al., 2014) or associate a specific biochemical, metabolic, or physiological characteristic with seed viability or vigor (Small and Brookes, 2012). However, a number of novel biomarker-based prediction tools have been developed, with the potential to monitor seed aging beyond traditional germination and biochemical tests (Fu et al., 2015). Biomarkers associated with DNA methylation (Rocha et al., 2005) as well as FA (Li et al., 2007) and endogenous antioxidant metabolism (Revilla et al., 2009) have been found to be reliable at predicting seed aging (Fu et al., 2015). Such tools may contribute toward predicting Cannabis seed viability, and be adopted for development of “best practice” methods for long-term ex situ seed management.

Frontiers | A Belated Green Revolution for Cannabis: Virtual Genetic Resources to Fast-Track Cultivar Development
Cannabis is a predominantly diecious phenotypically diverse domesticated genus with few if any extant natural populations. International narcotics convention...
 www.frontiersin.org
Frontiers | A Belated Green Revolution for Cannabis: Virtual Genetic Resources to Fast-Track Cultivar Development
Cannabis is a predominantly diecious phenotypically diverse domesticated genus with few if any extant natural populations. International narcotics convention...
www.frontiersin.org
REVIEW article
Front. Plant Sci., 29 July 2016
Sec. Plant Breeding
Volume 7 - 2016 | https://doi.org/10.3389/fpls.2016.01113
acespicoli
Well-known member
No Correlation Between Pollen Fertility and Viability: Differential Measures of Male Gametophytic Fitness in Cannabis sativa L.
Sydney B. Wizenberg, Michelle Dang, View ORCID ProfileLesley G. Campbell
doi: https://doi.org/10.1101/2021.11.04.467333
This article is a preprint and has not been certified by peer review [what does this mean?].
0000003
Abstract
Pollen grains are male gametophytes, an ephemeral haploid generation of plants, commonly engaging in competition for a limited supply of ovules. Since differential male fertility may influence the direction and pace of population evolution, the relative fitness of pollen is regularly estimated as either pollen viability, the proportion of pollen containing intact cytoplasm’s and regenerative nuclei, or pollen fertility, the frequency of pollen germinating under standardized conditions. Here, we estimated the relative fitness of pollen in a dioecious, wind-pollinated model system, Cannabis sativa, by characterizing pollen fertility and viability from multiple sires. Pollen fertility quickly declined within two weeks of anther dehiscence, and pollen stored under freezer conditions did not germinate regardless of storage time. In contrast, pollen viability declined slowly and persisted longer than the lifetime of a sporophyte plant under both room temperature and freezer conditions. Pollen samples that underwent both fertility and viability analysis displayed no significant correlation, implying researchers cannot predict pollen fertility from pollen viability, nor infer male gametophytic fitness from a single measure. Our work demonstrates two approaches to measure proxies of male fitness in C. sativa, and identifies new questions around what are valuable estimates of male fitness in plants.Introduction
Pollen grains are male gametophytes, representing an ephemeral, haploid generation in the plant life cycle (Hafidh et al., 2016; Maheshwari, 1949; Walbot and Evans, 2003). Pollen compete for opportunities to fertilize ovules and thus, influence differential reproductive success, a key condition for microevolution (Beaudry et al., 2020; Johnson and Shaw, 2016; Ottaviano et al., 1988; Ottaviano and Mulcahy, 1986). Post-meiotic gene expression and the abundance of pollen produced by many gymnosperms and angiosperms sets the stage for intense competition among pollen-derived sperm cells for the often limited supply of ovules, wherein sporophyte reproductive success relies on not only successful dispersal of pollen, but also successful pollination of stigmas and subsequent pollen germination and ovule fertilization (Ottaviano et al., 1988; Ottaviano and Mulcahy, 1986). To better understand and explore the competition occurring at the stage of pollen production and release, we must characterize and estimate their relative fitness, including: survival and fertility (Ottaviano et al., 1982). While there is a substantial body of literature estimating the relative fitness of pollen (Choi et al., 2014; Hauser and Siegismund, 2000; Hudson and Stewart, 2004; Luria et al., 2019; McDowell et al., 2015), the terminology used to describe these characteristics is inconsistent. Though some authors correctly differentiate between fertility and viability (Barrow, 1983; Dafni and Firmage, 2000; Rajasekharan and Ganeshan, 1994; Trognitz, 1991), others use the terms interchangeably as synonyms, reflecting broad misconceptions of these terms (Qureshi et al., 2009; Shukla et al., 2020; Tuinstra and Wedel, 2000). Definitively, viability measures cytoplasmic degradation of the regenerative cell to quantify the proportion of pollen from a sire containing intact regenerative nuclei (Alexander, 1969; Atlagić et al., 2012; Barrow, 1983; De Souza et al., 2003; Firmage and Dafni, 2000; Heslop-Harrison and Heslop-Harrison, 1970; Impe et al., 2020; Khatun and Flowers, 1995; Pinillos and Cuevas, 2008; Rao et al., 1992; Rich, 2009; Rodriguez-Riano and Dafni, 2000; Shivanna and Heslop-Harrison, 1981). Viability measures how many pollen grains are capable of engaging in reproduction under any condition, as a degraded cytoplasm indicates senescence and death of the gamete, as opposed to measuring how many pollen grains may germinate under a particular set of conditions. Comparatively, fertility is quantified through measurement of the proportion of pollen germinating under standardized conditions (Adaniya and Shirai, 2001; Conner, 2011; Heslop-Harrison, 1987; Janssen and Hermsen, 1976; Jayaprakash, 2018; Říhová et al., 1996; Sharma et al., 1990; Soares et al., 2008; Yates and Sparks, 1990). Successful germination of a pollen grain requires rehydration of the apertures and subsequent protrusion of the pollen tube towards the ovule, following which the pollen tube transports the male gamete to the female ovule to produce a zygote (Heslop-Harrison, 1987; Taylor and Hepler, 1997). Both pollen grain viability and fertility are used as measures of the proportion of pollen capable of engaging in reproduction under standardized conditions, and quantification of these measures could provide insight into why, or how, some male plants possess reproductive advantages.Viability can be tested using many methods (Atlagić et al., 2012; Pinillos and Cuevas, 2008; Rodriguez-Riano and Dafni, 2000; Trognitz, 1991), but one common means of differential staining is the Alexander stain. Originally published in 1969, the Alexander stain uses acid fuchsin and malachite green to test if the cytoplasm containing the regenerative nucleus is intact (Alexander, 1969). Malachite green stains the exine and intine cell walls blue, while acid fuchsin is absorbed by the cytoplasm, resulting in a pink stain (Alexander, 1969). Viable and non-viable pollen are differentiated by the resulting coloration, wherein pollen staining pink within the vegetative or regenerative cell did not contain an in-tact regenerative nucleus, and were therefore incapable of fertilizing an ovule regardless of the external germination conditions (Alexander, 1969). Originally containing chloral hydrate, mercuric chloride, and phenol, a simplified version of the Alexander stain was developed and tested in 2010, allowing wider applications of this method due to the removal of some toxic and difficult to acquire chemical components (Peterson et al., 2010). This simplified method was successful at differentiating between viable and non-viable pollen in numerous test species (Gingko biloba, Pinus resinosa, Acer rubrum, Arabidopsis thaliana, Betula populifolia, Fragaria versca, Lonicera tatarica, Oryza sativa, Prunus padus, Rhododendron mucronulatum) and shows promise in its ability to act as one standardized, interspecific method of differential pollen viability staining (Peterson et al., 2010). Measuring pollen fertility through in vitro germination is more challenging to standardize, as germination medias are typically developed for individual species, based on their distinct biochemical germination signals (Jayaprakash, 2018; Patel and Mankad, 2014). Some components, such as water, sucrose, boric acid, and polyethylene glycol, are used frequently in medias developed for different species, while other growth inducing additives such as calcium chloride, potassium chloride, potassium nitrate, and magnesium sulphate, can vary significantly in their quantity (Acar et al., 2010; Ateyyeh, 2005; Díaz and Garay, 2008; Fragallah et al., 2019; Imani et al., 2011; Jayaprakash, 2018; Jayaprakash and Sarla, 2001; Mercado et al., 1994; Mortazavi et al., 2010; Potts and Marsden-Smedley, 1989). All germination medias must contain a combination of carbohydrate sources in addition to growth inducing additives to mimic biochemical indicators of stigma proximity and induce rehydration and subsequent pollen tube growth (Heslop-Harrison, 1987; Jayaprakash, 2018). Because of variation in germination medias composition among species, standardization is difficult, and prevents relative comparisons of fertility between species relying on diverse germination medias.
Cannabis sativa L. is a dioecious crop frequently cultivated for its cannabinoids, fibre, and seeds (Amaducci et al., 2008; Bertoli et al., 2010; Carus and Sarmento, 2016; Grégoire et al., 2020; Small, 2015; van derv Werf et al., 1996; Zuardi, 2006). This species is anemophilous or wind-pollinated, and its exine morphology reflects this dispersal strategy, meaning its pollen grains are not ornamented and thus well suited to rapid movement coinciding with any changes in air flow (Halbritter et al., 2007; Small and Antle, 2003). Indoor industrial facilities producing cannabinoids from C. sativa often produce sinsemilla, unpollinated floral biomass, because pollination of female plants causes a reduction in cannabinoid content and the length of trichome dense stigmas (Ohlsson et al., 1971; Valle et al., 1968). Regulations relating to the production of C. sativa in countries such as Canada often include specific stipulations requiring that floral biomass is seedless (sinsemilla), therefor growing female plants in strict isolation is both favorable and legally required in some regions (Government of Canada, 2019).
In addition to answering basic scientific questions about male gametophytes and their life cycle, investigating the behaviour and related characteristics of pollen in this economically valuable species could improve our ability to control pollination risk within C. sativa growing facilities. Zottini et al. investigated the effect of gamma ray irradiation on pollen viability and fertility, using loaded fluorescein diacetate to differentiate between viable and non-viable grains under a microscope, and 5 different germination medias (Zottini et al., 1997). They found gamma ray irradiation did not affect measures of viability, but drastically reduced rates of in vitro germination, and noted estimates of fertility and viability differed from one another (Zottini et al., 1997). Rana and Choudhary (2010) tested three different measures of viability (Alexander’s stain, triphenyl tetrazolium chloride, and flurochromatic reaction) and documented a substantial decline in viability within three days of anther dehiscence (Rana and Choudhary, 2010). More recently, Gaudet et al. (2020) developed a media for in vitro germination and investigated long-term cryopreservation of C. sativa pollen for use in breeding programs. Pollen collected at diverse developmental stages also differed in its germination capabilities; some samples maintained fertility past three weeks, while others declined rapidly in the first two weeks of storage (Gaudet et al., 2020). Pollen stored in wheat flour and liquid nitrogen maintained its ability to germinate in vitro for up to four months, though the germination rates remained low, even for fresh pollen (Gaudet et al., 2020). Noting the inconsistencies in methodologies and conclusions among previous publications on this topic, and building on our previous work (Wizenberg et al., 2020), we set out to investigate C. sativa pollen viability and fertility, under the broader goal of developing a framework for measuring male gametophytic fitness. Accordingly, our research asks:
- How long is C. sativa pollen viable under standard and freezer conditions?
- How long is C. sativa pollen fertile under standard and freezer conditions?
- Can measures of C. sativa pollen viability predict pollen fertility?
Results
Pollen fertility and viability were generally high on the first day they were measured and declined with time (see below). Samples tested directly after collection had an average viability of 93.35 % (± 3.74%) and an average fertility of 38.69% (± 3.15%). Pollen stored under room temperature conditions (20 °C, 43% RH) showed a consistent decline in viability over the 12-week monitoring program, and the associated linear model predicted pollen samples under these conditions may maintain viability for up to 39 weeks, approximately nine months post anther dehiscence. The linear model fitted to predict pollen viability when stored under room temperature conditions was showed a strong model fit (Adj. R2 = 0.89, RSE = 3.12, df = 33, F = 277, p < 0.001; Fig. 1a). Pollen stored under freezer conditions (−4 °C and ~100% RH) maintained high viability even after 96 weeks of storage, and the associated linear model predicted pollen stored under freezer conditions may maintain viability up to 261.5 weeks, approximately five years after anther dehiscence. The linear model fitted to predict pollen viability when stored in a freezer also showed a strong model fit (Adj. R2 = 0.89, RSE = 3.79, df = 23, F = 214.8, p < 0.001; Fig. 1b).
Figure 1: Pollen grain viability under two experimental conditions.
The linear relationship between weeks post anther dehiscence and viability of pollen stored under (a) room temperature conditions (22 ± 0.95 C, ~43% r.h.) and (b) freezer temperature conditions (−4 °C, ~100% r.h.).
Pollen stored under room temperature conditions (20 °C, 43% RH) quickly declined in fertility, reaching 0% germination two weeks after anther dehiscence. The linear model fitted to predict pollen fertility when stored under room temperature conditions showed a moderate model fit (Adj. R2 = 0.87, RSE = 6.34, df = 13, F = 92.67, p < 0.001; Fig. 2). Pollen stored in a freezer (−4 °C and ~100% RH) showed no germination regardless of storage time, after testing in vitro germination at both one and two weeks and seeing no pollen tube growth we discontinued collecting data on fertility of frozen pollen.

Figure 2: Pollen grain fertility under room temperature conditions.
The linear relationship between weeks post anther dehiscence and the fertility of pools of pollen grains stored under room temperature conditions (22 ± 0.95 C, ~43% r.h.)
Pollen fertility did not significantly predict pollen viability using a linear model, when both traits were measured for a single sample (Adj. R2 = −0.06, RSE = 17.93, df = 13, F = 0.23, p = 0.64). Moreover, paired measures of pollen fertility and viability showed no detectable association using non-parametric approaches to analysis (Wilcoxon signed rank test: v = 120, p < 0.001), further demonstrating viability and fertility are independent measures of male gametophytic fitness and do not express any dependent linear relationship (Fig. 3).

Figure 3: Pollen grain viability does not predict fertility.
The relationship between fertility and viability of pollen grains from a single sample. The associated linear model has insufficient model fit (Adj. R2 = −0.06, RSE = 17.93); Wilcoxon signed rank analysis determined that the two characteristics were independent, showing no detectable relationship (v = 120, p < 0.001).
Discussion
Our work has demonstrated fertility and viability, two differential measures of male gametophytic fitness, are independent of each other and show no correlation in C. sativa. This coincides with previous C. sativa research by Zottini et al., wherein they also found no relationship between these characteristics (Zottini et al., 1997). This may be due, in part, to contrasting sensitivity to storage conditions and the external environment; in vitro germination requires rehydration and pollen tube growth, a complex biochemical and physiological process (J Heslop-Harrison, 1987). Comparatively, measures of viability rely on pollen senescence, a simpler process that may be less sensitive to storage conditions and the external environment (Gahan, 1981). Pollen fertility appeared to be more sensitive to environmental degradation than viability, as it quickly declined within two weeks of anther dehiscence, and pollen stored in the freezer (−4 °C and ~100% RH) did not germinate regardless of storage time, potentially as a result of the high humidity preventing sufficient dehydration. Interestingly, fresh pollen incubated in a germination media directly from dehiscent anthers did not exceed 42.4% germination, with an average of 38.7% at this time point, similar to the results obtained by Gaudet et al., who developed the media recipe and found fresh pollen germinated at rates varying between 30-50% depending on phenological behaviour (Gaudet et al., 2020). This could imply fertility is generally low in C. sativa, or the germination media could be further optimized to reach germination rates exceeding 50%. Previous research investigating pollen fertility in other species has demonstrated in vitro germination rates can exceed 80% through optimization of the content of sucrose, polyethylene glycol, and other growth inducing additives (Jayaprakash and Sarla, 2001), while others have shown relative humidity can strongly influence maximum germination rates under standardized conditions (Burke et al., 2004). More recently, optimization of in vitro germination in another crop (Pheonix dactylifera) has also failed to exceed a threshold of 60%, implying C. sativa is not the only species struggling to germinate in liquid media (de Oliveira et al., 2021). Bearing this in mind, quantitative measures of fertility in a germination media may not reflect real life fertility rates, but rather may only be used as a relative indicator of reproductive performance.Viability under room temperature conditions reached a maximum of 95.8%, and averaged 93.3% for freshly dehiscent pollen. Thus, most fresh pollen produced by male Cannabis plants are capable of engaging in reproduction under optimal conditions, and very few pollen grains do not contain an intact regenerative nucleus following maturation of the pollen sacs. Pollen viability under room temperature conditions averaged 68.8% 12-weeks after anther dehiscence, exceeding the approximate length of the Cannabis life cycle (Small et al., 2003). Thus, pollen senescence is a process that may be manipulated to preserve pollen samples for extended periods of time. This is verified by the high viability of pollen grains stored in the freezer for 96 weeks post anther dehiscence, which averaged 63.1% viability, with a maximum of 69.3% and a minimum of 58.8%. The linear regressions used to model the relationship between storage time and viability predicted that pollen would lose all viability at 38.3 weeks under room temperature conditions (Adj. R2 = 0.8903), and 261.5 weeks under freezer conditions (Adj. R2 = 0.8991), suggesting that long-term storage of pollen samples for genotyping is feasible. Furthermore, any pollen that escapes into growth rooms may remain viable, long after the crop has been harvested. However, the steady decline in fertility that occurred under both experimental conditions could prevent use of stored pollen samples for breeding programs, though it may be possible to extend the decline in fertility if storage conditions and the germination media were further optimized.
Investigation of the relationship between pollen viability and fertility in other species has yielded results largely similar to our conclusions. Trognitz (1991) explored correlation between viability assays and proxies of fertility in potatoes, finding that some methods of viability assessment predicted fertility more strongly than others (e.g., enzyme activity assays were a good predictor of pollen fertility but pollen staining by carmino acetic acid was not). Other research in cotton found that both pollen staining and germination were poor indicators of over-all fertility for this species, but under multiple storage conditions, pollen that stained as viable also germinated in situ and in an agar media (Barrow, 1983). Barnabas and Rajki (1981) tested the utility of year old Maize pollen, finding it to maintain 50% viability and 30% fertility, indicating that fertility declines much more rapidly than viability in this species as well. In bananas, measures of fertility and viability differed in multiple genotypes and under two different germination media compositions, though these authors did not directly test any related hypotheses (Soares et al., 2008). More recently, Chhun et al. (2007) demonstrated that gibberellin regulates both characteristics, but in different ways, implying that these attributes are interrelated yet distinct. Broadly, measures of fertility and viability differ across species and between characterization methods, through some work has indicated that correlation exists (Trognitz, 1991) depending on the individual procedures and techniques.
Through development and testing of these methods for characterizing male gametophytic fitness in C. sativa we have shown that the pollen of this species remain viable for extended periods of time but do not maintain fertility under these conditions beyond two weeks after anther dehiscence. Though these results are promising, some limitations of our work prevent larger inferences relating to male gametophytic fitness as a whole. Quantitative fertility, measured through in vitro germination, may not reflect real world germination rates, and can therefore only be used for relative comparisons between sires. The long-term viability documented in this experiment does not coincide with previous research on this species (Rana and Choudhary, 2010), potentially as a result of differences in methodology or genotypes used. Additionally, the use of early flowering males limits our ability to investigate if phenological behaviour influences fertility, as documented by Gaudet et al. (Gaudet et al., 2020). Future work on this topic should include multiple genotypes and pollen collected at different developmental checkpoints to investigate how these factors influence measures of male gametophytic fitness.
Methods
Over two years (2019-2021), we developed and tested a framework for measuring the relative fitness of pollen characterized by two traits: pollen grain viability and pollen grain fertility. We tested the Alexander stain to measure pollen viability (Alexander, 1969; Peterson et al., 2010) and Gaudet’s media to measure in vitro germination (Gaudet et al., 2020) on the pollen of C. sativa to establish baseline relative fitness values and measure pollen survival through time. Additionally, we tested if pollen grain viability and fertility were correlated when samples were collected from the same pollen source.Plant genotype and cultivation methods
To test pollen viability and fertility hypotheses, we grew CFX-2 (Hemp Genetics International, Saskatoon, Saskatchewan, Canada), a hemp cultivar of C. sativa with an expected total tetrahydrocannabinol (THC) content of less than 0.01%. The project was divided into three distinct experiments, which started on May 29th, 2019; October 21st, 2019; and April 2nd, 2021, respectively. For each experiment, we germinated 20 seeds in a terracotta germination pot (ANVÄNDBAR Sprouter; IKEA, Delft, The Netherlands) for three days, watering once daily with 25 mL of filtered water (Milli-Q purification system #F7KA48180D, Millipore Canada Ltd., Etobicoke, Ont.). Following germination, we planted all 20 seedlings into SC-10 cone-tainers® (Stuewe and Sons Inc., Tangent, Oregon, USA) filled with 200 mL of moistened PRO-MIX mycorrhizae peat moss growing medium (Premier Tech, Riviere-du-Loup, Quebec, Canada). Seven days later we transplanted the seedlings into circular pots (15 cm. diameter × 11 cm. height) filled with approximately 1 L. of moistened PRO-MIX mycorrhizae peat moss growing medium. We then placed the seedlings under 24h lighting from fluorescent T8 bulbs (F32W, Canarm lighting and fans, Brockville, Ontario, Canada) for four weeks, following which we switched to a 12h lighting photoperiod regimen to induce flowering for the remainder of the experiment. We watered each plant twice weekly with 50 mL of filtered water and fertilized them once weekly with 250 mL of 0.4% Miracle-Gro® (10-10-10 NPK; Scotts Miracle-Gro, Marysville, Ohio, USA) diluted in filtered water.Pollen collection
Once floral development was initiated, we identified and tagged ten pollen-producing plants using floral morphology, i.e., the visible development of pollen-producing inflorescences at apical branching junctions. Hereafter, we refer to these plants as males, though we did not perform genetic testing to confirm their karyotype. Of the ten pollen producing plants, we selected the five that flowered early for inclusion in the experiment to minimize any variation in pollen characteristics as a result of phenological differences (Gaudet et al., 2020). We closely monitored the five selected male plants until the inflorescences began to swell, showing visible protrusion of mature pollen sacs, indicating that anther dehiscence would occur. On the first day of anther dehiscence, we hand collected pollen (Wizenberg et al., 2020) in 1.7 mL centrifuge tubes (LIFEGENE graduated micro-centrifuge tubes, Modiin, Israel). Pollen samples in centrifuge tubes were left unsealed to dry for 1h before sealing, following which we stored them under one of two experimental conditions; samples were labelled and stored at either ‘room temperature’ conditions of 22 °C ± 0.95 °C and ~43% relative humidity, or ‘freezer’ conditions of −4 °C and ~100% relative humidity. For each male, we collected pollen twice on the initial day of anther dehiscence, with one sample being stored at ‘room temperature’ and the other being stored under ‘freezer’ conditions.Quantifying pollen viability
To test pollen viability, we prepared a batch of the modified Alexander stain (Peterson et al., 2010), and before the experiment, informally confirmed the presence of differential staining pollen containing functional cytoplasm (containing intact cytoplasm and a regenerative nucleus) or degraded cytoplasm (Fig. 4a). To evaluate the viability of each pollen specimen collected, we applied a small sample of pollen (ranging between 800 – 10,000 pollen grains), using a fresh cotton swab (Q-tips, Unilever, London, UK), to a 75 mm × 25 mm glass microscope slide. We pipetted 20 μL of the stain onto the pollen and heated the prepared slide 10 cm above a Bunsen burner for 5 s to set the stain. Once cooled, we applied a glass slide cover (25 mm × 25 mm) and the sample incubated at room temperature (22 ± 0.95 °C, 43% RH) for 24 hr. To estimate the proportion of pollen that stained viable as a percentage of the total sample, we counted the number of viable (stained pink) and aborted pollen (stained blue) using two hand-held tally counters (Uline, Pleasant Prairie, Wisconsin, USA) across vertical transects at 10x magnification (covering the entire length and width of the 2 mm.2 slide cover) under a compound microscope (Zeiss Primo Star Upright Light Microscope, Carl Zeiss Canada Ltd., Toronto, Ont.). Similarly to previous work (Wizenberg et al., 2020), we kept a tally of the number of burst pollen grains on each slide, separate from total pollen grains; burst pollen grains represented <1% of all sampled pollen grains. Any pollen forming clump were excluded from all counts because we could not differentiate between viable and aborted pollen. We measured pollen viability after initial anther dehiscence then weekly for the first four weeks of the experiment, and again after eight and twelve weeks for pollen stored at room temperature. We measured pollen viability after initial anther dehiscence then in 16-week intervals until 96 weeks for pollen stored at −4 °C.
Figure 4: Differential staining and in vitro germination of Cannabis sativapollen.
(a) Differential staining of viable (pink cytoplasm with blue exines) and aborted pollen grains (blue exines), showing absorption of pink acid fuchsin in the functional cytoplasm of viable pollen grains. (b) In vitro germination of fertile and infertile pollen grains, showing protrusion of the pollen tube in fertile pollen grains (blue arrows).
Quantifying pollen fertility
To test pollen fertility, we assembled a germination media recipe developed for C. sativa (Gaudet et al., 2020). Using a fresh cotton swab, we applied pollen (800 – 10,000 pollen grains) to a 75 mm × 25 mm glass microscope slide. We heated 10 mL of germination media in a 40 ml glass beaker placed on a hot plate at 70 °C for 10 min, at which point the media reached a temperature of 35 °C, then pipetted 50 μL of the heated media onto the pollen sample and covered it immediately with a glass slide cover (25 mm × 25 mm). We incubated the media at 28 °C (Fisher Scientific 6845 Isotemp Incubator 650D, Waltham, Massachusetts, USA) for 24 hr in a petri dish (8.5 cm × 8.5 cm × 1 cm) containing a filter paper (11 cm × 21 cm) soaked in 10 mL water to increase the relative humidity during incubation. After 24 hr, germination was visible (Fig. 4b) and we estimated the proportion of fertile pollen grains as a percentage of the total pollen sample using a compound microscope. We counted the number of germinated grains (rehydrated and containing a protruding pollen tube) and non-germinated grains across vertical transects at 10x magnification (covering the entire length and width of the 22 mm.2 slide cover). Again, we kept a tally of the number of burst pollen grains per slide, separate from the counted total; burst pollen grains represented <1% of all sampled pollen grains. Additionally, we excluded clumped pollen grains from all counts. We measured fertility of pollen stored at room and freezer conditions after initial anther dehiscence and then weekly until all samples showed no in vitro germination, at which point fertility was deemed to be zero.Statistical analyses
We conducted all analyses in R v.4.0.2, using the stats package (2019-04-06, R Core Team, 2019). We deemed all models to be sufficiently parametric using residual QQ plots. To determine if data collected conformed to typical patterns of pollen survival curves, we created three linear models where weeks post anther dehiscence predicted either viability (%) or fertility (%) using the ‘lm()’ function for separate data sets based on storage conditions. We gauged model strength through the adjusted R2, a goodness-of-fit statistics adjusted for the number of observations, and the residual standard error, both of which were reported using the ‘summary()’ function on each respective linear model. To measure the relationship between the paired estimates of pollen viability and fertility (from the parent pollen sample) we used a general linear model; the related summary statistics implied no dependent relationship (reported in the results), resulting in an insufficient model fit and weak predictive power. We transformed the data to investigate an inverse exponential relationship but this worsened the model fit and decreased the models predictive power. Finally, we investigated a potential non-parametric relationship between the two traits by performing the Wilcoxon signed-rank test, using the ‘wilcox.test()’ function contained in the stats package.Author Contributions
SBW and LGC designed the experiment. SBW and MD prepared materials, developed methods, and collected data. SBW, LGC, and MD prepared the manuscript.Acknowledgments
The authors thank S. Sbrizzi and J. Muir-Guarnaccia for research assistance, and the department of Chemistry and Biology at Ryerson University for equipment. This work was supported by funds from the Natural Sciences and Engineering Research Council of Canada [DG #402305-2011 and DG #05780-2019 to LGC], as well as the department of Chemistry and Biology at Ryerson University. The funders had no role in study design, data collection and analysis, decision to publish, or preparation of the manuscript. Research was completed under the auspices of a federal hemp research license (#18-C0169-R-01) and a federal marijuana license (#LIC-U5GX543XM6).Parsed Citations
- ↵
Acar, I. Ak, B. E., and Sarpkaya, K. (2010). Effects of Boron and Gibberellic Acid on In Vitro Pollen Germination of Pistachio (Pistacia vera L.). African Journal of Biotechnology, 9(32), 5126–5130.
Google Scholar - ↵
Adaniya, S., and Shirai, D. (2001). In vitro Induction of Tetraploid Ginger (Zingiber officinale Roscoe) and It’s Pollen Fertility and Germinability. Scientia Horticulturae, 88(4), 277–287.
Google Scholar - ↵
Alexander, M. P. (1969). Differential Staining of Aborted and Nonaborted Pollen. Stain Technology, 44(3), 117–122.
CrossRefPubMedWeb of ScienceGoogle Scholar - ↵
Amaducci, S., Zatta, A., Pelatti, F., and Venturi, G. (2008). Influence of Agronomic Factors on Yield and Quality of Hemp (Cannabis sativa L.) Fibre and Implications for an Innovative Production System. Field Crops Research, 107(2), 161–169.
Google Scholar - ↵
Ateyyeh, A. F. (2005). Improving In Vitro Pollen Germination of Five Species of Fruit Trees. Dirasat, Agricultural Sciences, 32(2), 189–194.
Google Scholar - ↵
Atlagić, J., Terzić, S., and Marjanović-Jeromela, A. (2012). Staining and Fluorescent Microscopy Methods for Pollen Viability Determination in Sunflower and Other Plant Species. Industrial Crops and Products, 35(1), 88–91.
Google Scholar - ↵
Barnabas, B. and Rajki, E. (1981). Fertility of Deep Frozen Maize (Zea mays L.) Pollen. Annals of Botany, 48(6), 861–864.
CrossRefWeb of ScienceGoogle Scholar - ↵
Barrow, J. R. (1983). Comparisons Among Pollen Viability Measurement Methods in Cotton. Crop Science, 23(4), 734–736.
Google Scholar - ↵
Beaudry, F. E. G., Rifkin, J. L., Barrett, S. C. H., and Wright, S. I. (2020). Evolutionary Genomics of Plant Gametophytic Selection. Plant Communications, 100115.
Google Scholar - ↵
Bertoli, A., Tozzi, S., Pistelli, L., and Angelini, L. G. (2010). Fibre Hemp Inflorescences: From Crop-residues to Essential Oil Production. Industrial Crops and Products, 32(3), 329–337.
Google Scholar - ↵
Burke, J. J., Velten, J., and Oliver, M. J. (2004). In Vitro Analysis of Cotton Pollen Germination. Agronomy Journal, 96(2), 359–368.
CrossRefWeb of ScienceGoogle Scholar - ↵
Carus, M., and Sarmento, L. (2016). The European Hemp Industry: Cultivation, Processing and Applications for Fibres, Shivs, Seeds and Flowers. European Industrial Hemp Association, 1–9.
Google Scholar - ↵
Chhun, T., Aya, K., Asano, K., Yamamoto, E., Morinaka, Y., Watanabe, M., … and Ueguchi-Tanaka, M. (2007). Gibberellin Regulates Pollen Viability and Pollen Tube Growth in Rice. The Plant Cell, 19(12), 3876–3888.
Abstract/FREE Full TextGoogle Scholar - ↵
Choi, H., Ohyama, K., Kim, Y.-Y., Jin, J.-Y., Lee, S. B., Yamaoka, Y., … Lee, Y. (2014). The Role of Arabidopsis ABCG9 and ABCG31 ATP Binding Cassette Transporters in Pollen Fitness and the Deposition of Steryl Glycosides on the Pollen Coat. The Plant Cell, 26(1), 310–324.
Abstract/FREE Full TextGoogle Scholar - ↵
Conner, P. J. (2011). Optimization of In Vitro Pecan Pollen Germination. HortScience, 46(4), 571–576.
Abstract/FREE Full TextGoogle Scholar - ↵
Dafni, A., and Firmage, D. (2000). Pollen Viability and Longevity: Practical, Ecological and Evolutionary Implications. Pollen and Pollination, 113–132.
Google Scholar - ↵
de Oliveira, A. C. A., da Silva Lédo, A., Polek, M., Krueger, R., Shepherd, A., and Volk, G. M. (2021). Optimization of In Vitro Germination and Cryopreservation Conditions for Preserving Date Palm Pollen in the USDANational Plant Germplasm System. Plant Cell, Tissue and Organ Culture (PCTOC), 144(1), 223–232.
Google Scholar - ↵
De Souza, M. M., Pereira, T. N. S., Viana, A. P., Pereira, M. G., Bernacci, L. C., Sudré, C. P., and Da Cruz Silva, L. (2003). Meiotic Irregularities and Pollen Viability in Passiflora edmundoi Sacco (Passifloraceae). Caryologia, 56(2), 161–169.
Google Scholar - ↵
Díaz, S. L., and Garay, B. R. (2008). Simple Methods for In Vitro Pollen Germination and Pollen Preservation of Selected Species of the Genus Agave. E-Gnosis, 6, 1–7.
Google Scholar - ↵
Firmage, D. H., and Dafni, A. (2000). Field Tests for Pollen Viability; a Comparative Approach. VIII International Symposium on Pollination-Pollination: Integrator of Crops and Native Plant Systems 561, 87–94.
Google Scholar - ↵
Fragallah, S. A. D. A., Lin, S., Li, N., Ligate, E. J., and Chen, Y. (2019). Effects of Sucrose, Boric Acid, pH, and Incubation Time on In Vitro Germination of Pollen and Tube Growth of Chinese Fir (Cunnighamial lanceolata L.). Forests, 10(2), 102.
Google Scholar - ↵
Federal Government of Canada (2019). Requirements Under the Cannabis Act and the Cannabis Regulations. Health Canada, Guide on Composition Requirments for Cannabis.
Google Scholar - ↵
Gahan, P. B. (1981). Cell Senescence and Death in Plants. In Cell Death in Biology and Pathology (pp. 145–169). Springer.
Google Scholar - ↵
Gaudet, D., Yadav, N. S., Sorokin, A., Bilichak, A., and Kovalchuk, I. (2020). Development and Optimization of a Germination Assay and Long-term Storage for Cannabis sativa Pollen. Plants, 9(5), 665.
Google Scholar - ↵
Grégoire, M., Barthod-Malat, B., Labonne, L., Evon, P., De Luycker, E., and Ouagne, P. (2020). Investigation of the Potential of Hemp Fibre Straws Harvested Using a Combine Machine for the Production of Technical Load-bearing Textiles. Industrial Crops and Products, 145, 111988.
Google Scholar - ↵
Hafidh, S., Fíla, J., and Honys, D. (2016). Male Gametophyte Development and Function in Angiosperms: a General Concept. Plant Reproduction, 29(1), 31–51.
Google Scholar - ↵
Halbritter, H., Weber, M., Zetter, R., Frosch-Radivo, A., Buchner, R., and Hesse, M. (2007). PalDat – Illustrated Handbook on Pollen Terminology. Vienna: Society of the Promotion of Palynological Research in Austria.
Google Scholar - ↵
Hauser, T. P., and Siegismund, H. R. (2000). Inbreeding and Outbreeding Effects on Pollen Fitness and Zygote Survival in Silene nutans (Caryophyllaceae). Journal of Evolutionary Biology, 13(3), 446–454.
CrossRefWeb of ScienceGoogle Scholar - ↵
Heslop-Harrison, J. (1987). Pollen Germination and Pollen-tube Growth. International Review of Cytology, 107, 1–78.
CrossRefWeb of ScienceGoogle Scholar - ↵
Heslop-Harrison, J. and Heslop-Harrison, Y. (1970). Evaluation of Pollen Viability by Enzymatically Induced Fluorescence; Intracellular Hydrolysis of Fluorescein Diacetate. Stain Technology, 45(3), 115–120.
CrossRefPubMedWeb of ScienceGoogle Scholar - ↵
Hudson, L. C., and Stewart, C. N. (2004). Effects of Pollen-synthesized Green Fluorescent Protein on Pollen Grain Fitness. Sexual Plant Reproduction, 17(1), 49–53.
Google Scholar - ↵
Imani, A., Barzegar, K., Piripireivatlou, S., and Masomi, S. H. (2011). Storage of Apple Pollen and In Vitro Germination. African Journal of Agricultural Research, 6(3), 624–629.
Google Scholar - ↵
Impe, D., Reitz, J., Köpnick, C., Rolletschek, H., Börner, A., Senula, A., and Nagel, M. (2020). Assessment of Pollen Viability for Wheat. Frontiers in Plant Science, 10, 1588.
Google Scholar - ↵
Janssen, A. W. B., and Hermsen, J. G. T. (1976). Estimating Pollen Fertility in Solanum Species and Haploids. Euphytica, 25(1), 577–586.
Google Scholar - ↵
Jayaprakash, P. (2018). Pollen Germination In Vitro. Pollination in Plants, 81.
Google Scholar - ↵
Jayaprakash, P., and Sarla, N. (2001). Development of an Improved Medium for Germination of Cajanus cajan (L.) Millsp. Pollen In Vitro. Journal of Experimental Botany, 52(357), 851–855.
Google Scholar - ↵
Johnson, M. G., and Shaw, A. J. (2016). The Effects of Quantitative Fecundity in the Haploid Stage on Reproductive Success and Diploid Fitness in the Aquatic Peat Moss Sphagnum macrophyllum. Heredity, 116(6), 523–530.
CrossRefGoogle Scholar - ↵
Khatun, S., and Flowers, T. J. (1995). The Estimation of Pollen Viability in Rice. Journal of Experimental Botany, 46(1), 151–154.
CrossRefWeb of ScienceGoogle Scholar - ↵
Luria, G., Rutley, N., Lazar, I., Harper, J. F., and Miller, G. (2019). Direct Analysis of Pollen Fitness by Flow Cytometry: Implications for Pollen Response to Stress. The Plant Journal, 98(5), 942–952.
Google Scholar - ↵
Maheshwari, P. (1949). The Male Gametophyte of Angiosperms. The Botanical Review, 15(1), 1–75.
Google Scholar - ↵
McDowell, S. C., López-Marqués, R. L., Cohen, T., Brown, E., Rosenberg, A., Palmgren, M. G., and Harper, J. F. (2015). Loss of the Arabidopsis thaliana P4-ATPases, ALA6 and ALA7 Impairs Pollen Fitness and Alters the Pollen Tube Plasma Membrane. Frontiers in Plant Science, 6, 197.
Google Scholar - ↵
Mercado, J. A., Fernández-Muñoz, R., and Quesada, M. A. (1994). In Vitro Germination of Pepper Pollen in Liquid Medium. Scientia Horticulturae, 57(4), 273–281.
Google Scholar - ↵
Mortazavi, S. M. H., Arzani, K., and Moeini, A. (2010). Optimizing Storage and In Vitro Germination of Date Palm (Phoenix dactylifera) Pollen. Journal of Agricultural Science and Technology, 12, 181–189
Google Scholar - ↵
Ohlsson, A., Abou-Chaar, C. I., Agurell, S., Nilsson, I. M., Olofsson, K., and Sandberg, F. (1971). Cannabinoid Constituents of Male and Female Cannabis sativa. UN Bulletin on Narcotics, 23, 29–32.
Google Scholar - ↵
Ottaviano, E., Gorla, M. S., Frova, C., and Pe, E. (1988). Male Gametophytic Selection in Higher Plants. In Sexual Reproduction in Higher Plants (pp. 35–42). Springer.
Google Scholar - ↵
Ottaviano, E., Gorla, M. S., and Pe, E. (1982). Male Gametophytic Selection in Maize. Theoretical and Applied Genetics, 63(3), 249–254.
Google Scholar - ↵
Ottaviano, E., and Mulcahy, D. L. (1986). Gametophytic Selection as a Factor of Crop Plant Evolution. In Developments in Agricultural and Managed Forest Ecology (Vol. 16, pp. 101–120). Elsevier.
Google Scholar - ↵
Patel, R. G., and Mankad, A. U. (2014). In Vitro Pollen Germination - a Review. International Journal of Science and Research, 3(5), 304–307.
Google Scholar - ↵
Peterson, R., Slovin, J. P., and Chen, C. (2010). ASimplified Method for Differential Staining of Aborted and Non-aborted Pollen Grains. International Journal of Plant Biology, 1(2), e13–e13.
CrossRefGoogle Scholar - ↵
Pinillos, V., and Cuevas, J. (2008). Standardization of the Fluorochromatic Reaction Test to Assess Pollen Viability. Biotechnic and Histochemistry, 83(1), 15–21.
Google Scholar - ↵
Potts, B. M., and Marsden-Smedley, J. B. (1989). In Vitro Germination of Eucalyptus Pollen: Response to Variation in Boric Acid and Sucrose. Australian Journal of Botany, 37(5), 429–441.
CrossRefWeb of ScienceGoogle Scholar - ↵
Qureshi, S. J., Khan, M. A., Arshad, M., Rashid, A., and Ahmad, M. (2009). Pollen Fertility (Viability) Status in Asteraceae Species of Pakistan. Trakia Journal of Sciences, 7(1), 12–16.
Google Scholar - ↵
Rajasekharan, P. E., and Ganeshan, S. S. (1994). Freeze Preservation of Rose Pollen in Liquid Nitrogen: Feasibility, Viability and Fertility Status After Long-term Storage. Journal of Horticultural Science, 69(3), 565–569.
Google Scholar - ↵
Rana, A., and Choudhary, N. (2010). Floral Biology and Pollination Biology of Cannabis sativa L. The International Journal of Plant Reproductive Biology, 2(2), 191–195.
Google Scholar - ↵
Rao, G. U., Jain, A., and Shivanna, K. R. (1992). Effects of High Temperature Stress on Brassica Pollen: Viability, Germination and Ability to Set Fruits and Seeds. Annals of Botany, 69(3), 193–198.
CrossRefGoogle Scholar - ↵
Rich, T. C. G. (2009). Pollen Stainability in British Sorbus L. (Rosaceae). Plant Ecology and Diversity, 2(1), 85–88.
Google Scholar - ↵
Říhová, L., Hrabětová, E., and Tupý, J. (1996). Optimization of Conditions for In Vitro Pollen Germination and Tube Growth in Potatoes. International Journal of Plant Sciences, 157(5), 561–566.
Google Scholar - ↵
Rodriguez-Riano, T., and Dafni, A. (2000). ANew Procedure to Asses Pollen Viability. Sexual Plant Reproduction, 12(4), 241–244.
CrossRefWeb of ScienceGoogle Scholar - ↵
Sharma, P. N., Chatterjee, C., Agarwala, S. C., and Sharma, C. P. (1990). Zinc Deficiency and Pollen Fertility in Maize (Zea mays). In Plant Nutrition-Physiology and Applications (pp. 261–265). Springer.
Google Scholar - ↵
Shivanna, K. R., and Heslop-Harrison, J. (1981). Membrane State and Pollen Viability. Annals of Botany, 47(6), 759–770.
CrossRefGoogle Scholar - ↵
Shukla, K., Sbrizzi, S., Laursen, A. E., Benavides, J., and Campbell, L. G. (2020). Hybridization Slows Rate of Evolution in Crop-Wild Compared to Wild Populations of Weedy Raphanus Across a Moisture Gradient. Frontiers in Agronomy, 2, 22.
Google Scholar - ↵
Small, E. (2015). Evolution and Classification of Cannabis sativa (Marijuana, Hemp) in Relation to Human Utilization. Botanical Reviews, 81, 189–294.
CrossRefGoogle Scholar - ↵
Small, E., and Antle, T. (2003). APreliminary Study of Pollen Dispersal in Cannabis sativa in Relation to Wind Direction. Journal of Industrial Hemp, 8(2), 37–50.
CrossRefGoogle Scholar - Small, E., and Naraine, S. G. U. (2016). Expansion of Female Sex Organs in Response to Prolonged Virginity in Cannabis sativa (Marijuana). Genetic Resources and Crop Evolution, 63(2), 339–348.
Google Scholar - ↵
Small, E., Pocock, T., and Cavers, P.B. (2003). The Biology of Canadian Weeds, 119, Cannabis sativa L. Canadian Journal of Plant Science, 83(1), 217–237.
Google Scholar - ↵
Soares, T. L., Silva, S. O., Costa, M., Santos-Serejo, J. A., Souza, A. da S., Lino, L. S. M., … Jesus, O. N. (2008). In Vitro Germination and Viability of Pollen Grains of Banana Diploids. Crop Breeding and Applied Biotechnology, 8(2), 111–118.
Google Scholar - ↵
Taylor, L. P., and Hepler, P. K. (1997). Pollen Germination and Tube Growth. Annual Review of Plant Biology, 48(1), 461–491.
CrossRefWeb of ScienceGoogle Scholar - ↵
Trognitz, B. R. (1991). Comparison of Different Pollen Viability Assays to Evaluate Pollen Fertility of Potato Dihaploids. Euphytica, 56(2), 143–148.
Google Scholar - ↵
Tuinstra, M. R., and Wedel, J. (2000). Estimation of Pollen Viability in Grain Sorghum. Crop Science, 40(4), 968–970.
CrossRefWeb of ScienceGoogle Scholar - ↵
Valle, J. R., Lapa, A. J., and Barros, G. G. (1968). Pharmacological Activity of Cannabis According to the Sex of the Plant. Journal of Pharmacy and Pharmacology, 20(10), 798–799.
PubMedGoogle Scholar - ↵
Walbot, V., and Evans, M. M. S. (2003). Unique Features of the Plant Life Cycle and Their Consequences. Nature Reviews Genetics, 4(5), 369–379.
CrossRefPubMedWeb of ScienceGoogle Scholar - ↵
Van der Werf, H. M. G., Mathussen, E., and Haverkort, A. J. (1996). The Potential of Hemp (Cannabis sativa L.) for Sustainable Fibre Production: a Crop Physiological Appraisal. Annals of Applied Biology, 129(1), 109–123.
Google Scholar - ↵
Wizenberg, S. B., Weis, A. E., and Campbell, L. G. (2020). Comparing Methods for Controlled Capture and Quantification of Pollen in Cannabis sativa. Applications in Plant Sciences, 8(9), e11389.
Google Scholar - ↵
Yates, I. E., and Sparks, D. (1990). Three-year-old Pecan Pollen Retains Fertility. Journal of the American Society for Horticultural Science, 115(3), 359–363.
Abstract/FREE Full TextGoogle Scholar - ↵
Zottini, M., Mandolino, G., and Ranalli, P. (1997). Effects of γ-ray Treatment on Cannabis sativa Pollen Viability. Plant Cell, Tissue and Organ Culture, 47(2), 189–194.
CrossRefGoogle Scholar - ↵
Zuardi, A. W. (2006). History of Cannabis as a Medicine: a Review. Brazilian Journal of Psychiatry, 28(2), 153–157.
Google Scholar
acespicoli
Well-known member
Cannabis pollen: how to collect, store and use it?
For the majority of home growers, as well as licensed professional growers, cannabis pollen is generally avoided in order to prevent a seeded crop. But for those wishing to breed or preserve cannabis genetics, pollen from the very best strains is a valuable commodity. For those who find that keeping mother plants is a costly and time-consuming process, collecting pollen is relatively easy. Our expert guide explains all.
What is cannabis pollen?

Cannabis is a dioecious species, meaning that it has both male and female plants. Pollen is produced by male flowers. These are found on male plants or on hermaphrodite cannabis plants. Cannabis pollen is a very fine creamy white powder with a slightly yellow hue.
In nature cannabis pollen is carried by the wind. Cannabis seeds are formed when cannabis pollen transfers from a male stamen to a female pistil. Pistils are the familiar small white hairs seen protruding from part of the forming buds known as the calyx. If you need a simple explanation of the various cannabis plant parts then our review, below, may help.
Is male pollen the same as hash pollen?
No. Hash is typically made from compressed trichome material produced by mature female plants. Sometimes these cannabis trichomes are incorrectly called ‘pollen’ or hash pollen. Perhaps this mistake arose because finely sieved trichome material can have some superficial similarities to genuine pollen.
Pros and cons of collecting cannabis pollen

If you have some incredible cannabis genetics that you don't want to lose there are several options open to you. One is to maintain a separate ‘mother room’ where you can keep your favourite plants (or cuttings taken from them) in a permanent non-flowering vegetive state, often with 18-20 hours of daily light.
| Related: |
| The cannabis vegetative stage |
However, keeping a mother room take up space, costs money to run and requires your attention and skill to maintain. The other, perhaps easier, option is to preserve cannabis genetics as seeds or cannabis pollen.Pros of collection cannabis pollen
One advantage of collecting pollen, especially for the professional cannabis seed supplier/breeder is that they can pause a breeding project for several years without losing any genetic material/progress. The best cannabis seed suppliers and breeders may also create extensive archives of cannabis pollen from the best individual specimens of the finest strains. Such genetic material is extremely valuable to the professional cannabis seed producer.Cons of collecting cannabis pollen
Cannabis pollen is extremely effective at its job of pollinating female plants. That’s the main reason why so many home growers and licensed commercial growers do their best to identify and remove any male plants (or male flowers on hermaphrodite plants) as quickly as possible.If left unattended, a rogue male plant will happily pollinate all the females nearby. This converts much of the precious, potent buds into cannabis seed. The dangers of accidental pollination are perhaps the main reason why so many avoid cannabis pollen at all costs. Most growers prefer to concentrate on producing high quality buds and are happy to leave cannabis seed & pollen production to the seed banks.
How and when to collect cannabis pollen
.jpg "pollen-capture-and-spread-cannabis-dutch-passion-seed-company")
Male plants start to produce pollen around 2-4 weeks into their ‘bloom’ cycle. The pollen sacs/stamens may look similar to miniature bunches of bananas. They eventually open, releasing the powder-like pollen which disperses easily in a breeze.
Knowing when/how the male flowers ripen and release their pollen is a skill that comes with experience over a few grows. Many breeders will use a paint brush to apply pollen. This can be done with great precision by those who have mastered the art.
How to use cannabis pollen
Often the aim is to use cannabis pollen to fully pollinate a female plant, with the goal of producing cannabis seeds. Sometimes pollen is applied to the entire plant with the aim of filling it with cannabis seeds.Occasionally some breeders will carefully apply cannabis pollen to e.g. a single branch of a female plant while carefully shielding other branches from exposure to the pollen. Plastic bags are used to protect and enclose areas exposed to pollen. Sometimes a cannabis geneticist may wish to pollinate a single female with pollen from a few different males. This would allow seeds of different hybrids to be collected from different branches.
All drafts, circulation fans and air movement need to stop for precise cannabis pollen application. Some old-school breeders enjoy blowing the pollen onto the female plants, though it should be noted that moisture (from exhaling) will inevitably inactivate some of the pollen.
How to identify male cannabis plant pollen sacs?

Check the nodes where the branches meet the main stem and look for miniature balls. If left to mature these will open. Once open, the pollen is shed from small banana-shaped stamens. The pollen tends to be cream/yellow coloured and will spread easily in the lightest breeze.
If you do see any male plants, they are usually removed and destroyed. Although it’s unusual to see a pure male cannabis plant produced from feminised seed or autoflower seeds it does occasionally happen.
More common are hermaphrodite plants which show both sexes. If rogue male flowers are spotted on a female plant the male flowers are often removed and disposed of immediately in a glass of water, the water inactivates the pollen preventing it from seeding your crop.
How to store cannabis pollen properly
Cannabis pollen is often collected by removing the part of the plant with the male flowers and putting them in a paper bag and allowing them to dry for a few days in a draft-free area. The dry pollen is easily removed by lightly shaking the male flowers. Remember to shake the paper bag too! The pollen is often sifted through a small mesh screen to remove any plant material. The pollen should be stored in a dry, sealed and preferably light-proof container.Pro Tip: When you need to use some cannabis pollen you may prefer to take a small sample out of your main stash and allow it to defrost for a minute or two before using it, rather than repeatedly defrosting and re-freezing the main cannabis pollen bottle, risking moisture ingress. When carefully looked after, dry/frozen pollen will remain viable for a couple of years. Drying removes the moisture without de-activating the pollen.
It’s important to dry the pollen before freezing since this prevents ice crystals forming in the pollen bottle during freezing. You may have noticed that food items that are frozen are often coated with ice crystals formed from their own frozen, desiccated moisture.
By drying pollen for a few days on the plant before collecting it you remove water, preventing future ice crystals forming in the pollen bottle in the freezer. This is important, since any ice in your pollen bottle ice will melt, spoiling the precious cannabis pollen.
Cannabis pollen from elite plants is often traded between growers. Some growers specialise in pollen production, though you need to ensure that these pollen producers are reputable - many are not.
How long does cannabis pollen last?
Once dried, pollen will last for a few years in the freezer. Keep it cool, dry and dark for maximum longevity. Avoid opening the cannabis pollen container unless necessary. As the pollen begins to reach the end of its useful life you will notice it starts to become more clumpy and not quite as easy to apply as before.Is it safe to dilute cannabis pollen with finely ground flour?
Some breeders dilute their cannabis pollen, with 1 part pollen to 4 parts flour. The finely ground flour provides a dry, harmless diluting effect. This may be especially useful for the less experienced breeder who hasn’t fully mastered the efficient art of using miserly quantities of cannabis pollen.Diluting 1-part of cannabis pollen with 4 parts of dry finely ground powder may not appeal to the old-school purist breeder, but for less experienced cannabis breeders it remains an option.
What to do with your fresh stash of pollen?

Many people collect and store pollen for future use. Sometimes it is used within a growing community to allow people to produce their own cannabis seeds from their favourite cannabis genetics. Others sell the pollen to interested buyers, often online.
Producing and collecting cannabis pollen is relatively easy. That said, it tends to be a minority of growers that produce and use it. For most growers, cannabis pollen is avoided like the plague - their only important goal being to produce sinsemilla (non-seeded cannabis buds)
Can you pollinate autoflower strains?
Short bonus tip. As well as using cannabis pollen to produce photoperiod feminised cannabis seeds, it can also be used to make autoflower seeds. In order to do this, you need to take cannabis pollen from a male autoflower plant and dust it on a female autoflower. Often this is done when the female is around 3-4 weeks into bloom.Note that following pollination, female plants will often show brown pistils emerging from the calyx rather than the more typical white hairs. The best way to harvest the cannabis seeds is to wait until the normal harvest time and dry the plant. This makes it easier to remove/separate the cannabis seeds from the plant material.
What is female cannabis pollen and how was it first made?
In the 1990’s Henk van Dalen, the founder of Dutch Passion announced the creation of cannabis pollen which would produce seeds that only grew into female cannabis plants. The world’s first feminised cannabis seeds had been invented!This feminised-seed producing pollen became known as female cannabis pollen. Today it is the most common form of cannabis pollen used in cannabis seed production.
Until that point only regular cannabis seeds existed - giving rise to roughly equal numbers of male and females. This was inconvenient, required bigger grow rooms and more energy to run.
Henk’s creation of female cannabis pollen changed cannabis seed production forever and put Dutch Passion firmly on the map. Some growers intially thought that Dutch Passion’s claim of feminised cannabis seeds was a hoax!
How was the first female cannabis pollen created?
Henk van Dalen trained as a Biologist at University and knew how important feminised seeds were in general agriculture. What if feminised cannabis seeds could be produced?Henk did some experiments, growing cannabis plants from regular seed - the only type available in those days. Rather than harvesting the female plants at the normal time Henk kept them going for a few weeks longer, to see what happened. He noticed that some of the female plants produced male flowers. This was the source of the first female cannabis pollen.
Final thoughts on cannabis pollen

Most growers have relatively little interest in cannabis pollen, their main concern is to avoid pollen at all costs and to focus on growing only the female plants for their un-seeded buds. Cannabis seed producers, on the other hand, have a huge interest in pollen.
Their business depends on it. But some home growers are also passionate about preserving the best cannabis genetics. For them, storing cannabis pollen in the freezer may be a more convenient option than trying to preserve a room full of cuttings.
thx DP
acespicoli
Well-known member
Plants 2020, 9, 665 3 of 10

Figure 2. Optimization of the Pollen Germination Assay. Cannabis pollen germination in PGM at
concentrations of 0.1, 1 and 10 mg/mL. Images were acquired after 16 h using an inverted fluorescent
microscope (Zeiss Axio Observer Z1, Germany).
2.2. Pollen Collected at Different Principal Growth Stages Exhibits Different Longevity
To establish how cannabis pollen germination rates change over time, we tested the pollen in a
pollen germination assay after storage at 4 ◦C. Because pollen collected from different principal growth
stages may affect germination rates, we collected pollen from male flowers at four different points
during floral development to cover the entirety of anthesis (Figure S1).
We compared the loss of viability of cannabis pollen collected from the four different points during
flower development over the course of 21 days. The rate of germination at T0 was 33% for Early
(62), 46% for Mid (64), 50% for Mid-Late (65) and 41% for Late (64) stage (Figure 3). All stages lost
viability after only one week at 4 ◦C storage, except Mid (64) (Figure 3). After 21 days storage at 4 ◦C,
pollen collected from Early (62), Mid-Late (65) and Late (67) stages, lost their viability (approached
0% germination). However, pollen collected from the Mid flowering stage (64) retained viability the
longest with 22% of pollen grains successfully germinated after 21 days storage at 4 ◦C (Figure 3).
This suggested that an optimal growth stage for pollen collection is around the developmental stage
(64), whereas the loss of pollen viability may begin while the pollen is still present in the anthers.
Pollen collected earlier, at developmental stage 62 may not have fully matured, resulting in a lower
germination percentage (Figure 3).
Figure 3. Loss of pollen viability over time. Pollen was harvested from plants at four different
developmental stages then stored at 4 ◦C for one to three weeks. Viability was determined via pollen
germination assay. Data were shown as mean ± SE (n = 9).

Baked wheat flour has been previously suggested as a possible cryoprotectant for long term
pollen storage [11]. To test whether baked wheat flour can be used as a cryoprotectant for cannabis
pollen, cannabis pollen was desiccated and combined with baked wheat flour. Vacuum desiccation
at a lower pressure of 5 kPa for the longest interval for 40 min, resulted in the highest germination
rate after storage in LN after 24 h (Figure 5). Pollen germination did not occur at higher pressures,
as the cells may have been compromised during the drying process. This treatment was used for
subsequent preservation experiments where the GLM test results indicated no significant differences
in germination rate between 24 h LN stored pollen and the non-LN control pollen (p > 0.05) that
was subjected to the same desiccation protocol and combined with whole wheat flour (Figure 6).
Desiccation itself caused approximately 50% reduction in germination as compared to untreated freshly
harvested pollen (Figures 3 and 6). Desiccated cannabis pollen combined with baked wheat flour was
kept in LN for four months to test long term storage. The GLM test results indicated that there was no
significant difference observed as compared to non-LN control and 24 h LN stored pollen (p > 0.05)
(Figure 6), suggesting long term storage is a possibility under appropriate conditions. To confirm in
planta viability of the treated cannabis pollen, the pollen/wheat flour mix was removed from LN and
applied to flowering female cannabis plants. The pollination resulted in successful seed formation in
all the flowers receiving treated pollen. Once the female had finished flowering, the flower material
was collected and processed for seeds. Seed number, size and morphology from the cryopreserved
pollen were similar to those obtained using untreated fresh pollen (Figure S3). Collected seeds were
germinated to ensure viability, with no abnormalities noted.
Figure 2. Optimization of the Pollen Germination Assay. Cannabis pollen germination in PGM at
concentrations of 0.1, 1 and 10 mg/mL. Images were acquired after 16 h using an inverted fluorescent
microscope (Zeiss Axio Observer Z1, Germany).
2.2. Pollen Collected at Different Principal Growth Stages Exhibits Different Longevity
To establish how cannabis pollen germination rates change over time, we tested the pollen in a
pollen germination assay after storage at 4 ◦C. Because pollen collected from different principal growth
stages may affect germination rates, we collected pollen from male flowers at four different points
during floral development to cover the entirety of anthesis (Figure S1).
We compared the loss of viability of cannabis pollen collected from the four different points during
flower development over the course of 21 days. The rate of germination at T0 was 33% for Early
(62), 46% for Mid (64), 50% for Mid-Late (65) and 41% for Late (64) stage (Figure 3). All stages lost
viability after only one week at 4 ◦C storage, except Mid (64) (Figure 3). After 21 days storage at 4 ◦C,
pollen collected from Early (62), Mid-Late (65) and Late (67) stages, lost their viability (approached
0% germination). However, pollen collected from the Mid flowering stage (64) retained viability the
longest with 22% of pollen grains successfully germinated after 21 days storage at 4 ◦C (Figure 3).
This suggested that an optimal growth stage for pollen collection is around the developmental stage
(64), whereas the loss of pollen viability may begin while the pollen is still present in the anthers.
Pollen collected earlier, at developmental stage 62 may not have fully matured, resulting in a lower
germination percentage (Figure 3).
Figure 3. Loss of pollen viability over time. Pollen was harvested from plants at four different
developmental stages then stored at 4 ◦C for one to three weeks. Viability was determined via pollen
germination assay. Data were shown as mean ± SE (n = 9).
Baked wheat flour has been previously suggested as a possible cryoprotectant for long term
pollen storage [11]. To test whether baked wheat flour can be used as a cryoprotectant for cannabis
pollen, cannabis pollen was desiccated and combined with baked wheat flour. Vacuum desiccation
at a lower pressure of 5 kPa for the longest interval for 40 min, resulted in the highest germination
rate after storage in LN after 24 h (Figure 5). Pollen germination did not occur at higher pressures,
as the cells may have been compromised during the drying process. This treatment was used for
subsequent preservation experiments where the GLM test results indicated no significant differences
in germination rate between 24 h LN stored pollen and the non-LN control pollen (p > 0.05) that
was subjected to the same desiccation protocol and combined with whole wheat flour (Figure 6).
Desiccation itself caused approximately 50% reduction in germination as compared to untreated freshly
harvested pollen (Figures 3 and 6). Desiccated cannabis pollen combined with baked wheat flour was
kept in LN for four months to test long term storage. The GLM test results indicated that there was no
significant difference observed as compared to non-LN control and 24 h LN stored pollen (p > 0.05)
(Figure 6), suggesting long term storage is a possibility under appropriate conditions. To confirm in
planta viability of the treated cannabis pollen, the pollen/wheat flour mix was removed from LN and
applied to flowering female cannabis plants. The pollination resulted in successful seed formation in
all the flowers receiving treated pollen. Once the female had finished flowering, the flower material
was collected and processed for seeds. Seed number, size and morphology from the cryopreserved
pollen were similar to those obtained using untreated fresh pollen (Figure S3). Collected seeds were
germinated to ensure viability, with no abnormalities noted.
acespicoli
Well-known member
Fungicide Seed Treatment
Encyclopedia Article

Damping-off diseases are a major concern for early-planted soybean. Because more and more growers are planting early, there is more interest in using seed treatments to promote good stand establishment.
Treating seeds with fungicides may be beneficial under the following conditions:
1. Early planting in cold, wet soils
2. Reduced till and no-till fields
3. Seed with low germination rate (<80%) or low seed vigor
Several kinds of fungi cause seed rot, seedling rot (damping off) and seedling disease. The most common ones in Iowa are Rhizoctonia and Fusarium, the water mold fungi Pythium and Phytophthora, and seed-borne Phomopsis.
The active ingredients mefenoxam and metalaxyl are effective in controlling the water molds Pythium and Phytophthora . When either one of these two chemicals is mixed with other active ingredients, the formulation can be used to control the other soil-borne fungi in addition to Pythium and Phytophthora (Table 1). We initiated an evaluation of fungicide seed treatments in 2004 and will continue in 2006.
For a good description of soybean seedling diseases, read Soybean Seedling Diseases in the Integrated Crop Management newsletter.
Table 1. Specific activity of fungicide seed treatments
Active Ingredient | Trade | Pythium | Phytoph- thora | Rhizoctonia | Phomopsis | Fusarium |
| metalaxyl | Allegiance formulations | excellent | excellent | no activity | no activity | no activity |
| mefenoxam | Apron formulations | excellent | excellent | no activity | no activity | no activity |
| azoxystrobin + metalaxyl | SoyGaard | good | poor | good | good | good |
| captan | many formulations | good | poor | good | fair | fair |
| captan + PCNB +thiabendazole | Rival | poor | poor | good | excellent | excellent |
| captan + PCNB + metalaxyl | Rival Pak | good | good | good | good | good |
| carboxin + thiram | Vitavax-200 | poor | no activity | fair? | excellent | poor |
| carboxin + thiram + metalaxyl | Stiletto | good | good | good | excellent | poor |
| carboxin + captan | Vitavax-captan | fair | poor | good | good | fair |
| fludioxonil | Maxim 4FS | poor | poor | good | good | good |
| fludioxonil + mefenoxam | ApronMaxx formulations | good | good | good | good | good |
| PCNB + ethazole | Terraclor Super-X Terra-Coat L-205N | good | poor | good | no activity | poor |
| thiram | many | fair | poor | good | fair | fair |
Insecticide Seed Treatments
High numbers of bean leaf beetles have created a concern about direct losses from beetle feeding injury plus losses related to bean pod mottle virus. Previously, we have been able to manage the beetles using foliar insecticides, but we do now also have an insecticide seed treatment that can be used to manage the beetles. In 2004 and 2005, Cruiser and Gaucho were registered to use as a seed treatment on soybean in United State, respectively. They are both systemic insecticides and belongs to a new subclass of neonicotinoids. They moves systemically throughout the plant and protects against target pests through contact and stomach activity. We are evaluating both Cruiser and Gaucho in different trials in combinations with different fungicides. The largeste study will be finalized after the 2007 growing season and data will then be available.Neonicotinoids are a relatively new class of chemistry to control insects. They are now widely adopted because they are persistent and systemic in plant tissues. Most field crops in Iowa have a neonicotinoid seed treatment. Common examples of neonicotinoids include: clothianidin (Poncho ®), thiamethoxam (Cruiser ®), and imidacloprid (Gaucho ®). Active ingredient rates range from 0.25-1.25 milligrams per kernel (sold as 250-1,250 rates).
2011 Evaluation of Fungicide and Insecticide Seed Treatments on Soybean in Iowa
February 22, 2012
ICM News
Alison Robertson, Daren Mueller, Stith Wiggs, Department of Plant Pathology and Microbiology; Erin Hodgson, Department of Entomology
The use of seed treatments on soybeans has increased considerably over the past few years. Seed treatments protect seed from seedling diseases, caused by Pythium, Phytophthora, Fusarium and Rhizoctonia, and also insect pests such as the bean leaf beetle. Although a seed treatment may help ensure uniform emergence and optimum stands, such benefits do not always result in greater yields.
In Iowa, the benefits of a seed treatment on soybean have not been well studied. A 2011 field study, funded with check off dollars from the Iowa Soybean Association, evaluated the effect of commercially available fungicide and insecticide seed treatments on seedling disease, insect pests and soybean yield. The study was done at three locations in Iowa: ISU Northeast Research and Demonstration Farm (NERF) at Nashua, ISU Southeast Research and Demonstration Farm (SERF) near Crawfordsville, and a farmer's field in Nevada (two planting dates). Twelve demonstration plots were also planted at the ISU Field Extension and Education Laboratory (FEEL) near Boone.
Materials and Methods
The experimental design at each location was a randomized complete block with four replications. Plot sizes were 10 feet wide (four rows) by 17.5 feet. Details on variety and planting and harvest dates are listed in Table 1. Unfortunately rain delayed our proposed planting dates by two weeks. Seed treatment products that were evaluated are listed in Table 2.
In addition, the effect of a seed treatment plus a foliar application of Headline® (6 oz/A) + Leverage® (3.8 oz/A) applied at growth stage R3 on yield was compared with a seed treatment alone. Seedling disease and insect damage were assessed at 14 days after planting (dap) and 28 dap. One-meter stand counts was taken 14 and 28 dap, and vigor (plant height) was assessed 28 dap. Foliar and stem disease was assessed at growth stage R5. Soybean aphid populations were assessed at growth stage R1 and R3 to R4.5. Plots were harvested with a plot combine. Grain moisture at harvest was determined and yields were converted to bu/acre at 13 percent moisture.
Table 1. Variety, planting date, and harvest date for soybean seed treatment trials done at three locations in Iowa in 2011

Table 2. Seed treatment products tested in soybean seed treatment trials at three locations in Iowa and mean yield (bu/A) of each treatment

Field Study Results
Seedling disease and insect pests
No seedling disease or insect damage occurred at any location.
acespicoli
Well-known member

Storing Seeds by Mel Frank
When storing seeds, use the same principles as when storing pollen: separate seeds from all vegetative matter. Separating seeds from very dry buds with a kitchen metal mesh strainer makes this quick and easy.
Store seeds in small containers and include a desiccant; clean, dry seeds remain viable at refrigerator temperatures for easily 20 and more years. High temperatures, temperature swings, and high humidity are ruinous for seeds. For very long term storage, glass or metal containers are recommended by seed archivists, but I've used film canisters with great success.

Do not store in baggies as these may leak or break, particularly if taken in and out of storage. Most plastics actually “leak” after time, but film canisters are especially tough and impermeable and keep contents reliably dry. Storing seeds in plastic baggies is particularly bad.
Glass jars are impermeable, but leakage may come through their covers, and more desiccants must be used in larger containers. Divide seeds among many small containers as any one failure is not a total disaster.
Refrigeration is my preferred, long-term storage solution and I’ve had 100% germination with seeds stored more than 20 years.
I’ve had less experience with frozen seeds, but had almost 100% germination with seeds frozen for 15 years. However, some were weaker than refrigerated seeds—their embryonic leaves had gray areas, indicating dead or dying tissue, but with tender care, 90% grew into strong, normal plants (photo below).

The photo shows Skunk #1 seeds with tissue damage after being frozen for 14 years.
This may have had to do with a freezer failure during this time. That convinced me that refrigeration was better, as refrigerator failure would not be as deleterious to seeds going from cold to household temperatures than frozen to thawed. Seeds cannot be taken in and out of a frozen state without harm, but can, in my experience, be taken out of refrigeration for short periods as long as stored with desiccants.
–Mel Frank
acespicoli
Well-known member
Making STS Spray To Produce Feminized Cannabis Seeds
Silver Thiosulfate or STS for short, is an ethylene blocker. Spraying it on a plant will inhibit the ethylene production and cause female plants to produce males flowers. These male flowers however will only produce “female pollen” as they only carry X chromosomes.
Most home growers and breeders use Colloidal Silver (CS) whereas most professional breeders resort to STS in order to produce feminized pollen. The pros love it because it is cheaper, more convenient to apply and more effective than CS.
STS recipes are widely available throughout the internet. However, the ratios and concentrations can vary greatly so we have decided to share the recipe that gave us the very best results throughout the years. Let’s make some STS!
Storing The Solutions
STS spray is simply a mix of 3 different products. Silver Nitrate, Sodium Thiosulfate and distilled water. When these are mixed up together, the STS (Solution AB) only stores for about a month.However, you can store Solution A and Solution B separately for at least 6 months in the fridge.
Then you can simply mix these 2 stock solutions when your females are ready to be sprayed.
Warning!
Just a word of caution before we get started, some of these products can burn the skin so you should always wear gloves and protective glasses when handling these.
Whenever you spray STS onto your plants, also wear a mask in order not to breath in the STS droplets.
Last but not least, the plants which have been directly sprayed are unfit for consumption.

Solution A:
- Fill up a light proof glass bottle with 1000ml of distilled water/reverse osmosis water.
- Slowly poor 1 gram of Silver Nitrate into the distilled water and gently swirl the bottle around for 30 seconds to dissolve the crystals.
- Label it “Solution A” and store it in a fridge.
Solution B:
- Fill up a light proof glass bottle with 1000ml of distilled water/reverse osmosis water.
- Slowly add 5 grams of Sodium Thiosulfate Anhydrous or 7.8 grams of Sodium Thiosulfate Pentahydrate into the distilled water and gently shake the bottle for 1 minute to dissolve the crystals.
- Label it “Solution B” and store it in a fridge.
Solution AB (STS Reversal Spray):
STS spray has a short lifespan of about 1 month. Breeders need to store it in a cool and dark place. Keep in mind that the fresher your STS reversal solution (Solution AB), the better. Therefore, it is great to make your STS right before spraying the plants.4 Simple Steps To Making STS Spray Solution:
1) Poor 100ml of solution B into a cup using a big clean plastic syringe.2) Using another clean syringe, slowly poor 100ml of solution A into the solution B while stirring with a plastic stirrer.
3) Poor the AB solution into a clean light-proof sprayer.
4) Add 600ml of distilled water and gently shake the sprayer.
There you have it!!
If the solution turns brownish gray, it usually means that the reaction failed as the different ingredients didn’t mix properly.
Mixing up the solution with too much water would cause the STS spray to be too weak and less effective. At the same time, if you do not dilute it enough, the spray solution with burn your plants.
Therefore, diluting 1 part of mixed solution (AB solution) with 3 parts distilled water is the sweet spot.
How and When To Apply STS?
Knowing how and when to apply your STS spray solution is just as important, if not more important than knowing how to make STS.Spray on the nodes and bud sites, not on the leaves.
Spraying on the leaves is useless and is more likely to burn the plants. It will not prevent the reversal but it will cause you to waste a lot of spray solution and time.
The first application should occur when the plants are still in their vegetative cycle. Spray your females 1 day before flipping them to flower. Because reversing a plant takes time, start spraying the donor plants about 1 week before flipping the receiver plants to flower.
Then, spray every 4 days until you see the first male flowers forming. Pure Sativas require 1 application every 3 days whereas you can spray the Indicas just once every 5 days.

Increase The Odds
Not all strains respond to STS the same way. Some may produce empty pollen sacks. That is why it is highly recommended to spray several female plants in order to increase the odds.Good luck!
thx -Khalfia team
since this has todo with making/saving seeds thought it was on topic for here ???
always into random stuff but thats the method to the madness
acespicoli
Well-known member
Cannabis Sex Reversal Using Silver Thiosulphate (STS)
by Katsu Bluebird | Aug 29, 2019 | Uncategorized | 1 comment

A lot of people have requested information about reversing the sex of a female plant to produce male pollen. The text from this post was pulled from the forums – Fet gets credit for much of the research and a kind (and currently unknown member) assembled it as it appears below.
The following is a safe, inexpensive, and successful method for reversing the sex of female cannabis plants. Individual plant responses may vary based upon strain, but I can verify that this process is fully effective in stimulating profuse staminate flower production.
This process can be used to:
A: create new feminized seeds from solitary prize mothers that you currently have
B: create interesting feminized-seed hybrids from different prize strains that you currently have
C: create feminized seeds for optimum outdoor use
D: accelerate the “interview” phase of cultivation, in searching for interesting new clone-mothers
E: reduce total plant numbers- great for medical users with severe plant number restrictions
F: increase variety, by helping to create stable feminized seedlines to be used as an alternative to clones
At the bottom of this post are some specific details about the chemicals used, their safety, their cost, and where to get them.
It is important to educate yourself about cannabis breeding theory and technique prior to using a method like this one. Check out Robert Clarke’s “Marijuana Botany”, which is a very good reference.
It is also important to use basic safety precautions when mixing and handling these chemicals, so read the safety data links provided. The risk is similar to mixing and handling chemical fertilizers, and similar handling procedures are sufficient.
Remember: nothing will ever replace good genetics, and some of your bounty should always go back towards the professional cannabis breeders out there… the ones who have worked for many generations to come up with their true-breeding F1 masterpieces. Support professional breeders by buying their seeds. Also, order from Heaven’s Stairway. Not that they need a plug from me, but they are very professional and provide very fast service worldwide.
Preparation of STS:
First, a stock solution is made. It consists of two parts (A and B) that are initially mixed separately, then blended together. Part A is ALWAYS mixed into part B while stirring rapidly. Use distilled water; tap water may cause precipitates to form.
Wear gloves while mixing and using these chemicals, and mix and use in a properly ventilated area. A mask will prevent the breathing of any dust, which is caustic. STS is colorless and odorless, and poses minimal health risks if used as described here. (See material safety data sheet links below). Note that silver nitrate and STS can cause brown stains upon drying, so spray over newspaper and avoid spilling.
Part A: .5 gram silver nitrate stirred into 500ml distilled water
Part B: 2.5 grams sodium thiosulfate (anhydrous) stirred into 500ml distilled water
The silver nitrate dissolves within 15 seconds. The sodium thiosulfate takes 30-45 seconds to dissolve.
The silver nitrate solution (A) is then mixed into the sodium thiosulfate solution (B) while stirring rapidly. The resulting blend is stock silver thiosulfate solution (STS).
This stock solution is then diluted at a ratio of 1:9 to make a working solution. For example, 100ml of stock STS is added to 900ml of distilled water. This is then sprayed on select female plants.
Both the stock STS and the working solution should be refrigerated after use, as well as the powdered chemicals, to avoid activity loss. Excess working solution can be safely poured down the drain after use (with ample running water) with negligible environmental impact. It’s pretty cheap.
Each liter of stock STS will make ten 1-liter batches of working solution of STS. With the minimum amount of base chemicals ordered from Photographer’s Formulary (see link below), this means that each 1-liter bottle of working solution STS costs less than 9 cents, and can treat 15-20 mid-sized plants. That’s 200 1-liter batches of STS for $18. Note that the distilled water costs far more than the chemicals.
Application:
The STS working solution is sprayed on select female plants until runoff. Do the spraying over newspaper in a separate area from the flower room. You probably won’t smell anything, but ventilate anyway. You now have what I call a “F>M plant”; a female plant that will produce male flowers.
After the F>M plant dries move it into 12/12 immediately. This is usually done three to four weeks prior to the date that the target (to be pollinated) plants will be ready to pollinate. Response times may vary slightly depending upon the strain. More specific times can be determined by trial with your own individual strains. In my trials it took 26 days for the first pollen. 30-35 days seems optimum for planning purposes.
So, assuming that a target plant needs 3-4 weeks to produce fully mature seeds, a strain that takes 8 weeks to mature should be moved into flower at about the same time as the female>male plant. A target plant that finishes flowering in 6 weeks needs to be moved into flower later (10 days or so) so that it doesn’t finish before the seeds can fully mature.
A seeded individual branch can be left to mature on a plant for a bit longer, while harvesting the other seedless buds if they finish first. Just leave enough leaves on for the plant for it to stay healthy.
Effects:
Within days I noticed a yellowing of the leaves on the F>M plants. This effect persisted for two weeks or so; after this they became green again, except for a few of the larger fans. The plants otherwise seemed healthy. No burning was observed. Growth stopped dead for the first ten days, and then resumed slowly. No stretch was ever seen. After two weeks the F>M plants were obviously forming male flower clusters. Not just a few clusters of balls, but complete male flower tops. One plant still formed some pistillate flowers, but overall it was predominantly male.
It is strange indeed to see an old girlfriend that you know like the back of your hand go through a sex change. I’ll admit that things were awkward between us at first.
When the F>M plants look like they may soon open and release pollen, ( 3-1/2 to 4 weeks) move them from the main flower room into another unventilated room or closet with lighting on a 12/12 timer. Don’t worry too much about watts per square foot; it will only be temporary.
When the pollen flies, move your target plants into the closet and pollinate.
A more controlled approach is to isolate the F>M plants in a third remote closet (no light is necessary in this one, as they are releasing pollen now and are nearly finished anyway). In this remote other closet the pollen is very carefully collected in a plastic produce bag or newspaper sleeve and then brought back to the lighted closet, where the target plants are now located. If this is done, be careful to not mix pollen types by letting the F>Ms dust each other. Avoid movement, or use yet another closet.
Take special care to not let pollen gather on the outside of this bag- a static charge is sometimes present. Drop small open clusters of blooms inside and then close the bag at the mouth and shake. Important: next, step outside and slowly release the excess air from the bag, collapsing it completely, so that pollen doesn’t get released accidently. Point downwind; don’t let it get on your hands or clothes.
This collapsed pollinated bag is now very carefully slipped over only one branch and is then tied off tightly at the mouth around the branch stem with a twist tie or tape, sealing the pollen inside. Let the bag inflate slightly with air again before sealing it off, so the branch can breathe. This technique keeps the entire plant from seeding. Agitate the bag a bit after tying it off to distribute the pollen. Don’t forget to label the branch so you know which seeds are which. Other branches on this same plant can be hit with different pollen sources.
If no lighted closet is available, the plant can be moved back into the main room, but- be very carefulollen is sneaky. After 4-5 days, the bag is gently removed and the plant completes it’s flowering cycle.
Yet another method has worked well for me. I position the target plants in a non-ventilated lighted closet, and then I collect pollen on a piece of mirror or glass. This is then carefully applied to the pistils of one pre-labeled branch by using a very fine watercolor paintbrush. Care is taken to not agitate the branch or the pollen. No sneezing. The plant needs to be in place first; moving it after pollination can shake pollen free and blow this technique.
Regardless of technique, at completion you will have feminized seeds. Let them dry for 2-4 weeks.
About the chemicals:
Silver nitrate is a white crystalline light-sensitive chemical that is commonly used in photography. It is also used in babies’ eyes at birth to prevent blindness. It can cause mild skin irritation, and it stains brown. Avoid breathing. I didn’t notice any smell or fumes, but ventilation is recommended. Be sure to wash the spray bottle well before you use it elsewhere; better yet: devote a bottle to STS use. A half gram is a surprisingly small amount; it would fit inside a gel capsule.
Here are links to some safety data. A Google search will bring up more information if needed.
Silver Nitrate info:
ICSC:NENG1116 International Chemical Safety Cards (WHO/IPCS/ILO) | CDC/NIOSH
http://www.lions.odu.edu/~redwards/… solution.pdf
For a realistic hazard level comparison, here is a link for the safety and handling data for Ammonium Nitrate, or common fertilizer:
Sodium thiosulfate is also a white crystalline chemical commonly used in photography; it is used in photographic fixers. Same general cautions apply, minus the staining. This formula uses the anhydrous type. Non-hazardous.
Sodium Thiosulfate info: http://ptcl.chem.ox.ac.uk/MSDS/SO/s…hiosulfate.html
http://www.med-chem.com/MSDS/Sodium_Thiosulf.htm
——————
Where to get the chemicals:
Photographic chemicals, photo chemistry, photo processing equipment, photo chemicals
silver nitrate: 10 grams: $10
http://www.photoformulary.com/Deskt…yID=27&langID=0
sodium thiosulfate (anhydrous): 100 grams: $3.95
http://www.photoformulary.com/Deskt…yID=28&langID=0
Have fun experimenting with this technique. Use it responsibly. There are a few good threads here at CW that go into the pros and cons of transsexual agents and feminized seeds. Read them. And most importantly, use STS with quality F1 strains developed by professional breeders for the most consistent results.
A huge thanks to Fet from Spice Brothers Seeds for his help and advice in using this technique. I simply brought together available information from previous posts and tried my own recipe. I’m thrilled to share the results. Future tests will be done to adjust the formula so the molar ratios of the chemicals are correct, as specified by Gobgoober (thanks, Gob) but the formula posted here is completely effective.

Latest posts
-

-
 High Grade CANNABIS BIBLIOGRAPHY SORTED AND ALPHABETIZED BY SUBJECT
- Latest: CharlesU Farley
-

-

-

Latest posts
-
-
High Grade CANNABIS BIBLIOGRAPHY SORTED AND ALPHABETIZED BY SUBJECT
- Latest: CharlesU Farley
-
-
-
