What's new
  • Happy Birthday ICMag! Been 20 years since Gypsy Nirvana created the forum! We are celebrating with a 4/20 Giveaway and by launching a new Patreon tier called "420club". You can read more here.
  • Important notice: ICMag's T.O.U. has been updated. Please review it here. For your convenience, it is also available in the main forum menu, under 'Quick Links"!

Hornet's 250W Insulated Attic Cab (First Grow!)

Hello. This is the first of hopefully many posts documenting my initial attempt at personal-use growing.

Goals:

Provide enough for my occasional use. No more, No less.

Do it simply, do it small, do it stealthy, do it cheaply, but most of all, do it right.

Disclaimers:

I'm not under 18, I don't live with my parents, I'm not on probation, and I'm not a fucking idiot(probably). I don't recommend growing to anyone, but especially not if you are unfortunate enough to be under any of the above circumstances.

That said, I am a complete newbie. I have no experience, I haven't read any books, I haven't asked anyone anything about growing. I haven't even posted questions on any forums.

What I have done is research. It is amazing how much you can learn with just Google and the Search button on the forums.

I will either crash and burn, or succeed and burn :kos:

Thanks for your time. I'm all about feedback, both positive and negative

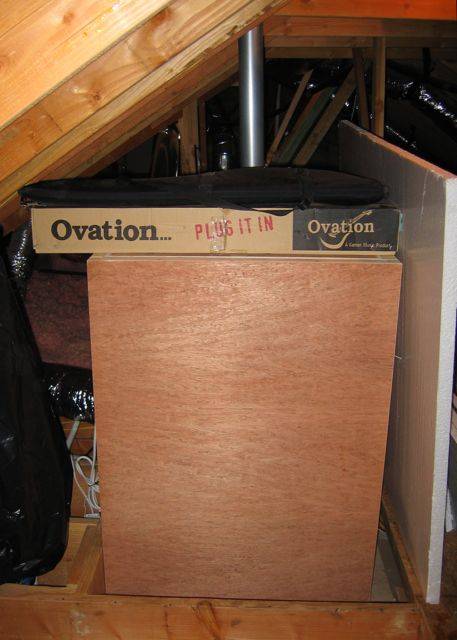
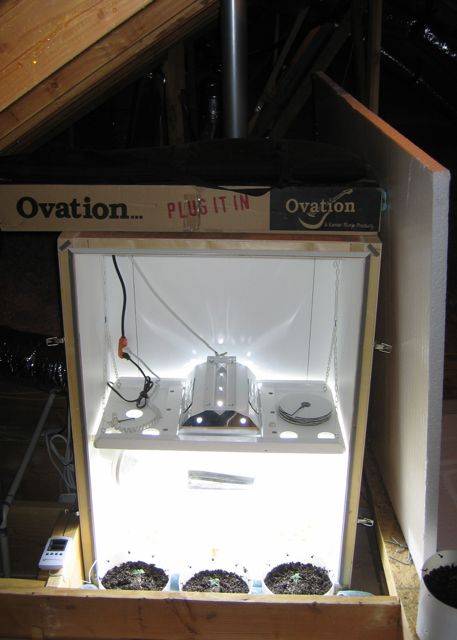
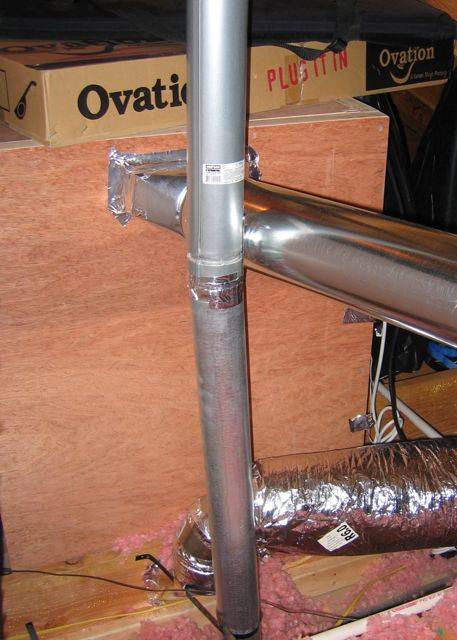
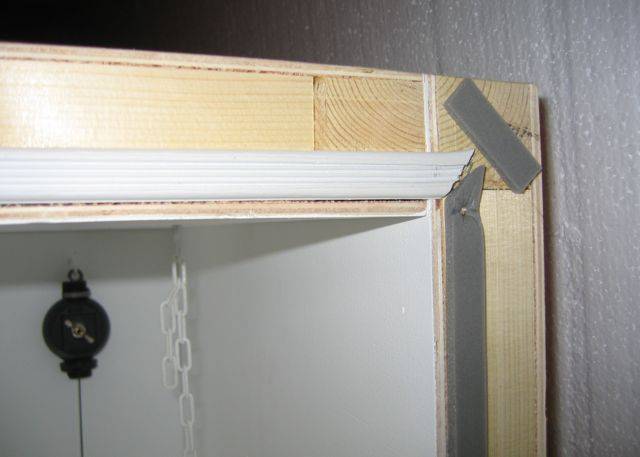
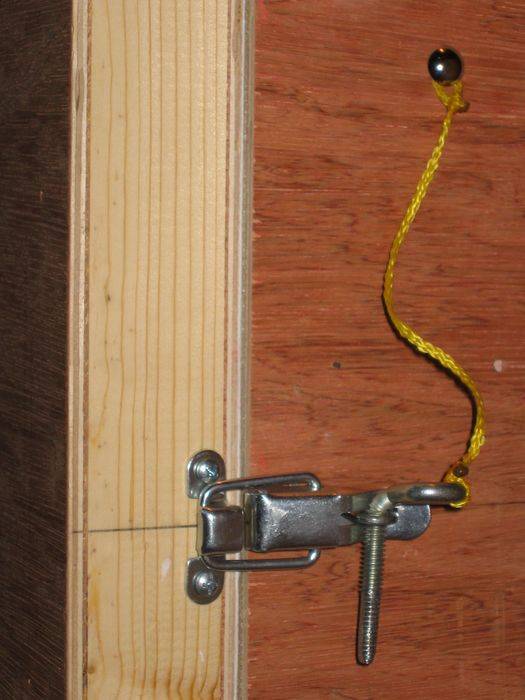
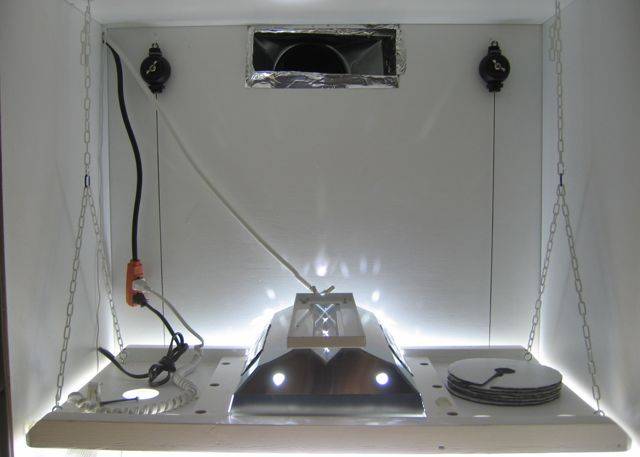
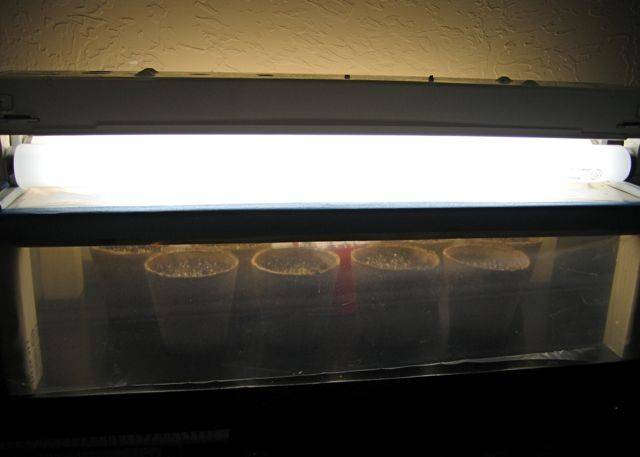
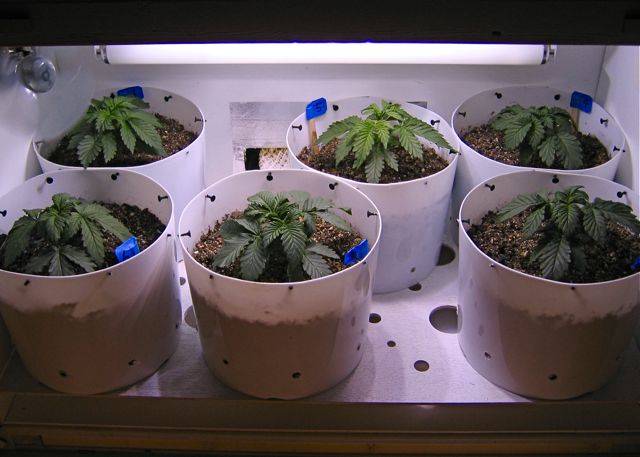
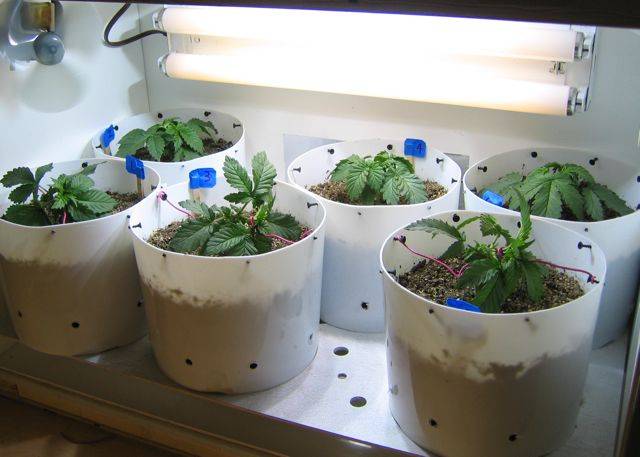
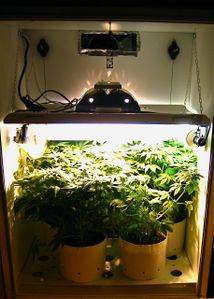
Here is a preview of the box, I have more pics to follow.

 
Last edited:

Dr Dog

Sharks have a week dedicated to me
Veteran
OK, your first issue is you need two posts to post pictures

Secondly, what are your plans in teh attic, you cant come on here and talk about something, then not tell us about it

size light? strains? medium? what are you plans dude?

And welcome to icmag
 
Size and Placement decisions

Size and Placement decisions

First, thanks Dr. Dog for the info and kick in the ass. Here goes.

Placement
I have several places within my home where I could have made a growbox/closet, but I eventually chose the attic. This area seemed to have the least chance of accidental discovery, but it is still easily accessible.

Attic advantages:
It's out of the way. Even the nosiest of houseguest doesn't snoop around in your attic. There is easy access to outside venting, electrical boxes, and even a drain for flushing. The living area stays isolated from odors, light leaks, noise, etc. The attic provides natural camo for the box. Wood, insulation, electrical wires, and ductwork look right at home in an attic. Throw in some old boxes, some stored-away Christmas decorations, etc, and nothing looks awry.

Attic disadvantages:
Temperature. Temperature. Temperature. My attic temps range from about 10 - 130 degrees F. Just in the last two weeks, I have recorded temps from 32 to 95 degrees F. During these intense swings, the inside temp of the growbox has stayed between 68 and 80 degrees F. Insulation and ventilation are the key.

Size
For the sake of simplicity, cost, and stealthiness, I purposely limited myself to a relatively small size. I wanted an area that could be well lit with a 250 Watt HPS and hold two or three plants. Again for simplicity, there is no separate mother/clone areas. I will be growing from seeds for awhile "Just big enough, Just big enough, Just big enough.." was my mantra during planning...

I have a reason behind every decision I made. That doesn't mean I made the right decisions though. Remember, I'm a N00B. Give me feedback, I'm a glutton for flaming.
 
Construction Overview

Construction Overview

Cabinet Construction
Insulating Stress Panels composed of 1.5" Polystyrene insulation board surrounded by a frame of 1.5" x 1.5" Fir. Everything skinned on both sides with 1/4" luan plywood. Strong, relatively light, very well insulated. Panels are joined to one another with 3" wood screws. Panels can be disassembled quickly and easily.
Interior dimensions - 31" Wide x 17" Deep x 45" Tall

Ventilation
Active Exhaust to roof vent. 6" rigid ducting with 424 CFM inline fan on diy speed control rheostat. Passive intake using 6" flexible insulated ducting. All air brought in from a heated and air-conditioned room, thus box is effectively heated and air-conditioned also.

Main Lighting
250 Watt HPS with remote ballast (outside of box) 250W Metal Halide conversion bulb used for veg.

Side Lighting
40 Watt total 24" T12 fixture. This probably does very little, I can place it in/under canopy, also provides different spectrum than main light.

Other Details
Moveable Hood/Divider. - Effectively separates bulb heat from plant area. Bulb also shielded from plants by double strength glass. Holes drilled in divider to direct air flow.

Air circulation - 9" oscillating fan (may have to eventually be moved to underneath canopy as plants grow toward max height)

Temp/Humidity Meter

Vegetative Pots - approximately 1.5 gallons. Cut down from paint buckets. Screws around outside lip are for eventual LST.

Drain - (can't really see it from pics) Pots are over a drainage tray that is plumbed into air-conditioner condenser drain. I can overwater and flush without moving plants from cab.

I regret not taking pictures during actual construction, but I was in a building frenzy.

Here is the closed cab (door is fully removable). I always keep plywood scraps, etc. in front of cab for more camo.


Here is open with the pots moved out. Can't see much with all the lights blowing the picture out.


Back of Cab. You can't see this side from the attic entry/storage area. Just put it up to show you the venting. Slim vertical ducting in middle is unrelated to cab (water heater vent)


This gives you a better idea of the inside. It's painted flat white all around. Hood is adjusted with chains, side lighting is on light yo yo's. Veg pots with screws can be seen.
 
Last edited:
G

Guest

seems interesting watch out on those low temps. running all the lights now you wont get too low but when you swap to 12/12 watch out.

cool setup, will be following!
 
More Pics

More Pics

Here is a close-up of the cabinet corner. You can see the thickness of the wall panels as well as weatherstripping. Door is lightproof and very nearly airtight.


Close-up of cabinet latches and pins. There are four total. Can also be padlocked shut if necessary.


Here you can see more of the hood and exhaust vent.
 
Last edited:

Doug_Marsh

Member
Looking good Headless Hornet I too am using a 250 and you can really get some buds of them. I'm 3 days till harvest and pretty sure I'm going to pull over 3 z's and its my first grow as well, but the second ones a'waitin. You seem to have everything in order nice stealthy space attics are always good lots of nooks and places to vent. A 424 seems a little big for a 250 and some t-5s but over kill is always better than heat problems and with a controler I'm sure your plants will be loving the weather. I'm using a 265 and its colling a 250 and 110w of t-5 as well and my temps stay at a steady 76. I like your reflector as well it looks as if it keeps the light right on the plants. What strains are you running? What nutes do you plan to use? Cheers :joint:
 
Last edited:
Soil

Soil

Thanks to everyone for viewing this thread.

Since the number one rule of growing is "tell no one" it's nice to have a place to show off your work relatively safely.

I'll try to give some more specs on my grow:

Soil:

I used a custom mix with a local nursery's organic potting soil as the base.

I added several amendments (I tried to sort-of average all the soil mix recipes I found online - erring on going with too little of an additive than too much)

Organic Potting Soil
Worm Castings
Peat Moss
Perlite
Vermiculite
Blood Meal
Bone Meal
Dolomite Lime
Epsom Salts
Liquid Kelp Fertilizer

I mixed it all up in a rubbermaid tub, moistened it, and let it sit for about 3 weeks. I mixed it about every other day.

My biggest problem is PH though. For whatever reason, (I think the local potting soil is alkaline) I originally tested my mix at a PH of about 8. Waaay to high.
Over the course of the last two weeks, I added more peat moss, some sawdust, vinegar, and lemon juice to it. I only got the PH down to 7 or 7.5, but by that time it was time to plant. I should have got the PH under control before planting, but beginners make mistakes. I hoping this mistake doesn't turn out to be fatal for my first crop of girls.

My current PH issues
 
Seeds

Seeds

Seeds:

I chose Northern Lights #5 for my first grow. NL is supposed to be about the easiest to grow, it has a very low odor, and is a short compact plant.

I ordered the seeds from HGS. (I don't necessarily recommend HGS, but they worked for me this time).

Before receiving my HGS order, I also ordered some Joey Weed NL x C99 beans from HD. I wanted to hedge my bets in case HGS didn't arrive.

Long story short, HGS arrived first (HD about a week later...I will use those for my second grow). I started germination on February 19th.

Germination:
Standard paper towel method, germinated 9 seeds, all of them cracked. 100% germ!


Seedlings:
I planted the seeds in peat pots (I won't use peat pots again...I've heard too many negative things.)
I let them sprout in a mini homemade greenhouse and a 24" T12 fixture with one WW and one CW bulb.


All nine sprouted, I chose my favorite six to be moved into the cab right under the 250W (i started with the light way up, and gradually moved it down) I used my original sprouting light as a side-light in the cabinet.


FreezerBoy

Was blind but now IC Puckbunny in Training
Veteran
Never thought I'd want to see a hornet's nest in an attic. This should be fun. I'll be interesed to see how it handles summer heat. Its a pleasure to see a newb thread by someone who's done their groundwork. So often you'll see someone with 2 posts under the name of GanjaGenius asking how to make water.

Not that I have a better solution but, the waterlogged foam strikes me as a breeding ground for fungus and mold.

Soil and hydro have different rules but, in hydro, vinegar, lemon juice etc, is only good for a few hours and you're back where you started from. Phosphoric acid (aka pH Down) is a more lasting solution. Just a few drops per gallon.

Welcome aboard :wave:
 
Thanks to all for checking out my grow!

Freezerboy, special thanks to you for the kind words. I take pride in figuring things out myself. It's easy to research a subject you are OBSESSED about. BTW, I like what's going on in your freezer too.

Good Hornet's Nest reference. It's now officially the new name for the cab.

Here is a pic of my revised humidifier.

I plug up my drainage tray. Fill it with two gallons of clean water. Place a humidifier wick in the tray, extend the wick over my intake. Has brought the humidity up about 20 points now. I still have to fill up the reservoir every other day. I'm keeping everything CLEAN and keeping an eye out for any mold, mildew, etc.

The price you pay for all my ventilation is low humidity.
 
When you go 12/12 let the clock help. Run your 12 on when it's coolest, probably nightime. When it's already 130 degrees in the attic during the day, lights out.
(Doh. Nothing like stating the obvious)
 
Last edited:
humidity

humidity

JDK said:
Your setup looks very nice. Clean well efficient.

About the humidity have you considered a small humidifier? They are cheap, easy to use and you wouldn't have to think about mold. I just did a quick check on amazon:
http://www.amazon.com/s/ref=nb_ss_k...lias=garden&field-keywords=Humidifier&x=0&y=0

JDK, thanks for the feedback.

I haven't gone with a portable humidifier for these reasons:

1. I have to use a lot of ventilation to keep my cabinet heated and cooled. Although I currently have my fan control set to the lowest setting, I'm still probably changing the air in my Hornet's Nest at least 5 times a minute.
Almost any humidity I add within the box will be sucked out immediately.(I think for anything to work, it would have to be inline with the intake)

2. I don't really have space within the cab for a regular humidifier anyway.(not an inconsequential problem)

3. I could put a portable humidifier within the room in my house that I suck air from...and I've though about this...but it would look a bit odd, and that room is also where I keep all my AV and computer equipment...

4. I'm really not concerned about mold and haven't seen any signs of it yet. Mold, mildew, etc. don't typically like light or air flow...things I have plenty of in my cabinet. Regardless, I'm keeping an eye out.

Lately my RH has been about 40%. (up from 15 - 20%) I don't forsee that level being a problem...but you never know. I definitely appreciate the suggestion. It's all fairly experimental now.

Please keep me on my toes!
 
Day 23 from seed: LST and FIM

Day 23 from seed: LST and FIM

LST and FIM
Day 23 from seed

I've been researching LST and FIM...I will probably end up doing both on every plant. Today I gave it my first shot. I LSTed the 3 tallest, and I FIMed the shorter girls (or boys...or god forbid hermies). I'm anxious to see how much this stresses my plants or affects growth. I'm not sure I like the wire I'm using to LST either. I may give the "metal hook into the soil" method a try later. I'm a growing virgin, so I want to experiment...but cautiously.

Thanks for stopping by!

Before LST:


After LST:


Before FIM:


After FIM:


Before Both:


After Both:
 
Y

YwouldntI

nice nest hornet.clean setup,your gonna like the results you get in there.ur plants look healthy no doubt.peace
 

FreezerBoy

Was blind but now IC Puckbunny in Training
Veteran
Headless Hornet said:

That's a pretty picture. Normally I'd avoid placing objects in the center and strive for some sense of assymetricality, positive and negative space, all that jazz but ... that's just a pretty picture
 

Latest posts

Latest posts

Top