What's new

400W CMH Coco Hut

hurricane

Member
Hello everyone, just got activated on the forums and thought I would share my current plans, and hope to get some pointers. I have grown before, have 4 previous harvests from an 800W setup in side by side C24 Cab to draw experience from. Was coco hand watered once a day in a drain to waste. 6 Plants per 400W. Average yields was prob 10-14oz total, so i've definatly got room to better my abilities.

Moving and other things got me out of growing, but I’m getting back into the game and using some of my old stuff, and some new stuff that I purchased. The $$ numbers are just approximate of what I think that stuff cost me, either now or when I originally bought it.

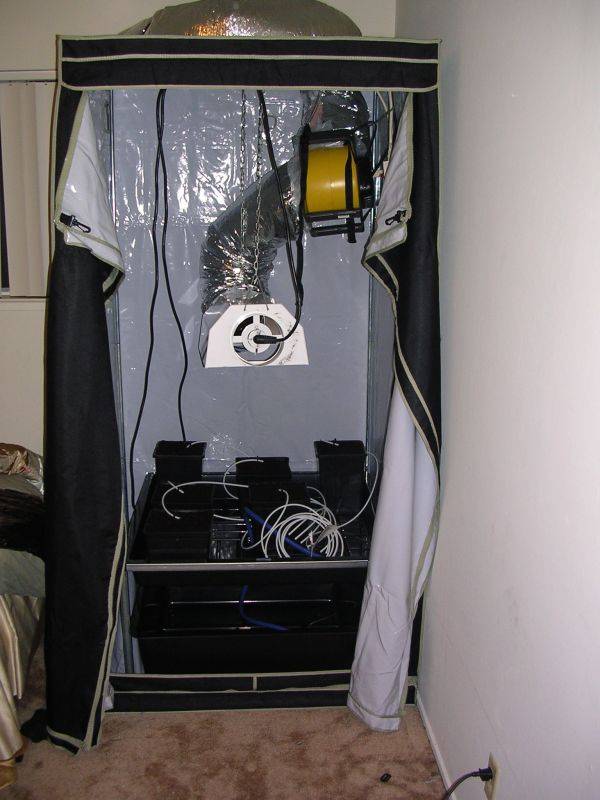
This time arround i picked up a HydroHut mini to hold everything(disasembling the C24's when i moved was a royal pain! ended up throwing them out) Hoping the square footprint will help with my yields, although my old 400W ballast might be a little small for the 39"x39" footprint(37W per SF i think)

So here goes the parts list:
Room: $200
39"x39" HydroHut Mini*

Lighting: $220
400W XtraSun HPS Ballast (ANSI S51)*
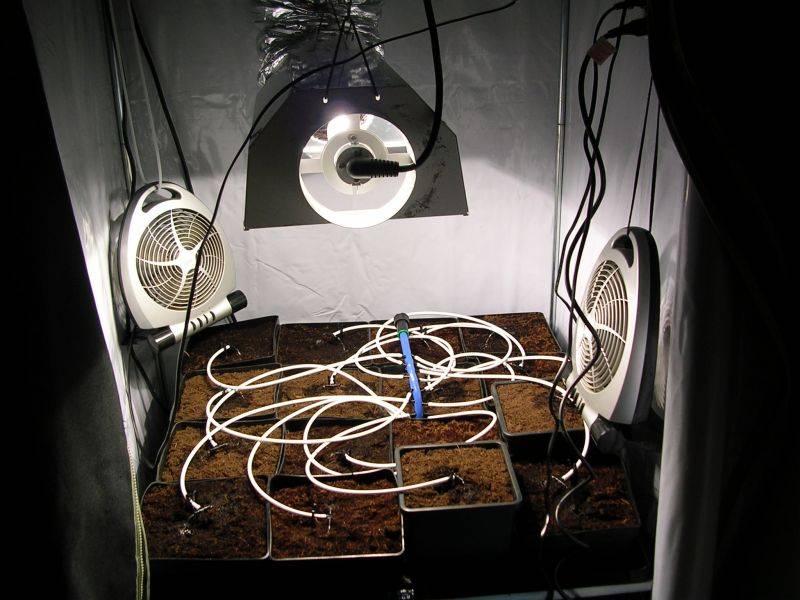
Daystar AC 6” Reflector*
Phillips CMH 400W Lamp*

Ventilation: $300
6” Elicent AXC 150A 247CFM@2500RPM 80W Inline*
Stanley 225CFM Blower*
25’ 6” Ducting

Electrical: $50
2xDigital Electrical Timer(need 1 +battery for other)
Heavy Duty Extension Cord*
Heavy Duty Surge Protector

Planting: $180
Flood Tray Stand*
3x3 Flood Tray*
Drain Fittings*
9x9” Square Pots*(need 2 more)

Reservoir: $100
30 gallon Reservoir*
270gph MagDrive Pump w/ceramic shaft*
In-line particle filter
Filter bag for pump
Air Pump(size?)
9’ Flexi air-bubble hose

Drip Feed $20
30’ 6mm Black Drip Tubing
9xNipple Connectors
Silicon Sealant
3x5Gallon Water Jugs for getting RO

Nutrients: $100
PBP Soil Formula Grow
PBP Soil Formula Bloom*
Cal Mag+ *
Root Stimulator

Meters: $50
HM TDS3 Tester*
Hannah PH1 Digital PH Tester*
7.01 ph storage buffer*
4.01 ph calibration solution

Misc: $10
Duct Tape or Metal Tape
Chain to hang reflector*

Silencer: $40
8” Solid Duct
4’ Hardware Cloth
8” to 6” Reducer*
8” Endcap
Fill Material

Anything with a * is stuff I already have. Everything else still needs to be aquired.

Build Out:
Daystar AC Reflector > Stanley Blower > 6” to 4” Reducer > Top Exuast > Homemade Silencer

Going to use the Stanley blower as main fan if at all possible. Much quieter than the Elicent. Moves a similar amount of air, but doesn’t have the real sucking power that the elicent has.
Not tested yet but expect local water to be fairly heavy. Expecting a 3/1 mix of RO and tap water in 20 gallon res.
Would like to use Canna Coco nutrients. But cant find them or any other coco specific nutes locally. Anyone know of a hydro store in san Francisco/bay area that sells canna nutes?
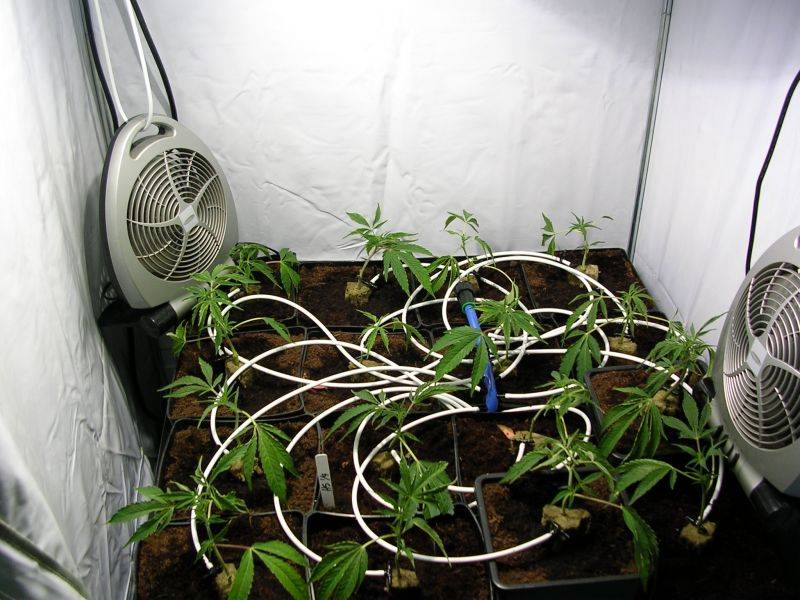
I expect to have the pumps feeding the plants 3-4 times a day, runoff of 15-20% going back into the reservoir. Expecting to need to at least check the TDS/PH on a daily basis.
I left out the carbon scrubber, last grow was small enough I didn’t need one. Will build one based on the same principle as the old one from overgrow if necessary.
The ballast is my old 400W HPS. Hopefully it will fire up the CMH real nice, find out in a couple days when the bulb arrives. Otherwise I have an old 400W Hortilux EYE than I can use for no more than a week or two to find a new bulb. Running through my old DayStar AC hood. I’m having problems locating the glass window for it, but some people encourage not using the glass so I might try it without.
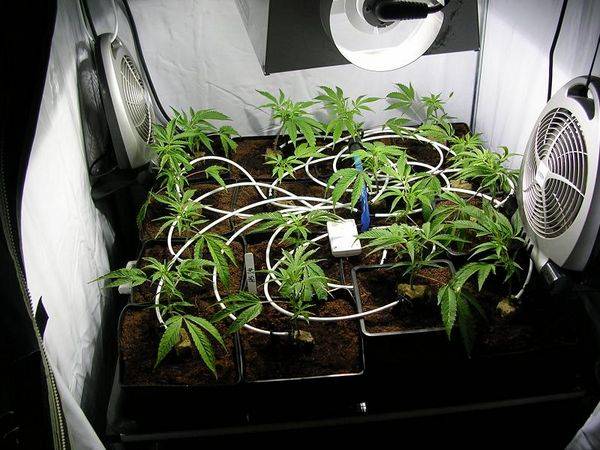
Clones will come from a medical club this first round. Next round I should have a mother (WRxWW seed from Nirvana) under some sort of fluorescent to provide clones that are all the same and strong.

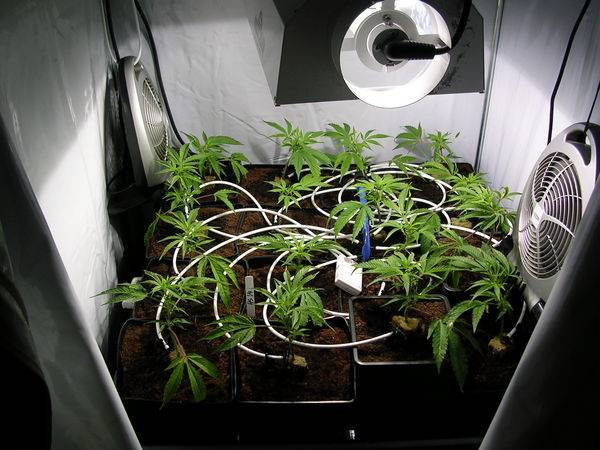
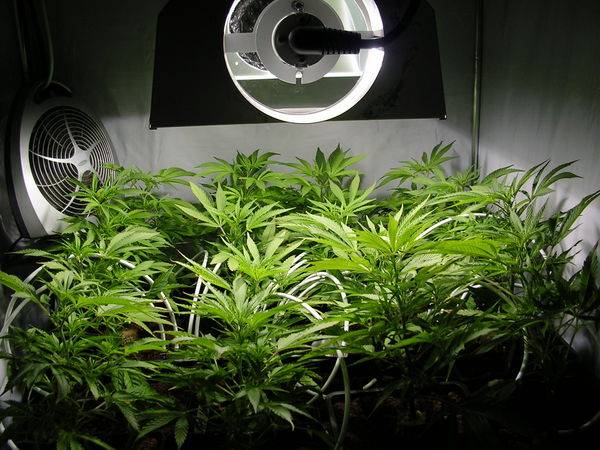
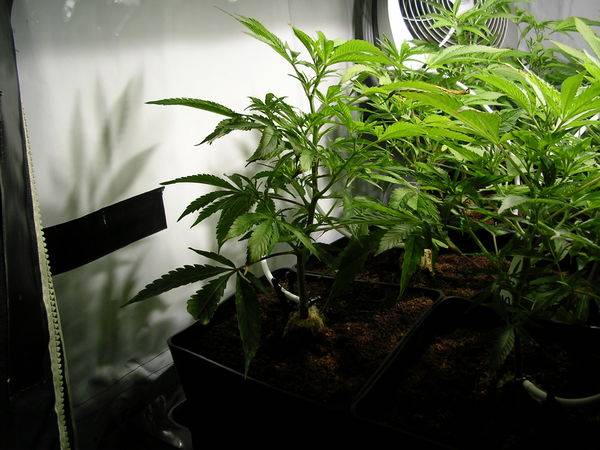
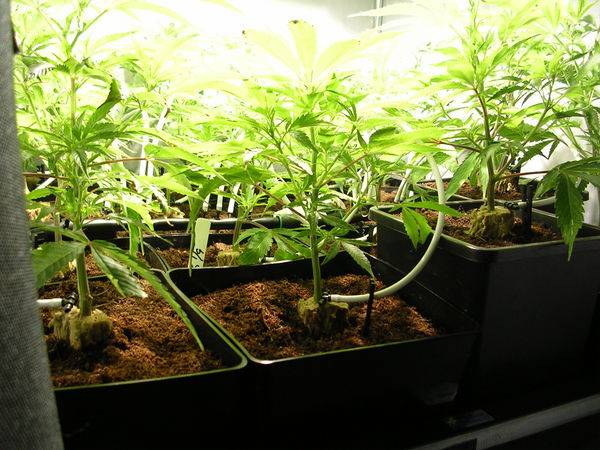
Is there anything I’m missing here? Things overlooked, or just forgotten in my break? Theres probably details related to getting the clones to quickly root into the coco, or something that i'm missing. I'm throwing in a few pictures of my old harvest(see P.S.) to see what I hope for again. Feel free to check out my gallery I put the only flowering pics i have, from a run of bluedot and romulan, also the glass collection got a few pictures :)

Hoping to get it all together friday/saturday, and pickup clones saturday afternoon. Help me get it right this time :)

Hurricane

P.S. How do you add pictures to your post? When i click the image in the gallery and preview it says:
Your Post contains one or more URLs, please remove them before submitting your message again.
 

SilverSurfer_OG

Living Organic Soil...
ICMag Donor
Veteran
I recently got the same 400w CMH bulb.

Plants look real nice underneath and are growing well.

Not sure about pointers with hydro... just keep em green!

:smoweed:

ps. Not a clue bout yer pics...
 

boroboro

Member
I just ordered one of those bulbs. In my anonymous zeal, though, I've already thrown out all the paperwork. I just searched around for the bulb part #, though: CDM400/V/O/.... I forget the rest.

Ended up buying it for about $45 total, no shipping. I think the company is out of Florida...
 

hurricane

Member
Hey All,

I also bought my bulb from simba's link. Arrived in a nice plain brown box with a tracking number emailed to be, all in all the service i would expect.

As for the grow room, its going slower than originally planned but i got it all built at least. Bulb fires, ventilation works nice.

I have a worry about the coco though. From an old grow i still had a full 50L bag of CoCo. I dont know the brand anymore, time has worn away the labeling, but i can still see it reads GHBB certified fully organic, and says 50% coco fiber 50% coco peat. The bag is mostly white maybee someone else knows what it is exactly. The hydro shop i got this from no longer has this coco though, they had some sort of premix with dolomite lime, worm castings, perlite, and likely some other stuff. In order to not confuse my plants too much i instead bought 2 large bricks of coco that the guy said would each rehydrate into about the same ammount of coco as a 50L bag. These bricks are labeled as Coco-BioBlock's, at the top it says "Bio Juice(tm)" i believe thats the brand.

Basically, my question is is it okay to mix the coir? Right now i have 6 2G pots filled with the old(but never used) coir and 10 more 2G pots to fill. I might be able to stretch the 2 blocks to fill all 16, or i could mix all the coco together to get an even mix, or i could just leave 6 plants in once kind of coco and 10 in the other. Any opinions?

Heres the pic of construction so far


Hurricane
 
Last edited:

hurricane

Member
In regards to the last post, i decided to just go with 10 pots of the blocked coco, and 6 pots of my old bagged coco. I dont remember which is which now though so wont be able to tell if the plants care.

Got my TDS/Ph meters in the mail today, horrah. Also got a batch of 16 Hindu Kush x Skunk #1 to run for this run. Ran about 6 21L Jugs of water through the system, return TDS is down to 95 which should be acceptable. Probably could have got by with less water, but the first 4 jugs i flushed with the recirc hooked up, instead of drain to waste. Return was about 300 at the begining of that flush, 200 twords the end. Another flush with 42L straight to waste got me down to 95.

Hopefully i dont burn these babies. I worrry most when planting clones because batches of the guys aint cheap. Currently i just have them still in their big blocks(the shop i went to sells 6 clones in a single 4" Grodan block) in a plain black tray just outside my hydrohut(about 4 to 4.5 feet from the lamp) Tomorrow morning i'll move them to 3' from the lamp and feed them a little RO mixed with liquid kharma @ 15ml/gal (highest suggested dose is with clones, i believe its a stress reliever of sorts). If they still seem happy after 4-6 hours there i'll plant them in their final 2gallon coco pots, which are the same 3' from the lamp

Should i do a final flush with liquid kharma in the res to get some into the coco, should i also have 1/4str nutes in there w/ the kharma when i do? And last question, even though my TDS reading is down to 95ppm, the water comes out with a brown/tan color to it. Should i continue flushing untill the water runs clean, or is that normal and my res will always be sorta tan?

Heres a pic of the flush in progress. The bulb probably didn't need to be burning, but i wanted to give it a good 48hrs burn in before i got the plants in there.


Hurricane
 
Last edited:

hurricane

Member
Plants looked good after time under the CMH. Not amazing exactly but i think i'm at least through the light shock phase. Fed them RO + 15ml/gal liquid kharma this morning. Tonight i rewetted the cubes with RO + 15ml/gal LK + 3ml/gal CalMag. Planted them in the coco, and then rewet the cubes and surrounding area with the same solution. TDS came out to 450. Ph going in was 5.7-5.8.

Here they are just after planting

Hurricane
 
Last edited:

hurricane

Member
Hello again. Was going to add in some pictures but it seems that was disabled during the downtime. Have the lights running 20/4, watering every 6 hours starting 15min before lights on. Hopefully i will only have to go 7d on 20/4, and then can get on into 12/12. Having 16 clones in a SOG(3'x3') tray i cant let them get very big. I do hope the CMH does as suggested and keeps the nodes nice and tight to also help my SOG stay managable.

Screwed up a little bit today, but all should be fine. Was reading the botanicare site for pbp and looking at their ppm suggestions:

500ppm seedlings
900ppm mid-size
1500ppm flowering

So, seeing as how my guys were on EC 0.9(450ppm) and it was almost no nutrients(LK is .1-.1-.5). Added a bit of my pbp soil bloom to push it up to just under EC 1.8(900). 2 feedings later almost all the plants were starting to curl just a little bit. Added RO water to bring the mix back down to <500 and hoping all will be well. I think i'm going to leave them at this until later. Also encouraging me to keep lower is that i've since found the conversion factor for my HM tds3 meter which is .5 This gives me an EC->TDS of:

EC TDS EC TDS
0.1 50 . 1.1 550
0.2 100 1.2 600
0.3 150 1.3 650
0.4 200 1.4 700
0.5 250 1.5 750
0.6 300 1.6 800
0.7 350 1.7 850
0.8 400 1.8 900
0.9 450 1.9 950
1.0 500 2.0 1000

Now, i remember reading many people saying new plants can handly 1.0, maybee 1.2, and full flower is 1.6 or so. Based on that my upping nutes to almost 900ppm(ec 1.8) was very bad, but a mistake i wont make again. I will also ignore the ppm suggestions from botanicare :) In the future i'm going to try and reference just the EC, and leave out the tds which isn't the same conversion for everyone.


In regards to pH i keep setting it lower, to 5.8, and it will slowly go up till it gets to 6.2. This is also the pH it was at when i made mix, before adding any acid. I'm not too woried about this though as i more reading suggests anything up to 6.5 is ok in coco, as long as the pH isn't there forever its creeping up to it.

Hurricane
 
Last edited:

cabanetforester

Active member
hello hurricane

hello hurricane

I haven't grown in coco yet. I have done a few grows with the Botanicare stuff though it's been DWC.

I use 5mill/gal of the LK most times. 10mill/gal of the PBPB. This is using tap water @ 130ppm 7.5 ph for dwc though.

Silica blast,cal mag,sweet,LK and PBPG are all 5mill/gal if any at all for a feeding depending on what I see and what I can get away with.

I need to do better with my NPK ratios though. Something like the lucas equivalent I've read here maybe.

Lowering the ferts was a good move as they look a little soft, but most time they do with my transplants anyway. Whats the humidity in there?

Also it's possible to get over fert lock out without the plants showing much sign of nute burn, even if your PH has been in line.

So I guess thats better than over fert killing them, however it can go un noticed easier IME. First sign of dropping ph means time for a flush with some leaching sloution then start back easy and get them pumping again.

Botanicare has always given me great natural tasting meds from my DWC. I hear the coco can taste even better, nice choice youll be happy im sure. CF

-Also the Botanicare stuff has buffers that will help your ph stabilize. At lower concentrations like you have now though the ph will run a little high. Can always use ph down in moderation but I prefer to let the food do most of the PH work which it will as you add more as the plant needs it.
 
Last edited:

Murphy

Member
Nice looking set up, I'm about 80% done my build with 400 watt CMH in a cabinet. I just put DJ Shorts Grape Krush in some bubblers under the light a week ago.
 

hurricane

Member
Greetings again, and thanks for stopping by!

@Murphy
Thanks for the kind words. Hope we both can break free the bonds of herb purchases:) Love your strain choice by the way, I've smoked DJ Shorts Blue Moonshine before and i will say its one of my favorite smokes. DJ Short makes amazing plants and I'm sure you will love that grape krush.

@cabanetforester
Great suggestions! I've actualy been doing alot of reading today and found another grower Neptune who has grown the same strain i'm growing right now, in coco with pbp. He suggests a nutrient regimine incredibly similar to what you have just mentioned, so i will definatly stick to it.
As to the plants looking limp, i believe that was just the planting. My Humidity sensor at the side of the SOG reads max 59%, min 45%, avg prob 50. My sensor sitting just above the soil reads 67max, 50min, but it probably is picking up moisture evaped out of the soil. I probably also have evap from the res at this point because its not covered, but a friend working for a plastics company is supposed to bring me a sized rez lit with access hatch.
At the point of that picture I had just (30min prior?) planted them. I was feeding them .9EC of just LK and a little calmag. It was after that i upped them to 1.8, and then dropped them back to 0.9. Here is a pix of them roughly 36 hours after i fixed the res. the closeup plant pix are about 48 hours later. I specifically took closeups of the purple stems because i'm not sure if thats healthy for this strain or not.


BTW, i've decided to start a full grow log, its up at Hindu Skunk Coco SOG

And on to the pics
36 hours after fixing nutes back to 0.9. you can also see where i keep my two temperature sensors. One on the left laying face up on the edge of the 3x3 tray, measuring the air temp coming up from the bottom(where the intake is), the second sitting soil level in the middle face down.
36660veg_day_3.jpg

48 hours after fixing nutes. Probably not much different, but i was taking the closeup shots, also includes the 4hr dark period, so technically this is day 4 and previous pic is day 3.
36660DSCN2888.JPG


Upclose on my two plants front left. I will continue taking pictures of these two daily for a little bit just to compare day-to-day growth easily.
36660DSCN2885.JPG

36660DSCN2883.JPG


And here is just one example that is particularly purple stemed. Is this healthy?
36660DSCN2887.JPG

Hurricane
 
Last edited:

TC84

Member
Nice............Plants look healthy...........The purple stems could be totally natural or a slight Phosphorous deficiency.........I'd just leave them be and keep up with your feedings
 

green_tea

Member
how do you like the ballast and that hood?

how air tight was the hood when you purchased it?

does it adequately throw the light to cover your area? (I plan on covering a 3'x3' area per 400W CMH in the future)
 

hurricane

Member
green_tea said:
how do you like the ballast and that hood?
Ballast works great. Its probably got at least 2 years of continuous use on it. I dont have a light meter but the plants seem to like it. Hood is fairly nice, does the job its supposed to do. I sometimes wonder if i could get a more effective coverage of 3x3, as my plants at the edges seem to be leaning in. In terms of the visible light footprint though, i move my light up when i the leaves visible rise above the light footprint. I'm hitting just above my edge plants at about 15", and about 12" from the 4 plants in the center, so not that bad overall. I've been raising the hood every cpl days based simply on the where the shade from the fan leaves falls on the side of the hut.

green_tea said:
how air tight was the hood when you purchased it?
When i originally purchased the hood, is was not air tight. When I originally had the hood i had to add 1/4" weather stripping to the end of the glass, and duct tape where the hangers were. All in all not sealed up to start with, but with a few minutes duct tape work was fine. With my current grow I'm not using the glass, so its not sealed. Even without the glass if I'm smoking a joint and blow the smoke into the opposite end of the hood, any air going into the hood area ends up sucked up by the fan. Keep in mind the new models have the light cord exiting the top through a gasket, and the glass attaches differently, so basically i have an old school hood :) They have new models since this 3yr old piece.

green_tea said:
does it adequately throw the light to cover your area? (I plan on covering a 3'x3' area per 400W CMH in the future)
Well, all in all i'd give my current hood, the DayStar AC 6"(original, the new models have a better air seal) a rating of 8 out of 10. I've used batwings before and see the difference between the bat wing and the DayStar AC. I have the 4 center plants roughly 12" from the light, the 12 edge plants are roughly 15" from the light, and i chose the 4 centers as my smallest plants. My only complaint about this hood is i'm sure the fan leaves on the outside of the hut are getting less light, but its good to remember the hut is 39"x39" giving only 38 W/sq ft. In general 12-15" is not bad at all and thats why i give this hood a good rating.

And heres a few updates on the crowd, this is flowering day 7 of the whole hut. I took a few pictures from different distances, but i think this one shows how the light is really bright in the center, bright to the main parts of the outer plants, but not the most outer leaves. Also putting a second shot of essentially the same thing, Its interesting how the color of the light is different from my camera, sometimes more yellow-white, sometimes more blue-white. I usually post the blue-white because thats how it looks to me in person.
36660DSCN2948.JPG

36660ADSCN2950.JPG


Heres the 2 plants i was keeping track of, they've put on quite a few branches.
36660DSCN2951.JPG

36660DSCN2954.JPG


Also my friend came through with the reservoir lid. Its funny i told him it just needed to be dark and not let light through, to a certain size. The lid he brought me is made of the exact same plastic as the reservoir just twice as thick :)

Hurricane
 
Last edited:

hurricane

Member
Back again for flowering day 16. The ladies have grown well, about 16-20" each in total height. Yesterday i took them all out of the hut and trimmed the bottom 1/4 - 1/3 to reduce popcorn. I also took the opportunity to place the smallest ladies in the center and the largest on the corners. Before i was seeing bulb<->top distances of 11-14", now I'm seeing 13"-14". Unfortunately the hood cannot get any closer than that without sacrificing light to the edges. A 600W might be prudent, but I will likely wait till the coming winter as summer will be hot and a low heat 400 will be required.

They are feeding PBPSB @9-10ml/gal and CalMag+ @3ml/gal for a final EC of 0.85-0.1. The water in the 2G pots has been lasting 4-5 days till it gets light, i just turn on the feeding pump by hand when i can tell they are ready. Now i will have the timer running the feeds every other day for 6 minutes, starting 15min before lights on. Intended to start a few days ago but forgot to set the timer to auto after programming it. Its properly set now.

Heres the day 16 pics, this one is the standard front view I've been shooting
36660Overview.jpg

Here is a corner picture. I kinda like the angle this gives vs. the front I've been doing.
36660DSCN3047.JPG

And this is the lady that ended up in the front corner, a nice specimen.
36660Plant11.jpg


After shooting these pics i thought the light seemed a little short, and lifted it a notch. Right now i've got the temps at 74 just below the canopy. It tends to hang a little lower than that, arround 70. Another side note, it seems during the night when the cab is running i get condensation on any part of my window that contacts cold outside air(part is open to allow the room the cool). Is there any easy solution to this possible security issue, perhaps RainX on the window? Or should i just find a dehumi, and if so how big.


Hurricane
 
Last edited:

Wickkk

Active member
Hi man !! Very nice and good job !
I am going to also execute coco-drip !! Very with me i like !
Thanks ! Bye bye
 

Kenny Lingus

Active member
I hold my input and just congratu;ate you!

Stick to EC 1,6 as anticipated peak level and up it if needed. Some skunks can use up to 2,2 in coco but most my strains like it between 1,2-1,8 peak level. (I start at 0,5 sor first rooting, then 0,7 and later 0,9. Then I flower from 0,9-peak point....)
 

Latest posts

Latest posts

Top