Blue_adept
Active member
Like many of you here i tend to over-engineer things. This is the first of several posts with DIY themes. Hope you enjoy.
I like to use galvanized flat stock from the HVAC section of my local big box hardware store. They come in various sizes and are a nice thickness to work with. You will need a few scraps of plywood/OSB/2x material as you bending form, a large enough piece of sheet steel to make you light traps, and a sharp pair of tin snips.
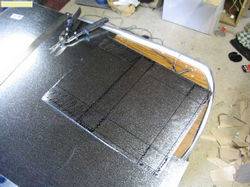
Here is the basic layout for a 6x8x2 light trap, but it can be scaled in any direction for a larger/smaller application.

Once you have cut this:

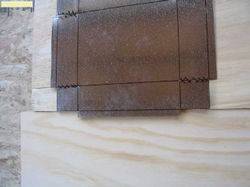
to look like this:

now you are ready to start bending. Score the bends with a utility knife, put you sheet stock between two pieces of board and bend towards you, using a hammer to finish the bend gives a nice smooth line
I prefer to start with the smallest pieces first and work in a linear direction:


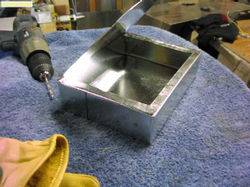
Once you have all the bends made, you can drill 1/8 in holes and use rivets to pin it together. I attach the 2x2 squares around their respective sides first to create the basic box shape.

Then mark opposing sides to be cut. On one side cut the top right, on the other it will be the bottom left.


Take one of the offcuts i told you to save earlier and bend it along the line already marked on it.


You can now paint the inside of your box and the divider piece.

Once the paint has dried you can rivet the divider into the box with it aligned against one side and running parallel between your two cutouts:

apply some weatherstripping along the edges of the divider to keep any of that sneaky light out.
Now you can fold down the last piece and rivet in place. Apply enoough rivets to ensure there are no large gaps anywhere:

At this point i give the inside a little respray through the holes to make sure any scratches i made during assembly are covered. then i tape around all the seams, and there she be!.

These can be attached with screws/rivets/tape/whatever and flow a fair amount of air with no noise.
BlueAdept
I like to use galvanized flat stock from the HVAC section of my local big box hardware store. They come in various sizes and are a nice thickness to work with. You will need a few scraps of plywood/OSB/2x material as you bending form, a large enough piece of sheet steel to make you light traps, and a sharp pair of tin snips.
Here is the basic layout for a 6x8x2 light trap, but it can be scaled in any direction for a larger/smaller application.

Once you have cut this:

to look like this:

now you are ready to start bending. Score the bends with a utility knife, put you sheet stock between two pieces of board and bend towards you, using a hammer to finish the bend gives a nice smooth line
I prefer to start with the smallest pieces first and work in a linear direction:


Once you have all the bends made, you can drill 1/8 in holes and use rivets to pin it together. I attach the 2x2 squares around their respective sides first to create the basic box shape.

Then mark opposing sides to be cut. On one side cut the top right, on the other it will be the bottom left.


Take one of the offcuts i told you to save earlier and bend it along the line already marked on it.


You can now paint the inside of your box and the divider piece.

Once the paint has dried you can rivet the divider into the box with it aligned against one side and running parallel between your two cutouts:

apply some weatherstripping along the edges of the divider to keep any of that sneaky light out.
Now you can fold down the last piece and rivet in place. Apply enoough rivets to ensure there are no large gaps anywhere:

At this point i give the inside a little respray through the holes to make sure any scratches i made during assembly are covered. then i tape around all the seams, and there she be!.

These can be attached with screws/rivets/tape/whatever and flow a fair amount of air with no noise.
BlueAdept


