BonsaiGrower
Occasional User
Well folks as the title says, this is my DIY drying trunk. 
I bet alot of you are like me and every harvest hate that you have buds hanging somewhere in your house, stinkin up the place and completely countering everything you did to make your grow stealth....so I started thinkin, since I'm kinda broke lets see what's layin around.
This was built out of left over bits and bites from building my grow cabinets. I'm sure most of you have everything you need to do this same project. If you were to build this from scratch though I bet you could do it for under $100. If you spend more you didn't have a thing of your own and you got ripped off.
Here we go. Keep in mind, this is what and how I built it. Clearly it's an easy design and meant to be just that. EASY. You can use any size cabinet and any design really. Hope this gives you some ideas.
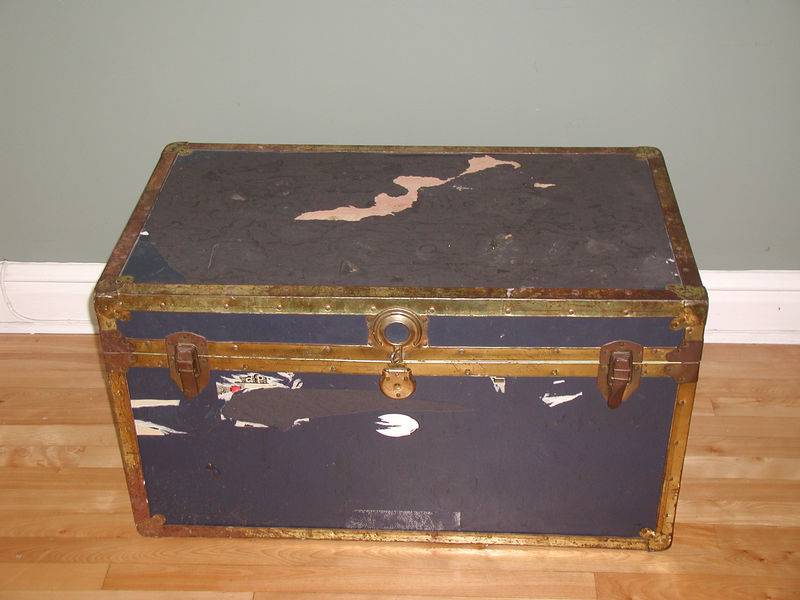
Start with a trunk something like this. This one happens to be cedar lined. I bet you already have one in your basement collecting dust, holding things you'll never use again. Don't forget to remove any old stickers so your new friends at ICMag don't clue in to exactly who you are.


Next build one of these. Use Sugabear's DIY Link here, for detailed instructions. Thanks Sugabear.
http://www.icmag.com/ic/showthread.php?t=48949

Here's the only time you need to think really. You'll need to stop now and think about your layout. Where is the fan going to be installed? Think about where the buds will hang from and where your shelves are going to go. Make sure when you close the lid everything will clear each other. What about the exhaust? Are there any hinges or metal in the way? Keep in mind some trunks have a curved top so you may be installing the fan on the sides or back.
Now get out your drill and dremel and cut some holes. Measure twice although it's not that exact.
I cut a 3/4" hole on each side bottom corner for intake and a small square hole on the back for exhaust.


Next you'll need to install the scrubber and muffler, then seal it all up with some good old fashioned duct tape.


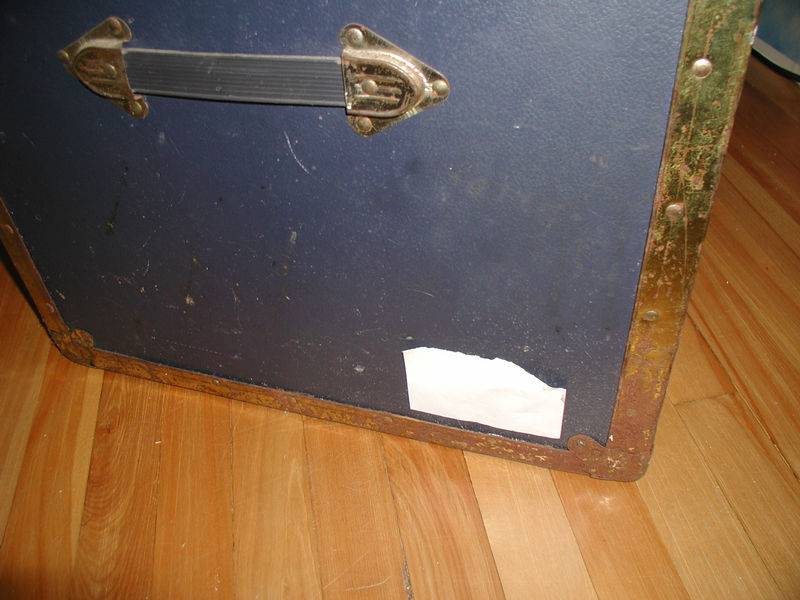
Now plug it in and check your back pressure. What you are looking for is a vortex of air inside but not a whirlwind as you want your bud to dry as slow as possible without getting moldy. With the intake holes being 1/2 the size (in total) of the exhaust you should have proper back pressure. Take a small piece of paper and hold it over the intake. The pressure should just hold the piece of paper against the hole. Like this....

Now you'll need to get out your saw and tape measure. You most likely have some strapping or 1"x2" wood around there somewhere. Plus you'll need some left-over carpenters cloth from when you made your DIY scrubber maybe. I just stapled the cloth to the wood.
Build a couple of these ...

and put them in here.

If you need help building these, please see this link.
http://www.woodcraft.com/family.aspx?FamilyID=5376
Now you'll need to cut a few more pieces of wood and screw them into the trunk. This makes the trunk a bit more solid and gives a place to staple the string to. Get out some string and do some string art. Remember you need to leave space for the scrubber and to get your hand in there at the buds.

In my trunk I have just over 13" of hanging height.


That's it folks. You should be looking at something like this now.

Now, I just built this and have still to test it with a full harvest. (This weekend ) I'll be back to give a report on that. I posted this up in my diary yesterday and so far a few suggestions and concerns have been mold. This is something that can be monitored and a Moisture Meter would be a nice addition. Sugabear suggested adding a plate of rice to the bottom to absorb some moisture and I thought that to be a good idea. How about a silica pack stapled to the lid maybe? It's up to you folks.
If any of you have built something like this I'd like you to add a pic and your experience with it.
If any of you build one using the ideas from this thread I'd like you to add your pic and share your experience with it as well.
Hope you enjoyed folks. It took me very little time and not a dime!
BonsaiGrower.
Thanks ICMag

I bet alot of you are like me and every harvest hate that you have buds hanging somewhere in your house, stinkin up the place and completely countering everything you did to make your grow stealth....so I started thinkin, since I'm kinda broke lets see what's layin around.
This was built out of left over bits and bites from building my grow cabinets. I'm sure most of you have everything you need to do this same project. If you were to build this from scratch though I bet you could do it for under $100. If you spend more you didn't have a thing of your own and you got ripped off.
Here we go. Keep in mind, this is what and how I built it. Clearly it's an easy design and meant to be just that. EASY. You can use any size cabinet and any design really. Hope this gives you some ideas.
Start with a trunk something like this. This one happens to be cedar lined. I bet you already have one in your basement collecting dust, holding things you'll never use again. Don't forget to remove any old stickers so your new friends at ICMag don't clue in to exactly who you are.

Next build one of these. Use Sugabear's DIY Link here, for detailed instructions. Thanks Sugabear.

http://www.icmag.com/ic/showthread.php?t=48949
Here's the only time you need to think really. You'll need to stop now and think about your layout. Where is the fan going to be installed? Think about where the buds will hang from and where your shelves are going to go. Make sure when you close the lid everything will clear each other. What about the exhaust? Are there any hinges or metal in the way? Keep in mind some trunks have a curved top so you may be installing the fan on the sides or back.
Now get out your drill and dremel and cut some holes. Measure twice although it's not that exact.
I cut a 3/4" hole on each side bottom corner for intake and a small square hole on the back for exhaust.
Next you'll need to install the scrubber and muffler, then seal it all up with some good old fashioned duct tape.
Now plug it in and check your back pressure. What you are looking for is a vortex of air inside but not a whirlwind as you want your bud to dry as slow as possible without getting moldy. With the intake holes being 1/2 the size (in total) of the exhaust you should have proper back pressure. Take a small piece of paper and hold it over the intake. The pressure should just hold the piece of paper against the hole. Like this....
Now you'll need to get out your saw and tape measure. You most likely have some strapping or 1"x2" wood around there somewhere. Plus you'll need some left-over carpenters cloth from when you made your DIY scrubber maybe. I just stapled the cloth to the wood.
Build a couple of these ...
and put them in here.
If you need help building these, please see this link.
http://www.woodcraft.com/family.aspx?FamilyID=5376
Now you'll need to cut a few more pieces of wood and screw them into the trunk. This makes the trunk a bit more solid and gives a place to staple the string to. Get out some string and do some string art. Remember you need to leave space for the scrubber and to get your hand in there at the buds.
In my trunk I have just over 13" of hanging height.
That's it folks. You should be looking at something like this now.
Now, I just built this and have still to test it with a full harvest. (This weekend
 ) I'll be back to give a report on that. I posted this up in my diary yesterday and so far a few suggestions and concerns have been mold. This is something that can be monitored and a Moisture Meter would be a nice addition. Sugabear suggested adding a plate of rice to the bottom to absorb some moisture and I thought that to be a good idea. How about a silica pack stapled to the lid maybe? It's up to you folks.
If any of you have built something like this I'd like you to add a pic and your experience with it.
If any of you build one using the ideas from this thread I'd like you to add your pic and share your experience with it as well.
Hope you enjoyed folks. It took me very little time and not a dime!

BonsaiGrower.
Thanks ICMag


 great DIY thread BG.. of course i saw it on ya diary but more details here and links so anyone can make their own... now do i have a cool chest like that? mmm heheh


