Palindrome
King of Schwag
Welcome to the Groffice
I have been working on this idea, for quite some time now.
As after I got back to growing, I quickly realised that I was short of space. As well a needed more to fill out my time, so what better to do then expand the grow?!?
I love building, growing and experimenting.
And even tho I live in a house, IMO big for only two people.
The misses and I are not always on even terms, on what good use of a spare room's could be.
But being the man of the house, I always get the final word .... 'Yes Ma'am'.
There for I am expanding in the garage.
I don't have alot of free space left, as I do share the garage with a car and my workshop.
But it works, drive the car out of the garage and I can move my table saw/work table around.
Last year I put up a new wall in the garage, deviding it up and making a small extra room.
At first to be have a space in the garage, that don't get covered in wood dust all the time.
But also to make a lungroom, that was insulated for the winter season. Now that didn't work out as well as hoped, but it gave me this option.
As it is now, I have an office in the house.
Where I spend a lot of time, and do alot of smoking.
I constantly have a window cracked open, and in the winter that is a waste of heat.
By moving everything into the garage, I won't waste as much energy, as I do now and use the heat, im anyway venting out of my office.
The Groffice messures 3x3,2 meters, and the height of the room is 2,35 meters.
Layout: Top view of the Garage building
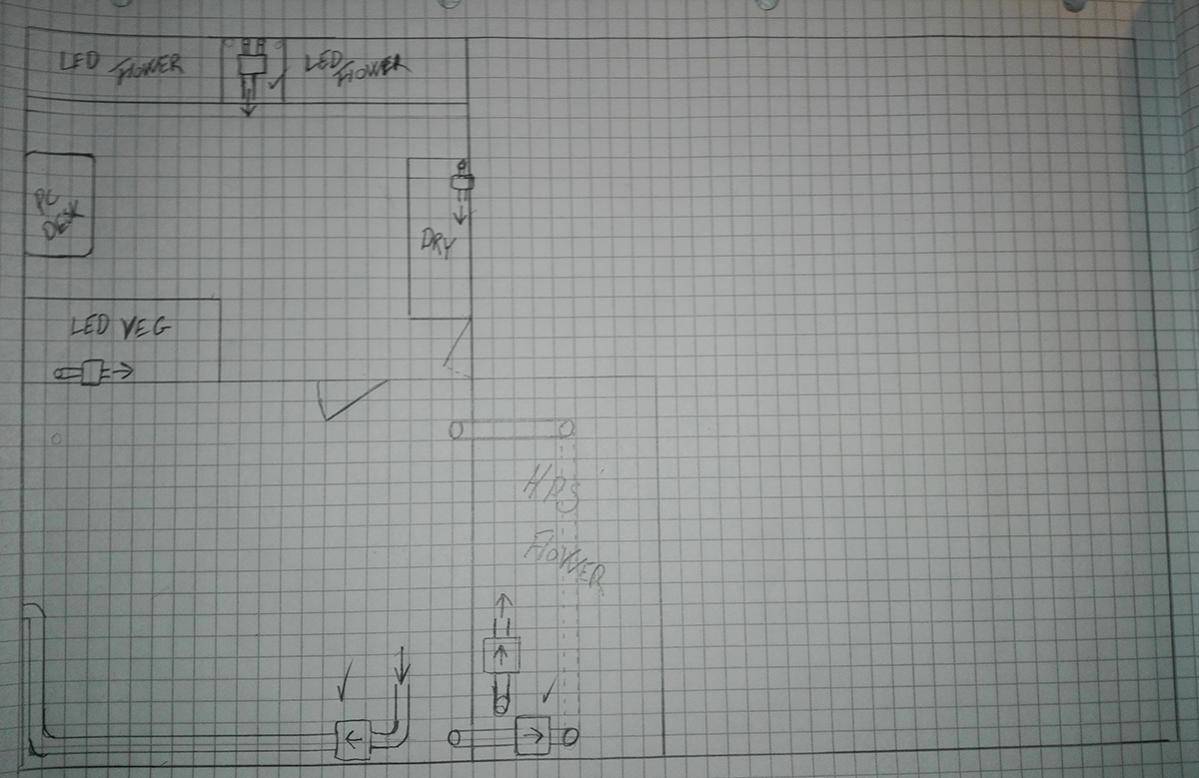
It's a sketch, the messurements are not accurate.
Just to give an idea of the layout, and how to use the space optimal.
And talking about optimal use of space, that's a big part of this whole project and experiment.
I wish to stack 3 layers of flowering plants, in each flower closet under LED Strip lights.
Closet Layout:
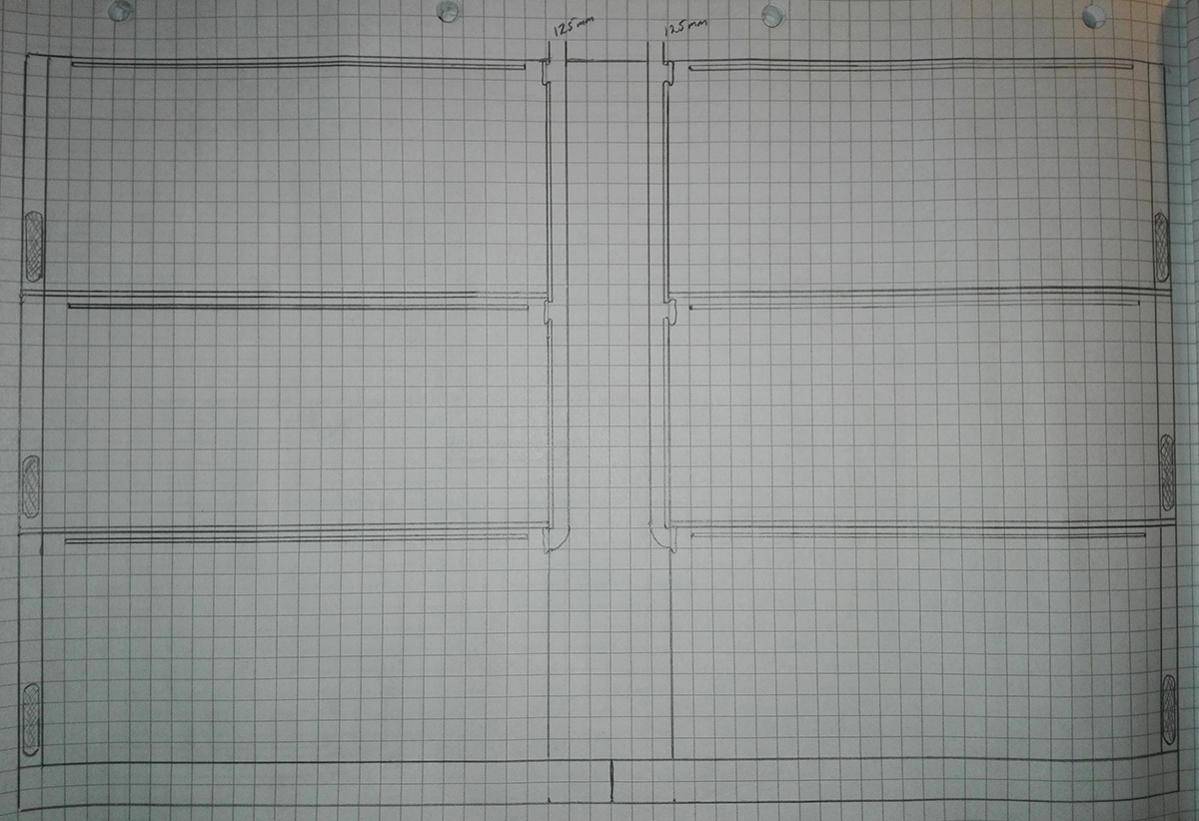
A flat reservoir devided in two, under two closets with 3 indevidual cabinets.
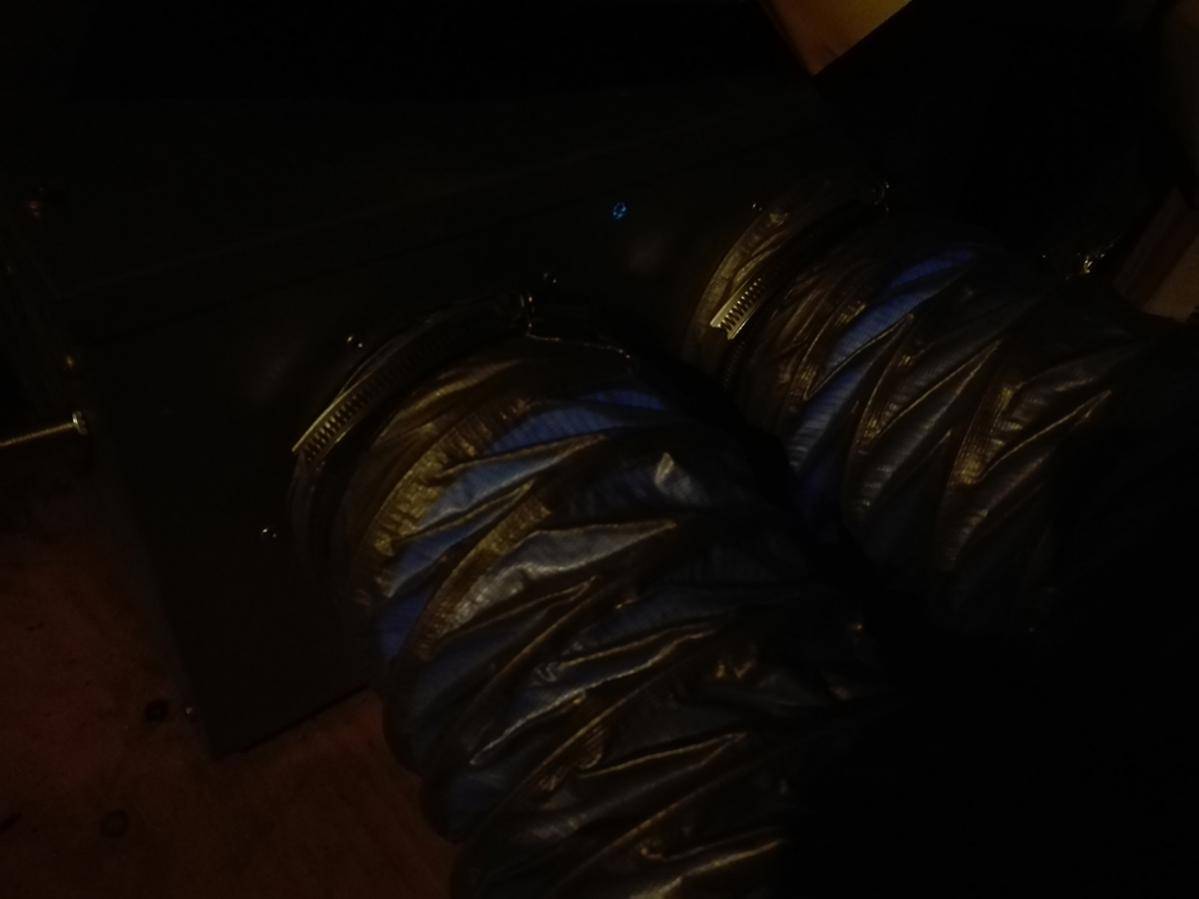
Pulling air from the groffice, venting into the attic thru two 125 mm metal ducts.
With a Ozone bulp, build into the a box fan in the attic.
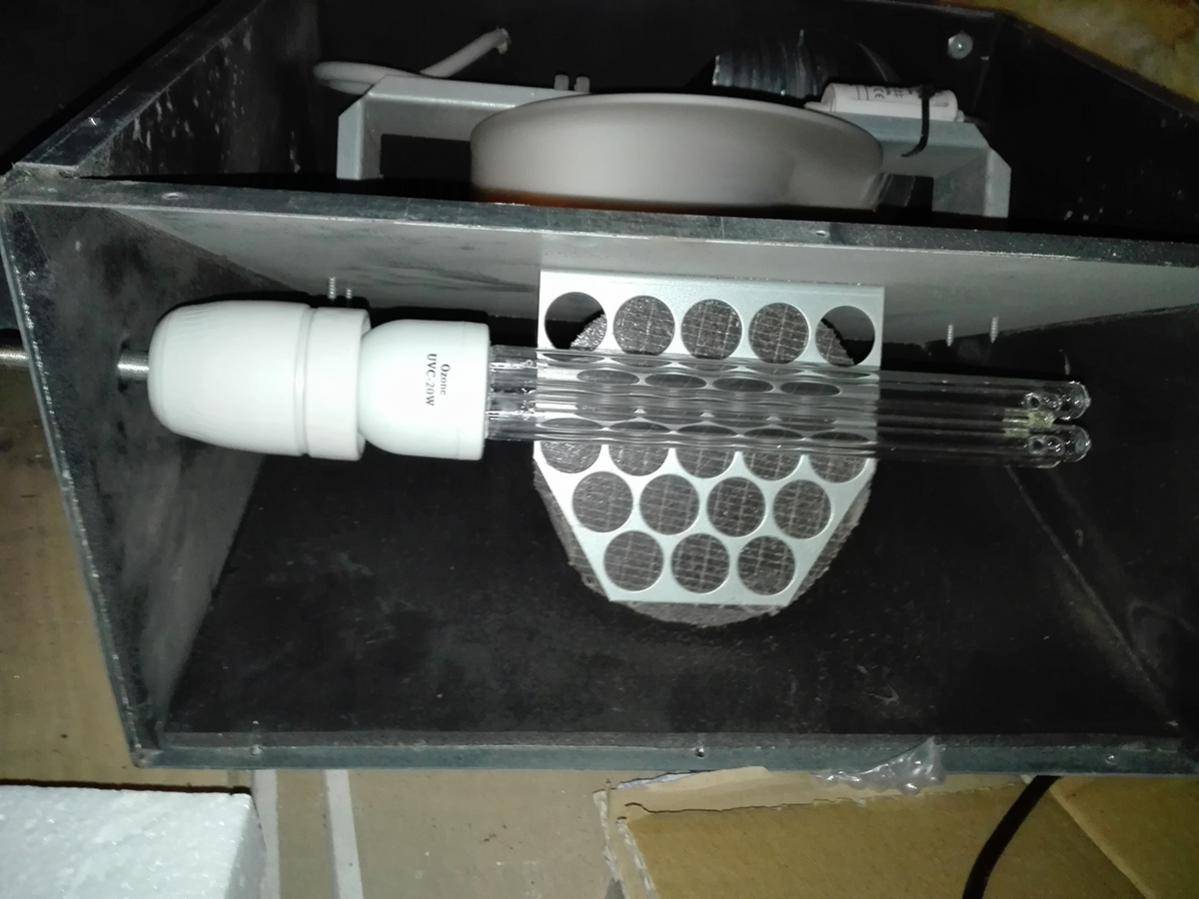
This eleminates any potential ozone damage done to the plants, and protects my eyes from harmfull UV rays.
The bulp was 12€ on Aliexpress, and should run a year before it needs to be changed.
Im told a 20W bulp will cover the smell of a 1K watt HPS grow in flower.
I will need to order more bulps, in the end I should end up with something around 2400 Watt's of Flower (HPS & LED) and 500 Watt's of Veg.
If everything is running at max capacity.
My guess is 3x 20W will cover my needs, as the drying will also be adding something to the mix.
One in each flower boxfan, and the last one in the vent from the dry cabinet.
Giving me the option to turn that one off, when I not drying anything.
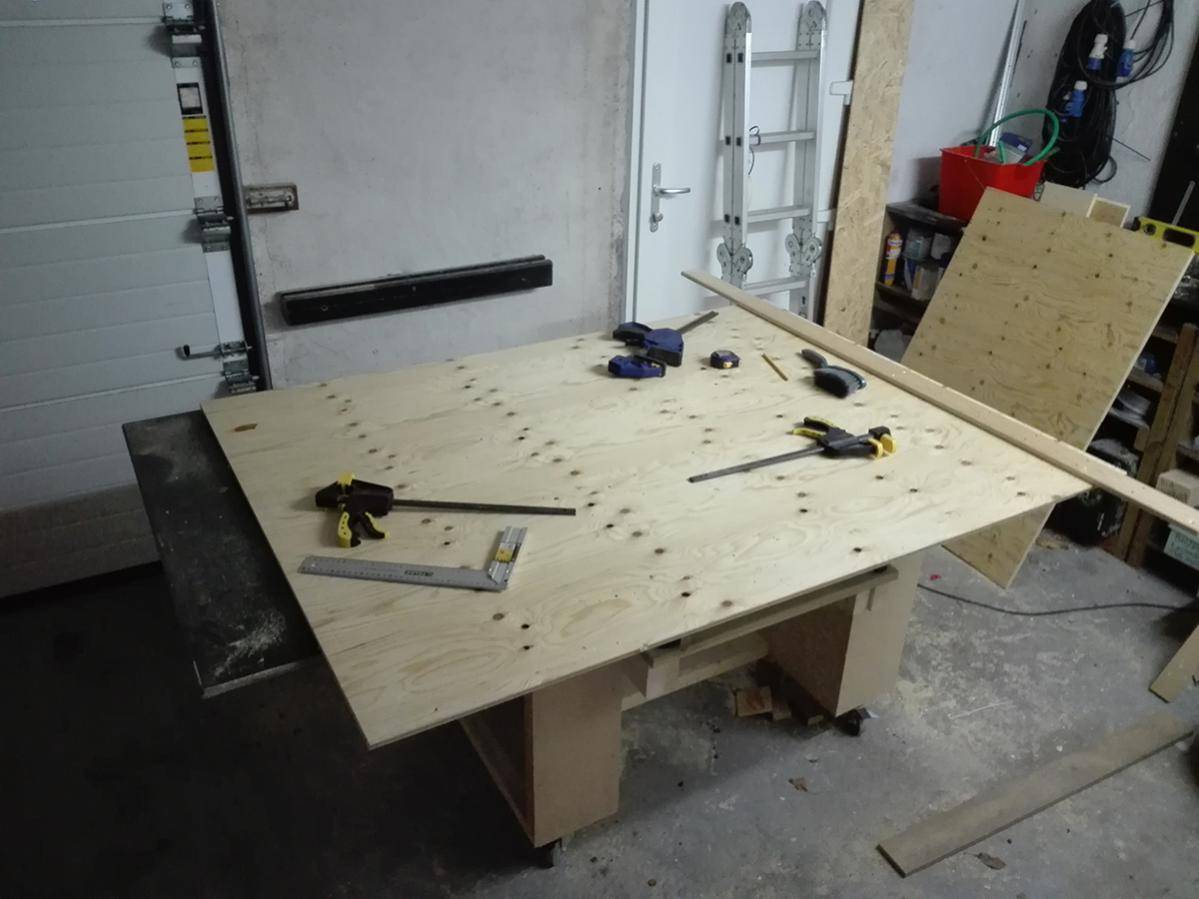
Now I have only just started the build, so this will be a follow along thread.
I will do my best not to drag the build out too long, but again I am not in anyway a pro handyman.
I like to do things right, and some times that forces me to redo things, that im not happy with.
I have been working on this idea, for quite some time now.
As after I got back to growing, I quickly realised that I was short of space. As well a needed more to fill out my time, so what better to do then expand the grow?!?
I love building, growing and experimenting.
And even tho I live in a house, IMO big for only two people.
The misses and I are not always on even terms, on what good use of a spare room's could be.
But being the man of the house, I always get the final word .... 'Yes Ma'am'.
There for I am expanding in the garage.
I don't have alot of free space left, as I do share the garage with a car and my workshop.
But it works, drive the car out of the garage and I can move my table saw/work table around.
Last year I put up a new wall in the garage, deviding it up and making a small extra room.
At first to be have a space in the garage, that don't get covered in wood dust all the time.
But also to make a lungroom, that was insulated for the winter season. Now that didn't work out as well as hoped, but it gave me this option.
As it is now, I have an office in the house.
Where I spend a lot of time, and do alot of smoking.
I constantly have a window cracked open, and in the winter that is a waste of heat.
By moving everything into the garage, I won't waste as much energy, as I do now and use the heat, im anyway venting out of my office.
The Groffice messures 3x3,2 meters, and the height of the room is 2,35 meters.
Layout: Top view of the Garage building
It's a sketch, the messurements are not accurate.
Just to give an idea of the layout, and how to use the space optimal.
And talking about optimal use of space, that's a big part of this whole project and experiment.
I wish to stack 3 layers of flowering plants, in each flower closet under LED Strip lights.
Closet Layout:
A flat reservoir devided in two, under two closets with 3 indevidual cabinets.
Pulling air from the groffice, venting into the attic thru two 125 mm metal ducts.
With a Ozone bulp, build into the a box fan in the attic.
This eleminates any potential ozone damage done to the plants, and protects my eyes from harmfull UV rays.
The bulp was 12€ on Aliexpress, and should run a year before it needs to be changed.
Im told a 20W bulp will cover the smell of a 1K watt HPS grow in flower.
I will need to order more bulps, in the end I should end up with something around 2400 Watt's of Flower (HPS & LED) and 500 Watt's of Veg.
If everything is running at max capacity.
My guess is 3x 20W will cover my needs, as the drying will also be adding something to the mix.
One in each flower boxfan, and the last one in the vent from the dry cabinet.
Giving me the option to turn that one off, when I not drying anything.
Now I have only just started the build, so this will be a follow along thread.
I will do my best not to drag the build out too long, but again I am not in anyway a pro handyman.
I like to do things right, and some times that forces me to redo things, that im not happy with.
")


 Best way to hide the garden