What's new
  • Happy Birthday ICMag! Been 20 years since Gypsy Nirvana created the forum! We are celebrating with a 4/20 Giveaway and by launching a new Patreon tier called "420club". You can read more here.
  • Important notice: ICMag's T.O.U. has been updated. Please review it here. For your convenience, it is also available in the main forum menu, under 'Quick Links"!

DIY extend-a-closet GROW TENT

synthacide

Member
Since i started growing i realized that the key to quality is environmental control, thus the need for a sealed room or chamber....
i found a lot discussions on the commercially available ones, but being the do-it-yourselfer that i am and knowing the 250 price tag was bs i set out to make my own...

HERE IS MY STORY :sasmokin:

we started out with a trip to home depot

x7 3/4 inch pvc pipe (10ft each) $2.19 ea x 7= $15.33

x8 3/4 slip by 1/2 fpt "y" couplings $1.19ea x 8= $9.52

x8 1/2fpt by 3/4 slip coupling $ 0.49ea x8= $3.92

x2 tarp zippers $8.99 ea x 2= $17.98

x1 roll of duct tape $5.49

x1 filtrate furnace filter $15.99

THEN TO THE HYDRO STORE:

x1 roll of black and white poly plastic, also called panda plastic....$89
10 by 100 feet... unfortunately i couldn't source this anywhere else, so of course i got nailed...

grand total = $ 158.13

the bulk of that being the poly plastic sheeting, after the project the roll looks untouched, you could probably make 10 rooms with a roll :chin:

And we begin:


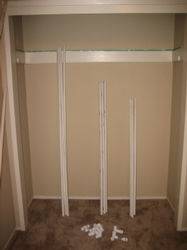
Remove doors, shelves, rails EVERYTHING


synthacide

Member
Now we start framing with the pvc, i made the lengths that run the length of the closet 1.5in longer to create some rigidity, KEEP IN MIND THIS IS NOT LOAD BEARING, AS LIGHTS AND OTHER GROW GADGETS ARE MOUNTED ON THE SIL OF THE CLOSET.


Time to lay some poly :)
I cut mine way bigger than need be, my goal to make a floor that could hold some water as ill be putting in buckets later and Ive herd they leak sometimes


I fold the edges like a Christmas present :)


All the way around and sealed with a lot of duct tape


repeat to top, i had a piece that was huge, so i stuck that puppy on top


do the sides the same.... but remember to leave something open so you can step inside, install one zipper and complete:


Continue sealing everything with duct tape, install next zipper and you should have something like this


now if your lazy i guess you could just cut a few holes add plants and go....
I have OCD... read on :joint:
 

synthacide

Member
so i flipped on my exhaust fan and this is what happened


SUCKtion.... I didn't think this would happen, so off the HD i go, and leave with a filtrate furnace filter, picked a spot out of sight and light and wound up with this


LIGHT PROOFING! huh? :dueling:

Then I got in, turned the light on outside the tent and it was hella bright, so i started thinking, this is what i came up with


OK I'm ghetto, but its all i had, spray can caps, and old weed bottles from the local co-op, this is done to prevent the poly sucking to the filter ;) I'm a genius


then taped one the front side and top


the zipper has poly "blinds" on both side of the zipper


MAN that grey duct tape pisses me off, why did'nt i buy white? hmmm..


that's pretty much it, was a bit more complex than i thought at first, but im quite happy with the result :wave:

here's a pic with a few goodies mounted to the sil of the closet, not seen is the squirrel fan to the right, that all that ducting is going to. first time i used duct tape on a duct :)


cadillachydro

Active member
Very nice job dude, extenda-closet for sure! Clean and simple, bout time to throw some ladies in there and see what she'll produce. Nice.
 

UmphreyMcgee420

Heady Connoisseur
Veteran
great work buddy... definatly a nice closet grow there... might have to consider some of your building methods with my next one.
 

synthacide

Member
im sure on strain...
depends on what the co-ops have...
it will be 12 e&f buckets with hydroton, that light is on a mover so evenly across im gettin like 43 wpsf (watts per square foot)

obviously still planning, but i know once its setup you cant much screw with it while running, so im spending a lot of time learning, thinking and experimenting...

MMMV :)
 

Laxpunker

Active member
With only 43 watts/sq.ft you might want to think about grabing a few CFL's. They're relatively cheap and will help with penetration.
 

cultiv8t0r

Member
Excellent idea....one question....is your light centered in there? It seems like the area you built extends out farther than the depth of the closet.
 

Gantz

Smoke weed and prosper
Veteran
lurkmore said:
I like plywood! but good job bro!! looks neat...

wood is nice but bugs come with it. and if they don't then if you will ever have bugs they'll lay eggs in the wood and then you will never get ridd of them.
 

RuralRoute420

Active member
.

.

as a fellow DIY'er, and an owner of a woodcab, closet grower, hydrohut grow tent owner, and a renter; i see a few things, not saying that this isn't the best setup for YOU. you would need a closet to run your setup. beings though you can't hang anything from it. shoulda looked into the HH for 169.99...that's about the same price.
 

synthacide

Member
for me, i wanted to utilize the closet so my grow didnt take over an extra room....
this effectivly, cuts the volume in half only taking up 2 feet of depth in the room...
designing it myself allowed me a costom fit to maximize the footprint in my area...
i like to make stuff :)

i saw a question about how my light is mounted....if you look in the pics, youll see where a removed the rail that the closet doors slid on... this allowed me to mount the rail in its place (with some trimming) and thusly hang my lightmover

also i have enough material left over, that if i get more pvc and zippers or velcro, i can make another room...

as said above this works for me...the HH seems cool i looked at it, just diddnt want to order it, have it sent SOMEWHERE...

thanks for all the kind words :)

oh yea! lax... i thought 50 per sq foot was opt. am i wrong? thanks for pointing that out btw.. :yoinks:
 
Last edited:

Reorx

Member
hey at least your not doing it in a carboard box like others. Decent design, just tweak were needed.
 
Top