What's new

Construct your own greenhouse/light deprivation tent for under $200

Momerath

Active member
I figured this would be the best place for this thread. A few people have been asking me about it so I thought I would make a photo pictorial so y'all can get the idea and hopefully recreate one for yourself and save some money.

The idea here is a dome shaped greenhouse with roughly a 12' x 12' x 6 1/2' area to work with. Perfect for many small plants or several larger ones. You could get 4 big smart pots in one of these.

Here's what you'll need (all of this can be scaled up, this is what we did):

11 lengths of 1" PVC
~6 long side pieces, 10' long
~3 Support pieces, 6 1/2-7' long
~2 Spine pieces, 6' long

7 1" PVC connectors
~3 4-way connectors
~2 Right angle connectors
~1 End to end connector
~1 "T" connector

9 pieces of Reebar, 2' in length

8 1 1/2" PCV end-to-end connectors

1" PVC insulation (black foam kind)

A few 2" clamps

30' x 25' roll of plastic (our hardware store didnt have this, so we used two smaller pieces)

Alright, here we go...

Got the spot picked and kinda levelled. Kinda. So we lay out our sections.
picture.php


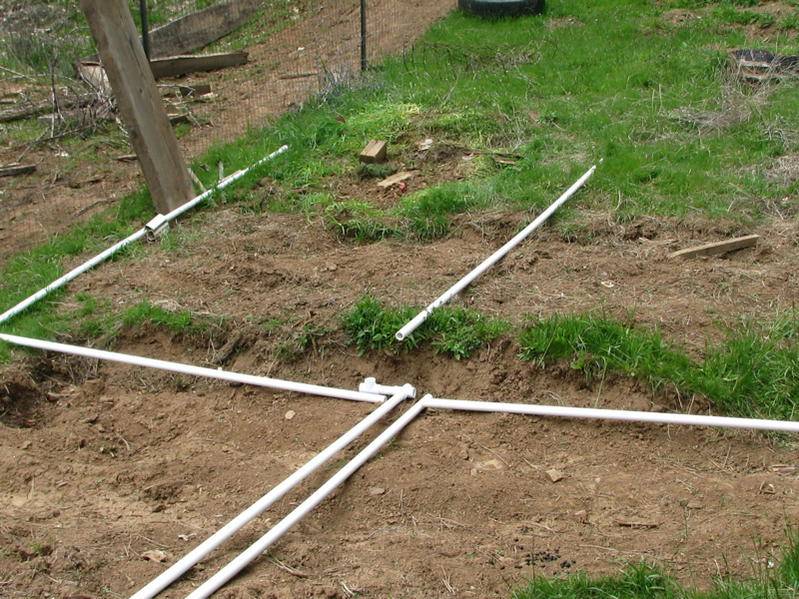
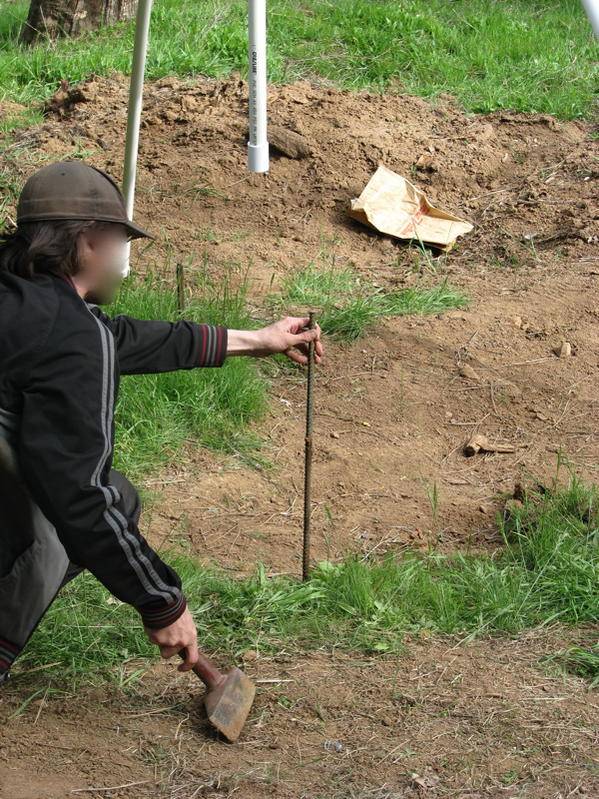
We get one side set up and get an idea of where to put the reebar.
picture.php


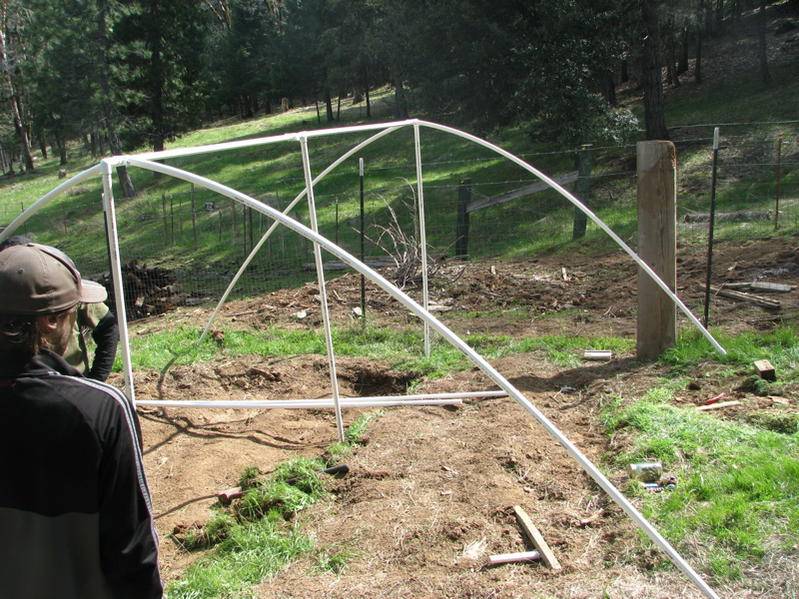
And up one side goes
picture.php


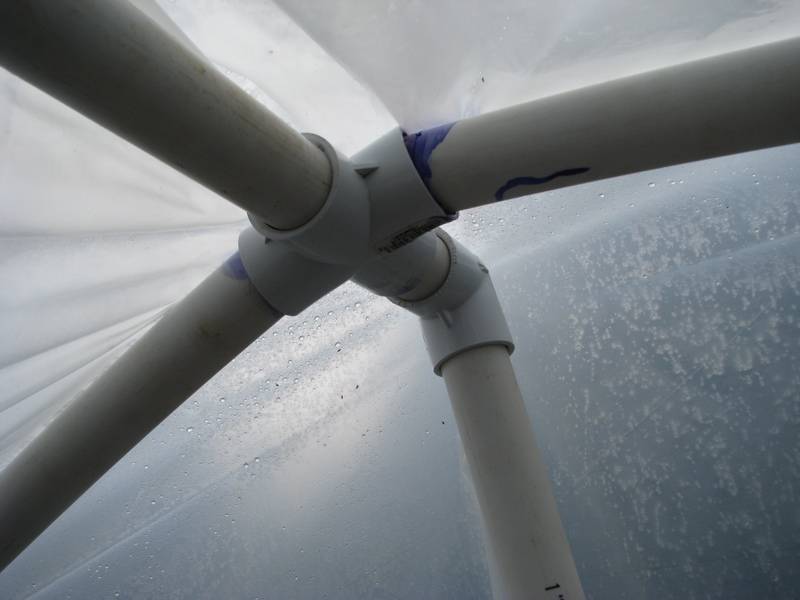
Here we have the center of the spine. We have to use two connectors here, but thats easy enough :) One 4 way and one T make it easy.
picture.php


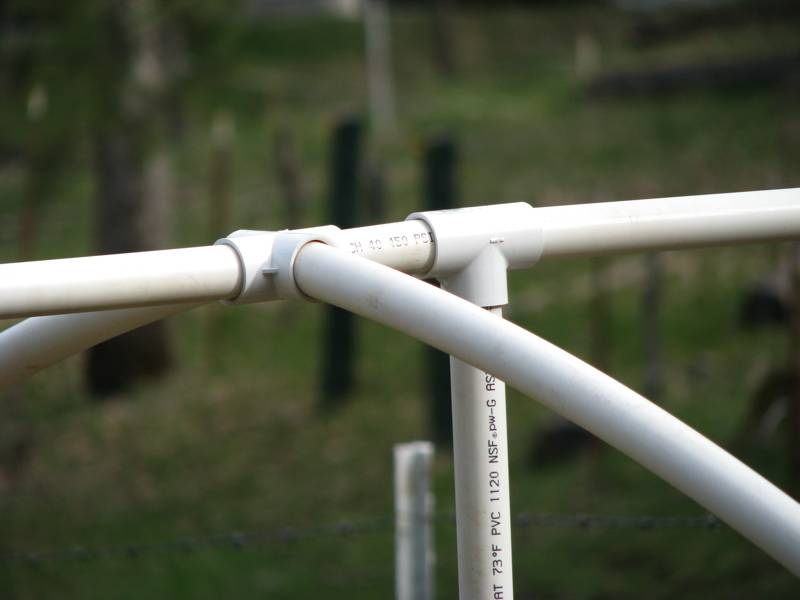
Here is what the two ends of the spin look like. One 4 way and one Right angle connector.
picture.php


Build another side and connect with to the first with the spine. Slip in the support pieces and you are almost there! Remember, Reebar for every piece of PVC. You're making a giant windsock, and it can very easily blow away if not secured :moon:
picture.php


Add the last two side pieces, and voila! We have a frame :)
picture.php


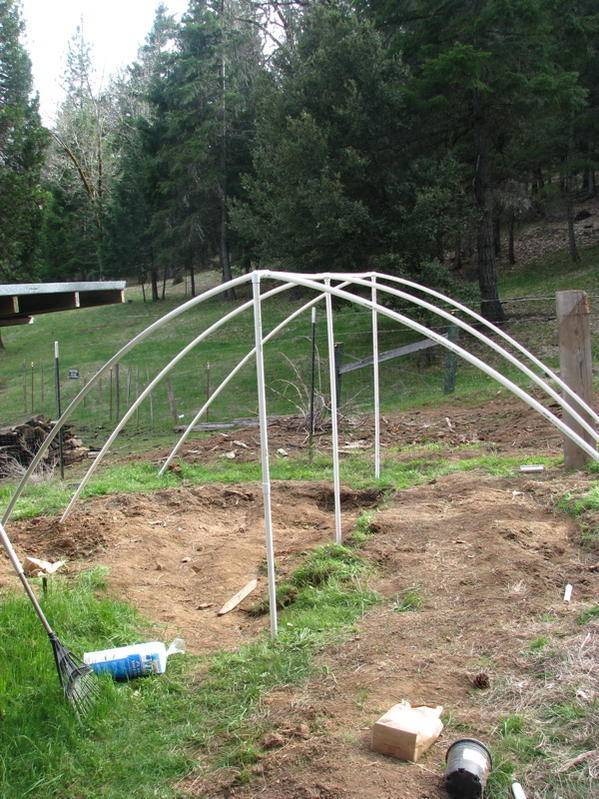
Next up, Step 2. Adding plastic and plants! :tiphat:
 

Momerath

Active member
Covering and securing

Covering and securing

Ok, now its time to put up the plastic. We use the clamps to hold it in place temporarily. I also decided to level the ground more (this step optional).
picture.php


Next we put the second piece on and secure with our home made plastic holders.
picture.php


We needed something that would hold the plastic securely without tearing it. The hardware store didnt have enough clamps, so we devised these.
picture.php


We cut out about 1/4 of the 1 1/2" connector so it could snap over the 1" PVC with foam. We put the plastic in place, put the foam over the plastic and 1"pipe, then slipped these over to hold securely. They are working well so far in case you were curious :)
picture.php


It may also be wise to bury the ends of the support pieces in the dirt, for added stability.
picture.php


And here we have a completed greenhouse :tiphat:
picture.php


With plants moved in...
picture.php


The back right quadrant. This thing is just big enough for lots of young ones, and will eventually house 12 plants in light deprivation.
picture.php


Well there you have it for now. I will update when we turn it into a light deprivation tent. All that entails is removing the plastic and getting a big black tarp.

Thanks y'all for showing an interest, any questions or comments are welcomed :tiphat:
 

blackone

Active member
Veteran
Yeah baby :) Light deprivation could be the future... what do you do for ventilation at nighttime?
 

trichosaurus

*Stoned User*
Veteran
Nice simple outline.
Stability is the key... looks like yours is pretty sturdy. One of mine last year was not secured properly and a big windstorm sent it rolling like a tumbleweed and leaving my plants exposed, which killed more than half of them. Will have to grab some spikes to keep em down this year. ;) thanks for the idea.

Looking forward to the next installment.....
 

Greyskull

Twice as clear as heaven and twice as loud as reas
ICMag Donor
Veteran
thank you for posting this up
staying tuned...
aloha
 

Momerath

Active member
Thanks for the response everyone. We've been doing light dep for 3 years now and have built many differently shaped and sized "greenhouses" from small boxes to large boxes to domes of different size. This year was a new model and yeah it has its flaws and its benefits, but so far it seems to be working better than any of those damn boxes hahaha.

Beta, when it comes to tarp, you got two options. Hardware store, or internet. Last year we ordered one online and regretted it as it wasnt 100% lightproof, so we had to cover the whole thing with black plastic. If you can imagine spreading out a 30' x 50' tarp and laying two black plastic sheets over it...that was me last year. Never again :)

So this year I've been eyeballing the heavy duty black/silver tarps at the hardware store. They MAY have one that would just barely fit, but I might just need 2. We recommend the tarp over just plain plastic because of the durability, and the weather. Two years ago it hailed in July. Right in the middle of the light dep run, putting a bunch of holes in the plastic. I know this is an uncommon scenario, but I put it out there because unforseen events occur...like clockwork usually. Go for the tough tarp :)

So a quick update on the greenhouse. We had a lotta rain the last two days and found these key points to remedy:
~Go with the orange clamps all the way around. The plastic ones work good if there isnt a lot of stress on the plastic, but there was heavy rain and wind, and knocked half of em off, and knocked a plant over. Ouch :(
~Should be obvious, but make sure you have good drainage and level ground. We didn't, and it was a big cause of problem number 1 ^

Aside from all of that it been working like a dream. Its been about 60 degrees on average during the day here, but that thing stays about 80 all day, and nice humidity too!
As far as ventilation goes, we're simple. We leave the top of the doorway open and the backside plastic a few inches off the ground. It keeps decent, but not overwhelming airflow going through it.

I am most excited to see this thing with the black tarp and the 12 lovely ladies going in it.
In case you are wondering its gonna be these:
Casey Jones
Super Lemon Haze
Lambsbread
Blue Moon Rocks
:)
 

CanniDo Cowboy

Member
Veteran
Hey M...Good job on the greenhouse tutorial dude! I recently got my "knockdown" greenouse up n running. Right now, I am using 2 store bought sliver tarps, not for blackout, but to keep nosy neighbors from seeing the supplementary lighting at night. Pullin 2 tarps off and on every morning and evenin is a pit of a pain because they are a lot heavier than plastic but they do work for being 100% liteproof. Gotta use the real thick, larger ones. Plus, the heaver tarps help keep some of the warmth generated by the lamps in the greenhouse at nite. CC
 

Momerath

Active member
Yes pulling the tarp off and on every day is a bit of a pain, but its good to have a schedule haha and it gets me up and going at a reasonable time :)
 

Latest posts

Latest posts

Top