What's new
  • Happy Birthday ICMag! Been 20 years since Gypsy Nirvana created the forum! We are celebrating with a 4/20 Giveaway and by launching a new Patreon tier called "420club". You can read more here.
  • Important notice: ICMag's T.O.U. has been updated. Please review it here. For your convenience, it is also available in the main forum menu, under 'Quick Links"!

Seriously SILY - A Branch Blooming Diary

ScrogMonster

Active member
Veteran
Hey Ya'll. It's time for a new thread. So for a slightly unfortunate (no big deal) series of new laws, events, and technicalities; I can only have four plants if I want to comply 100% and a have a totally legal grow. I feel blessed and overjoyed to live in a day and age and state where that's possible.

I was thinking I would have some more numbers from Medical Marijuana cards but, alas, that is not my current hand of cards.

That got me thinking... how can I harvest half of my flower capacity once/month (16sqft.. conservative aprox 1lb once dialed in.) with only four plants?

I thought of two different ways. Both involve grafting many strains onto a single plant. One way that I know would work, would be to have a big mutli-strain mother that I will start an air layering on once/month. Then just keep up sizing the pots for those air layered branches and growing veg plants while they are still attached to the mom. I could even cut the veg plant off once it's about the size that one more month of veg would have it ready to be flowered vertically between two of my 2'x4' - 306w - SIL fixtures. One mom, one veg for one month, and two flower plants, and as many strains as I want.

The first idea I thought of however, is one that I'm not sure will work. It's weird and a little bit SILY... but I just have to try it and find out. So in one of my 2'x4' tents I'll be attempting to keep the middle of a big plant in VEG on an 18/6 cycle.... while flowering branches of that plant (passed through a light barrier) on both the right and the left. If the middle stays in veg and the branches that break on through to the other side with a 12/12 cycle will flower... I can graft as many strains as I want in the middle and choose what to grow out, pass through the barrier, and flower. I could keep this same plant alive for years potentially, root pruning once every few cycles after a harvest when I can actually remove the plant from the box.

Has any one ever seen any one do this?! Is there a thread about it any where? I couldn't find one... but I didn't look super hard... Does any one know some biology info on this topic of flowering just a portion of a plant while keeping the rest of the plant in veg? Please chime in if you have or do.

I will now commence with the dumping of the many photo's that took of the build.

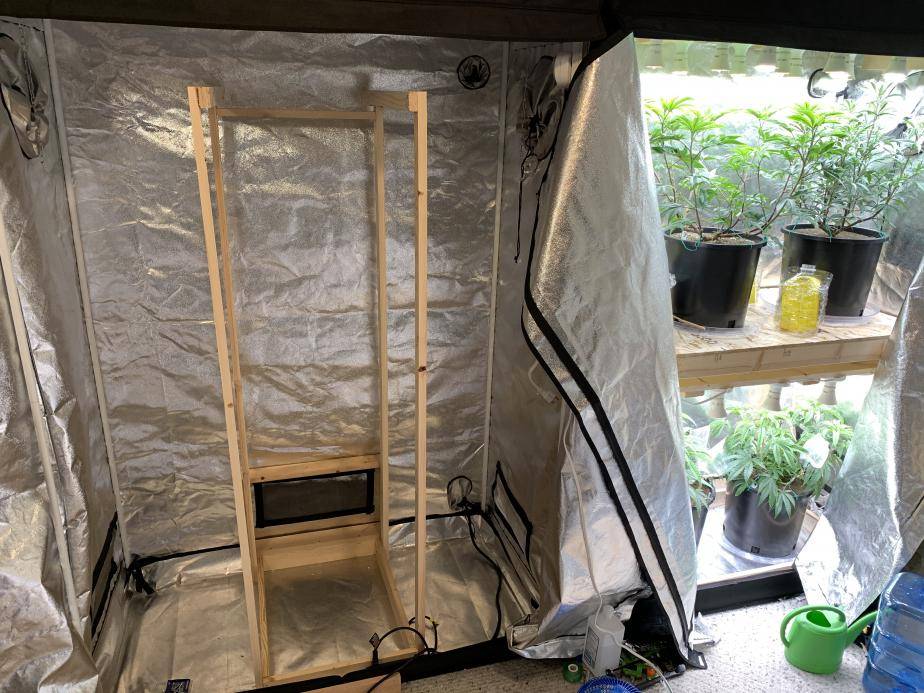
First I cleaned up from the cycle I just chopped and moved the plywood off the shelf. I was going to just try and re purpose this wood but I had 1x2"s lying around so I figured I'd use as much of the smaller boards as possible
picture.php


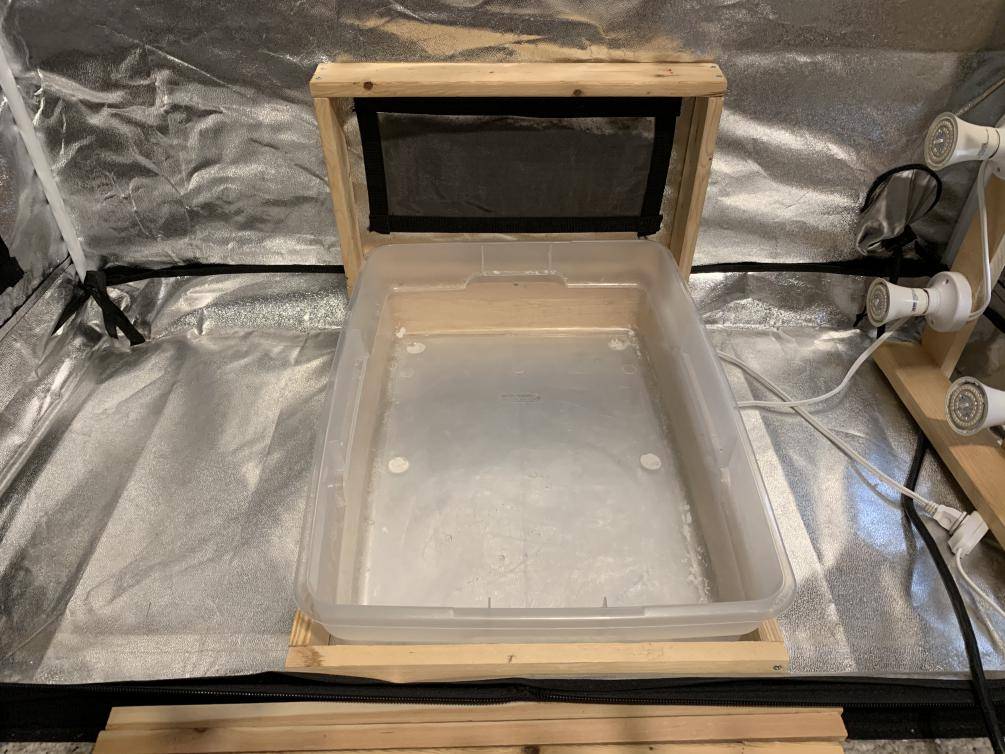
Put a frame for the Perlite SIT (Sub Irrigation Tray) and a frame to include that middle vent and block it off from the rest of the tent.
picture.php


picture.php


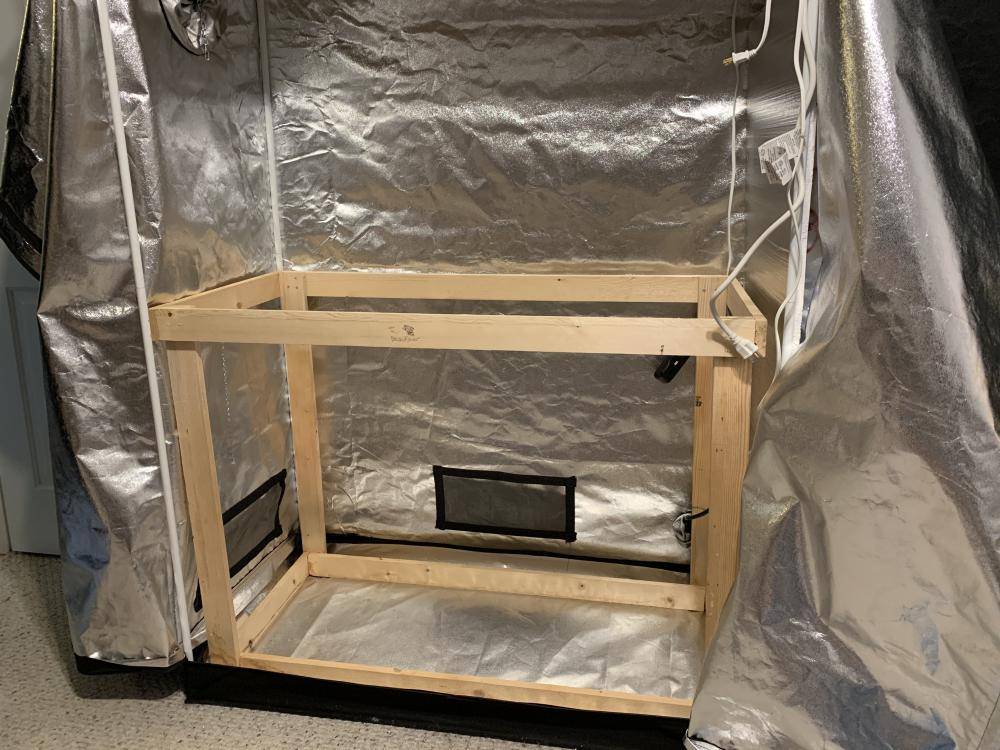
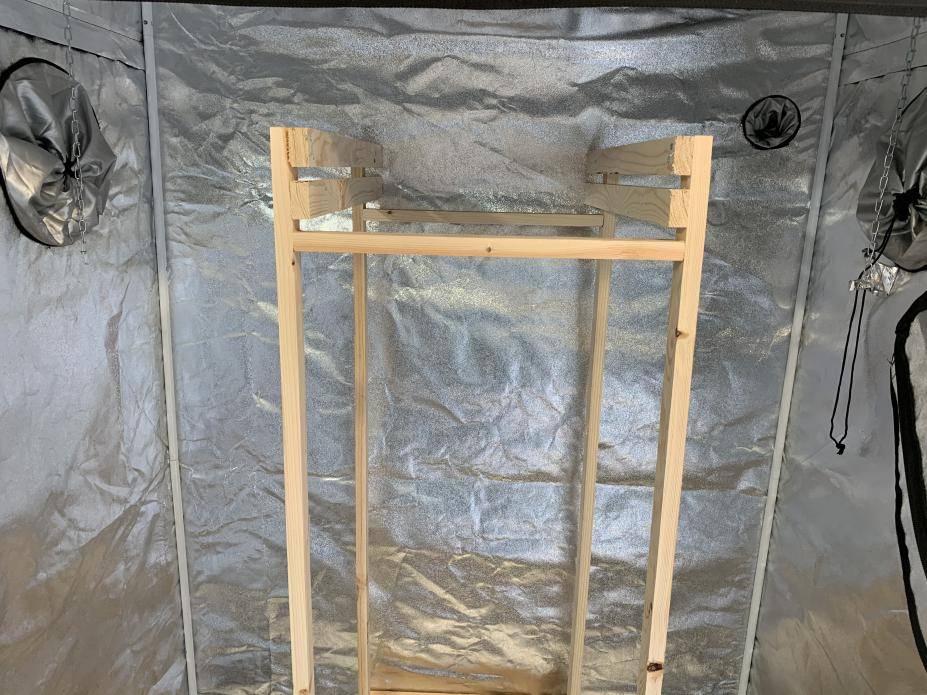
Frame for the box and the frame for the light trap up top are assembled.

picture.php


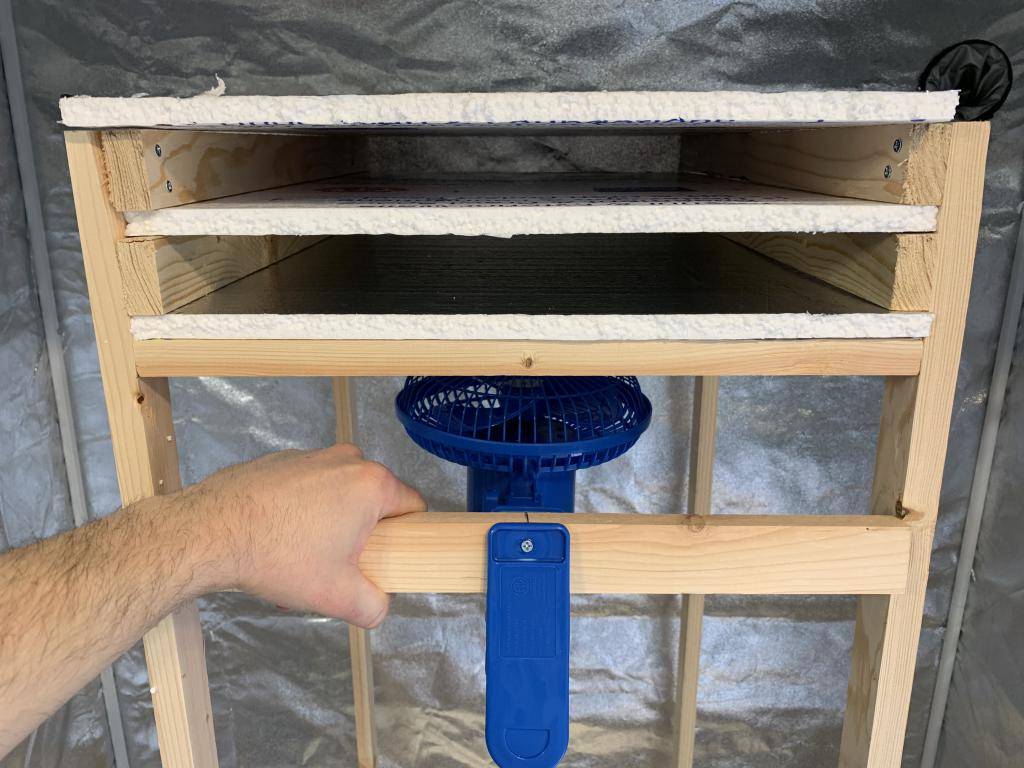
Hmm I think I'll use this desk/clip fan that was laying around as the extraction fan for veg box.
picture.php
 

ScrogMonster

Active member
Veteran
There we go, got that in place
picture.php


picture.php


Now to cut up some old black T-Shirts and hot glue the fabric onto those foam insulation boards for a nice light trapping effect.
picture.php


There we go, that's nice.
picture.php


Built a little frame on the front of that with more 1X2" boards and stapled some more t shirt around there.

picture.php
 

ScrogMonster

Active member
Veteran
Borrowed some art supplies from my daughter, my sweet angel has me covered here. This Matt Black acrylic paint should do fine in these cracks here.
picture.php


Here's the back of the light trap set up, I just cut a peice off of the top of the back and taped it onto the backity back of it. Looks trappy.
picture.php


This piece of tape with a strip of shirt stuck to it is covering the back of the foam boards to close the bottom back of the trap off.
picture.php


A whole role of aluminum duct tape was used in the making of this box, starting with blocking off this vent and including it in the veg box.
picture.php


Okay got that shape right with blacky black all over and here's another piece of foam board with T shirt hot glued to it to cover up the front.
picture.php
 

ScrogMonster

Active member
Veteran
Taped up the Desk/Extraction fan. Glad this fan had a good tight wing nut. With that and the screw through the clip on the board, that sucker is solid in place.
picture.php


There is the front of the light trap all taped up and I'm cutting some foam boards for the side walls now.
picture.php


I've covered the white sides of those foam boards with black poly because even two layers of this reflective foam insulation back to back is not totally light leak proof. So each wall is a foam insulation sandwich with a slice of black poly. Except for the door to the box. That'll just be a single board with black poly on the outside.
picture.php


picture.php


The box has really taken shape now and is almost in place. That's the door to the box on the left side of it. I stapled some black felt purchased in small 12x12" squares from walmart along the door jam and creased them in for some trap-age. I got my cloning light from my veg box out and sawed some wood off the ends so it'd fit in there. I'm thinking just two bulbs might be enough for the space its about 16" by 21"
picture.php
 

ScrogMonster

Active member
Veteran
At this point I went a head and turned the lights on in the box and off in the rest of the room to see what kind of leaks were coming out this point and see where tape is needed. I had not yet taped the seams of the insulation from on the inside and these faint glows were seen coming through where the seams are. Time to tape those up then.
picture.php


There are already only very faint glows and little leaks only coming out of the box. This is a photo of the front of the box, the door. There is just a few tiny leaks coming through the sides at the top and bottom.
picture.php


Good thing I also bought some excellent little sheets of thin black foam from the craft section of Walmart for 47 cents each. This is stuff is useful.
picture.php


There ya have it... the box is pretty much done.
picture.php

picture.php
 

ScrogMonster

Active member
Veteran
I gotta say so far I'm pretty happy with it.
picture.php


There's my Perlite SIT (Sub Irrigation Tray) in place, with perlite added and some strips of black poly hot glued around the edges to cut back on humidity loss around the sides of the cut 18 tote that will fit right over that there square.
picture.php


I'm just gonna cut up this 3 gal fabric pot here and...
picture.php


Drill these holes all up in the bottom of this tote. I cut about 3.5" off the top of the tote, those small holes were in the tote already as I've used this as a planter in a previous grow already.
picture.php


It was a pain in the butt to cut a bunch of little squares of fabric pot and hot glue them over the small holes all over the container, but I really wanted them covered. I drilled many more large holes in the center of the bottom, as much as I could fit, and hot glued the bottom of the fabric pot down over those holes. This will allow nice wicking through the bottom and keep all the soil in the container, where it should be. Also I kinda turned the 18gal tote into an aprox 12gal hard plastic smartpot. I like that there will be better aeration and no root circling going on here especially since this root mass might go a few cycles before being pruned. I even glued the handles from the pot onto the sides of the tote just for laughs. I used a ton a hot glue and to my surprise the handles actually stayed glued on and were usable even after filling this with soil.
picture.php
 

ScrogMonster

Active member
Veteran
In the tent next to this experiment I am happy to announce that I will be leaving that tent the fuck alone for now and flowering my two not so small any more seedlings, I love new genetics! New to me any ways. That will be a standard two tier horizontal scrog like my previous cycles. One is Sugar Black Rose from Delicous Seeds and the other is Peyote Cookies from Barney's Farm. SBR won over 11 cups!! It smells so good already. I can't wait to watch these grow and to try them later. Any way this is just a fresh 18gal tote that I modified the same way for one of those two plants. I had another gray tote with small holes in it already for the other of the two seedlings. This time I drilled the same 7/8" holes in the side and a lot fewer of them, so I could cut less but bigger fabric squares and do less hot glue-ing. I also used strips on the bottom instead of the circle and cut a good bit more holes in the bottom for wicking although I may not have the headspace in that tent to put these on top of SIT's.
picture.php


Potting up the Lemon Meringue from it's 5gal to this... all my plants are pissed at me right now and throwing a tantrum because I've neglected them for 4-5 days or better building this damn box... maybe a week. They were screaming at me for a transplant. Ask and you shall receive my little green friends.
picture.php
picture.php
picture.php


I had this landscape fabric in the bottom of the 5gal's because at one point I thought I was just going to flower them in those until my plans changed.... the roots were growing through it... sooo... I just left them on the root mass and planted it like that... I don't think it'll harm anything..
picture.php
 
Last edited:

ScrogMonster

Active member
Veteran
I'm using DTE brand Bio Thrive and their Rose and Flower mix. I think they got around 7-8 gallons of fresh soil... So I put about 4-5 table spoons of each of those mixed into the upper half of the soil.
picture.php


A couple photo's of me cracking the door open to veg box for the branch blooming experiment in the dark room.
picture.php
picture.php


Punch out for a quick lunch break. Shrimp Fajita style tacos OM NOM NOM.
picture.php


Back to work, where was I... Oh yeah...cracking that door open... Looks like temps are super steady in there with just those two 17W SIL's. Plant looks lit up enough for now. Haven't put the branches through yet. Need to do that then hang my lights vertically on the sides of the box.
picture.php
 

ScrogMonster

Active member
Veteran
I tied up those branches that I had already trained to the sides to be passing through the walls of the box. 4 big branches on each side. I tied them together so I could squeeze her into the box.
picture.php


She looks cramped at the moment. Better start the fun part.
picture.php


Peek-A-Boo!! Tee Hee. :biggrin:
picture.php


Ohh btw. Here is a picture of my first graft. It healed and started growing again in just 10 days. Just cut 45 degreeish angles with a clean xacto, slapped em together and put some aluminum tape around it with the backing stuck in the middle like a band-aid... a sandwhich back over it for some humidity. I took the bag off 10 days later when I saw it was looking pretty alive again.
picture.php
 

ScrogMonster

Active member
Veteran
Got one side through.
picture.php


Tee Hee. There's something so playful about this.

picture.php


I put back into the wall, the pieces of insulation that I cut out to put the branches through, I also put the black plastic piece back in the middle where I could, and also stuffed landscape fabric and fabric pot pieces into the middle and like around the branches, where it was needed, for extra light leak protection. Then I taped these up nice. There'll be no light leakage here folks.
picture.php

picture.php


Here's the outside of one of the walls after the branches have been passed through and it's all tapped up! I think it looks cool!
picture.php
 

ScrogMonster

Active member
Veteran
Welperdoodle.... these last five pictures are ones of completeness. This concludes the set up/build for the branch blooming experiment.


picture.php


picture.php


picture.php


picture.php


picture.php


I will continue to post as many updates as possible to this grow experiment diary as well as posts about the Sugar black Rose and Peyote Cookies in the tent next to it. I have scrog screen building and plant training to do on those.

Thanks to those who have dropped in and said hello while I was posting all this! Hi! welcome! Make yourselves cozy.
 

q3corn

Active member
This is so interesting! I really hope the plant is able to perform both veg and flower cycles! Following!
 

ScrogMonster

Active member
Veteran
Thanks for the support fellas. I can't wait to see what happens. I hope it works like I want it to but if it doesn't at least I'll know and I won't have to wonder what could have been.

Here's what the tent next to that is looking like.
picture.php


SBR up top
picture.php


Peyote Cookies down on bottom
picture.php


Here's what they looked like Monday, bout 5-6 days ago. That is the Peyote Cookies in the middle as I was transplanting. The sugar Black Rose on the right and that Tangelo on the left I put back in my veg box after I cleared out MOST the junk I instantly stored in there when i wasn't using it momentarily.

picture.php


I am going to put at least 6 scions on that Tangelo today. 2 from Peyote Cookies/SBR/LM and also my successful GG scion on my LM host is big enough to take a cut from and graft it onto the Tangelo as well. This Tangelo will be my multi strain mother that I'll keep adding to which I will then train branches down to the floor next to it and start an air layering that I'll keep up potting as long as possible before cutting it off to flower it. I removed the boards that I had for the floor of my second tier in my veg box so that I can grow those air layerings nice and tall. I'll need to install plenty of side lighting as the idea is to cut one once/month that is ready to flower as a tree between two of my 2'x4' fixtures hung vertically. So I'll be cutting maybe 5gal potted branches with 3 ft tall bushy plants off the mother and putting them pretty much straight into flower. If the branch blooming experiment works like I want it to I'll slow my air layering down to starting one every two months instead instead of one every month and I'll keep that branch blooming plant healthy and producing as long as I can.

The Tangelo in its spot. I'll transplant it to a 5gal at some point in the next few weeks. I'm gonna drill those 7/8" diameter holes in it and hot glue smart pot fabric over the holes on the inside like I did for the flower plants.
picture.php
 

Latest posts

Latest posts

Top