buying online quality name sils
buying online quality name sils
buying online quality name sils
hellu
screwn led friends
i'm appreciate all thread
before i read this
i think 'what lyght for small box', mayb $250
small box lyght more expensive in store
little available, size alway problem
never my size
i make my lamp with instruction here
go to store, near house
total money mayb $55 (bulb, wood, hook, wire,etc)
and 4 hour work
it work
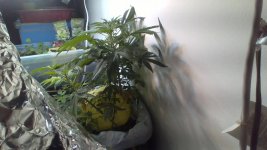
11 day pass
[URL=https://www.icmag.com/ic/picture.php?albumid=82279&pictureid=2009378&thumb=1]View Image[/url] [URL=https://www.icmag.com/ic/picture.php?albumid=82279&pictureid=2012037&thumb=1]View Image[/url]
lamp is just wood chonk
lmoa
[URL=https://www.icmag.com/ic/picture.php?albumid=82279&pictureid=2008576&thumb=1]View Image[/url]
mayb some thing for note
january i buy led bulb in aliexpress
arrive this week, i try
is 18w...
compare to philips 12w... is nothing, no brand bulb is bad bad
good quality led is what want
philips brand is good
is little experiance, but show it work,
only veg in small box, but have automatyc plant too,
if flower i just happy happy
again thank to thread to all
have help me real life
save money
plant happy
what better thank
[/QUOTE
I found sylvania 12.5 W sils online 1w chips
$3 each free shipping https://www.icmag.com/ic/album.php?albumid=80912&pictureid=2002757
")

Last edited: