
Snype's Guide To Cloning In Rockwool Or Aeroponics With 100% Success Rates!
This guide is to help out fellow growers who don't have perfect success in Rockwool or Aeroponics. Because of the data that I keep, I know how to have 100% success rates with my cuttings. I haven't lost 1 cutting for at least the last 10 years because of what I have learned.
It is extremely important to first talk about Sterile Conditions and Tools before cloning. Every surface must be cleaned with some sort of Bleach or Physan 20 and every tool that you use must be also cleaned with Isopropyl Alcohol or something of the like. Sanitary Conditions are very important to have 100% Success Rates.
It is also very important to take your cuttings from perfect healthy MOMS. Perfect healthy rooted cuttings come from perfect healthy MOMS. If you MOMS are unhealthy, it would be best to bring them back to full health before taking your precious cuttings.
Lets start out talking about cloning in Rockwool because I believe that more people use this method. When I clone in Rockwool, I use Grodan 1.5" Mini-Blocks. My first step is to label each Mini-Block with the corresponding cutting that is going to be put into the Mini-Block.
First I start with a clear light cover from a 60 watt CFL from home depot and wash it off with a bleach and water solution and put it aside. After that, I take a sterile container and I soak the 1.5 inch Grodan Mini-Blocks for 1 hour in a solution of:
4 mL General Hydroponics Flora Series Micro
6 mL General Hydroponics Flora Series Bloom
10 mL Technaflora Thrive Alive B-1 (RED)
ALL THESE RATES ARE PER GALLON OF WATER AND THE SOLUTION IS PH'D TO 5.8
After the Mini-Blocks soak in the solution, I slightly drain just a little bit of the solution by very slightly squeezing the Mini-Block which drains 5% of solution.
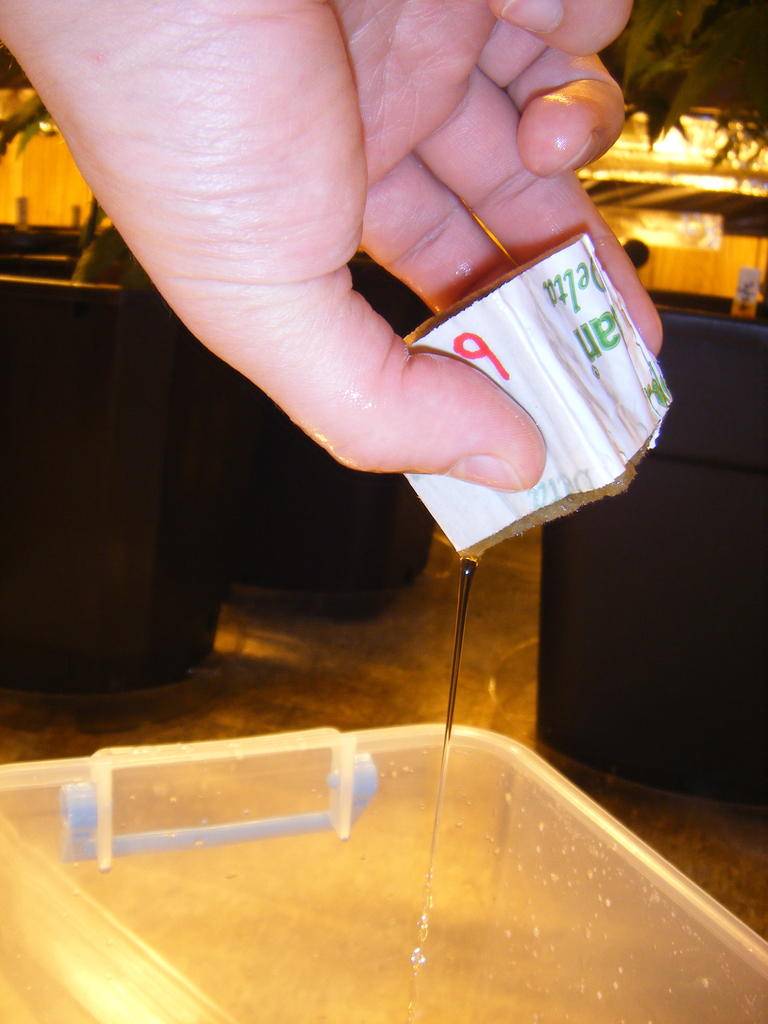
Lets take this time to talk about how I come up with exact percentages of solution drained. The average of my completely soaked Mini-Block weighs 67.3 grams. When I slightly drain the cube, it weighs 64.3 grams. Using a scale to fine tune your technique, adds consistency to taking your cuttings throughout your life. When you get used to using a scale for a while, you may start to become more familiar with how weights feel and then you won't need to use a scale anymore. An accurate calibrated scale will never lie to you.
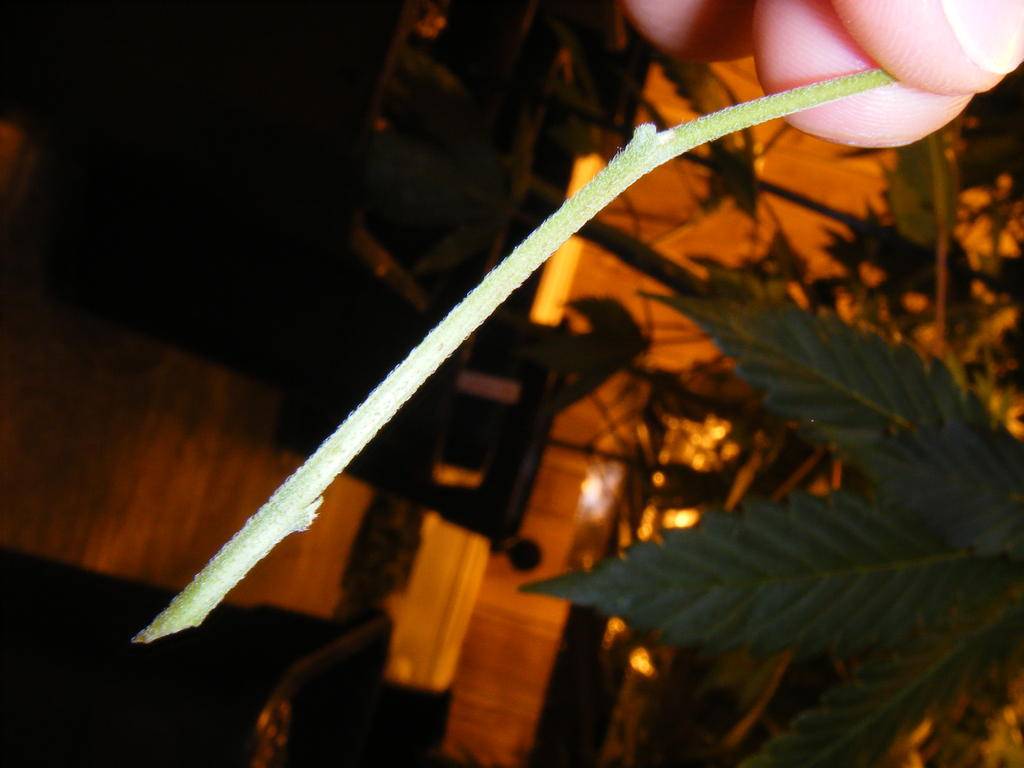
After 5% of solution is drained from the Mini-Block, I take my cuttings from a Perfectly Heathy MOM and cut off the lower leaves while keeping the top leaves in tact. Then I take a 45 degree cut about 1/4 to 1/2 inch below the point where I cut off a leaf. This is what it looks like when I've made my cuts. Notice the 2 points on the stem from where I cut off the 2 leaves. These 2 point will be placed in the cube and that will be 2 more points where solution can have contact with the inside of the stem as well as the main diagonal cut that I made on the stem.
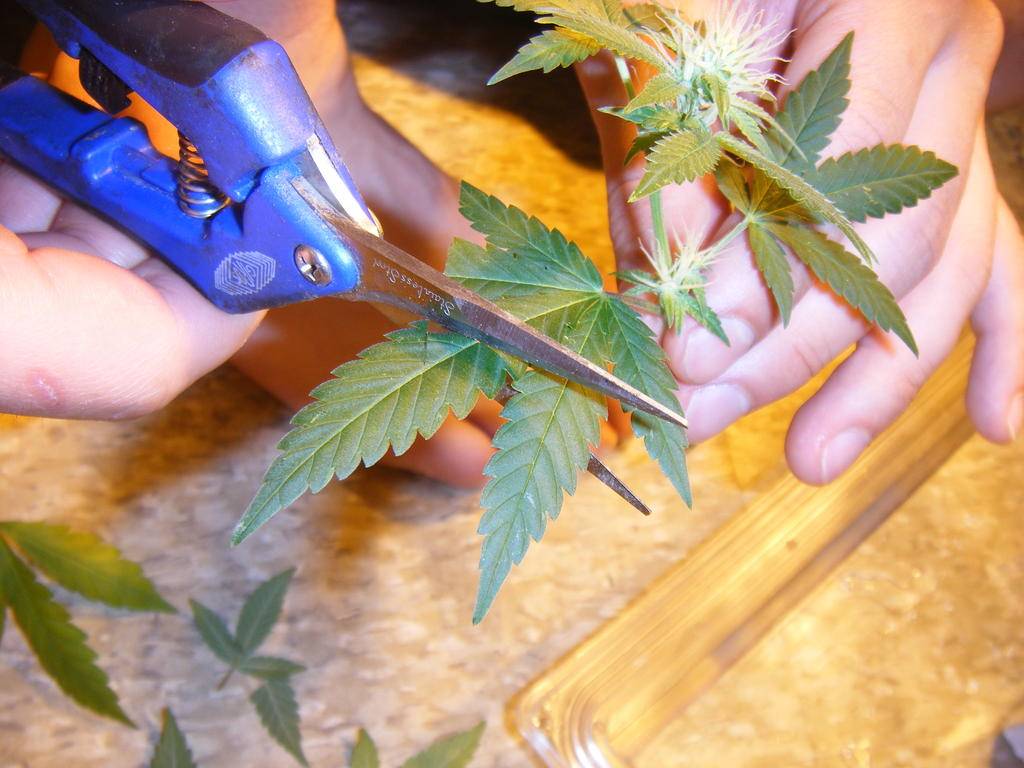
If the cutting has any big leaves on it, I trim the leaves so the plants can worry more about growing roots instead of saving big leaves.
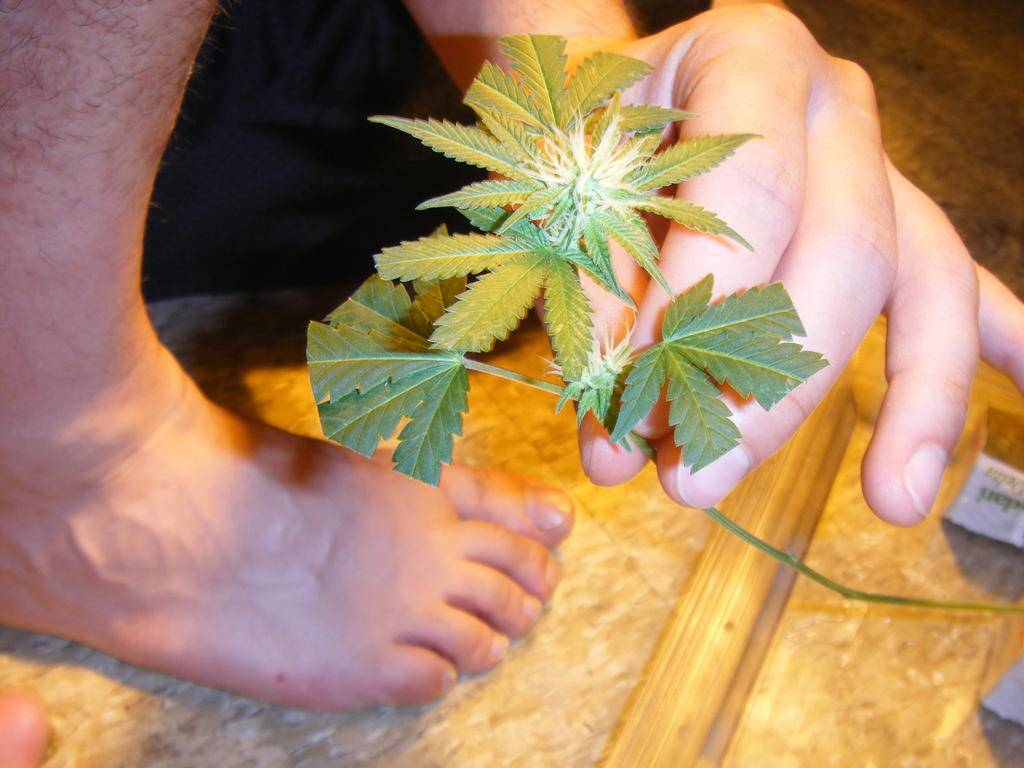
Please note, I need to get some new pictures to replace these ones that came from flowering plants.
Now I just slide it down into the cube and go pretty close to the bottom of the cube without being able to see it touch the bottom though. I make sure that the points where I cut off the leaves completely make there way into the cube.
I take the rest of my cuttings and put them onto my light cover and make sure that all the cubes are touching. I can fit up to 18 cuttings on this clear light cover.
Insert Picture
Finally, I place the clear tray into a Propagation Tray & Dome that contains holes on the dome that can be open or closed. I make sure that I close the vents for the first 24-36 hours. I don't always let the cubes touch their neighbors. If I do space the cubes more apart, some of them tend to dry out faster than others so I have to keep a closer eye on each cube.
After 24-36 hours, I lift up the entire dome for 3-5 minutes and wipe off any condensation that collected on the Propagation Dome and let the cuttings get some fresh air. When I put the Dome back on, I keep all the vents open from this point on.
Every 24 hours, I lift up the entire dome for 3-5 minutes and wipe off any condensation that collected on the Propagation Dome and let the cuttings get some fresh air.
After about 5 days, I check the cubes to make sure there's enough solution in the cubes and also check to make sure they are not too heavy. On day 7-9, I am looking for the Mini-Block to weigh close to 48 grams. If your Mini-Block stays too wet, it takes much longer for your cuttings to root. If the cubes start to dry out, I add a little bit more solution but I squeeze out the excess very gently so they are not water logged. The sweet spot to getting fast roots is for the Mini Blocks to get to around 48 grams by day 7-9. I can usually get roots in 7-10 days and after about 7 or 9 days, if your Mini Blocks weigh over 55 grams and don't have a root that you can see from looking at the bottom of your clear tray, you need to keep the Dome off for longer periods of time. I don't like to keep the Dome off for more than 1 hour at a time so if you need more than an hour, do that every 6 hours or so. That's the beauty of these clear trays, you don't need to disturb the roots to see if you have roots, you just look underneath. Try these cloning techniques and watch your success rate go to 100%! Enjoy!

More pictures will be edited into this post.
This guide is to help out fellow growers who don't have perfect success in Rockwool or Aeroponics. Because of the data that I keep, I know how to have 100% success rates with my cuttings. I haven't lost 1 cutting for at least the last 10 years because of what I have learned.
It is extremely important to first talk about Sterile Conditions and Tools before cloning. Every surface must be cleaned with some sort of Bleach or Physan 20 and every tool that you use must be also cleaned with Isopropyl Alcohol or something of the like. Sanitary Conditions are very important to have 100% Success Rates.
It is also very important to take your cuttings from perfect healthy MOMS. Perfect healthy rooted cuttings come from perfect healthy MOMS. If you MOMS are unhealthy, it would be best to bring them back to full health before taking your precious cuttings.
Lets start out talking about cloning in Rockwool because I believe that more people use this method. When I clone in Rockwool, I use Grodan 1.5" Mini-Blocks. My first step is to label each Mini-Block with the corresponding cutting that is going to be put into the Mini-Block.
First I start with a clear light cover from a 60 watt CFL from home depot and wash it off with a bleach and water solution and put it aside. After that, I take a sterile container and I soak the 1.5 inch Grodan Mini-Blocks for 1 hour in a solution of:
4 mL General Hydroponics Flora Series Micro
6 mL General Hydroponics Flora Series Bloom
10 mL Technaflora Thrive Alive B-1 (RED)
ALL THESE RATES ARE PER GALLON OF WATER AND THE SOLUTION IS PH'D TO 5.8
After the Mini-Blocks soak in the solution, I slightly drain just a little bit of the solution by very slightly squeezing the Mini-Block which drains 5% of solution.
Lets take this time to talk about how I come up with exact percentages of solution drained. The average of my completely soaked Mini-Block weighs 67.3 grams. When I slightly drain the cube, it weighs 64.3 grams. Using a scale to fine tune your technique, adds consistency to taking your cuttings throughout your life. When you get used to using a scale for a while, you may start to become more familiar with how weights feel and then you won't need to use a scale anymore. An accurate calibrated scale will never lie to you.
After 5% of solution is drained from the Mini-Block, I take my cuttings from a Perfectly Heathy MOM and cut off the lower leaves while keeping the top leaves in tact. Then I take a 45 degree cut about 1/4 to 1/2 inch below the point where I cut off a leaf. This is what it looks like when I've made my cuts. Notice the 2 points on the stem from where I cut off the 2 leaves. These 2 point will be placed in the cube and that will be 2 more points where solution can have contact with the inside of the stem as well as the main diagonal cut that I made on the stem.
If the cutting has any big leaves on it, I trim the leaves so the plants can worry more about growing roots instead of saving big leaves.
Please note, I need to get some new pictures to replace these ones that came from flowering plants.
Now I just slide it down into the cube and go pretty close to the bottom of the cube without being able to see it touch the bottom though. I make sure that the points where I cut off the leaves completely make there way into the cube.
I take the rest of my cuttings and put them onto my light cover and make sure that all the cubes are touching. I can fit up to 18 cuttings on this clear light cover.
Insert Picture
Finally, I place the clear tray into a Propagation Tray & Dome that contains holes on the dome that can be open or closed. I make sure that I close the vents for the first 24-36 hours. I don't always let the cubes touch their neighbors. If I do space the cubes more apart, some of them tend to dry out faster than others so I have to keep a closer eye on each cube.
After 24-36 hours, I lift up the entire dome for 3-5 minutes and wipe off any condensation that collected on the Propagation Dome and let the cuttings get some fresh air. When I put the Dome back on, I keep all the vents open from this point on.
Every 24 hours, I lift up the entire dome for 3-5 minutes and wipe off any condensation that collected on the Propagation Dome and let the cuttings get some fresh air.
After about 5 days, I check the cubes to make sure there's enough solution in the cubes and also check to make sure they are not too heavy. On day 7-9, I am looking for the Mini-Block to weigh close to 48 grams. If your Mini-Block stays too wet, it takes much longer for your cuttings to root. If the cubes start to dry out, I add a little bit more solution but I squeeze out the excess very gently so they are not water logged. The sweet spot to getting fast roots is for the Mini Blocks to get to around 48 grams by day 7-9. I can usually get roots in 7-10 days and after about 7 or 9 days, if your Mini Blocks weigh over 55 grams and don't have a root that you can see from looking at the bottom of your clear tray, you need to keep the Dome off for longer periods of time. I don't like to keep the Dome off for more than 1 hour at a time so if you need more than an hour, do that every 6 hours or so. That's the beauty of these clear trays, you don't need to disturb the roots to see if you have roots, you just look underneath. Try these cloning techniques and watch your success rate go to 100%! Enjoy!
More pictures will be edited into this post.
Last edited:

") I'll try Woods Rooting Compound and I will write about the results.
I'll try Woods Rooting Compound and I will write about the results.
