
Sauce
Active member
x10fast said:

Sorry for the shitty paint sketching but you get the basic idea. Just wire the cord to the socket, you don't want the base assembly part at all. You would probably save $ and time to just buy the cord and the socket separate and then wiring them together. Sometimes you can find a socket already wired to the cord with no assembly part.
Last edited:


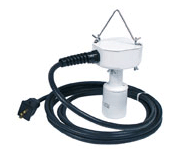
 Here's what I used:


