What's new
  • Happy Birthday ICMag! Been 20 years since Gypsy Nirvana created the forum! We are celebrating with a 4/20 Giveaway and by launching a new Patreon tier called "420club". You can read more here.
  • Important notice: ICMag's T.O.U. has been updated. Please review it here. For your convenience, it is also available in the main forum menu, under 'Quick Links"!

1toke's dual 400 HPS closet grow #6

G

Guest

OK - a few peeps in chat wanted threads - so here's a contribution for what it's worth.

My GHETTO FAB CLOSET (or Dumpster-Diving DoHicky) :biglaugh:

Soon after relocating and early chopping the 5th grow of Nevilles' we finally got settled into our new place - a big 2-story country farm house. Mrs. toke and I have an empty nest and a guest bedroom! :eek: BTW - check her out in chat some time, she pops in when she has to see what all the laughing is about! Hates to see the guys having all the fun! Come on in - there's plenty of room for everyone -no standing & the bars' always open! Gypsy's got big comfy couches & big screen TV! :biglaugh:
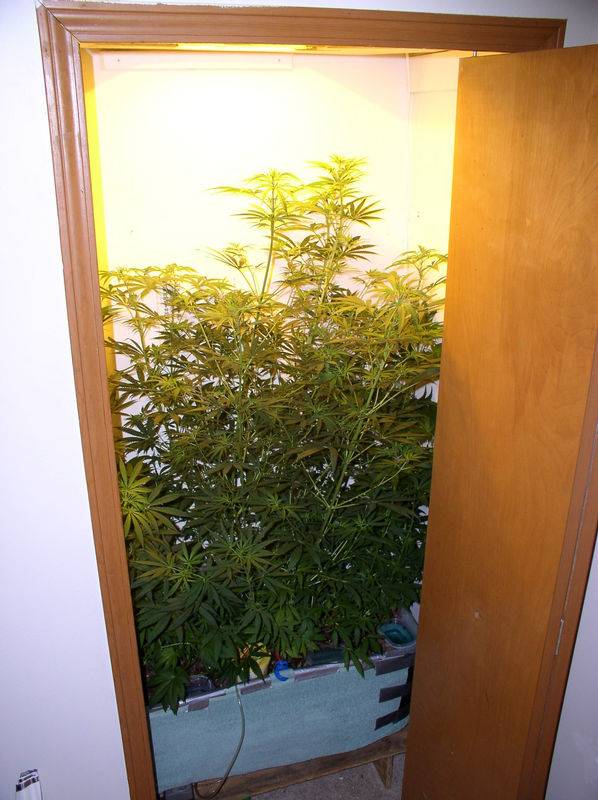
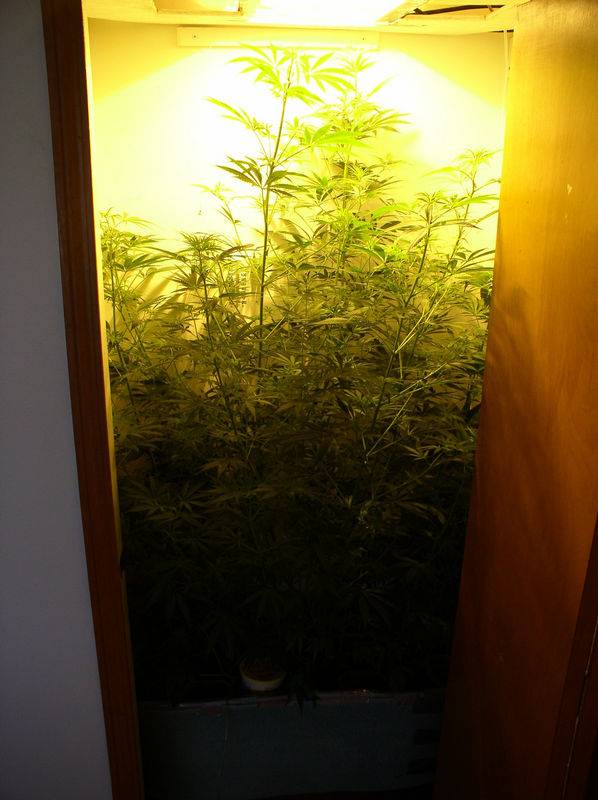
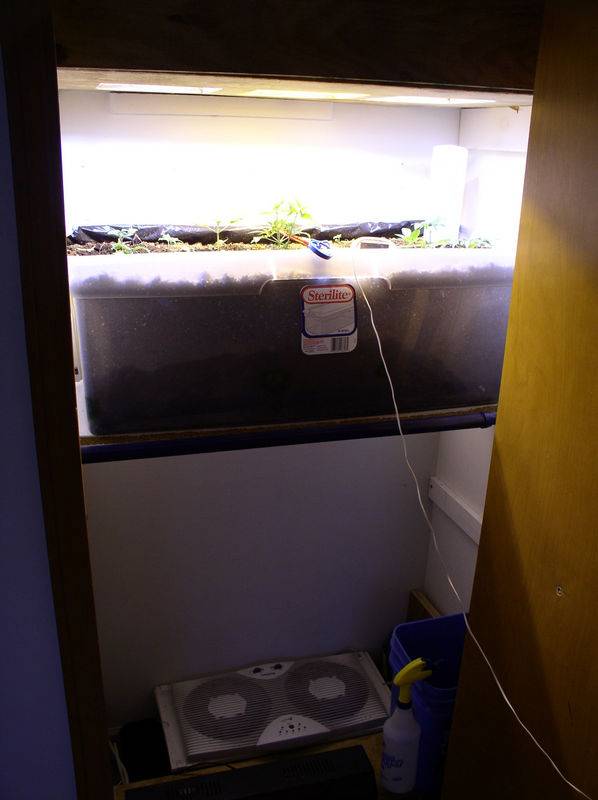
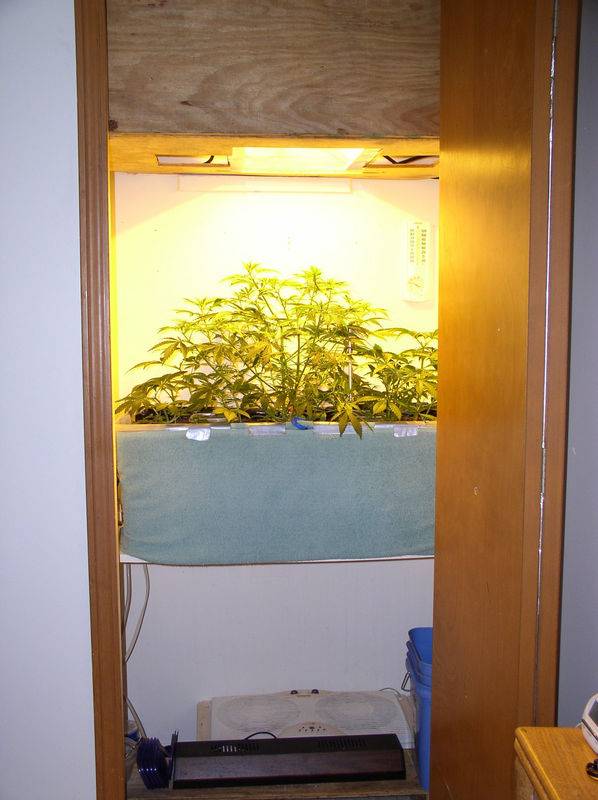
Well, we may need the bedroom for stoners that discover they ain't gonna make it home tonight - but the closet is off to one corner. Hmm. 2' deep, almost 4' wide and 8' ceiling - with a shelf and clothes hanger bar. :chin:

Out to the garage dumpster-stash:
} Nice 31 gal TufTub - about 2.5 cu.ft. - 14x40 and 14 deep - dumpster freebie.
}Two new window fans - digital temp controlled - about $30 each.
}Chunk of sheet metal - dumpster freebie.
}Plywood scraps - dumpster freebie
}Two 400 watt HPS with remote ballast - eBay win, $253 total.
}Air conditioner extension cord and plug strip - dumpster freebie.
}Couple digital greenhouse timers, couple 1800w timers - dumpster freebie.
}Assortment of plate glass - dumpster freebie.
}Garden thermometer/humidity gauge - dumpster freebie.
}Dryer vent duct - aluminum flex - dumpster freebie.
}Wall vent cover - dumpster freebie.
Total dent in wallet...........................................$313

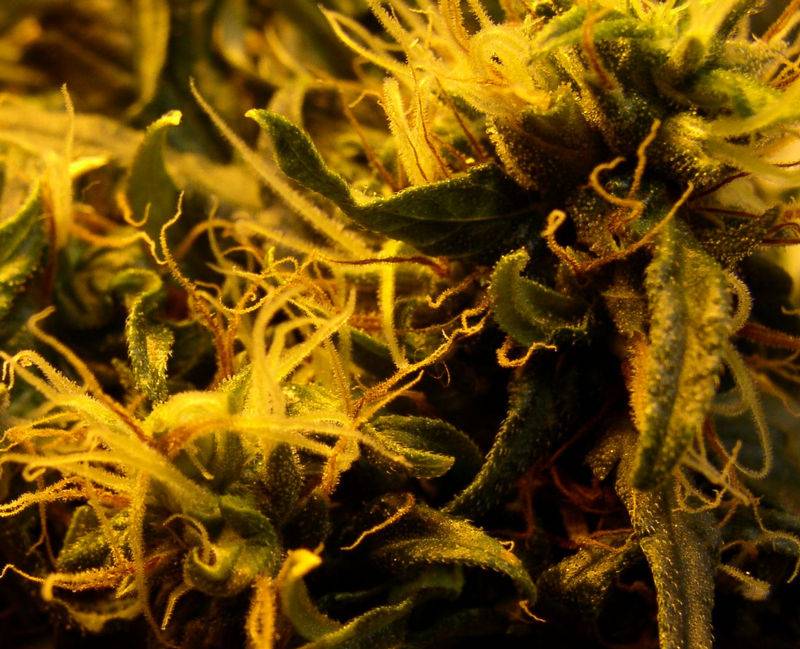
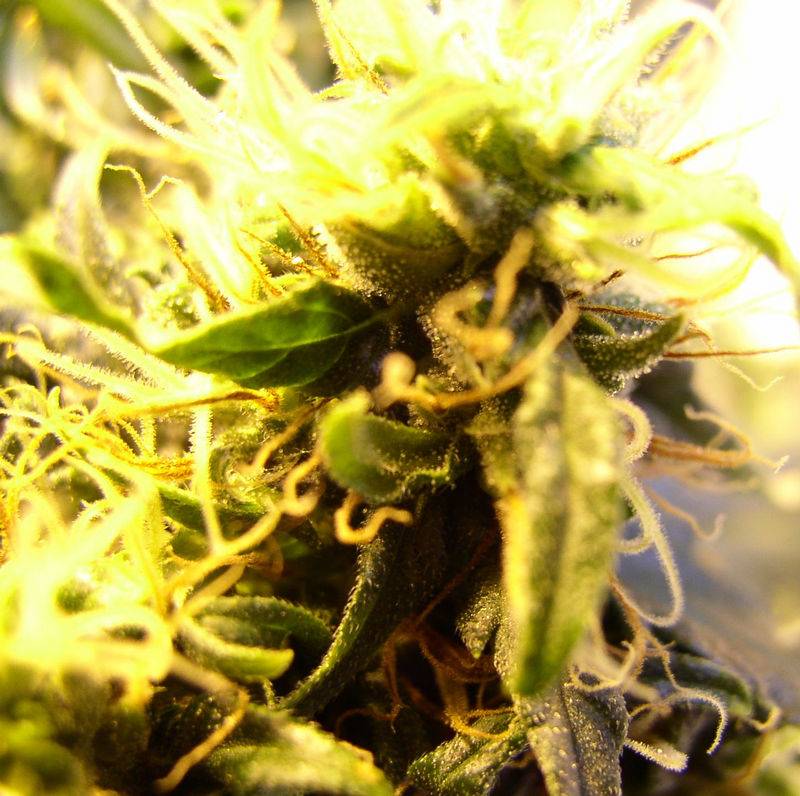
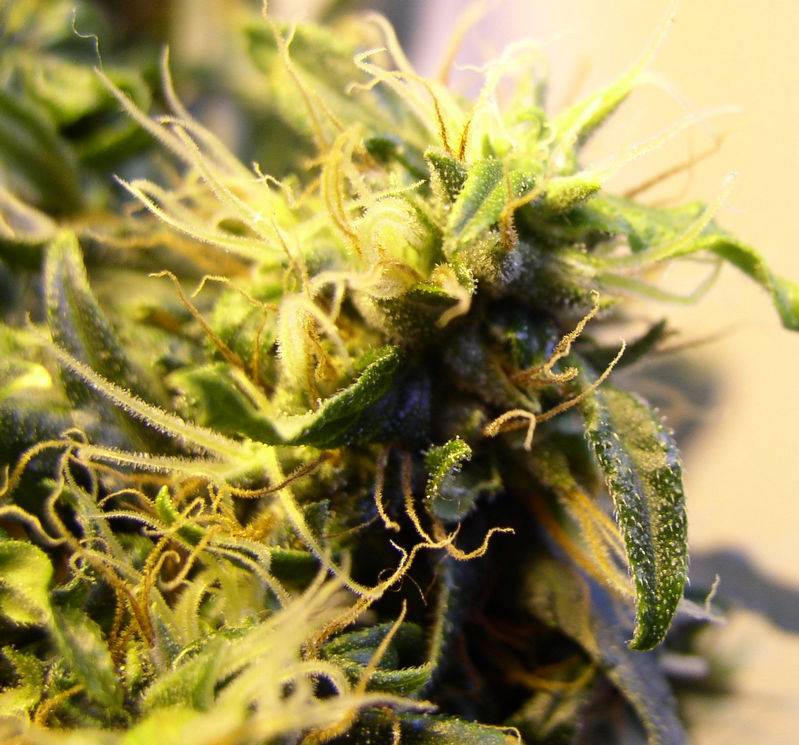
Smoking your own homegrown bud - FUCKING PRICELESS

:chin: 
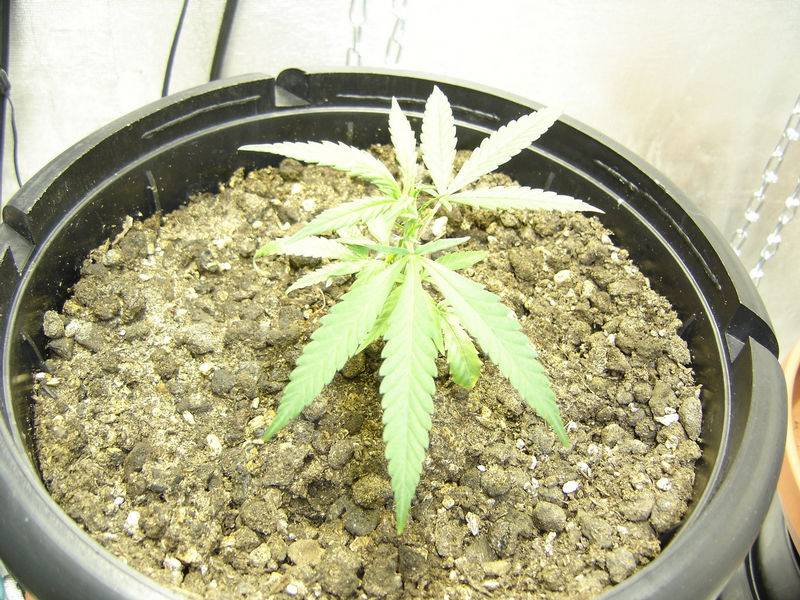
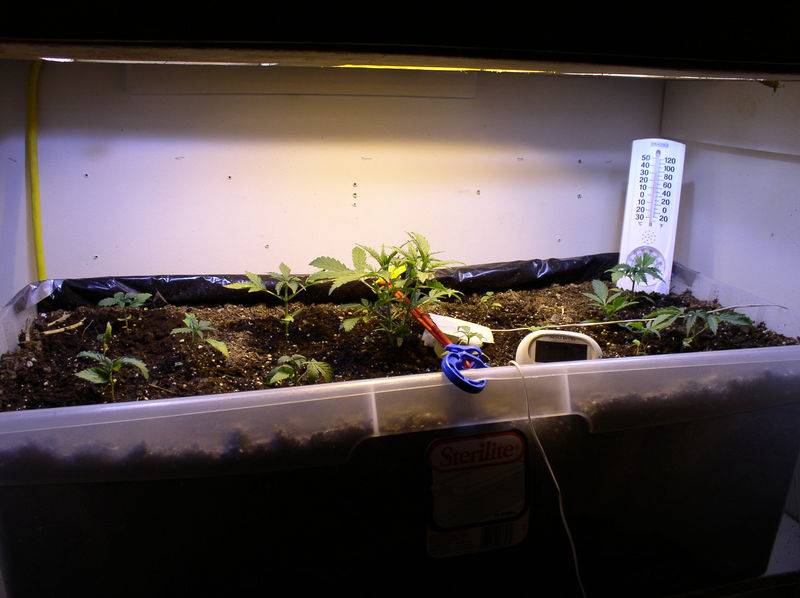
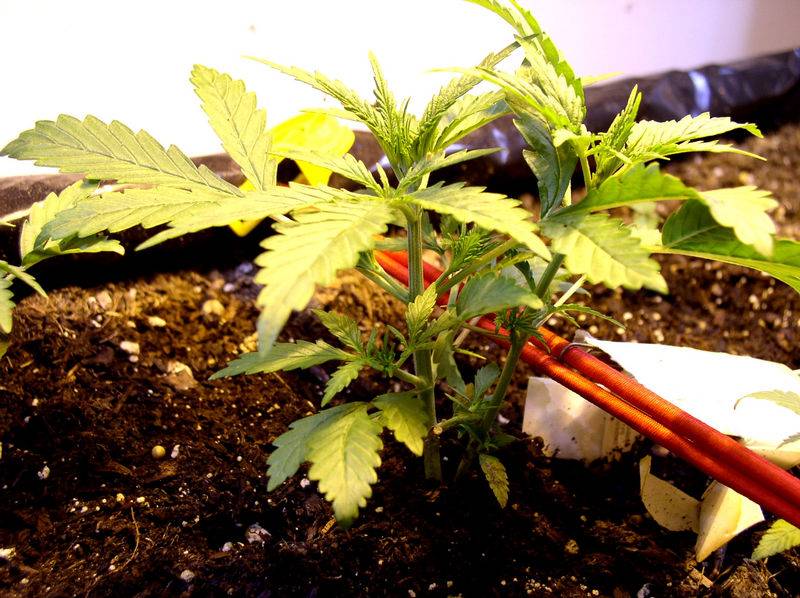
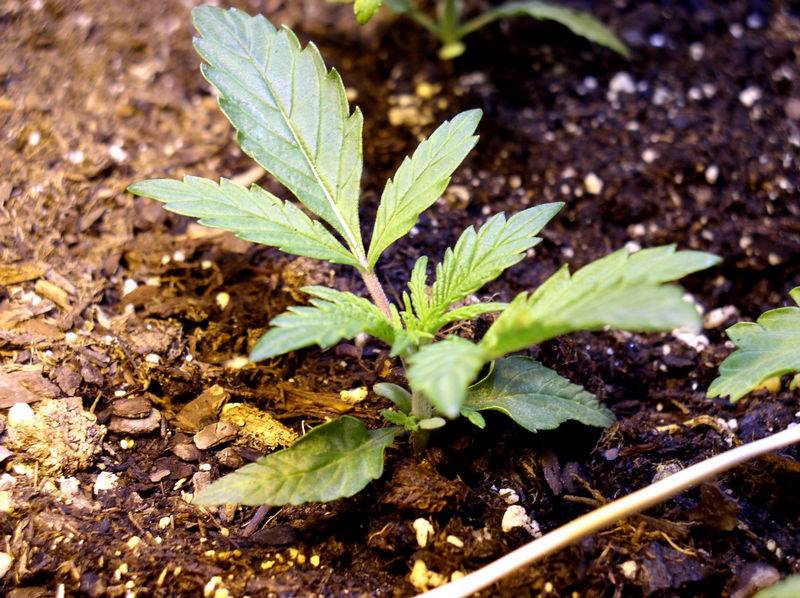
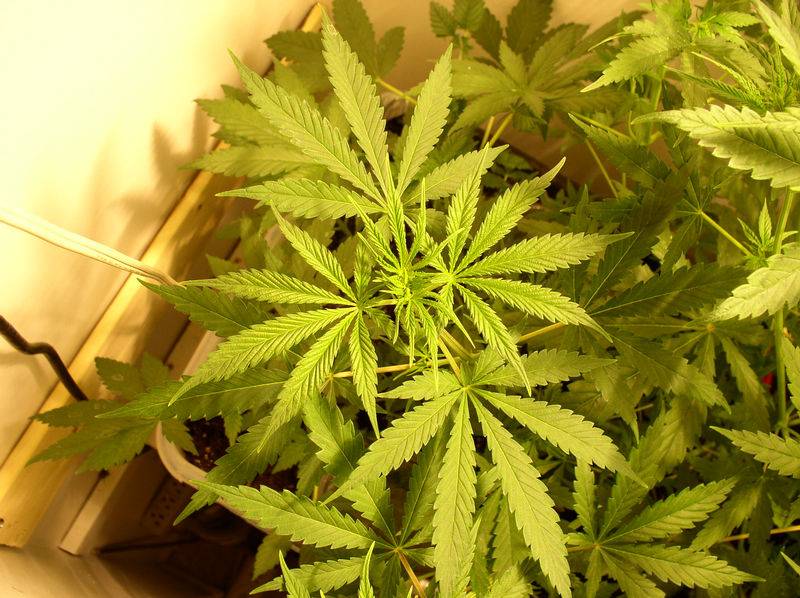
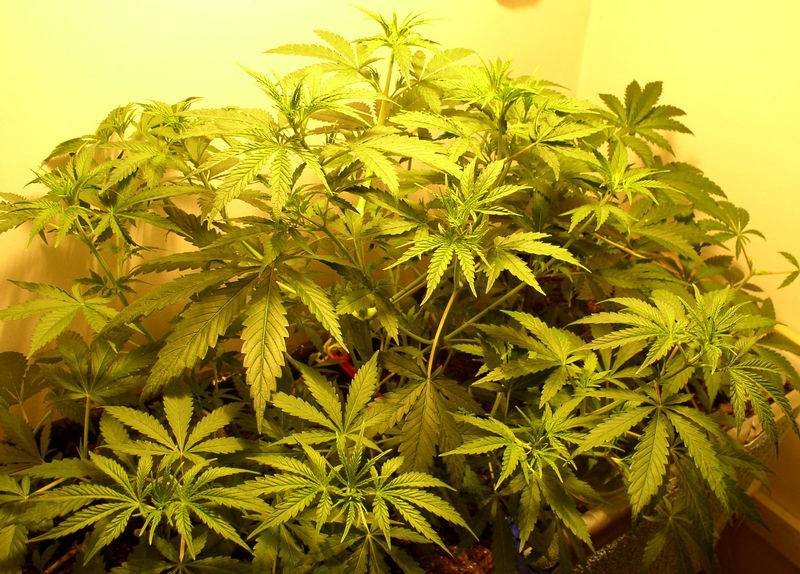
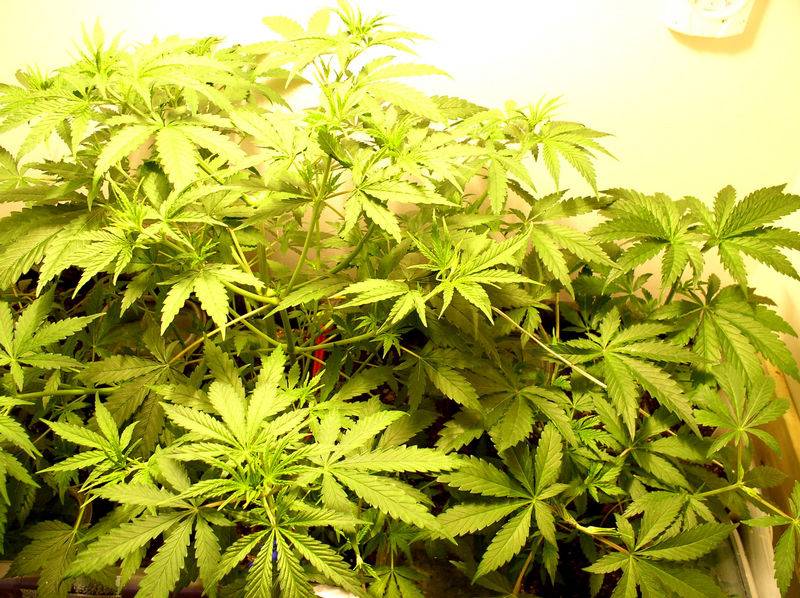
First thought is use the shelf and hang lights on the clothes bar, set a tub filled with soil mix in & get beans cookin. :rolleyes:
:rolleyes: But with last 5 grows I needed all the 8' with these sativas. :canabis:
:chin: Thinking that they want a lot of money for hoods - then try to vent them-why not turn the shelf and above it into a hood. After a few more bowls I decided to remove the bar and cut holes in the shelf, cover them with glass and set the lights on them and put the heavy ballasts on the shelf. This is what I came up with:


:chin: 
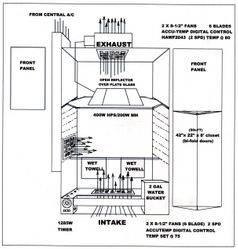
With the ballast and everything on the shelf - I'm gonna have to move the potting tub up and down to the light, so I'll have to fasten strips and the walls. And I'll need plenty of ventilation, so off we go to mount the fans and get the closet ready.

 
G

Guest

:wave: First problem turning the shelf and compartment above into a hood: need an intake without cutting up the hollow core bi-fold doors. :eek:
:chin: Bottom of the door is about 1 1/2" off the floor - 32x1.5=48 sq.in. for intake. And definitely want one of the fan sets near the floor blowing up the back wall. Solution: build a platform (false floor) and mount the fans at the back. Fans assist intake and blow it up back wall to the "hood" shelf. Have to cut vent holes in the shelf to take flower chamber air out and into the "hood" where it will be vented up into the attic by the other set of fans mounted in the ceiling.


G

Guest

:wave: After more lurkin 'n learnin' about how important temp control is, got to thinking about the central air and something someone once asked about tieing a 4" duct to it and into the closet. I found an old clothes dryer vent flex thingy, got out the ladder, climbed up into the attic and found the guest bedroom leg I could T into. I don't want duct hanging in the closet and taking up room, so how to get the AC to the lower part of the closet? :chin:
Easy. I cut the top plate of the closet wall in the attic and attached the 4" air conditioning duct to it. Then I dug up a vent cover and cut a hole in the wall cavity the duct was attached to - pop on the vent, and voila! Instant air - the wall cavity is now part of the AC ductwork. And the vent has controllable "flaps" to adjust the flow. :smile:

I have never need it but ya never know - Murphy was an Optimist.


They seem to like it.


G

Guest

:wave: Gotta take the opportunity to thank IC for mentoring me this far - all you guys that have answered my noob questions and put up with my "humor" - I salute you. Without you guys I wouldn't be even this far - tho I got a long way to go to grow with the Big Fellas! :biglaugh:


G

Guest

:wave: Time for a break - join us at the Ann Arbor Hash Bash!


Also had time to dream this one up after reading up on drip buckets but that's another thread! :biglaugh: Stop by Bigtokes' bio bucket thread and check it out! I may start a hydro thread for another brainstorm project I started. :confused:

:friends: :friends: :friends: :friends:


Last edited:
G

Guest

Update pics.


Notice the tub cover - learned early on that the damn tub was almost clear and it stunted growth - coulda painted or replaced the tub, but cheapskate that I am decided to cover with towels that are occasionally misted to double as a humidifyer too!

 
G

Guest

:wave: Hey all - more updates.


Had to move the plants down. Also needed more room - so time to raise the shelf "hood" as high as I can :biglaugh:


And took some cutting after reading 00420's Butter Bucket Bubbler :biglaugh:


nycnoob

Member
damn...really nice plants and nice closet...sooo great...nice innovative skills too..did you put a water pump under that lol? Well seriously hope you have more fun..
 
G

Guest

Dude
Are you moving them outside? :chin: When are you going to start flowering? Whats the stretch on that strain like? :confused: :eek: keep us updated this should be interesting.. peace.

sack :friends: :canabis: :joint:
 
G

Guest

Thanks for stoppin by & checking it out

Thanks for stoppin by & checking it out

:wave: Hey everyone. Thanks for popping in to check this grow. :wave:
Howdy Mr. GreenJeans - yep they like it too much. :biglaugh:

Hey SS - good to hear from ya - thanks -see ya in chat! :biglaugh:
nycnoob - great to see ya m8. No water tank yet but this Nevilles' gets ya thinking! :biglaugh:
zeppelindood - thanks for the TU! This is gonna be along one. :biglaugh:
sackoweed - moving them outside is not an option, wish it was! The stretch is scary! For those that haven't chatted I suppose a little seed history would help.

When we were stationed out in Denver, CO, a manager that we were training invited us to partner with him on a seed venture from a med grow op in Colorado Springs - after sampling the strain I burned my hand getting money outta my pocket! We got an ounce to smoke and 500 seeds, which we split 50-50. The seller told our partner that is was Neville's Haze - that was 2 years ago.

nOOb that I was I couldn't wait to pop some beans and do a grow out there - of course everything took it's natural course, I knew nothing - yeild was excellent smoke but hardly 2 ounces and took forever - it went to seed. :biglaugh:

So I packed the seeds, labelled them and stored them. That grow was cut short as our company relocated us to our current residence. When we got settled in here and I got the chance to do a lot of research I found out the the original Neville's was brought about in Haze Bros Greenhouse in Santa Cruz, CA in the 70s' - very doubtful now that our strain claim was genuine. Being the stubborn ass that I am and refusing to give up (wanting to believe that we did have Neville's) I found out that Neville and a friend of his (Haze Bros) decided to create a haze strain in a 3 year project by crossing Columbian Gold with Acapulco Gold the first year, then cross that with lowland Thai brought in the 2nd year and finally cross that with highland Thai brought in the 3rd year. The resulting strain apparently couldn't be stabilized enough to be commercially viable and the project was dropped. Here is where very little is mentioned and hard to find any information that can be verified - somehow Shantibaba had it in Amsterdam in the 80s' and sold it at Mr. Nice Seeds. I would appreciate any collaboration on this strain research and distribution timeline - all my info is secondhand heresay and we all know how reliable that is. About the same time we purchased our seeds and after finding OG, CW and IC Mag it appears that JLP released or distributed a Phoenix1 Project seed lot that appears to be the continuing stabilization project for Neville's Haze. I would be inclined to think that our seeds were from this stock - but those were distributed in neat little blister packs and clearly labelled Phoenix1 whereas ours was received vacuum packed and a quantity of 500, but the timeline sure fits - maybe just co-inky dinky? Whatever the outcome of this interesting research the high is unmistakably Neveilles' - and reminiscent of that old Columbian Gold/Acapulco Gold that memories are made of - the smoke reminded me of Columbian Redbud in taste and smell, mild but wildly expansive and when released you can feel the buzz as you exhale. Your whole nervous system relaxes and you begin to feel that head buzz behind your eyes - as you take your second toke your mind begins to race and everyone starts uncontrollable giggles, you immediately spot the humor in everything. If you continue smoking your heart races and when you have too much your hands start to shake (kind of like low blood sugar). All this time you really don't know how blasted you are until you stand up and try to do something. The amazing trait - and the main reason I'm convinced it's somehow closer to the original haze is that the buzz can last all day! I've had a few tokes for wake & bake and find myself still blasted at supper time. Anyway - updates on strain verification as they come in, this one is on the top of my watch list. From the Phoenix smoke reports it's my opinion that quality was a casualty of the stabilization attempt, from what I've been able to read the buzz was dissappointing and lasted a few hours - far cry from our experience!


As to flowering - last grow I went 12/12 right from seed and they finished at 4'. This time I let the sprouts muscle up for 2 weeks before transplanting into the big tub - then another week and they looked healthy enough to top at 12". I was going to experiment with the light regimen after reading a lot of very interesting threads on the subject of simulating natural lighting periods and I started them on 20/4, switching to 18/6 when they were transplanted.

After they were topped went to 16/8 for a month vegging, and at 5 weeks went to 14/10 and they showed sex the next day. At 7 weeks they were 4' tall and I got talked into taking cuttings. Cuttings were at 3 days with no luck - I used conditioned tap water ph'd to 7 - I discovered the airstone plugged on me so I upgraded with two 9" wands - this is day 4.

I'm at the point of running out of room - this is one plant - I transplanted the rest and have them and scrambling to confiscate another closet. :biglaugh:


Last edited:
G

Guest

:wave: :chin: :wave:
Quick update while it's on my mind (like everything else rushing through! Creating a vacuum) :biglaugh:

Summary of grows on this one:
1. Spare bathroom shower/tub grow - cut short (apartment inspection)
2. Tool shed grow - photoperiod control prob (outdoors) - seeded
3. Closet grow #1 - early harvest - relocated to another state
4. Closet grow #2 - nothing to brag about - excellent smoke tho
5. Closet grow #3 - 3 ounces of excellent bud to smoke, could have gone another 30 days. Lights, ventilation, soil PH make all the difference.
6. Closet grow #4 - this thread. THANKS EVERYONE ! ! ! :friends:
 
G

Guest

nycnoob said:
damn...really nice plants and nice closet...sooo great...nice innovative skills too..did you put a water pump under that lol? Well seriously hope you have more fun..

Now ya went and did it! :biglaugh: Yep - now has a water pump, drip system & timer! :biglaugh:

Will be taking week's vacation over in Wisconsin to visit some "real" old farts - so the quest for a robot caretaker began. :biglaugh:

I borrowed the pond pump (racoons always steal the damn coy anyway!) and made a drip tube from 3/8" irrigation tubing, capped off the end, tossed the pump into the water bucket, plugged it into a timer and saved caretaker's wages for watering while I'm gone. :biglaugh:
 

issack

Active member
Veteran
nice box man...looks like mine.. good innovation!!!. wish more people would use the glass to seal off the light. makes life soooo much easier..
 

issack

Active member
Veteran
i found that two paynes of glass is much better. when i was doing one payne the heat still was extreme....just a thought 4 u
 
G

Guest

:wave: Hey issack! How's yer closet doin? Great to see the other personal growers around with cabs and closets! Who said we gotta come outa the closet???? Move over big fellas! The closets can compete too! :biglaugh:

:smile: Thank you , Thank you FJ! (er- Ghost_of_John) :biglaugh:
Damn - gonna have to get used to that!

This morning I found the bitch burnt her top! :eek: She has officially stopped - or at least slowed the damn stretch down! I had to grab some adjustable curtain rods to span across the top and spread her to the walls.
:biglaugh: Note to self for next grow: SCROG :bashhead: :biglaugh:

Thinking if I can rig up a cargo net about a foot under the lights to give 'em something to think about and spread out before they burn those pretty tops! Then maybe train them across and out to maximize the light penetration. Will post updates when I get it installed. :spank:

Someone asked about the AC - nope, it's not needed, U wouldn't think an inch and a half short door would provide 48 square inches of intake, wouldja! Temps are consistently 71 - lights on or off (thanks to the digital temp controlled fans) and go up 5 degrees if I open the door to work in there. So what about the AC? Well....this time around I'm gonna stress her into finishing faster both by setting the photoperiod during the last few weeks to make her "see" the sun 5 times in a week, thus maximizing the light period without adding more lights!

http://www.overgrow.com/growfaq/607 Well. Since links to that (ahem) other site don't work: :fight: :fight: :cuss:
:Bolt:
How do I manipulate the photoperiod for larger yields?
Big thanks to MisterIto :abduct:

[DISCLAIMER]: This information is provided as experimental data and not fact.

The only photoperiod manipulation from years of experiments that offered discernible improvements was the following photoperiod adjustment made for 1 or 2 calendar weeks at the point of maximum flowering rate: Daylength of 21 hours, 36 minutes with a dark period of 12 hours. To accomplish this, you need a 7 day, 24 hour digital timer. During a 7 day calendar week on Earth, the "sun" only cycles 5 times. This permits easily switching back to the regular 12/12 at your discretion. You may want to only alter during peak flower production to stimulate the plant's metabolism. Using this photoperiod throughout the flowering cycle will cause this:

A variety that takes 49 days of 12/12 to mature, won't see 49 - 12 hour dark periods under 21:36/12 until almost 10 calendar weeks have passed.

The total increase in light energy is almost 80%, which will produce larger yields, if all of your other enviromental conditions are kept optimal.

The total increase in flowering period is only 40%, half the potential room for improvement. This means you don't have to be perfect to win out.

Selective application of the 21:36/12 photperiod for only 1 or 2 weeks extends the wait only 2 to 4 Earth days, which makes up the missing 2 complete day and night cycles each week on Planet Ito. This permits the additional light energy to be provided without purchasing additional equipment or overloading existing circuits, which maximizes the existing system's capabilities. The main advantage is that matched with co2 and optimal nutrition, the plants metabolism will increase dramatically. I have only successfully tested this photoperiod for two weeks. The potential for a net increase of 40% over the entire cycle (80% increase in light energy vs. 40% longer wait) is worthwhile. Don't be afraid!

Day 1 - Sunday, 6:00am til Monday, 3:36am
Day 2 - Monday, 3:36pm til Tuesday, 1:12pm
Day 3 - Wednesday, 1:12am til Wednesday, 10:48pm
Day 4 - Thursday, 10:48am til Friday 8:24am
Day 5 - Friday, 8:24pm til Saturday 6:00pm


NOW comes the AC! (Was wondering when he was gonna get to the point! :biglaugh: ) As they finish I'm thinking she should feel the fall coming on fast with the shorter days and temps gradually gettting colder - thus the AC. This one's gonna be interesting - stay tuned! Updates at eleven! :biglaugh:
Oscar's keeping an eye on the grow fer me.


and his bud Lucky - Oscar is about 6 pounds, Madagascar Pleco is about twice that -14":
 
Top