
DurbanPoison
Member
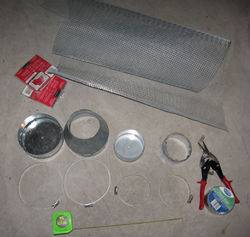
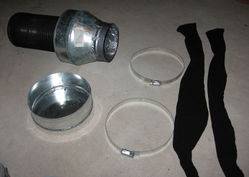
Here's what you'll need:
Tools:
Fat flat head screw driver (For Clamp Tightening)
Scissors (Preferrably Tin Snips if you have them or some tough scissors)
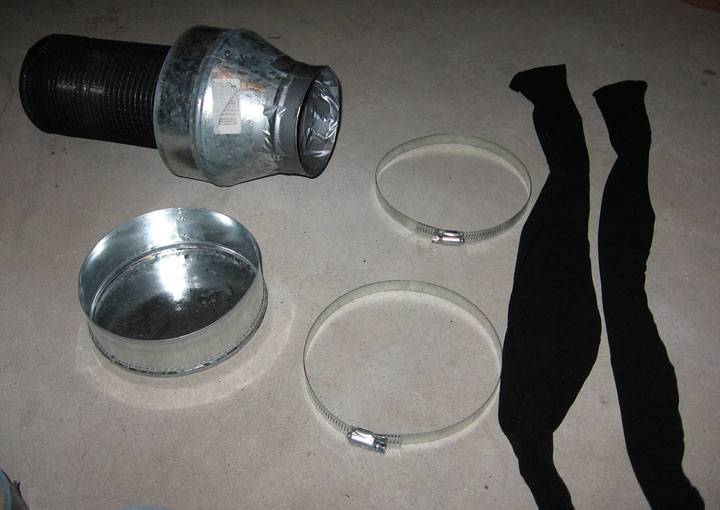
Parts:
Casa Depot-
1 - 4" Duct Cap $2
1 - 6" Duct Cap $2
1 - 4" Duct Collar $4
1 - 6" Duct Reducer $6
2 - 4" Hose Clamps $2
2 - 6" Hose Clamps $2
1 - Roll Duct Tape $3
Small roll of welded steel mesh (few sq. yards) - Firm preferrably. Not too stretchy. I used the stretchy soft stuff at first which works only if you pack the carbon in and use a lot of batting on the ends. It's ok but will sag. It doesn't keep its shape as well as the harder stuff. $6-$10
[Depending on how you will connect your fan, you may also want another reducer thats the same size of your fan and will connect to your reducer on the filter.]
Wallyworld-
Batting - Small Roll Blanket Style Not Clumped Preferrably $3
2 Pair Panty Hose (Clearance!) $2
3 18oz Cartons of Super Activated Carbon *@ Pet Store Too $15
(Or do like me and buy in bulk online. I found a guy on eBay selling 10lbs. of carbon for $10. Can't beat that! Although shipping was like $8-10 too but still a smokin hot deal.)
To figure out the size filter you will need for your fan, use this formula:
[If you need a larger diameter filter than listed in the tutorial, then you need to upgrade the duct sizes in the list and update the instructions.] Also keep in mind that if you're running some ghetto fan, expect ghetto results. Spend some decent money on your fan and it will perform. Some cheaper fans will give inflated figures too as to what the true CFM ratings are. My sig has a link for great pricing on vortex fans. I'm using the 4" 175CFM.
D = Diamter of Filter Inner Core (Inches)
H = Filter's Height (Inches)
I = Inner Core Surface Area Square Inch
CFM D H I
150 4 9 113
200 4 12 151
275 6 12 226
375 6 16 302
400 6 24 603
550 8 24 603
650 10 24 754
See the relation there?
Just take the CFM of your fan and choose the diamater of core you want and divide it accordingly. For example: I have 175 CFM and intend to use a 4" Diameter core. So I can look at the list above and figure;
150(CFM) divide 9(H) = 16.6 (Approximately)
Then I can take my 175(CFM Fan) and divide it by 16.6 to get 10.5". Therefore, my 175 cfm fan with a 4" Diameter would need a core height of 10.5".
[I found this formula somewhere online I can't remember. It's legit though.]
And so on... Just remember to be careful when your cutting the length of your core. It's important that the size is accurate or the filter won't work properly. If anything, you want to overshoot the height of your core by about a half inch at most. (I.e. I needed a 10.5" Height, so if there was a problem, I would want to make sure that my core is at least 10.5" to 11".) If you don't do this correctly you get a nice little backdraft and you filter nothing - like i did the hard way the first time lol.") Filter the air - don't blow it around. Enjoy!
Filter the air - don't blow it around. Enjoy!

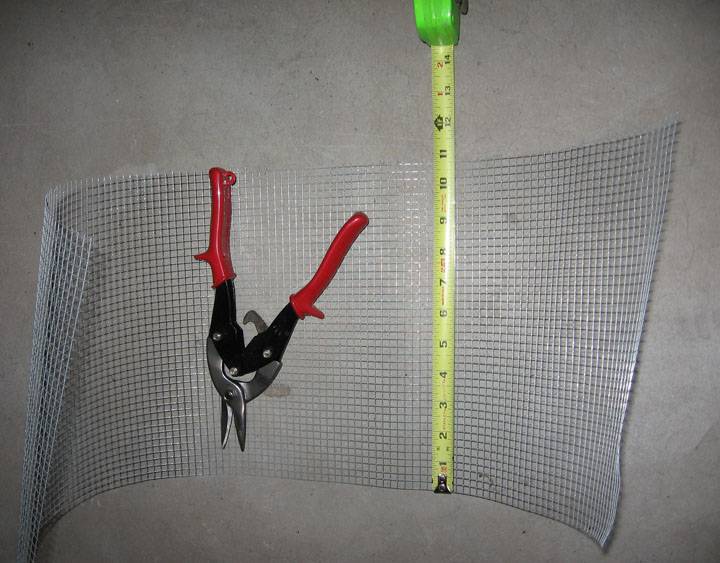
Ok step 1:
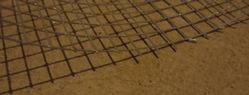
Take out your roll of steel mesh and measure the amount you will need. Make sure to use the formula above. Once you have the height of the core, just start snippin' away. I also like to use the same direction as the roll was in so it's easier to work with. [I have a 4" 175CFM Vortex fan so I built my filter core 10.5" Long.]
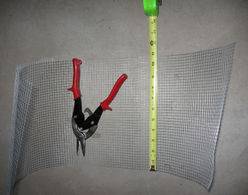
Step 2:
To measure the amount you will need, start rolling the piece you cut off around the 4" duct cap. Make sure to overlap by approximately 1-1.5". Or of course you can just measure it.

Step 3:
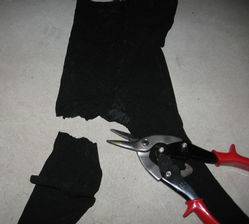
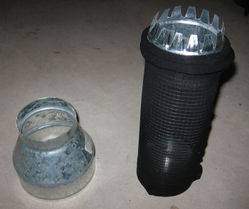
Once you have the size you need, go back and do one of two things. Either carefully snip off the long sharp edges or if you have a grinder, just grind them away. I have a grinder, but the snips were more accessible so I didn't bother. Here's a pic showing the difference. Get as close as you can - more details about this later.
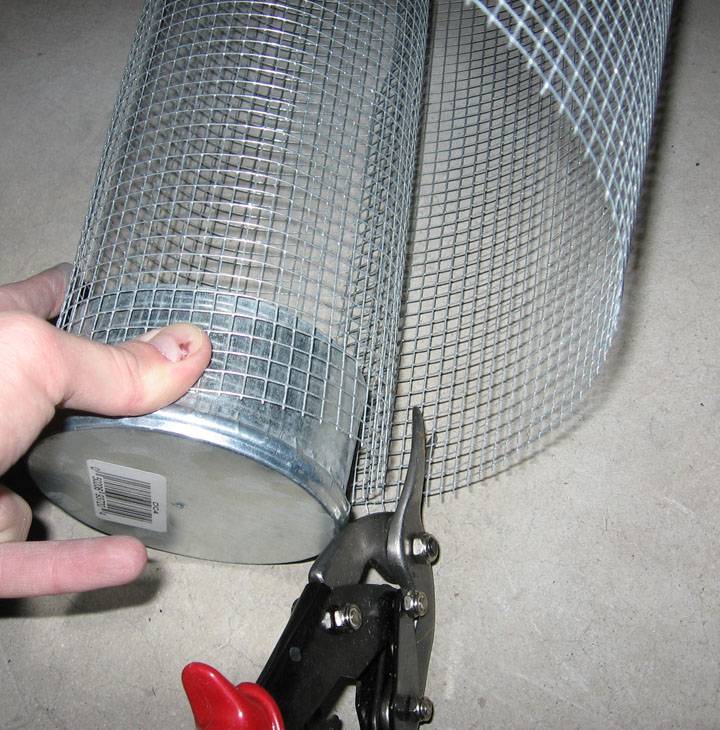
Step 4:
Now make sure to have both the 4" duct collar, cap, and 4" hose clamps available.
Once you've smoothed out the mesh, begin wrapping it around the duct cap again and once you have it lined up straight, attach the 4" Hose clamp and tighten it down good. Make sure it's very tight, but don't get carried away and make it start bending. We want longevity, not overkill.

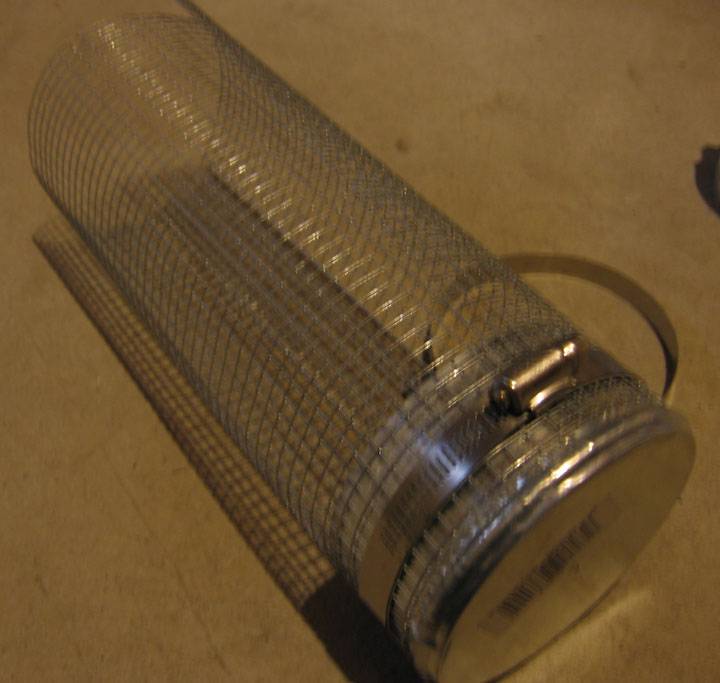
Step 5:
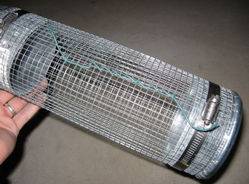
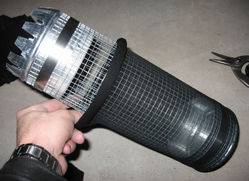
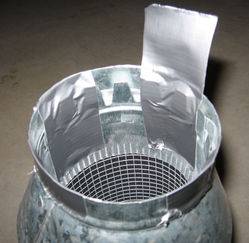
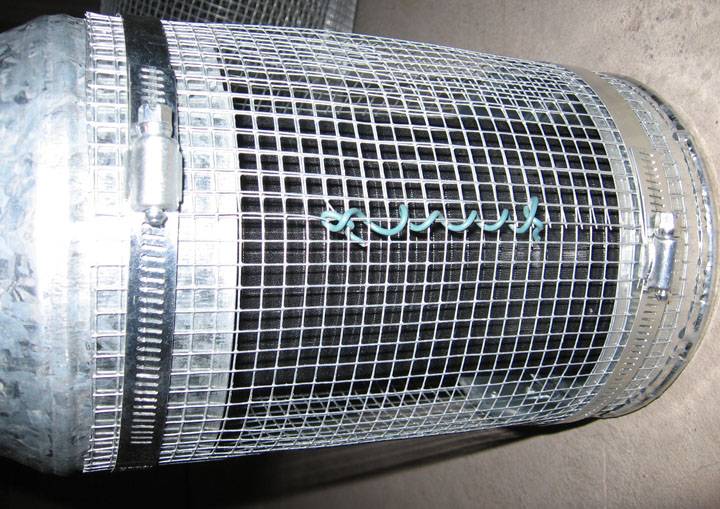
Now on to this little contraption which is going to be the core of our filter, add the 4" duct collar to the opposite end. Tighten the mesh and then attach the hose clamp just as it was done previously on the duct cap. You should end up with something that looks like the picture below.

Step 6:
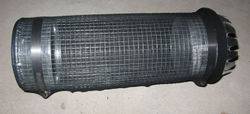
Now unless your perfect, you likely ended up with this goofy looking part sticking out on the mesh. What I did is took some spare wire lying around (which you likely have too ) and stiched it down to the main piece. This is what it looked like when I was through.
Step 7:
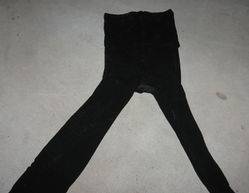
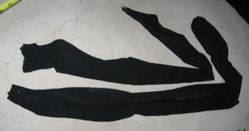
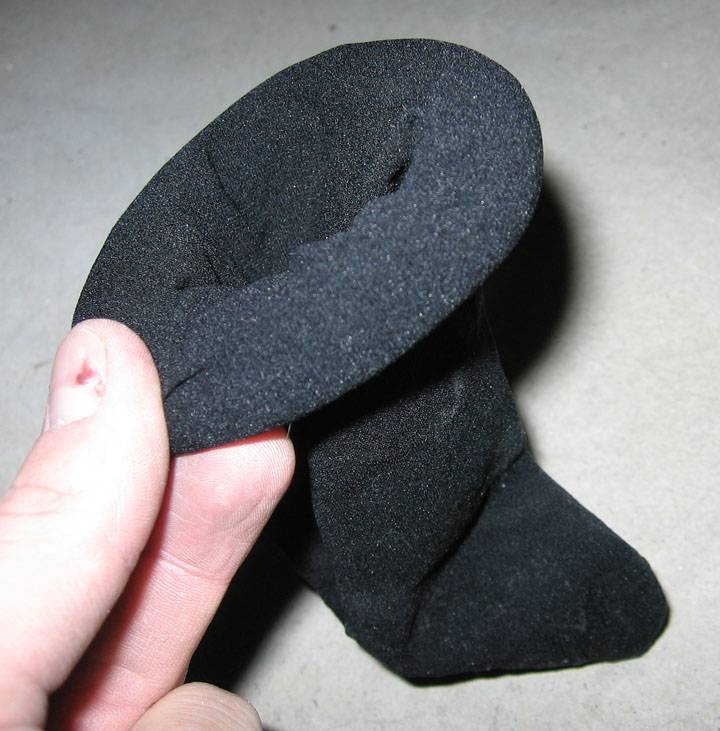
Ok now open up a package of the leggings. We will be just cutting off the legs and the new 'socks' will act as a pre-filter. Depending on what type of leggings you got, you may or may not have a separate seam that attaches the panty part to the legs. If it's there, make sure to cut on the side of the panty and not the side of the legging. This will help ensure the end of the 'sock' doesn't unravel. Here are a couple examples for you:
Step 8:
Now we're going to make something that looks very familiar to most of us. A condom! No - kidding, but seriously I can't stop thinking that it looks like one. Take one of the socks from the open end and start rolling it. If you need help, please get in touch with the nearest female you know on how to do this. It's really not complicated. Just the opposite of wrapping yourself up.
Also, repeat this step with the second legging.
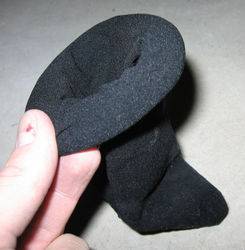
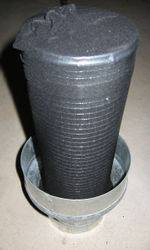
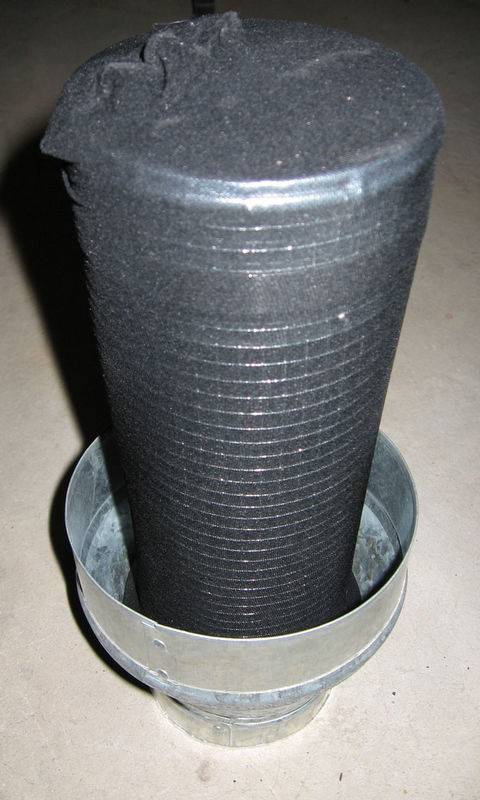
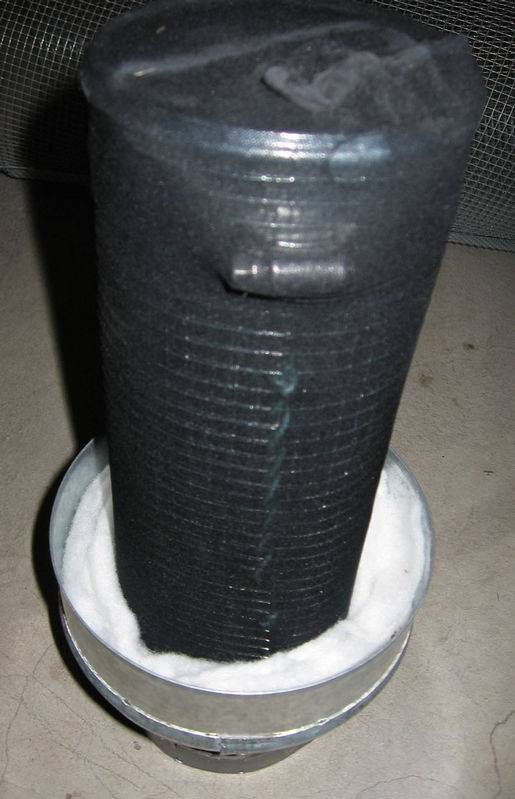
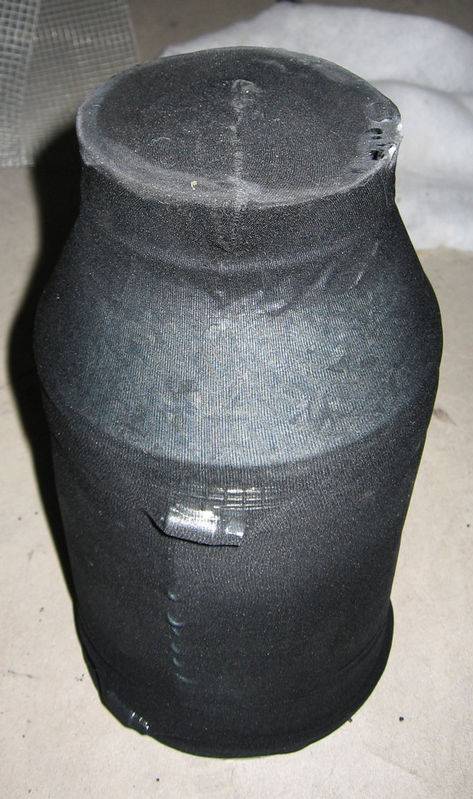
Step 9:
Now your going to take your 'sock condom' and roll it up and over the filter core. The closed side of the sock will end up on the same side as the duct cap. Also be sure to roll the sock only up to the point of the collar. Repeat this with the second legging so you have two layers of sock. It should look something like this when your through:
You'll find out quickly why it was so important to smoothe out the edges of the mesh because it will catch and cause the leggings to run like a marathon. SO BE CAREFUL!
Step 10:
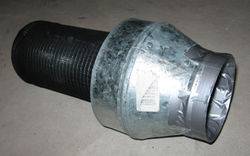
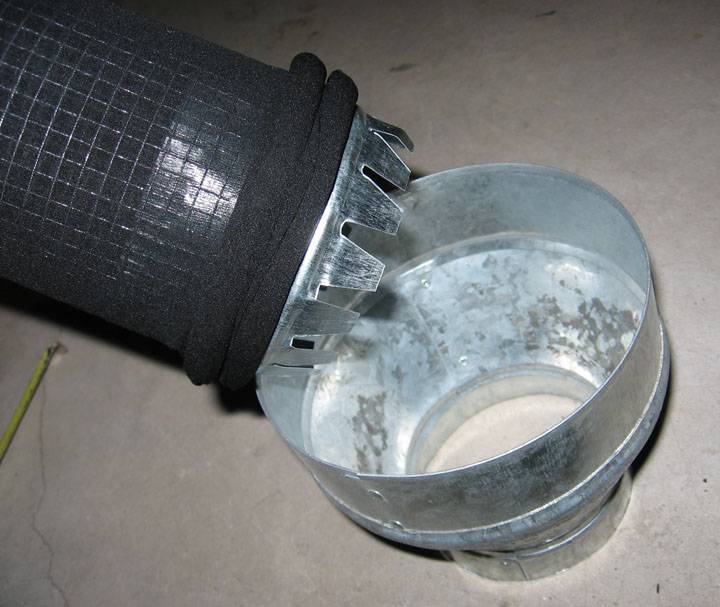
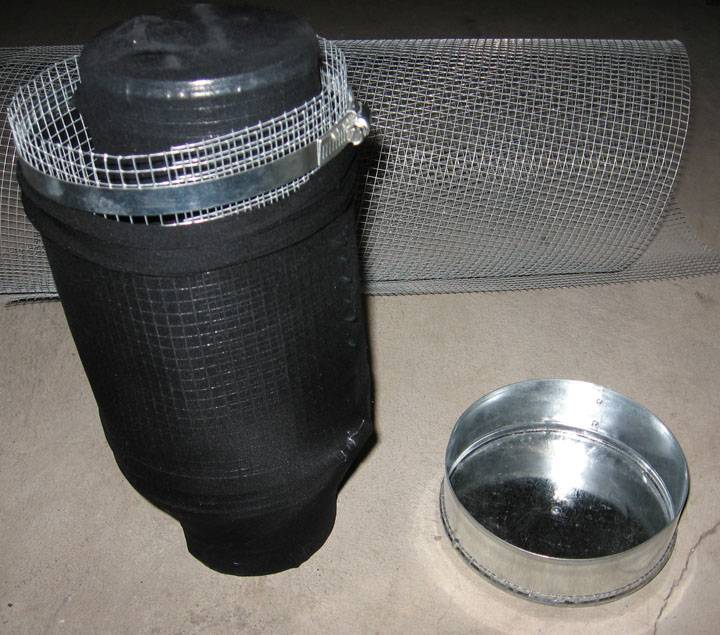
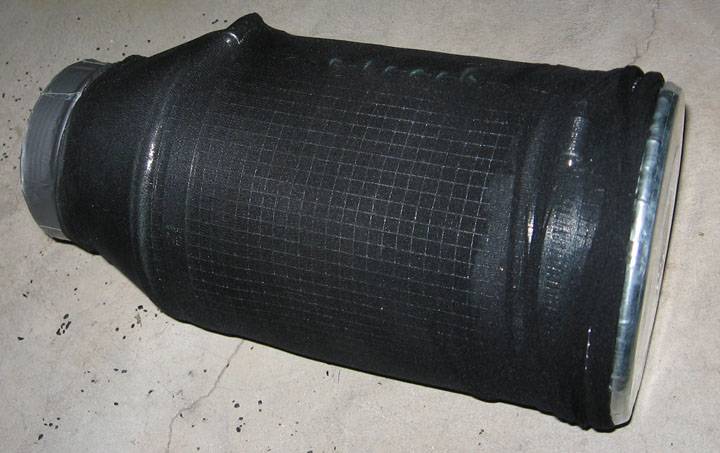
Next we'll be taking the 6" to 4" reducer out and connecting it to the 4" duct collar.
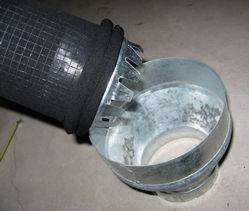
Once it's in there securely, flip it over and we will then duct tape the collar to the reducer as shown below:
To ensure it's taped securely you can tape one part on the inside, then tape the opposite side. Kind of like lug nuts being attached to the wheel of a car. Of course you can do this however you like, but make sure it's taped on very tightly and also ensure that your filter core is lined up straight with the reducer.
Once you've completed this step, you should end up with this:
Step 11:
Ok we now have a majority of the filter complete. Now just for the finishing touches. This part is also somewhat annoying, but you only have to do it once. Moving on..
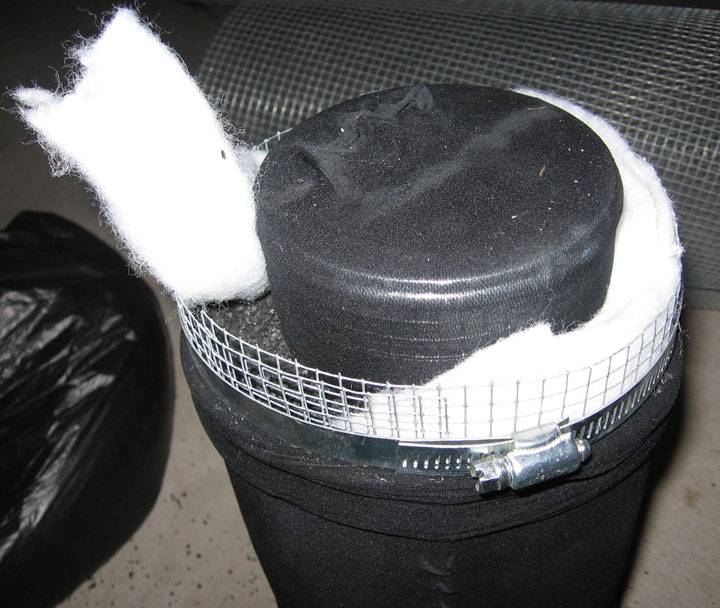
Take out the other package of leggings and cut them the same as we did on the previous package. You'll also need to get out the large 6" hose clamps and batting as well.
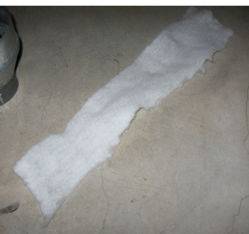
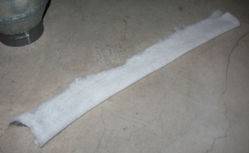
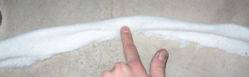
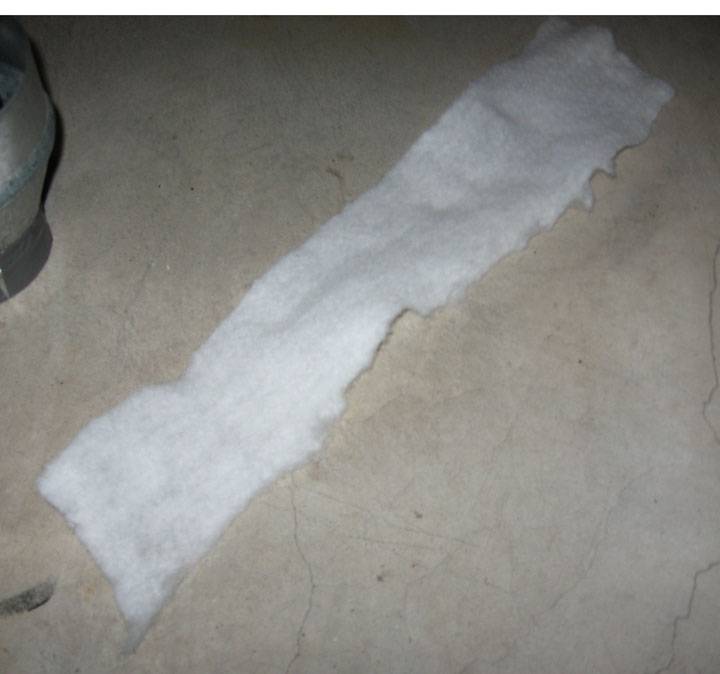
Take your batting and make a 4" thick strip that will be long enough to go around the 6" duct reducer once and slightly overlap. Then fold the strip in half, and then in half again as shown below:
Tools:
Fat flat head screw driver (For Clamp Tightening)
Scissors (Preferrably Tin Snips if you have them or some tough scissors)
Parts:
Casa Depot-
1 - 4" Duct Cap $2
1 - 6" Duct Cap $2
1 - 4" Duct Collar $4
1 - 6" Duct Reducer $6
2 - 4" Hose Clamps $2
2 - 6" Hose Clamps $2
1 - Roll Duct Tape $3
Small roll of welded steel mesh (few sq. yards) - Firm preferrably. Not too stretchy. I used the stretchy soft stuff at first which works only if you pack the carbon in and use a lot of batting on the ends. It's ok but will sag. It doesn't keep its shape as well as the harder stuff. $6-$10
[Depending on how you will connect your fan, you may also want another reducer thats the same size of your fan and will connect to your reducer on the filter.]
Wallyworld-
Batting - Small Roll Blanket Style Not Clumped Preferrably $3
2 Pair Panty Hose (Clearance!) $2
3 18oz Cartons of Super Activated Carbon *@ Pet Store Too $15
(Or do like me and buy in bulk online. I found a guy on eBay selling 10lbs. of carbon for $10. Can't beat that! Although shipping was like $8-10 too but still a smokin hot deal.)
To figure out the size filter you will need for your fan, use this formula:
[If you need a larger diameter filter than listed in the tutorial, then you need to upgrade the duct sizes in the list and update the instructions.] Also keep in mind that if you're running some ghetto fan, expect ghetto results. Spend some decent money on your fan and it will perform. Some cheaper fans will give inflated figures too as to what the true CFM ratings are. My sig has a link for great pricing on vortex fans. I'm using the 4" 175CFM.
D = Diamter of Filter Inner Core (Inches)
H = Filter's Height (Inches)
I = Inner Core Surface Area Square Inch
CFM D H I
150 4 9 113
200 4 12 151
275 6 12 226
375 6 16 302
400 6 24 603
550 8 24 603
650 10 24 754
See the relation there?
Just take the CFM of your fan and choose the diamater of core you want and divide it accordingly. For example: I have 175 CFM and intend to use a 4" Diameter core. So I can look at the list above and figure;
150(CFM) divide 9(H) = 16.6 (Approximately)
Then I can take my 175(CFM Fan) and divide it by 16.6 to get 10.5". Therefore, my 175 cfm fan with a 4" Diameter would need a core height of 10.5".
[I found this formula somewhere online I can't remember. It's legit though.]
And so on... Just remember to be careful when your cutting the length of your core. It's important that the size is accurate or the filter won't work properly. If anything, you want to overshoot the height of your core by about a half inch at most. (I.e. I needed a 10.5" Height, so if there was a problem, I would want to make sure that my core is at least 10.5" to 11".) If you don't do this correctly you get a nice little backdraft and you filter nothing - like i did the hard way the first time lol.
Filter the air - don't blow it around. Enjoy!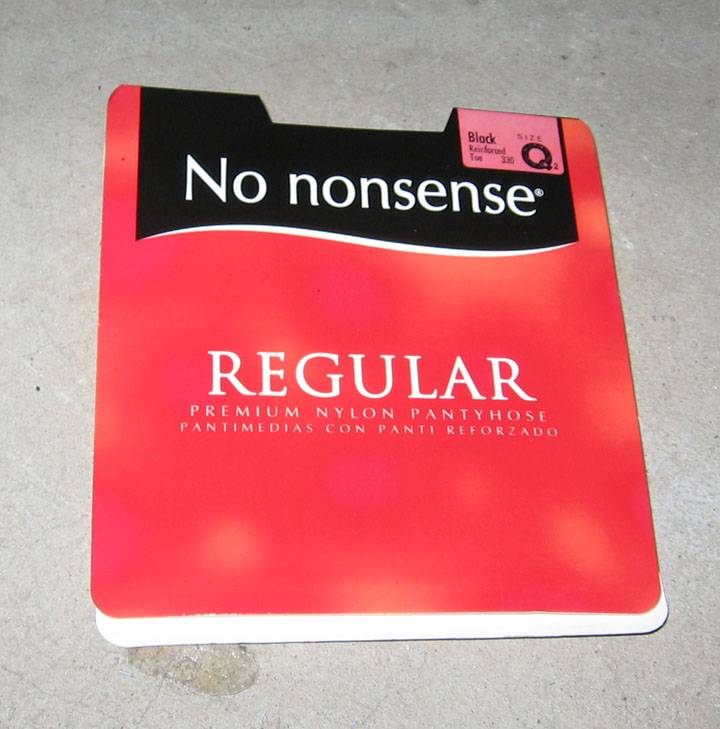

Ok step 1:
Take out your roll of steel mesh and measure the amount you will need. Make sure to use the formula above. Once you have the height of the core, just start snippin' away. I also like to use the same direction as the roll was in so it's easier to work with. [I have a 4" 175CFM Vortex fan so I built my filter core 10.5" Long.]
Step 2:
To measure the amount you will need, start rolling the piece you cut off around the 4" duct cap. Make sure to overlap by approximately 1-1.5". Or of course you can just measure it.
Step 3:
Once you have the size you need, go back and do one of two things. Either carefully snip off the long sharp edges or if you have a grinder, just grind them away. I have a grinder, but the snips were more accessible so I didn't bother. Here's a pic showing the difference. Get as close as you can - more details about this later.

Step 4:
Now make sure to have both the 4" duct collar, cap, and 4" hose clamps available.
Once you've smoothed out the mesh, begin wrapping it around the duct cap again and once you have it lined up straight, attach the 4" Hose clamp and tighten it down good. Make sure it's very tight, but don't get carried away and make it start bending. We want longevity, not overkill.
Step 5:
Now on to this little contraption which is going to be the core of our filter, add the 4" duct collar to the opposite end. Tighten the mesh and then attach the hose clamp just as it was done previously on the duct cap. You should end up with something that looks like the picture below.

Step 6:
Now unless your perfect, you likely ended up with this goofy looking part sticking out on the mesh. What I did is took some spare wire lying around (which you likely have too
) and stiched it down to the main piece. This is what it looked like when I was through.
Step 7:
Ok now open up a package of the leggings. We will be just cutting off the legs and the new 'socks' will act as a pre-filter. Depending on what type of leggings you got, you may or may not have a separate seam that attaches the panty part to the legs. If it's there, make sure to cut on the side of the panty and not the side of the legging. This will help ensure the end of the 'sock' doesn't unravel. Here are a couple examples for you:


Step 8:
Now we're going to make something that looks very familiar to most of us. A condom! No - kidding, but seriously I can't stop thinking that it looks like one. Take one of the socks from the open end and start rolling it. If you need help, please get in touch with the nearest female you know on how to do this. It's really not complicated. Just the opposite of wrapping yourself up.
Also, repeat this step with the second legging.
Step 9:
Now your going to take your 'sock condom' and roll it up and over the filter core. The closed side of the sock will end up on the same side as the duct cap. Also be sure to roll the sock only up to the point of the collar. Repeat this with the second legging so you have two layers of sock. It should look something like this when your through:


You'll find out quickly why it was so important to smoothe out the edges of the mesh because it will catch and cause the leggings to run like a marathon. SO BE CAREFUL!
Step 10:
Next we'll be taking the 6" to 4" reducer out and connecting it to the 4" duct collar.

Once it's in there securely, flip it over and we will then duct tape the collar to the reducer as shown below:

To ensure it's taped securely you can tape one part on the inside, then tape the opposite side. Kind of like lug nuts being attached to the wheel of a car. Of course you can do this however you like, but make sure it's taped on very tightly and also ensure that your filter core is lined up straight with the reducer.
Once you've completed this step, you should end up with this:

Step 11:
Ok we now have a majority of the filter complete. Now just for the finishing touches. This part is also somewhat annoying, but you only have to do it once. Moving on..
Take out the other package of leggings and cut them the same as we did on the previous package. You'll also need to get out the large 6" hose clamps and batting as well.
Take your batting and make a 4" thick strip that will be long enough to go around the 6" duct reducer once and slightly overlap. Then fold the strip in half, and then in half again as shown below:


Last edited:


 I'm awfly stoned but how does the carbon not fall out the end where the second batting is, does the 6" clamp keep it all in place somehow? Thanks a bunch for the step by step


