
Oh Yes very nice Mr. Sparkle!
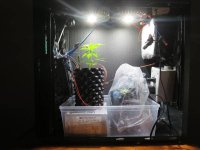
On your diy smart pots; are they solid fabric on the bottom, or are there any holes like those in a traditional pot? That's brilliant btw and thanks! Will be whipping some up to replace solos. I like the idea of having a lot more surface to outside air exposure.
On your diy smart pots; are they solid fabric on the bottom, or are there any holes like those in a traditional pot? That's brilliant btw and thanks! Will be whipping some up to replace solos. I like the idea of having a lot more surface to outside air exposure.
")


 , yeah the arduinos take a bit to get into but very easy and cheap to do so.


 Thanks for posting.

