Throwgar
Member
I had posted this DIY at Cannabis Culture a while back, and I couldn't get it through their search, so I went through some cached pages and found it. It shouldn't get lost here... ")
Well, here goes. I finally built my tumbler, and it looks like I beat Mountaintechne to the finish line. I'm 100% positive that I could have made a solid, well constructed tumbler in about a fifth of the time, but I always seem to be the one that likes to take the road less traveled.
This is going to be less of a "tutorial" and more of a "this is how I built my tumbler". Use this post to get ideas, or to realize where the pitfalls are, or just to entertain yourself. I originally wanted to build the whole thing out of metal so that I could practice my MIG welding skills, but I failed miserably and had to fall back on my impressive pop-riveting skills.
I also wanted to use as many parts as I could that I had laying around the house. Mind you that I have a full work shop and I have a lot of stuff that most normal people wouldn't have.
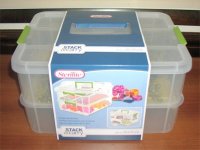
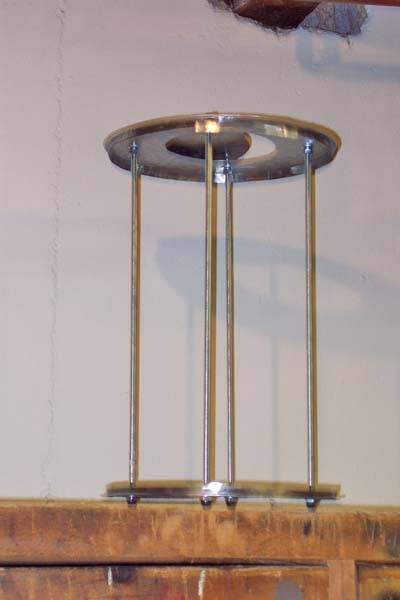
Anyway, here's a picture of the finished project. A little warning, I have about 50 pictures and I plan on using most of them.
To start, I needed a source of sheet metal. Conveniently placed in my garage in a spot that really annoyed me while trying to get from my car to my house was an old filing cabinet destined for the dump.
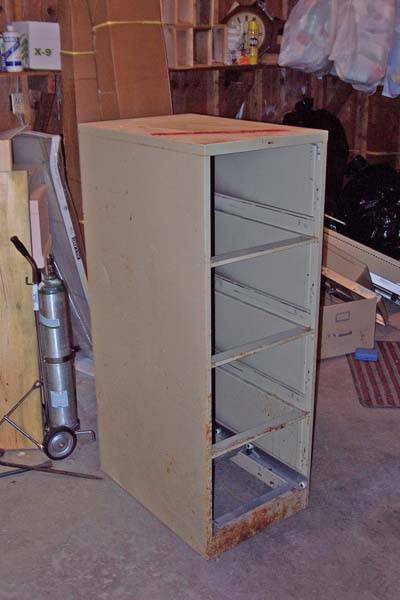
I tried to bash the top and side panels out with a sledge hammer, but that piece of shit filing cabinet still had some life left in her
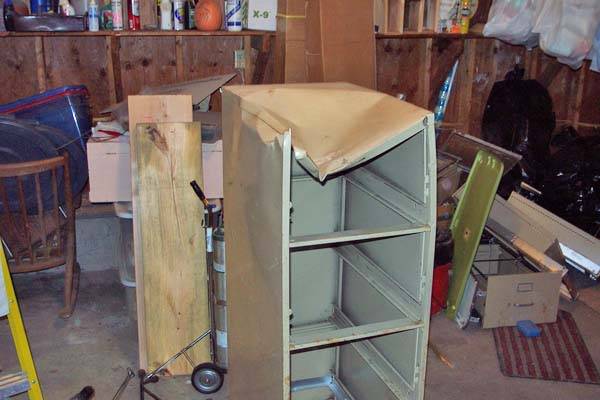
I put down the sledge, and started cutting with my tin snips. I don't feel like I've accomplished something unless I bleed a lot, and this project was no different. When working with sheet metal, please, PLEASE use protective gloves. Don't bleed like me.

And finally, a nice big piece of sheet metal to start working with:
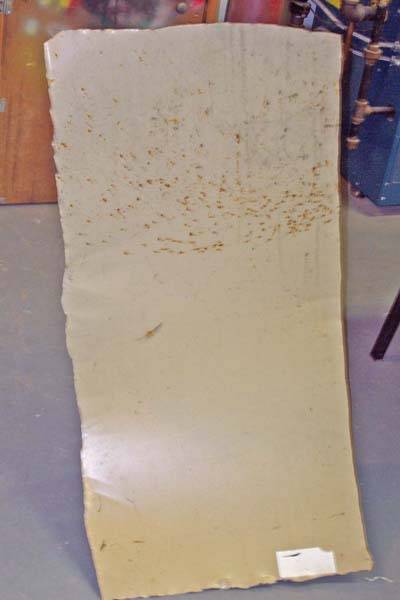
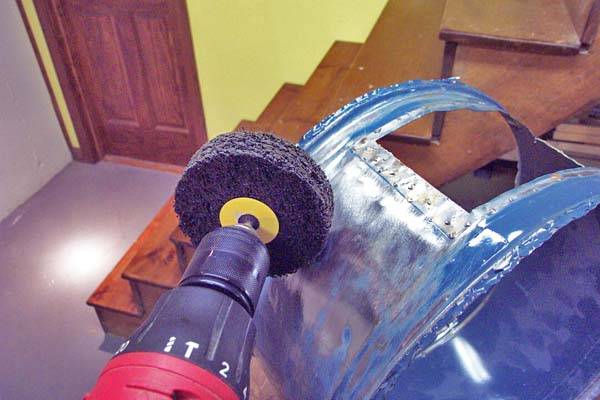
The next step was to strip all of the paint and rust off of the sheet metal. I wasn't about to take my health for granted anymore, so I wore a respirator, safety glasses, and work gloves and went to town with my power drill and it's paint striping bit.
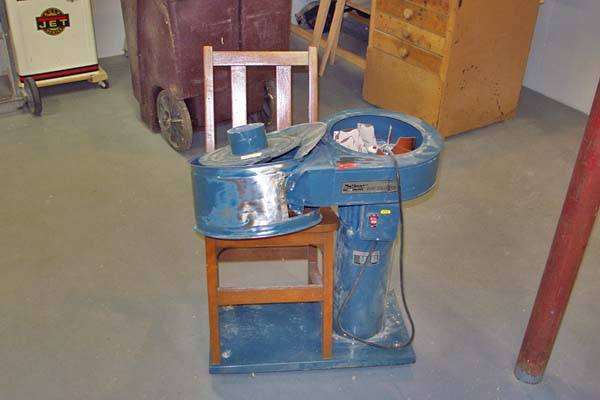
I had an old dust collector in my basement that had kicked the bucket, and I saw some potential for the makings of the tumbler drum:
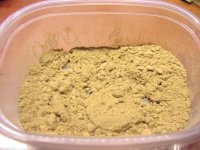
So, I striped the paint off of that too. A little note about striping paint off of sheet metal; it sucks. Metal and paint dust gets everywhere. Make sure not to breathe that shit. Make sure that your work area is either outside or well ventilated.
There were flanges on either end of the dust collection cylinder, so I needed to pound those out. I figured if I didn't, it would crinkle the mesh screen.
to
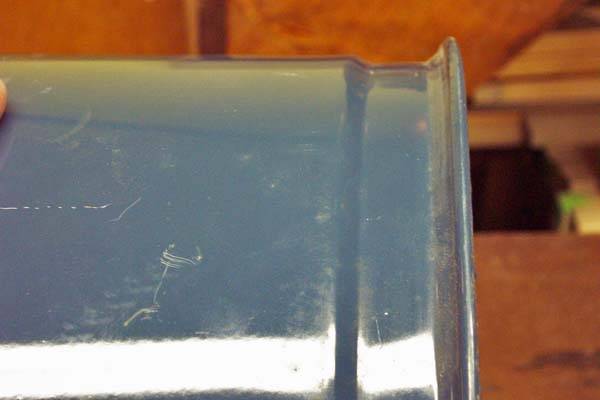
The dust collection drum also had a convenient lip that only another picture could explain:
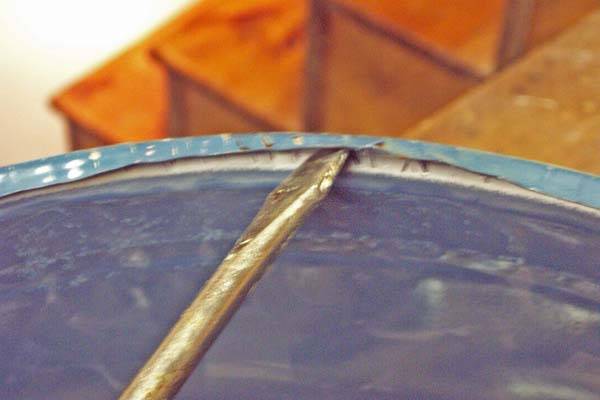
I figured that this lip would work well to hold a circular piece of sheet metal to form the tumbler sides, so I pried the entire lip out to fit a circular piece of sheet metal on both sides:
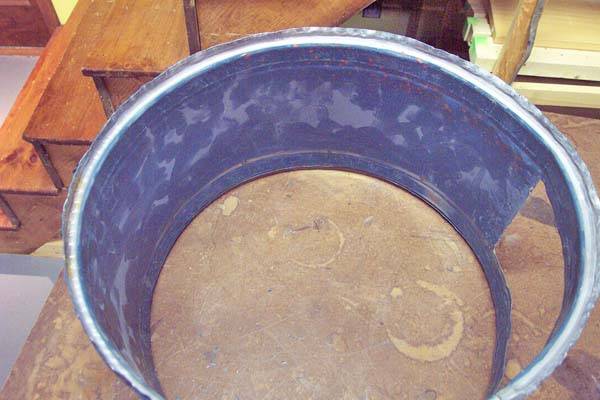
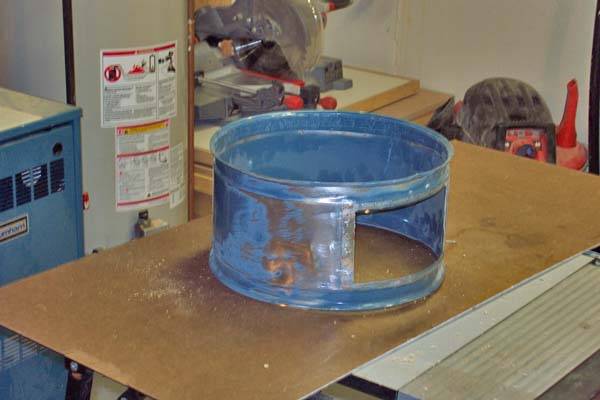
Here's a shot of the drum striped and ready to receive the circular pieces of sheet metal that I just cut from the filing cabinet sides:
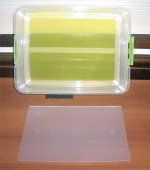
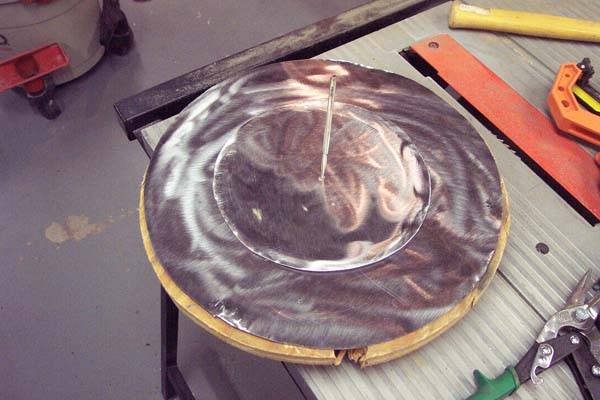
One of the sides needed a port to get the stuff in and out, so I cut a smaller hole out of one of the circular pieces of sheet metal, then I cut another circular piece of sheet metal that was about 3 inches in diameter larger than the hole that I just cut.
To attach the port hole cover to the main drum side, I used 1" #6 metric screws with butterfly nuts. I drilled 8 holes through both pieces of metal that would take the mini bolts. Since I couldn't be positive that everything was symmetric, I had to mark the top of both of the metal circles so that it would fit together the same way each time.
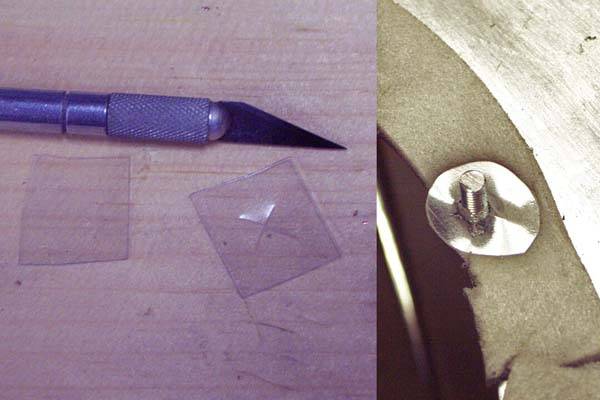
To make sure that the bolts wouldn't fall into the drum, I made some "bolt holders" out of semi-rigid plastic. You know, the kind of plastic that holds most electronics, and if you try to rip it open you're guaranteed to cut the hell out of yourself? I got this idea from installing outlets. All outlets and switches have these so that the bolts don't fall out while you're installing them.
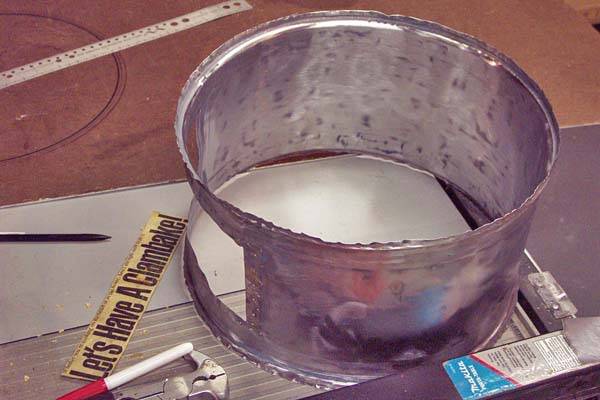
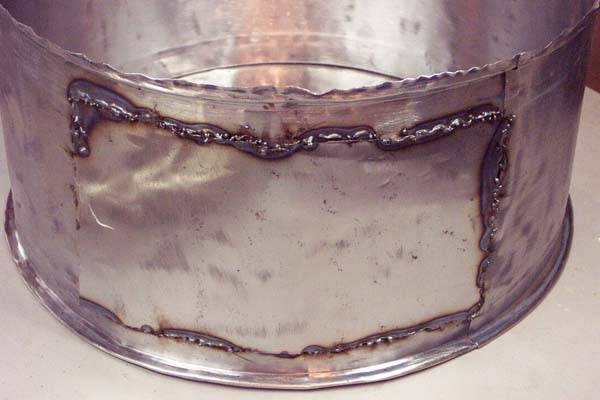
And if there weren't already enough pictures in this post, here's one more of my pitiful attempt at MIG welding a piece over the side of the dust collection drum. No matter how low I turned the voltage, I still burned through the metal. Not only that, I got spatter all over the place, and never got a nice continuous welding line going, so I said screw welding. I'm the king of pop-rivets anyway.
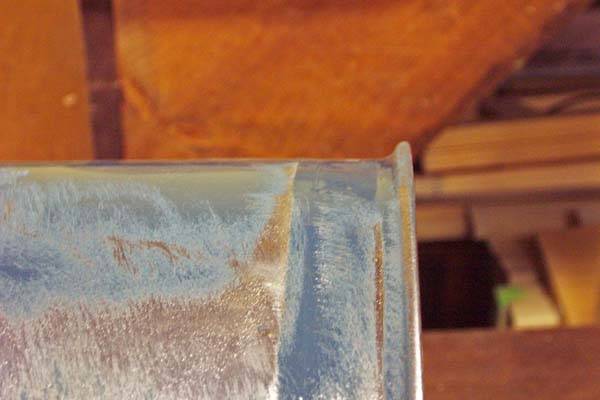
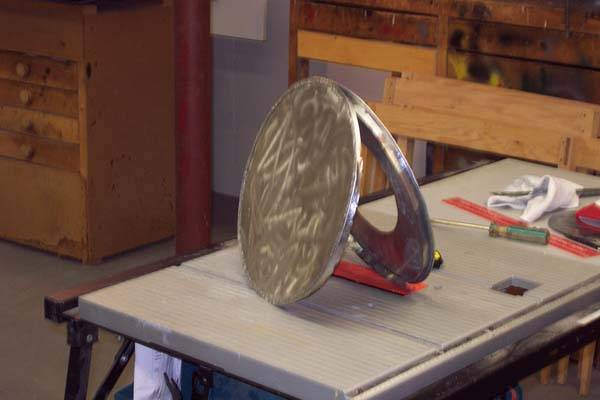
Here's a picture of one of the drum sides seated in the drum lip. It fit in a lot easier than I thought it would. After it slid into place, I hammered the hell out of the lip again to seal it into place. All I could think about during this step was of a giant take out meal with those aluminum sides that bend over the take out top.


The whole welding step was completely unnecessary, since I was going to be cutting off both of the ends of the drum anyway. I figured that if I had a plate over that hole, than it would be a little bit more stable when I ran it over my table saw. I replaced my wood blade with a mason/metal blade and I went ginsu on its ass.
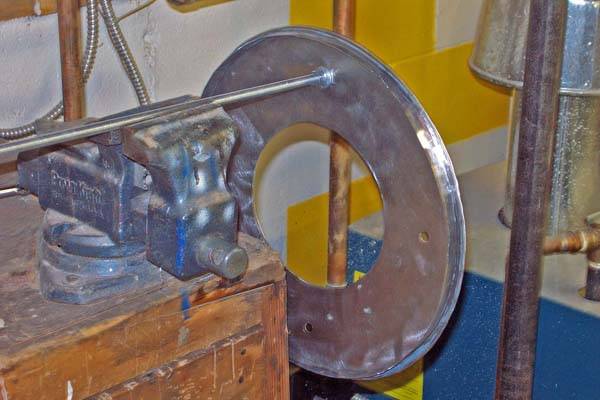
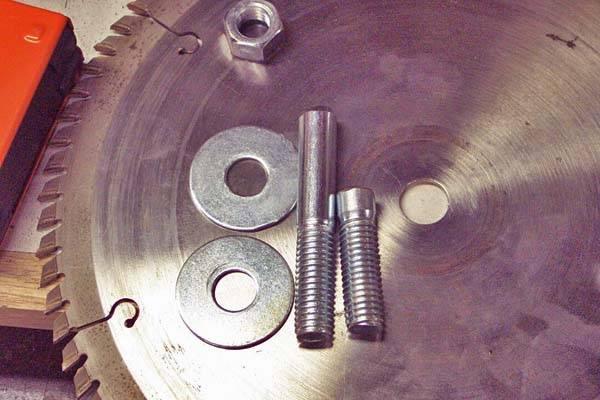
The next step was to connect the two drum ends together. I used 4 x 2' lengths of 3/8" threaded rod to connect the two pieces together. Here's a picture of how I did this. I used a lock nut and washer on the inside of each rod, and a cap nut and washer on the outside:
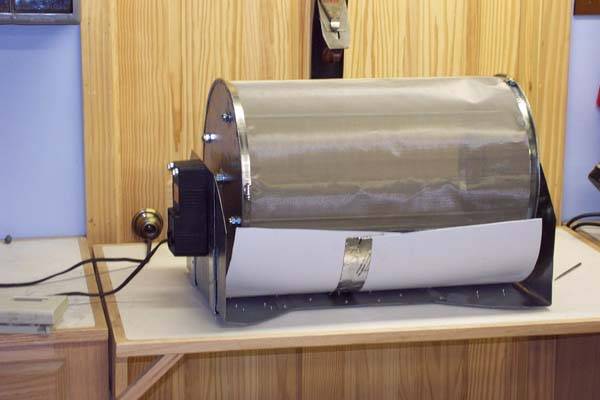
Now that the drum is basically in place, I'll turn to how I made the frame that would house the Farberware Rotisserie motor that I bought on eBay for $20. I figured that the motor would be a lot cheaper, and if I had to do it over, I would have probably used a higher speed motor, and geared it down using the appropriate ratio pulleys and a drive belt. It's done now, so there's no turning back, right?
I wanted the base to be somewhat flexible so that I could remove the drum easily by pulling on the sides a little bit, but rigid enough so that it wouldn't fall apart.
A quick note on my design. I decided to make things even more difficult for myself by not using a "through the drum drive shaft". I used a short drive shaft that was made out of a bolt with the head cut off.
This picture shows 2 bolts that I used on the opposite side of the motor. I made a mistake by making it too short to start. It kept on falling out of the vinyl grommet that I was using, so I made a longer one.
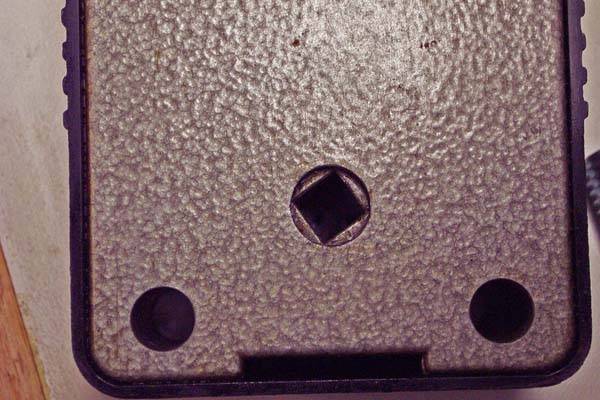
Here's a picture of the receiving end of the rotisserie motor's drive shaft. I didn't take a picture of the bolt that I used for this, but it was basically the same as the one in the previous picture, except that I ground down the sides square so that it would fit right into that square hole. Go figure. It worked great.
Well, here goes. I finally built my tumbler, and it looks like I beat Mountaintechne to the finish line. I'm 100% positive that I could have made a solid, well constructed tumbler in about a fifth of the time, but I always seem to be the one that likes to take the road less traveled.
This is going to be less of a "tutorial" and more of a "this is how I built my tumbler". Use this post to get ideas, or to realize where the pitfalls are, or just to entertain yourself. I originally wanted to build the whole thing out of metal so that I could practice my MIG welding skills, but I failed miserably and had to fall back on my impressive pop-riveting skills.
I also wanted to use as many parts as I could that I had laying around the house. Mind you that I have a full work shop and I have a lot of stuff that most normal people wouldn't have.
Anyway, here's a picture of the finished project. A little warning, I have about 50 pictures and I plan on using most of them.
To start, I needed a source of sheet metal. Conveniently placed in my garage in a spot that really annoyed me while trying to get from my car to my house was an old filing cabinet destined for the dump.
I tried to bash the top and side panels out with a sledge hammer, but that piece of shit filing cabinet still had some life left in her
I put down the sledge, and started cutting with my tin snips. I don't feel like I've accomplished something unless I bleed a lot, and this project was no different. When working with sheet metal, please, PLEASE use protective gloves. Don't bleed like me.
And finally, a nice big piece of sheet metal to start working with:
The next step was to strip all of the paint and rust off of the sheet metal. I wasn't about to take my health for granted anymore, so I wore a respirator, safety glasses, and work gloves and went to town with my power drill and it's paint striping bit.
I had an old dust collector in my basement that had kicked the bucket, and I saw some potential for the makings of the tumbler drum:
So, I striped the paint off of that too. A little note about striping paint off of sheet metal; it sucks. Metal and paint dust gets everywhere. Make sure not to breathe that shit. Make sure that your work area is either outside or well ventilated.
There were flanges on either end of the dust collection cylinder, so I needed to pound those out. I figured if I didn't, it would crinkle the mesh screen.
to
The dust collection drum also had a convenient lip that only another picture could explain:
I figured that this lip would work well to hold a circular piece of sheet metal to form the tumbler sides, so I pried the entire lip out to fit a circular piece of sheet metal on both sides:
Here's a shot of the drum striped and ready to receive the circular pieces of sheet metal that I just cut from the filing cabinet sides:
One of the sides needed a port to get the stuff in and out, so I cut a smaller hole out of one of the circular pieces of sheet metal, then I cut another circular piece of sheet metal that was about 3 inches in diameter larger than the hole that I just cut.
To attach the port hole cover to the main drum side, I used 1" #6 metric screws with butterfly nuts. I drilled 8 holes through both pieces of metal that would take the mini bolts. Since I couldn't be positive that everything was symmetric, I had to mark the top of both of the metal circles so that it would fit together the same way each time.
To make sure that the bolts wouldn't fall into the drum, I made some "bolt holders" out of semi-rigid plastic. You know, the kind of plastic that holds most electronics, and if you try to rip it open you're guaranteed to cut the hell out of yourself? I got this idea from installing outlets. All outlets and switches have these so that the bolts don't fall out while you're installing them.
And if there weren't already enough pictures in this post, here's one more of my pitiful attempt at MIG welding a piece over the side of the dust collection drum. No matter how low I turned the voltage, I still burned through the metal. Not only that, I got spatter all over the place, and never got a nice continuous welding line going, so I said screw welding. I'm the king of pop-rivets anyway.
Here's a picture of one of the drum sides seated in the drum lip. It fit in a lot easier than I thought it would. After it slid into place, I hammered the hell out of the lip again to seal it into place. All I could think about during this step was of a giant take out meal with those aluminum sides that bend over the take out top.
The whole welding step was completely unnecessary, since I was going to be cutting off both of the ends of the drum anyway. I figured that if I had a plate over that hole, than it would be a little bit more stable when I ran it over my table saw. I replaced my wood blade with a mason/metal blade and I went ginsu on its ass.
The next step was to connect the two drum ends together. I used 4 x 2' lengths of 3/8" threaded rod to connect the two pieces together. Here's a picture of how I did this. I used a lock nut and washer on the inside of each rod, and a cap nut and washer on the outside:
Now that the drum is basically in place, I'll turn to how I made the frame that would house the Farberware Rotisserie motor that I bought on eBay for $20. I figured that the motor would be a lot cheaper, and if I had to do it over, I would have probably used a higher speed motor, and geared it down using the appropriate ratio pulleys and a drive belt. It's done now, so there's no turning back, right?
I wanted the base to be somewhat flexible so that I could remove the drum easily by pulling on the sides a little bit, but rigid enough so that it wouldn't fall apart.
A quick note on my design. I decided to make things even more difficult for myself by not using a "through the drum drive shaft". I used a short drive shaft that was made out of a bolt with the head cut off.
This picture shows 2 bolts that I used on the opposite side of the motor. I made a mistake by making it too short to start. It kept on falling out of the vinyl grommet that I was using, so I made a longer one.
Here's a picture of the receiving end of the rotisserie motor's drive shaft. I didn't take a picture of the bolt that I used for this, but it was basically the same as the one in the previous picture, except that I ground down the sides square so that it would fit right into that square hole. Go figure. It worked great.