Drop That Sound
Well-known member
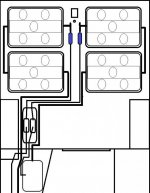
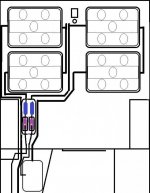
Here is the plans so far. Which config would you pick? I'm still deciding, before I run to the hardware store.
Or, there's a blank to edit in case anyone wants to make a suggestion..
Maybe put pumps in control res cabinet (not much room at all), or
just simply pull from the reservoirs to the "house" and pump back to each tote? I would prefer undercurrent though.
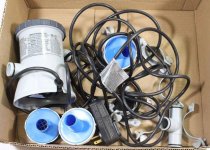
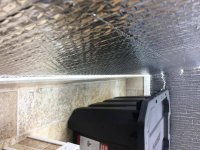
Will be using 2 inch manifolds & bulkheads, and down to 3/4 for the return pipes\fittings. Probably use more flexible black tubing with fittings from the pump, and through the wall to the res cab.
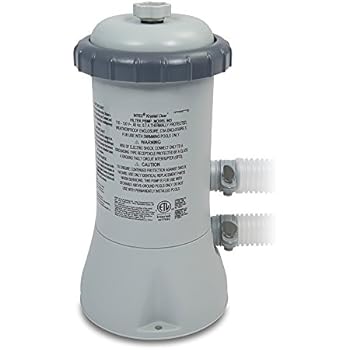
2x 396gph pumps, 2x 18 watt commercial air pumps. Also one 50 gallon top off res w/ 2 float valves. Stay tuned as I update for custom air diffusers.
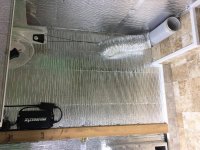
Like to keep the center area in between systems clear for work space.. to lay in if possible. Gonna be a tight fit now! Sometimes I string up this 12' or so area between the 2 scrog nets, it grows the best between bulbs.
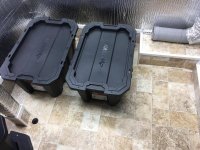
Settled in on this plan, as totes have more capacity, and less plumbing than smaller containers.
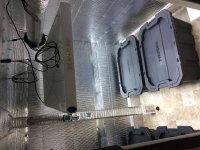
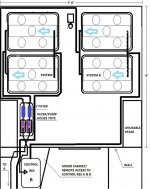
I also like my idea of using a smaller matching tote for a "pump house", to minimize spills, etc. Can shutoff the valves + unscrew the unions to remove the whole tote for maintanence.
I would also like to house the filters in there too, but unsure about system B. Being farther away, is it better to go with 2 inch return pipe to the house tote, is a long 3/4 run before it even gets to the filter more likely to clog?
The filter is usually on the manifold at the end of rows, where 2 inch reduces to 1/2 - 3/4', as it should be... I think I should be ok with it being farther away though...
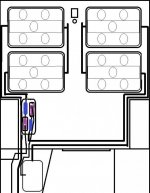
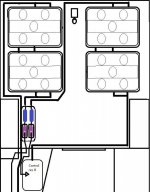
Or, there's a blank to edit in case anyone wants to make a suggestion..
Maybe put pumps in control res cabinet (not much room at all), or
just simply pull from the reservoirs to the "house" and pump back to each tote? I would prefer undercurrent though.
Will be using 2 inch manifolds & bulkheads, and down to 3/4 for the return pipes\fittings. Probably use more flexible black tubing with fittings from the pump, and through the wall to the res cab.
2x 396gph pumps, 2x 18 watt commercial air pumps. Also one 50 gallon top off res w/ 2 float valves. Stay tuned as I update for custom air diffusers.
Like to keep the center area in between systems clear for work space.. to lay in if possible. Gonna be a tight fit now! Sometimes I string up this 12' or so area between the 2 scrog nets, it grows the best between bulbs.
Settled in on this plan, as totes have more capacity, and less plumbing than smaller containers.
I also like my idea of using a smaller matching tote for a "pump house", to minimize spills, etc. Can shutoff the valves + unscrew the unions to remove the whole tote for maintanence.
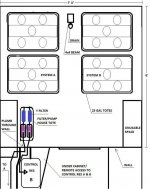
I would also like to house the filters in there too, but unsure about system B. Being farther away, is it better to go with 2 inch return pipe to the house tote, is a long 3/4 run before it even gets to the filter more likely to clog?
The filter is usually on the manifold at the end of rows, where 2 inch reduces to 1/2 - 3/4', as it should be... I think I should be ok with it being farther away though...
")