I was given an armoire quite awhile ago, and I have starred at it for a few years planning to one day construct a killer cab with it.
I drew up some plans and changed them several times before I actually started the work. I had already spent lots of time researching for the best set-up available to construct a nice cab with, and I always came back to the armoire that I have. It, IMO, is the best cab a man can purchase for the money, as it lends itself perfectly for a grow cabs needs.
I have always been a closet grower, until last year when I dared my first outside grow, which was a fantastic success, BUT...I have promised my lovely wife I would not put her through that stress again. So, it's back to the indoors.
I think I am really going to dig this cabinet thing!
My first grow is now underway and I will be posting a grow thread in the Mandala section, since I am deflowering the cab with the Mandala Safari Mix.
But, for this thread, let me introduce my armoire....
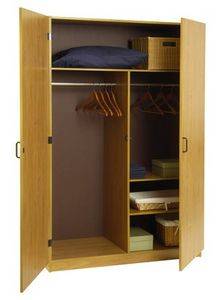
This little jewel is 4 ft wide x 6 ft tall x nearly 2 ft deep.
The left side is the flower chamber, and it has a footprint of 23" x 19.75" which is roughly 3 sq ft, or 1 sq m.
The mom chamber has the same footprint.
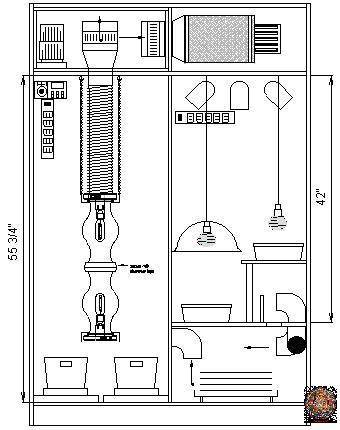
Here is the last plan I churned out before starting up the saw and drill...

As you can see, the airflow starts out in the top of the mom chamber and flows through light traps into the cure/storage chamber, and into the flower chamber. The airflow is routed through the top of the flower chamber into the utility chamber that holds the remote ballasts.
A 6" inline 230cfm duct fan powers the exhaust through a chamber divider (that was provided by using one of the removable shelves) and through my DIY 8x12 carbon scrubber. (props to the scrubber gurus of ICmag)
This is a shot of the mom chamber as is:
You can see the light trap 90's on the right side of the mom chamber, which wasn't satisfactory airflow, so I have holes drilled directly in front of all the 90's but I placed no 90's over the extra holes. I simply cut a piece of self-cut air filter from Waldos World and covered up the holes. Works great.
I have 2 45watt CFL's in the mom room.
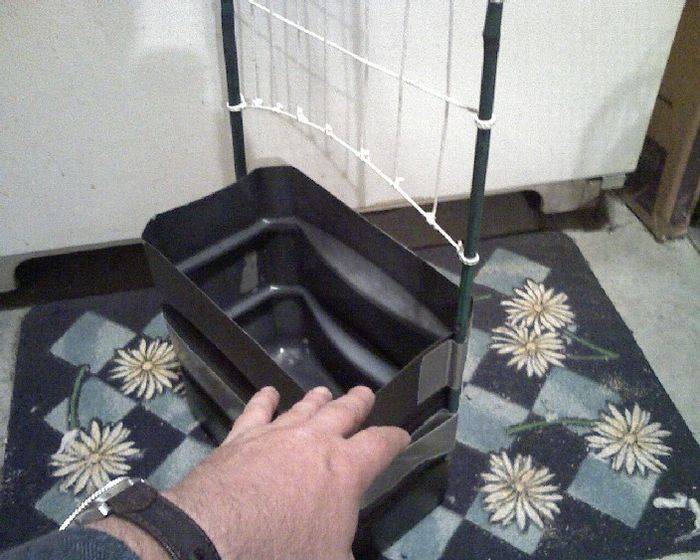
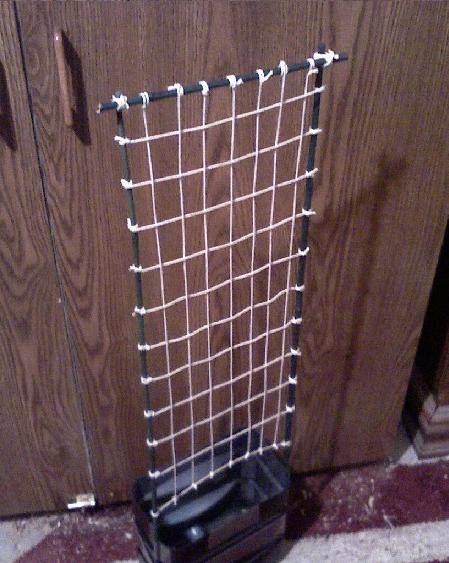
Notice in the cab sketch that I show a double stadium scrog. This is what I plan to use, once I have the moms that I want, and have a clone system working. But until that point, I am using a stationary 3 pot system for a SOG.
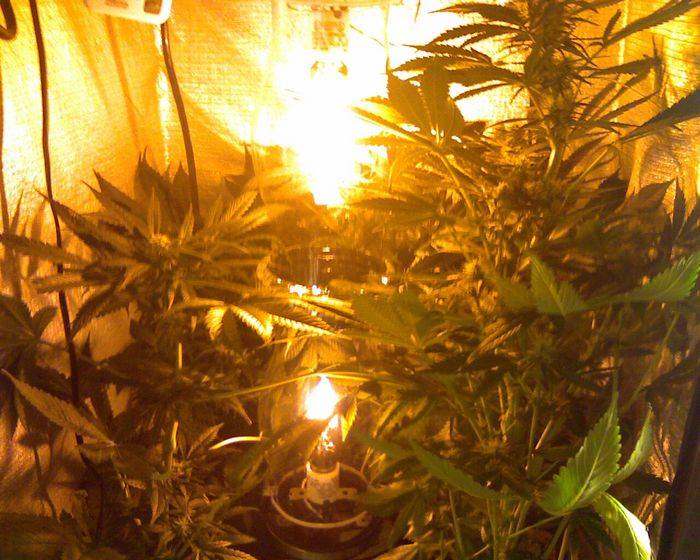
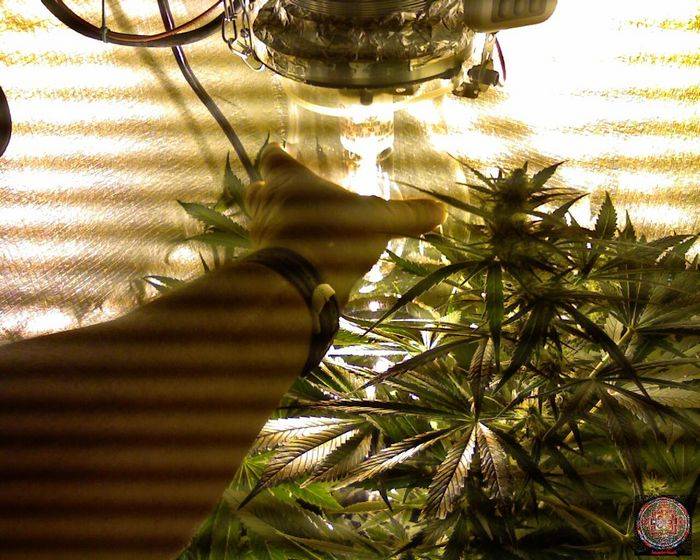
This is the mini-stadium that I have set up for the time being.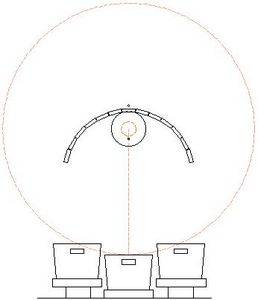
Note how I show a radius circle from the center of the HID on both the SOG and the SCROG set ups. IMO, this is very key to having the lighting set up properly to the grow platform, no matter what method of grow is used.
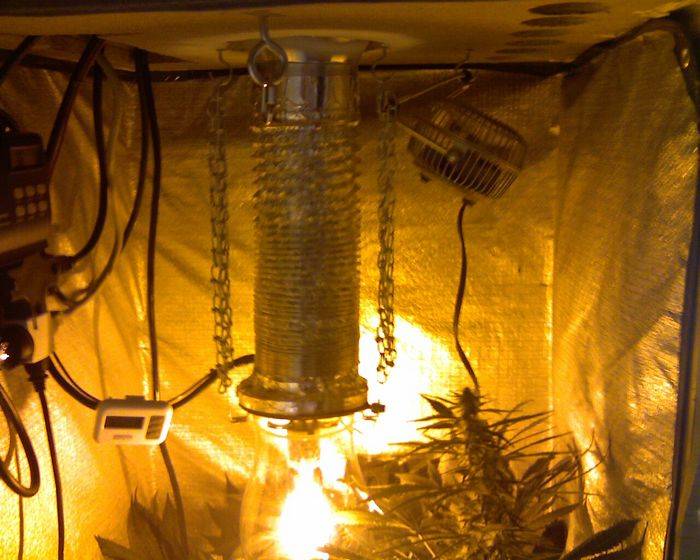
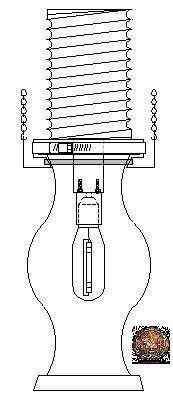
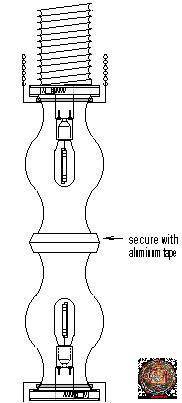
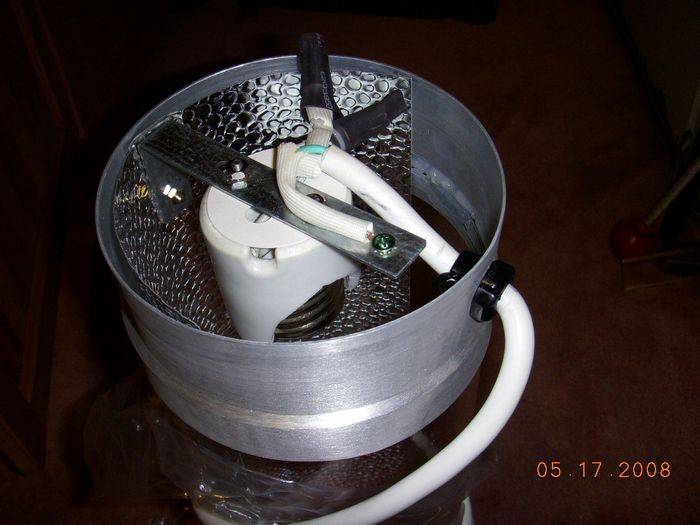
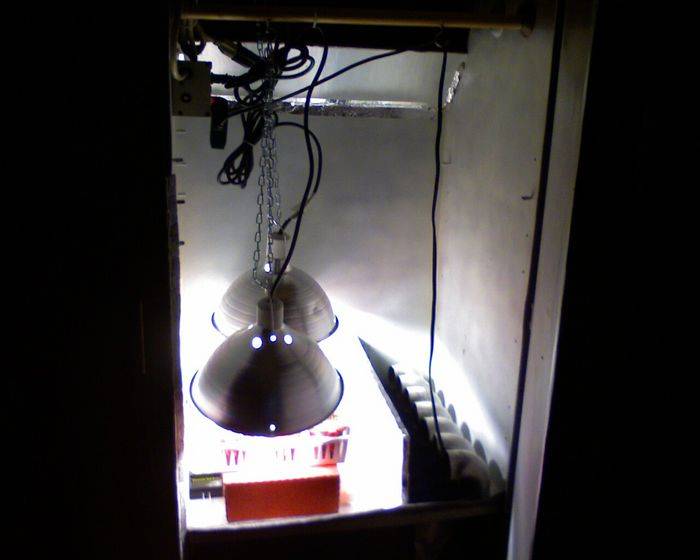
This brings me to my HID. It is a contraption that I constructed from 2 econolight 150HPS, and a piece of SuperTuff-R (dow corning) aluminum coated insulation board. I love the stuff, and use it for many things.
I will give a shot of the light here, but I plan on a DIY on how to build one of these rascals in detail. I am quite proud of my little Rube Goldberg HID.

The other side of the reflector is a mirror image of this side, but this side is the only one with a fan attached.

The air flows through the roof fo the flower chamber into the ballast room.
This room is stealthed out and tight using the SuperTuffR board.
The outside of the ballast room is cool to the touch, as is the rest of the cab actually. I doubt choppers can spot this cab.
With the plug board out, you can see my ballast boxes. I used old Intermatic timer boxes for this mount. I then elevated them using parts of the cheapo econolights I bought. I will show in detail how I fashioned the boxes in my HID build thread later.
Now, if you look real close, on the right side of the ballast box, you will see a cardboard box protruding through the chamber separator. This is simply a 6x6x6 box from Office Depot. This box is housing my 230cfm duct fan. The spaces created internally were stuffed up with poly batting.
The box is shimmed up with styrofoam.
The duct fan is connected to my DIY carbon scrubber in the exhaust chamber. With this cardboard box setup, I can barely hear my fan running without the scrubber connected. With it connected, this is damn near completely stealth. This is a shot of the exhaust/scrubber chamber. Air exits out the back of the cab.

I have forgotten a ton of things I'm sure, but if anyone has any questions, I'd be more than happy to answer them.
Hope y'all like my armoire!
I drew up some plans and changed them several times before I actually started the work. I had already spent lots of time researching for the best set-up available to construct a nice cab with, and I always came back to the armoire that I have. It, IMO, is the best cab a man can purchase for the money, as it lends itself perfectly for a grow cabs needs.
I have always been a closet grower, until last year when I dared my first outside grow, which was a fantastic success, BUT...I have promised my lovely wife I would not put her through that stress again. So, it's back to the indoors.
I think I am really going to dig this cabinet thing!
My first grow is now underway and I will be posting a grow thread in the Mandala section, since I am deflowering the cab with the Mandala Safari Mix.
But, for this thread, let me introduce my armoire....

This little jewel is 4 ft wide x 6 ft tall x nearly 2 ft deep.
The left side is the flower chamber, and it has a footprint of 23" x 19.75" which is roughly 3 sq ft, or 1 sq m.
The mom chamber has the same footprint.
Here is the last plan I churned out before starting up the saw and drill...
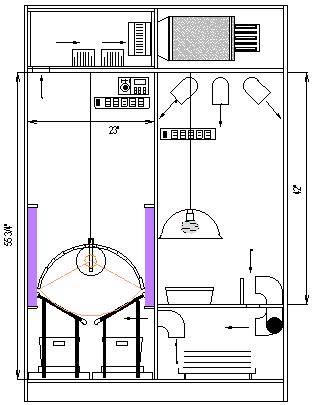
As you can see, the airflow starts out in the top of the mom chamber and flows through light traps into the cure/storage chamber, and into the flower chamber. The airflow is routed through the top of the flower chamber into the utility chamber that holds the remote ballasts.
A 6" inline 230cfm duct fan powers the exhaust through a chamber divider (that was provided by using one of the removable shelves) and through my DIY 8x12 carbon scrubber. (props to the scrubber gurus of ICmag)
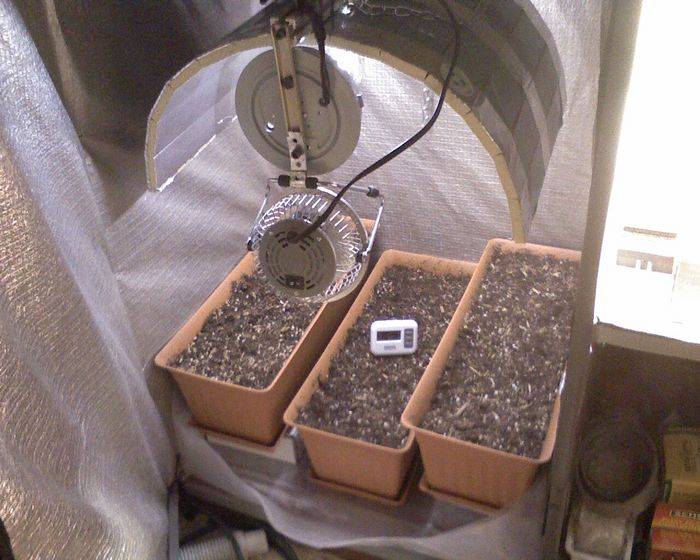
This is a shot of the mom chamber as is:
You can see the light trap 90's on the right side of the mom chamber, which wasn't satisfactory airflow, so I have holes drilled directly in front of all the 90's but I placed no 90's over the extra holes. I simply cut a piece of self-cut air filter from Waldos World and covered up the holes. Works great.
I have 2 45watt CFL's in the mom room.
Notice in the cab sketch that I show a double stadium scrog. This is what I plan to use, once I have the moms that I want, and have a clone system working. But until that point, I am using a stationary 3 pot system for a SOG.
This is the mini-stadium that I have set up for the time being.

Note how I show a radius circle from the center of the HID on both the SOG and the SCROG set ups. IMO, this is very key to having the lighting set up properly to the grow platform, no matter what method of grow is used.
This brings me to my HID. It is a contraption that I constructed from 2 econolight 150HPS, and a piece of SuperTuff-R (dow corning) aluminum coated insulation board. I love the stuff, and use it for many things.
I will give a shot of the light here, but I plan on a DIY on how to build one of these rascals in detail. I am quite proud of my little Rube Goldberg HID.
The other side of the reflector is a mirror image of this side, but this side is the only one with a fan attached.
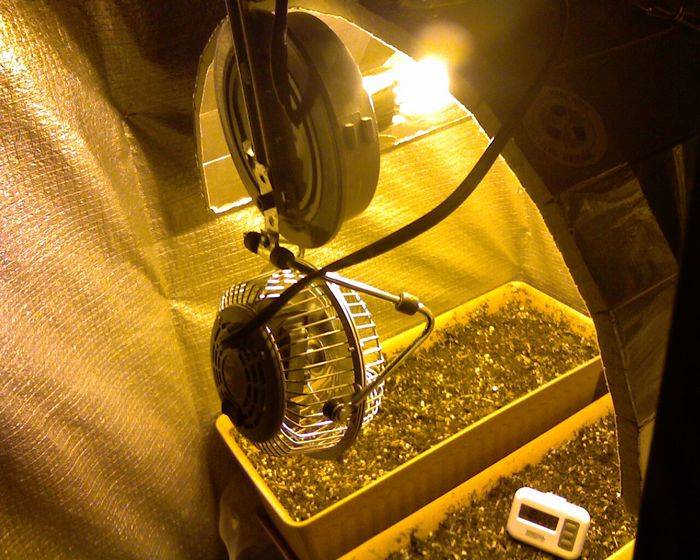

The air flows through the roof fo the flower chamber into the ballast room.
This room is stealthed out and tight using the SuperTuffR board.
The outside of the ballast room is cool to the touch, as is the rest of the cab actually. I doubt choppers can spot this cab.
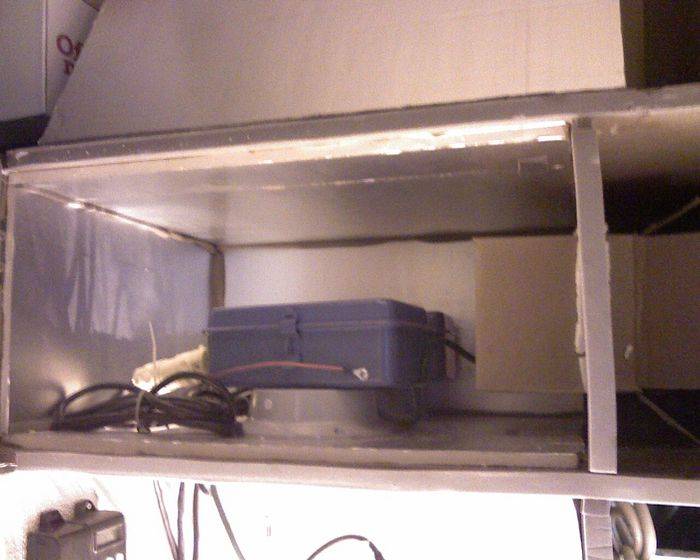
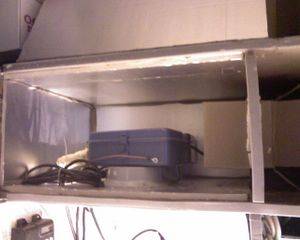
With the plug board out, you can see my ballast boxes. I used old Intermatic timer boxes for this mount. I then elevated them using parts of the cheapo econolights I bought. I will show in detail how I fashioned the boxes in my HID build thread later.
Now, if you look real close, on the right side of the ballast box, you will see a cardboard box protruding through the chamber separator. This is simply a 6x6x6 box from Office Depot. This box is housing my 230cfm duct fan. The spaces created internally were stuffed up with poly batting.
The box is shimmed up with styrofoam.
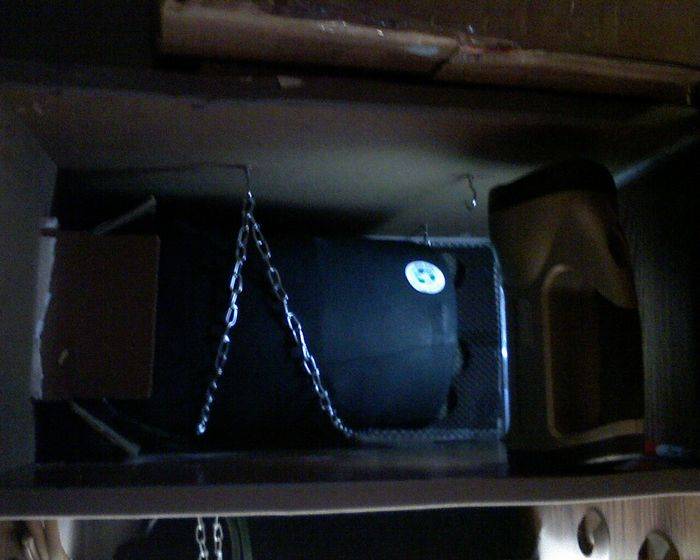
The duct fan is connected to my DIY carbon scrubber in the exhaust chamber. With this cardboard box setup, I can barely hear my fan running without the scrubber connected. With it connected, this is damn near completely stealth. This is a shot of the exhaust/scrubber chamber. Air exits out the back of the cab.
I have forgotten a ton of things I'm sure, but if anyone has any questions, I'd be more than happy to answer them.
Hope y'all like my armoire!