
G
Guest
Ok well I figured I might post this up - it's my simple flexible DWC method.
All you need are some RW starter plugs, a sheet of foil sided insulation and various buckets (light-proofed of course), some SuperSimpleScrog materials (metal coat hangers and twist ties), and some metal skewers to support the screen.
This method allows you to start in smaller buckets and move up to bigger buckets without stress to plants.
I use cheapo buckets wrapped in aluminum foil tape
for lids i use foil sided insulation a 4' x 8' sheet is $10 and you can use it for lots of things.
I simply cut a hole in the middle = the size of the RW cube I plan to insert - in this case 1" starter cubes - another hole in the lid with a drill bit for the air line - then i slide the cube in and use these metal skewer pieces I cut to position and secure the cube. a few pieces of alum tape around the cube to keep light out of any gaps and we're ready to go.
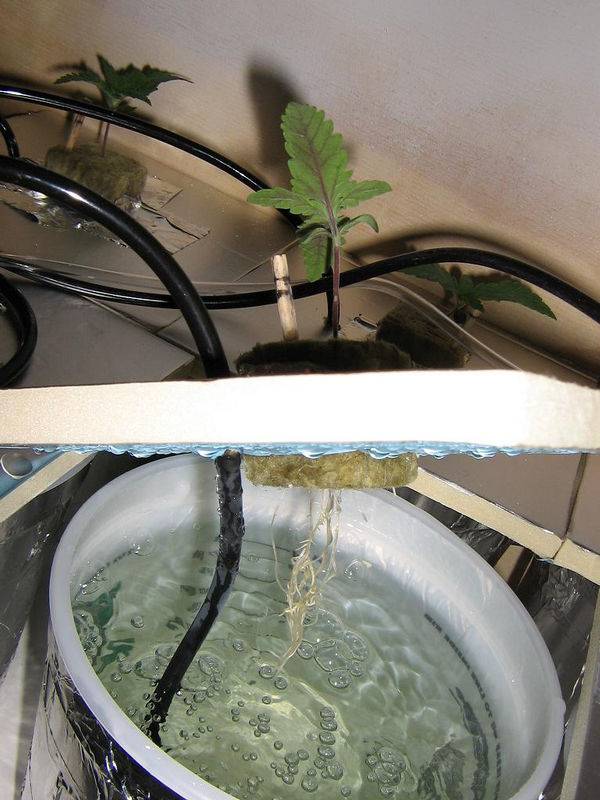
here's a pic showing the RW cube in place in the piece of foil sided insulation - this is a seedling, just started showing roots from the cube when put in here.

and another detail shot showing the roots coming out of the cube and the air line - at this point I am using 2.5 quart buckets which work fine until about 4 weeks and allow you to fit more plants per square from seedling

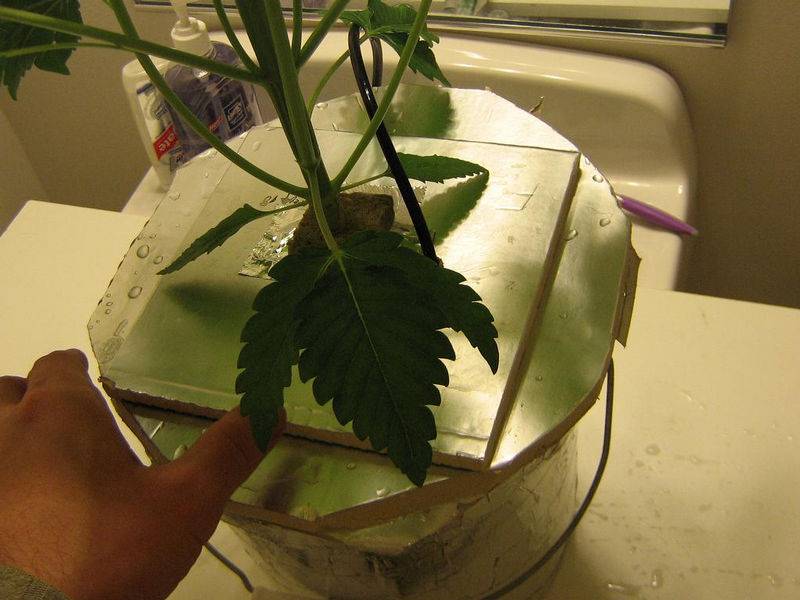
here's the view from the top - you can see the lid at this point was square and also the way I taped again with aluminum tape around the cube to keep air/light from getting in there.

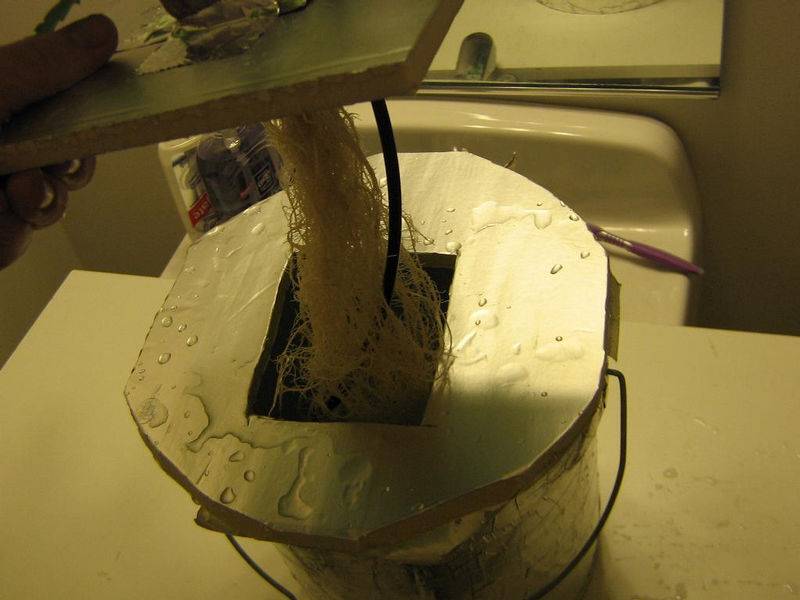
and here is how I upgrade the bucket size. again I use the foil sided foam insulation. this time I cut a bigger piece to fit as a lid over the new 2 gallon buckets. then i cut a whole in that new lid big enough for the roots and airline from the smaller lid to fit in... the pics probably make more sense then my words

and then the small lid fits on top of the big lid - a little more aluminum duct tape and we're all set for the new buckets in this case 2 gallons for the finish - but 5 quart could be used in between for longer veg.

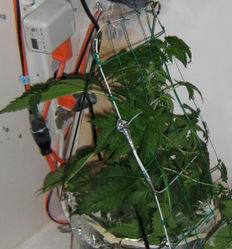
Finally we attach the scrog screens - coat hangers and then
i use metal bbq skewers as supports. i bend them and then stick the sharp ends into the foam and the top part hooks onto the screen.
In these pics I used two long and two short skewers to slant the screen giving more surface area then a standard horizontal screen - I've also done this with equal sized skwers for a horizontal scrog

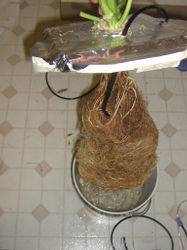
So the end result for that plant after 21 days from seed and another 60 days of flower is this huge mass of roots. As you can see the lid acts as the support for the roots and the plant above. At the end the RW cube is just compressed around the outside of the huge stem leading to big tap roots and then a fatty root ball
All you need are some RW starter plugs, a sheet of foil sided insulation and various buckets (light-proofed of course), some SuperSimpleScrog materials (metal coat hangers and twist ties), and some metal skewers to support the screen.
This method allows you to start in smaller buckets and move up to bigger buckets without stress to plants.
I use cheapo buckets wrapped in aluminum foil tape
for lids i use foil sided insulation a 4' x 8' sheet is $10 and you can use it for lots of things.
I simply cut a hole in the middle = the size of the RW cube I plan to insert - in this case 1" starter cubes - another hole in the lid with a drill bit for the air line - then i slide the cube in and use these metal skewer pieces I cut to position and secure the cube. a few pieces of alum tape around the cube to keep light out of any gaps and we're ready to go.
here's a pic showing the RW cube in place in the piece of foil sided insulation - this is a seedling, just started showing roots from the cube when put in here.
and another detail shot showing the roots coming out of the cube and the air line - at this point I am using 2.5 quart buckets which work fine until about 4 weeks and allow you to fit more plants per square from seedling

here's the view from the top - you can see the lid at this point was square and also the way I taped again with aluminum tape around the cube to keep air/light from getting in there.

and here is how I upgrade the bucket size. again I use the foil sided foam insulation. this time I cut a bigger piece to fit as a lid over the new 2 gallon buckets. then i cut a whole in that new lid big enough for the roots and airline from the smaller lid to fit in... the pics probably make more sense then my words
and then the small lid fits on top of the big lid - a little more aluminum duct tape and we're all set for the new buckets in this case 2 gallons for the finish - but 5 quart could be used in between for longer veg.
Finally we attach the scrog screens - coat hangers and then
i use metal bbq skewers as supports. i bend them and then stick the sharp ends into the foam and the top part hooks onto the screen.
In these pics I used two long and two short skewers to slant the screen giving more surface area then a standard horizontal screen - I've also done this with equal sized skwers for a horizontal scrog


So the end result for that plant after 21 days from seed and another 60 days of flower is this huge mass of roots. As you can see the lid acts as the support for the roots and the plant above. At the end the RW cube is just compressed around the outside of the huge stem leading to big tap roots and then a fatty root ball


