What's new
  • Happy Birthday ICMag! Been 20 years since Gypsy Nirvana created the forum! We are celebrating with a 4/20 Giveaway and by launching a new Patreon tier called "420club". You can read more here.
  • Important notice: ICMag's T.O.U. has been updated. Please review it here. For your convenience, it is also available in the main forum menu, under 'Quick Links"!

Quantum Tower LED PC case: 46w of SDOG

T

trem0lo

Hey all! :wave:

This is my second grow ever. My first was with JLP's Sour Diesel IBL and OG Kush cross (which I was lucky enough to receive) under 250w of HPS with excellent results. The resulting cross from a male and female of those seeds will be the subject of this grow.

Unfortunately my new house limits my grow space, and stealth is paramount. Enter the Quantum Tower LED PC case.

picture.php


picture.php


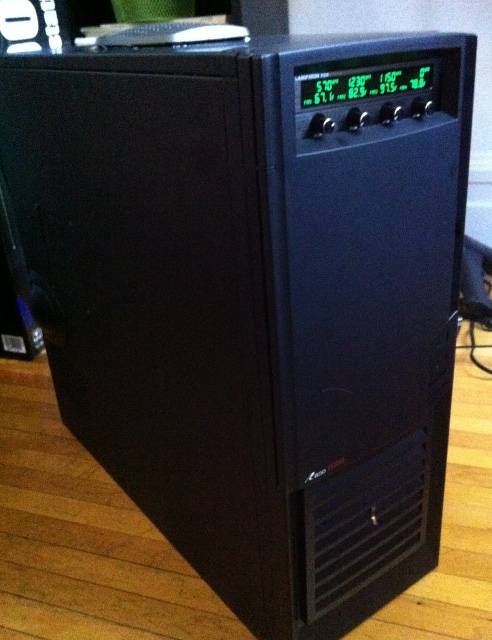
The Quantum Tower features a Lamptron fan controller with temperatures sensors and RPM control. It supports up to four 30w fans and temperature probes (F/C), and the RGB jumpers give nine color possibilities :dance013:

picture.php


picture.php


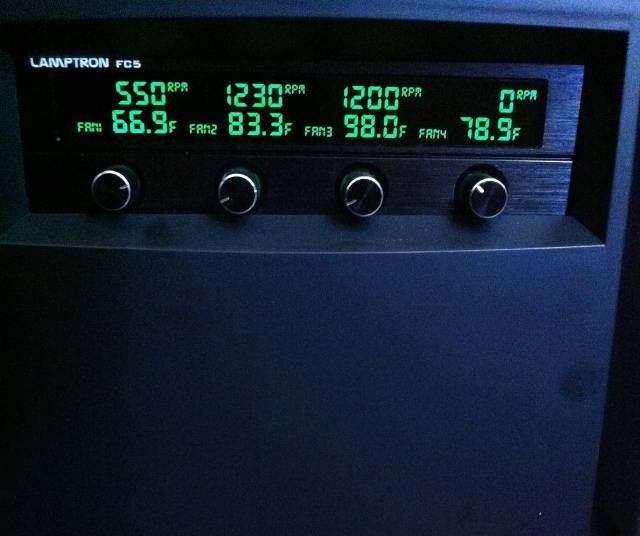
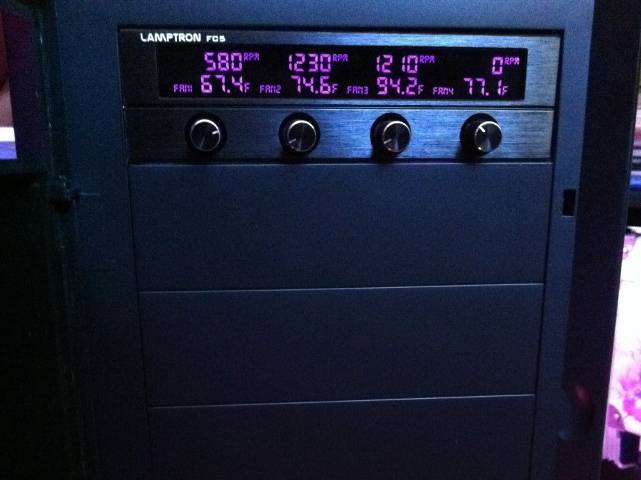
I paired each fan with its own probe for temperature control and to calculate the CFM moving through the case and scrubber.

Temp/fan 1: Air intake temp
Temp/fan 2: Air exhaust temp
Temp/fan 3: Heatsink temp
Temp/fan 4: Canopy temp

My lighting source is 46w of Osram Golden Dragon Plus LEDs. Two separate strings are mounted to a 8x6 heatsink from an old thermoelectric cooler and are powered by two Meanwell LPC-35-700 drivers at 700mA. I used 15 660nm reds, 6 warm whites and 3 royal blues. The seedlings are loving it so far. Much thanks to KNNA for his LED expertise and help in choosing the proper light spectrum and building the lamp.

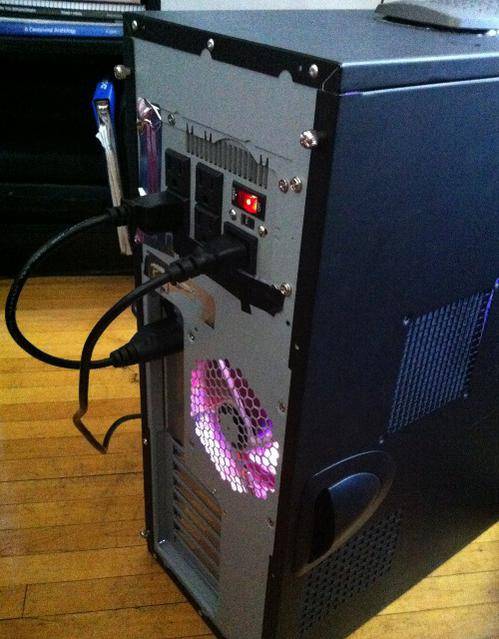
Open the case and you'll see that the design is relatively simple. I opted to not use a separate chamber for the electronics: Using the heat from the drivers and heatsink, the temps in the cabinet can be controlled from 5 to 15 degrees above ambient with the fan controllers, depending upon the season. I can also turn off one of the LED arrays via a front switch if things get too toasty in the summer. My intake and outtake fans are both Noctua NF-P12s and are rated for excellent static pressure as well as being completely silent. The grow space is approximately 17x18x8 inches.

picture.php


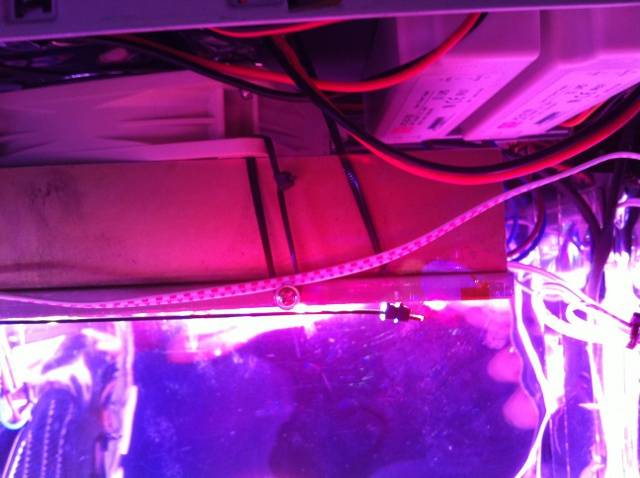
A closer look at the light. You can see the drivers mounted above it in the right top of the case with magnets. Another Noctua NF-P12 fan blows down on the heatsink to keep it warm to the touch. The wires run beside and above the heatsink to stay out of the grow space.

picture.php


Thanks to everyone stopping in. I'll keep this thread updated as much as I can with pictures of the SDOG ladies and additions/improvements to the cab.

Peace! :ying:
 
T

trem0lo

My LED array

My LED array

Here's how I built my LED light. It's not as hard as you might think if you understand a few basic principles:

LEDs require DC power at a constant current (amps). Obviously AC (alternating current, what comes out of our wall outlets) does not provide this. For this reason we use AC-to-DC power supplies rated for the voltage and amps we need. They are like a more powerful version of the DC wall warts we use to wire computer fans. (You could even use them, but you'd need a lot and they aren't as reliable.) Meanwell makes a number of drivers for this purpose, and they are much smaller and more attractive than a dozen wall warts. Basically you add up the voltage of the LEDs then figure out how hard you want to drive them and how many drivers you need. Some LEDs can be driven in excess of 1 amp, but the Golden Dragons I'm using work most efficiently between 400 and 700mA. (Check the datasheet for this info, they have graphs and other neat data comparing heat, light output and efficiency.)

LEDs require a heatsink. No, they don't get that hot, not even as hot as CFLs, but they are a fragile technology and their own generated heat will make them run less efficient and drastically shorten their lifespan if you don't have a good thermal solution. For an actively cooled heatsink (i.e. a fan blowing at it), 9 square inches of heatsink surface area for every watt of LED is a good starting point. Aluminum finned heatsinks are what most DIY builders use. You can find them on fleabay or spend a bit more for a custom one.

LEDs are sold in bins. At first it's like some sort of code language... 3T, 4U, 1Z... Actually it's how LED manufacturers sort the different wavelength and brightness profiles of the LEDs they make, as there are variances in the batches that come off the assembly line. When buying them for growing, it's important to understand the difference. For example, the Osram 660nm reds that I used are classified as 1T, 2T or 3T. Each bin has a difference min and max brightness, usually listed on the LED datasheet. 1T has a minimum radiant power of 280mw and the 3T bin goes up to 400. It's quite a difference in light output. Shopping for higher bins is difficult and often you'll pay more for them when not ordering in full reels (200+).

Taking all these things into account, you can see why buying retail LED lamps is risky. Prices and results can be all over the map so building your own makes a lot of sense.

OK, still with me? Let's design my LED array.

20-30 watts will easily cover a PC case. My case is a full tower and so I'm going to go a little overkill to compensate for possible errors (or low bins) and give the plants a little extra by bumping up the wattage to 46 watts on two separate arrays that I can turn on and off.

I'm going with a basic formula of 5 red, 2 warm white 1 royal blue. I'll be tripling this recipe, and for convenience's sake I'm going to drive them all at 700mA. It's a little hot for the reds, but my heatsink is overkill so heat won't be an issue.

Here's an example of the math for of one of my arrays to calculate my driver needs. To get the voltage you simply look at the datasheets for the LEDs, available on Osram's website. There's a nifty graph that shows the voltage at any given current. Remember Volts x Amps=Watts:

String 1:
8 red @ 2.4V = 19.2V @ 700mA (.7A) = 13.44w
3 soft white @ 3.4V = 10.2V @ 700mA = 7.14w
1 royal blue @ 3.4V = 3.4V @ 700mA = 2.38w
Total=~33V, 23w

String 2 is essentially the same with the addition of one blue and subtraction of one red.

Seeing as each string draws about 33V, we just need a driver that supplies 33V (or more) at 700mA. The Meanwell LPC-35-70 fits my needs perfectly. I order two, one for each string. Easy cheesy.

STILL with me? Let's get our supplies for the construction.

You'll need:

Heatsink
LEDs
Drivers
Thermal pads
Thermal adhesive
copper tape
Kapton tape
razor & tweezers
soldering iron+solder
a multimeter for testing (not required but you might need it)

Here is the bare heatsink. It's a big hunk of finned aluminum from fleabay. At three pounds and 30+ fins, it's a beast.


The LEDs from Mouser, Osram Golden Dragon Plus, 15 660nm red, 6 warm white and 3 royal blue, W5AM. Up close, you can see the small dot in the right hand corner that indicates the cathode (negative) side. They really are quite tiny, hence the tweezers.


Space out and mark where your LEDs will go (keep track of the colors!) Cut the thermal pads to size. I just stacked the larger pads and cut carefully with scissors to create multiple at a time. Make them as close to the size of the thermal slug at the bottom of each LED as possible. The pads I used are Wakefield Thermal Pads, also from Mouser.


Next we glue the pads to the heatsink with the thermal adhesive. Just a dab'l do ya... I used Arctic Silver adhesive that is popular with computer modders for its superior performance. Now we have an excellent path for the heat to flow from the metal slug on the bottom of the LED directly into the massive heatsink.


Now cut a length of Kapton tape and stick it between each pad. Get as close to each pad as possible; use a razor to trim if necessary. As Kapton is a very non-conductive material, it will prevent your heatink from turning into a voltage boobytrap. The thermal pads are also non-conductive, so we've completely isolated the LEDs from the heatsink.


On top of each Kapton trace goes a slightly shorter piece of copper tape. This acts as a wire (which you can also use if you prefer) to connect each LED.

Next, attach each LED with thermal adhesive to the pads. You'll need the tweezers unless you have miniature hands. The LEDs all need to be connected in series, i.e. positive-negative-positive-negative...etc. So each LED is essentially attached the same direction. The Osrams have a small mark in the corner indicating the cathode, or negative, side.

Now we solder each lead to the copper tape. If you've never soldered before, check out some Youtube tutorials and practice a bit before jumping in with expensive LEDs. Don't be afraid: It's not difficult, it just takes a bit of getting used to. Also, singeing off some armhair is a prerequisite. Osrams are easy to solder, so they shouldn't give you too much of a problem. The end result should look like this:


Of course your results will vary. But you can see how each array is a simple U-shape circuit with positive at one end and negative at the other.

Now we connect the drivers. Solder the positive (red) end of the driver wire to the positive end of each array and the negative (black) to the negative. You can also solder a molex connector to it, which is what I ended up doing and highly recommend for easy plugging/unplugging. The other end of the driver simply connects to an AC line, so wire it to the pronged end of an extension cord (matching positive and negative of course) and you're golden.

Plug in the driver to a wall outlet and pray. If you're like me, neither array turned on the first time. Doh! :thinking: Turns out my soldering skills were weak: I had multiple sites of bad (dull) solder sites. Simply reheating them so they adhered to the LED leads (rather than just covering them) did the trick. If the solder is shiny, it's a much better conductor. Use the multimeter (told you you'd need it) in diode mode to troubleshoot your connections. The LED will light up if it's good. Otherwise it's like a Christmas tree light string--If one connection is bad, the whole circuit won't work.


If all goes well, let there be light!!! :dance013: :wave:

 
T

trem0lo

hey guys thanks for stopping in...

@Secrecy, the fan controller is great. I did some research and Lamptron seems to have the best build quality. I read too many horror stories about cheap fan controllers failing in the night... no thanks!

@tanito, I know I know... I used CFLs for part of my last grow and they gave out a surprising amount of heat. To have enough for a decent yield (I'm hoping for 1:1 watt/ounce) my case would get pretty toasty and difficult to cool.

Today I built a new scrubber. SDOG is a high odor strain (thanks SD) and last time my homemade scrubber wasn't adequate during the last week or two. I based it on the bigger can types, but instead using 80mm computer ducting and a couple mesh pencil cups. I will post pics later.
 

crunkyeah

Well-known member
Veteran
Awesome PC case and DIY LED light man!

I see you got a new scrubber built for it, would you mind sharing photos? :)

More people need to be onto stuff like this!

I am curious, what's the initial startup cost on something like this(if you don't mind sharing)? I really like the fan controller as it adds that much to the stealthy aspect of growing in a computer tower.
 
T

trem0lo

Hi guys, I've been out of town for a bit for work but thanks for tuning in! :tiphat:

I am making a few improvements to the case including on/off switches for each LED array and a mini CAN style scrubber... I'll be updating with pics very soon.

In the meantime I updated the second post with information and a mini DIY guide to how I built my LED light. Cheers!
 
Can you give us a total cost and breakdown for building the led array. I want to try LEDs but the cost doesn't seem to cover the benefits yet.
 

frozty

Member
I got a question mate, I've been wanting to make my own led light. I m looking at these emitters since they are going to be mounted on a heat sink I don't want em on a MCPCB.
I'm new with leds so how would you mount these led emitters.
They can run at 5W @1000mA and have a nice lumen output. I love their price too since im on a budget

http://www.ledengin.com/products/emitters#LZ1

Would these work? I'm not sure if I can apply them the same way you did since they don't have the two side aluminum things.
 
T

trem0lo

Can you give us a total cost and breakdown for building the led array. I want to try LEDs but the cost doesn't seem to cover the benefits yet.

Hi Diesel, here is a rundown...

LEDs: $150
drivers: $45
heatsink: $15
tape, thermal glue, thermal pads etc: $20

If you don't have soldering equipment, factor in another $25. You could do fine with half the LEDs I have and still grow well in a small case. $150 is a good starting point for around 23 watts and plan on closer to $200 if you're a beginner without stuff like soldering tools and a multimeter laying around.

I got a question mate, I've been wanting to make my own led light. I m looking at these emitters since they are going to be mounted on a heat sink I don't want em on a MCPCB.
I'm new with leds so how would you mount these led emitters.
They can run at 5W @1000mA and have a nice lumen output. I love their price too since im on a budget

http://www.ledengin.com/products/emitters#LZ1

Would these work? I'm not sure if I can apply them the same way you did since they don't have the two side aluminum things.

On those, the + and - leads are at the bottom, so reflow soldering is necessary to attach directly to the heatsink. It's one of the reasons I like the Osrams... they are easy to mount without fancy tools... a $15 soldering iron is all you need.

If you look at the datasheet for the 660nm red version, it runs at about 2.4-2.6V @ 1000mA, so using our formula they actually run at about 2-3 watts of effective power, but heat will become a consideration if you drive them that hard. You can also see how linearly the radiant flux (light output) goes down as the junction temperature at the heatsink rises (on page 8), a characteristic of all LEDs. The LedEngins go down right away beginning at 20C, while the similar Golden Dragon 660nm (here, pg 8) stays stable up to 40C then the light drops. Probably not a huge deal but it's interesting to point out when thinking about efficiency.
 

frozty

Member
Checked out their sheets it looks like at a temperature around 20-25 Celsius would be a good range for these lights. The decline of efficiency is not too bad at 25. Now all I got to do is find out how exactly to wire these bad boys and the limitations.

I am In for this grow because I'm very interested in this grow. It may help me produce my next cab that will hopefully get me a nice yield (prepetual) :lurk:

Best of luck to you mate. Although from the attention to detail, you seem to have everything in check :)
 
T

trem0lo

Frozty, I'm glad you're liking my grow. I'm crossing my fingers for a decent harvest and hoping I do everything right!

The temperature on those graphs is the junction temperature, where the LED meets the thermal pad. The heat must be able to travel easily from here away from the LED, so a good thermal paste and thermal pad are necessary. This is where many cheap LED lamps fall down I think--the heat is not removed and they get too hot (relatively) so efficiency and lifespan are greatly reduced. If you are familiar with overclocking CPUs it is the same idea, except LEDs are much more temperature sensitive.

Unfortunately the junction area is almost impossible to measure since it is directly beneath the LED; using an infrared kitchen thermometer I get readings of ~25C at the junction while the copper tape gets a bit hotter which is to be expected as copper is an excellent conductor.

The LEDs you posted are good ones--the trick is actually soldering them to the heatsink. If you're a first timer it might be difficult.
 

GP73LPC

Strain Collector/Seed Junkie/Landrace Accumulator/
Veteran
wow, VERY nice PC tower. love the sensors with temp/rpm led readouts :good:

and the DIY LED tutorial is SWEET too, now i have to build one... ;)
 
Top