
-
Happy Birthday ICMag! Been 20 years since Gypsy Nirvana created the forum! We are celebrating with a 4/20 Giveaway and by launching a new Patreon tier called "420club". You can read more here.
-
Important notice: ICMag's T.O.U. has been updated. Please review it here. For your convenience, it is also available in the main forum menu, under 'Quick Links"!
You are using an out of date browser. It may not display this or other websites correctly.
You should upgrade or use an alternative browser.
You should upgrade or use an alternative browser.
ReikoX's Workshop 2018
- Thread starter ReikoX
- Start date
ReikoX
Knight of the BlackSvn
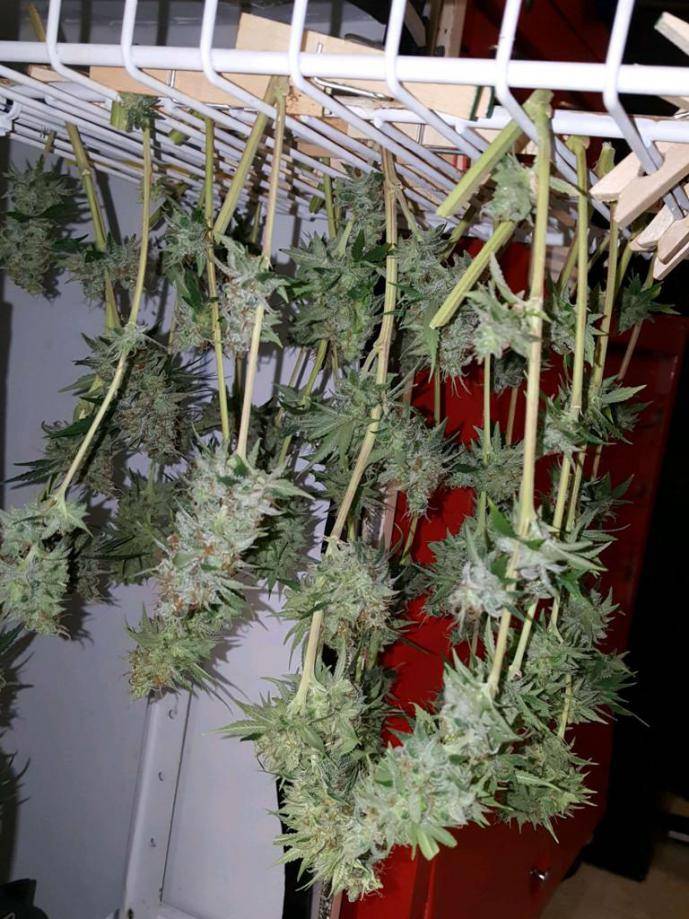
This is the Jilly Bean keeper. Smells just like peeling a fresh tangerine.
A quick trim and they are hanging for the next few days.
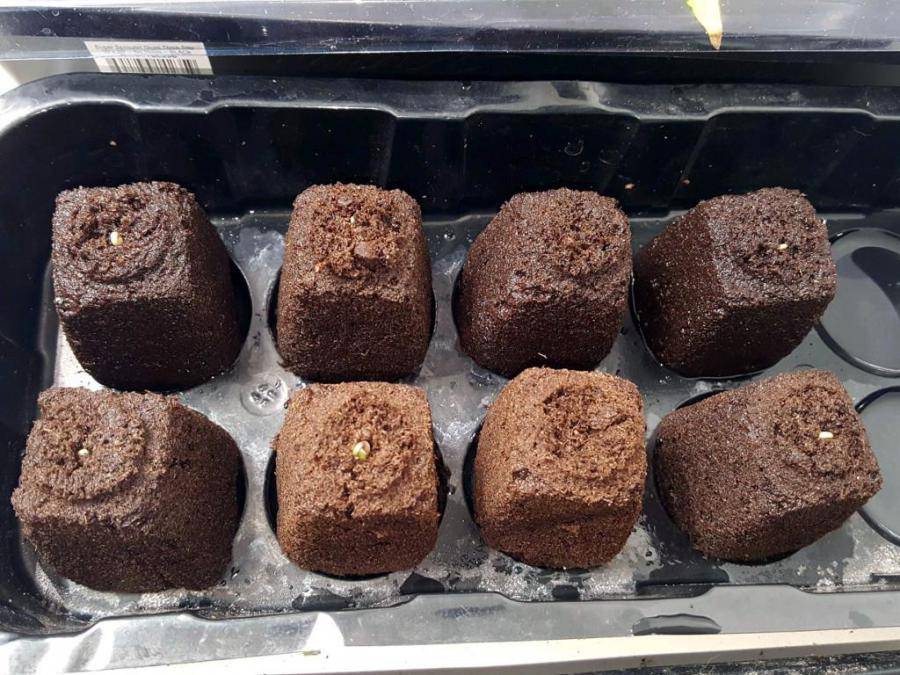
Grass Monkey starting to burst out of their plugs. Some are a tad on the dry side, will keep misting them. Someone asked me about why I used Ful-power, kelp, and aloe to soak my plugs. I though it was worth posting in here.
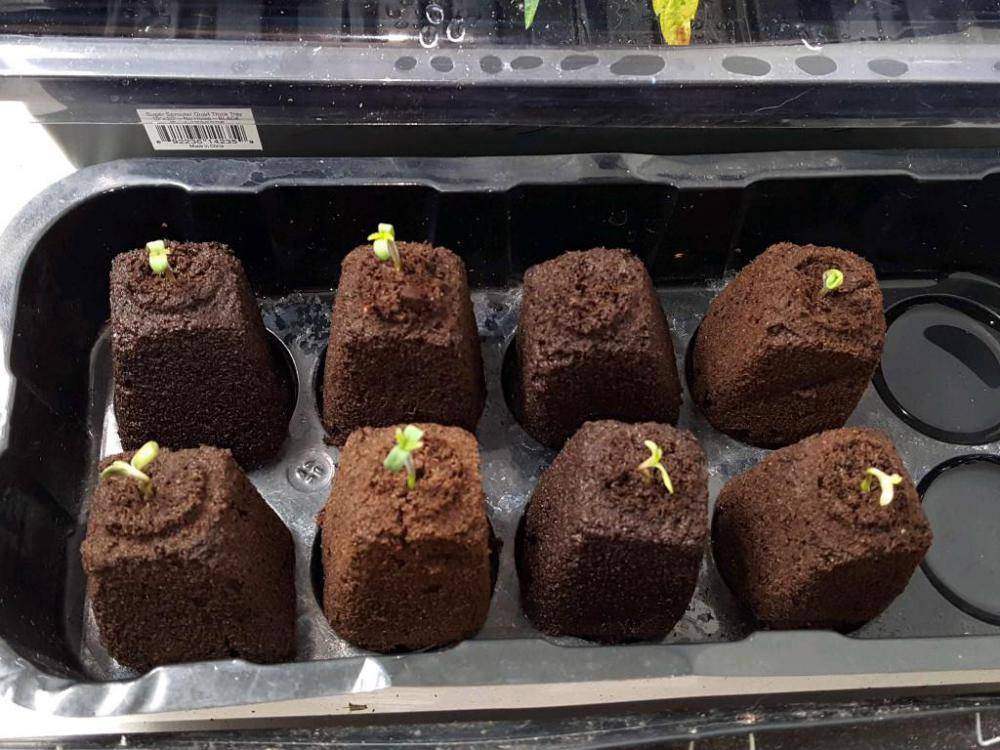
24 hours later...
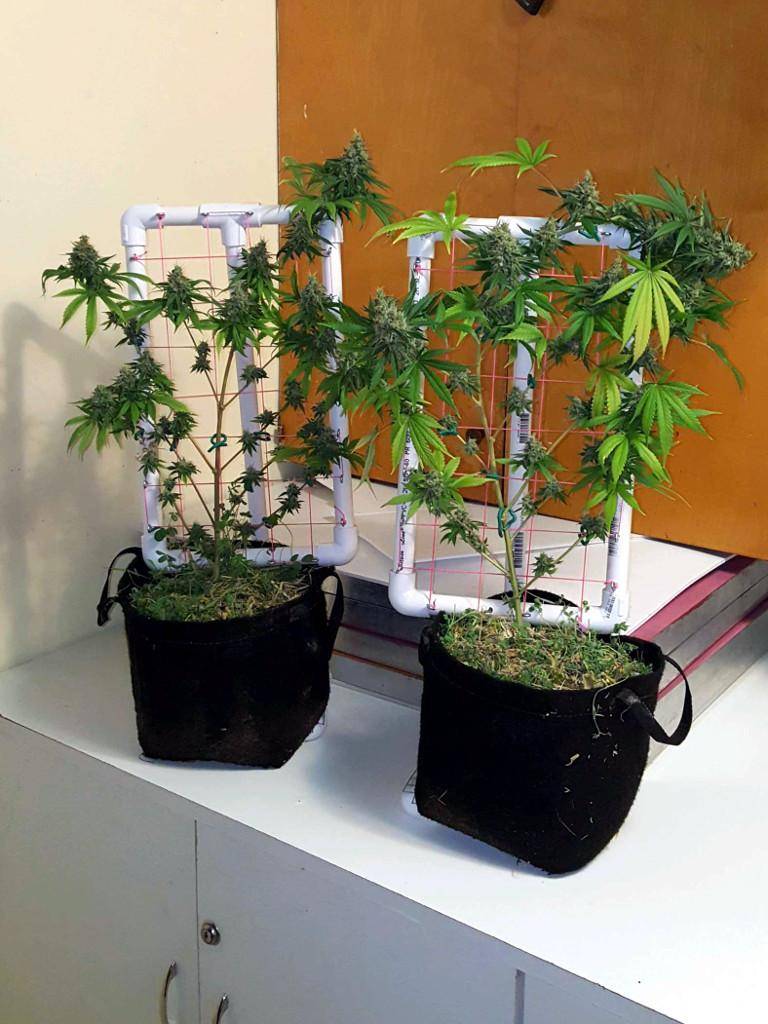
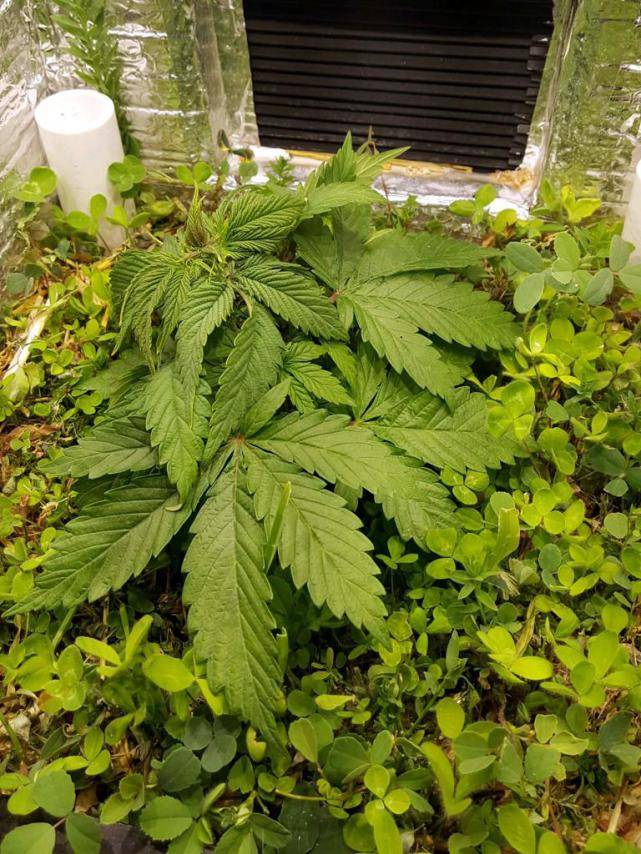
The Blueberry is starting to grow up, I started "LST" on it, and you can see the top is bent over. As usual, I was a bit too rough and snapped the stem. I gave it a dose of LITFA (leave it the fuck alone) and she is doing just fine now.
A quick trim and they are hanging for the next few days.
Grass Monkey starting to burst out of their plugs. Some are a tad on the dry side, will keep misting them. Someone asked me about why I used Ful-power, kelp, and aloe to soak my plugs. I though it was worth posting in here.
ReikoX said:Well, sprouting seeds is all about enzymes, they are the catalyst for germination. Fulvic acid (Ful-power) is like a catalyst for enzymes. The kelp has plant growth hormones and regulators (PGH & PGH) as well as over 80 micro nutrients and a cheating agent, mannitol. Aloe has PGRs as well as saponins making it a wetting agent.
24 hours later...
The Blueberry is starting to grow up, I started "LST" on it, and you can see the top is bent over. As usual, I was a bit too rough and snapped the stem. I gave it a dose of LITFA (leave it the fuck alone) and she is doing just fine now.
wow is it ever squat.
Tbonegrower
Member
Glad I could roll through. Looking good around these parts.
ReikoX
Knight of the BlackSvn
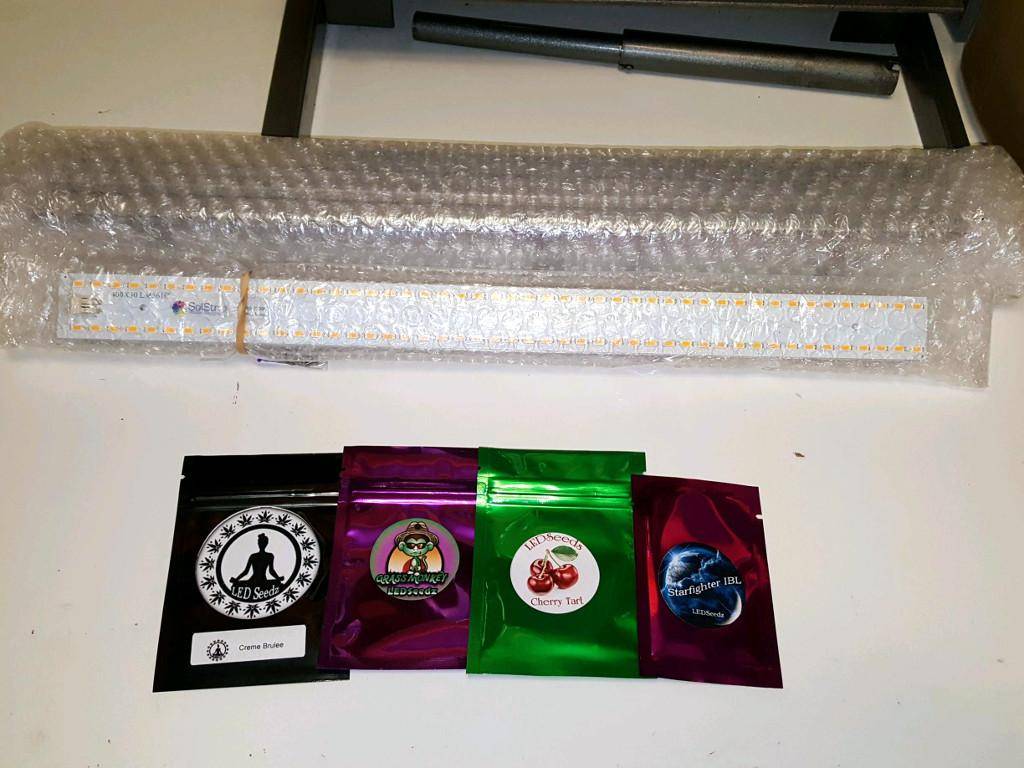
Uncle Sam got be some new toys to play with. I got 6x SolStix with a 250-watt dimmable driver. I also picked up some more LED_Seedz. Grass Monkey F2, Cherry Tart (Cherry OG x Grass Monkey F2), Creme Brulee (ICookies x Grass Monkey F2), and Starfighter IBL.
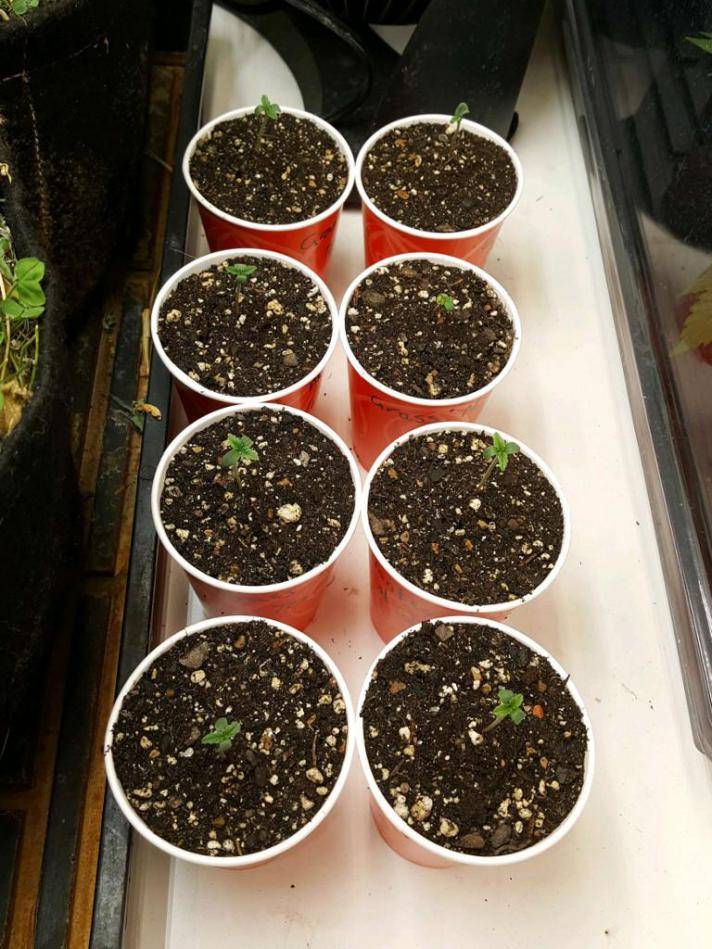
The Grass Monkey F2 seedlings are all up. They were dipped in VAM mycorrhizae, transplanted into paper cups, and watered with kelp, aloe, and fulvic acid. Once they get their first set of three bladed leaves, I will take the cotyledons for testing gender.
The Grass Monkey F2 seedlings are all up. They were dipped in VAM mycorrhizae, transplanted into paper cups, and watered with kelp, aloe, and fulvic acid. Once they get their first set of three bladed leaves, I will take the cotyledons for testing gender.
Safe Gardener
Active member
What are you doing for heatsinks with the Solstix?

Safe Gardener
Active member
I was just on their web site and saw the led strip/heatsink combo. I'm really tempted to pickup 4 of those to use in one of my cabs.
So far are you happy with the growth your seeing with these?
So far are you happy with the growth your seeing with these?
~star~crash~
Active member

ReikoX
Knight of the BlackSvn
ReikoX's Cannagar Tutorial (1/2)
ReikoX's Cannagar Tutorial (1/2)
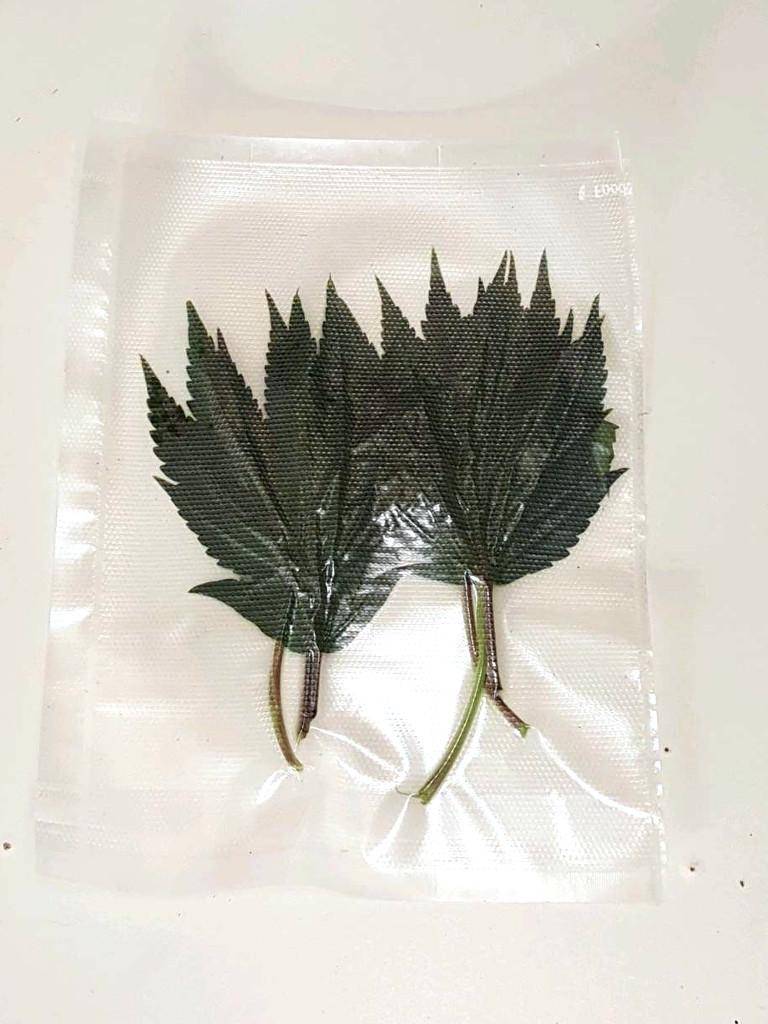
To cure the leaves, I first take them fresh off of the plant and vacuum seal them. Then I put them some place warm like on a seedling mat for a couple of days. After a few days, the moisture will be removed from the leaves and may even pool in the bag. I remove the leaves and let them dry until they are just starting to crisp up at the ends, then vacuum seal them again for a week or so.
Next I shape the cigar. A cigar mold would probably work better, but the artisan hand rolled cigar is always nice as well.
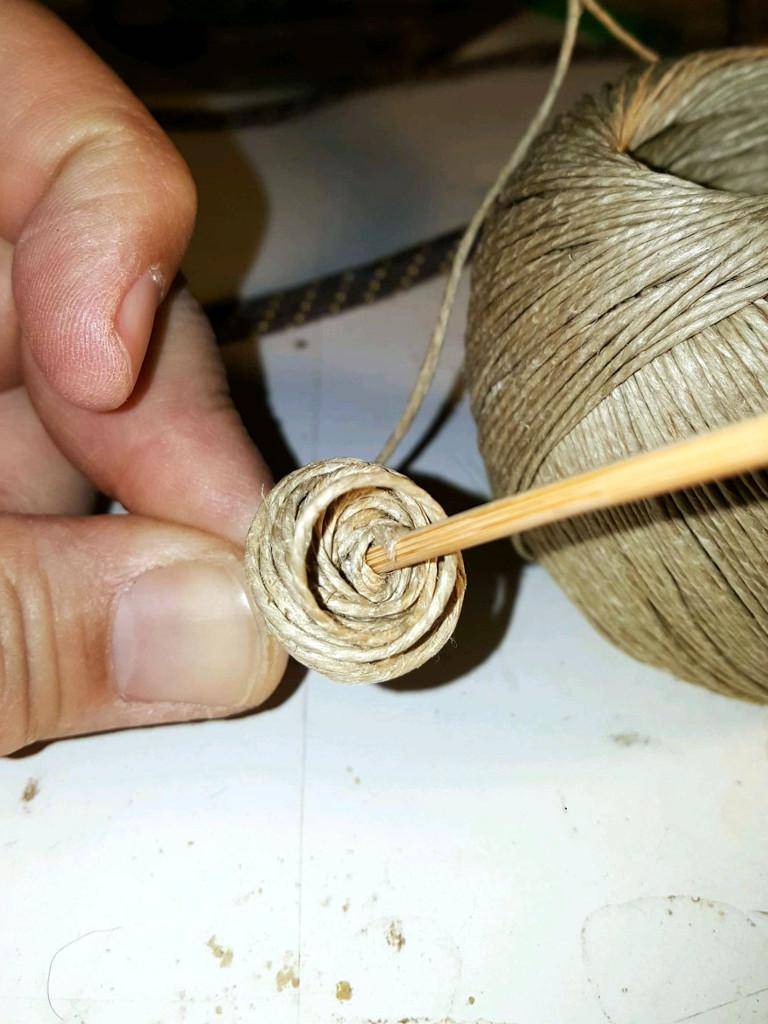
First, I shaped the tip of the cigar with some hemp twine. The idea is to get the hemp twine as thick as the cigar will be in the end.
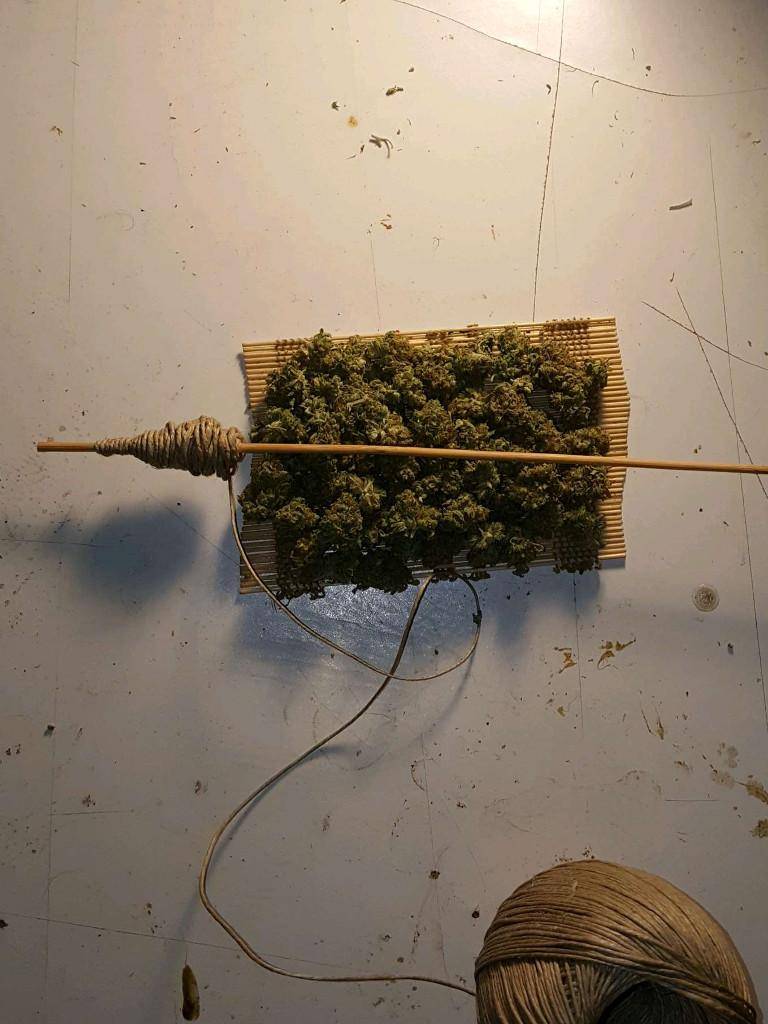
Next, I weighed out about 7 grams of bud and removed any large stems. I broke the buds down so they were a uniform size, and formed them into shape with a bamboo rolling mat.
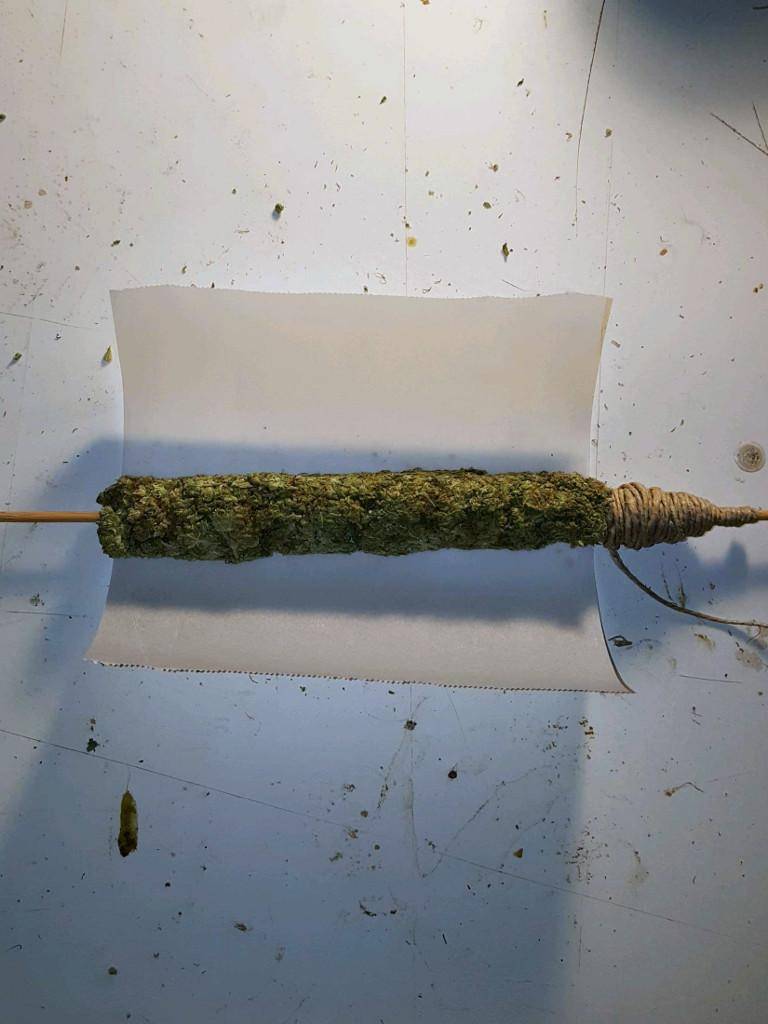
Then, I cut a piece of parchment paper and wrapped it around the buds. This helps keep the buds from falling apart when wrapping them with the hemp twine.
After that, I wrapped it tightly with the hemp twine. Notice how much more compact it got wrapping it like that.
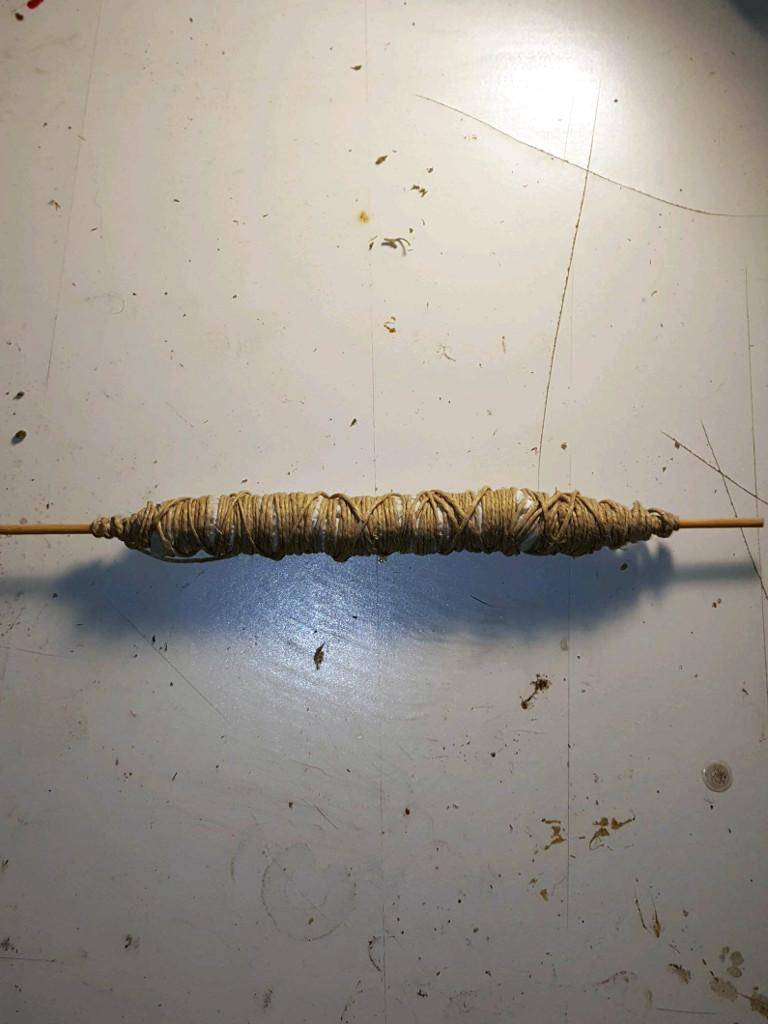
Finally, I vacuum sealed it for a couple of weeks. This will help it keep its shape when wrapping the leaves later.
ReikoX's Cannagar Tutorial (1/2)
To cure the leaves, I first take them fresh off of the plant and vacuum seal them. Then I put them some place warm like on a seedling mat for a couple of days. After a few days, the moisture will be removed from the leaves and may even pool in the bag. I remove the leaves and let them dry until they are just starting to crisp up at the ends, then vacuum seal them again for a week or so.
Next I shape the cigar. A cigar mold would probably work better, but the artisan hand rolled cigar is always nice as well.
First, I shaped the tip of the cigar with some hemp twine. The idea is to get the hemp twine as thick as the cigar will be in the end.
Next, I weighed out about 7 grams of bud and removed any large stems. I broke the buds down so they were a uniform size, and formed them into shape with a bamboo rolling mat.
Then, I cut a piece of parchment paper and wrapped it around the buds. This helps keep the buds from falling apart when wrapping them with the hemp twine.
After that, I wrapped it tightly with the hemp twine. Notice how much more compact it got wrapping it like that.
Finally, I vacuum sealed it for a couple of weeks. This will help it keep its shape when wrapping the leaves later.
ReikoX
Knight of the BlackSvn
ReikoX's Cannagar Tutorial (2/2)
ReikoX's Cannagar Tutorial (2/2)
After a week or so of being tightly wrapped, I carefully removed the hemp twine and parchment paper. Now it's time to finish wrapping the buds with the leaves. For this cannagar I'll use about 7 grams of Holy Grail 69 bud, 0.5 grams of mixed kief, about 1 gram of Skunk rosin, and several Duban Poison (male) leaves.

First I pressed the dry sift between two pieces of parchment with a hand clamp. A full gram would have been better, I'll make due with what I have.
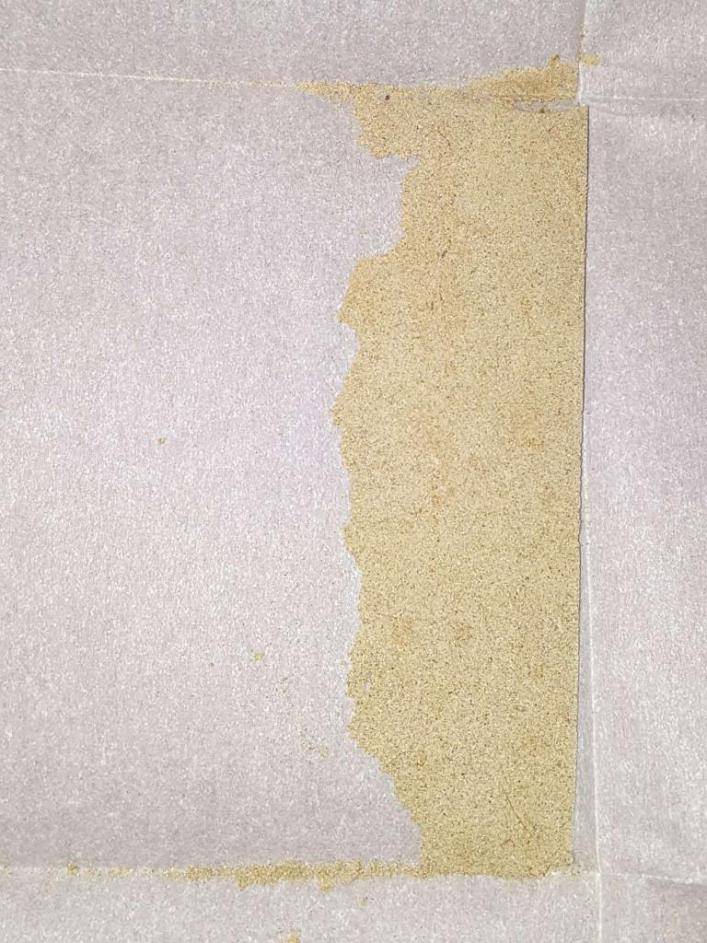
The bud was lightly covered in rosin and rolled in the pressed kief. To use the rosin, I put a dab on my dab tool and melt it with my e-nail. Then while it's liquid I can smear it on the bud or leaves.
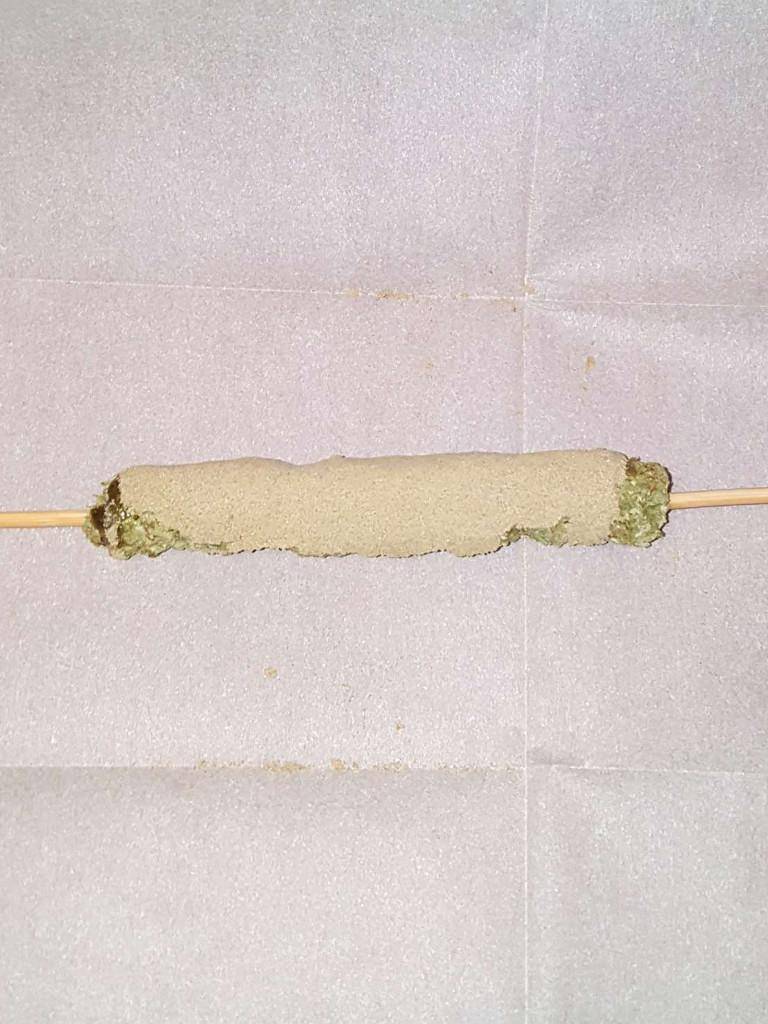
Each of the fingers of the leaves were carefully removed. Using the rosin as an adhesive, I first made the tip of the cigar by putting a hole in the middle of the leaf and putting through the skewer.
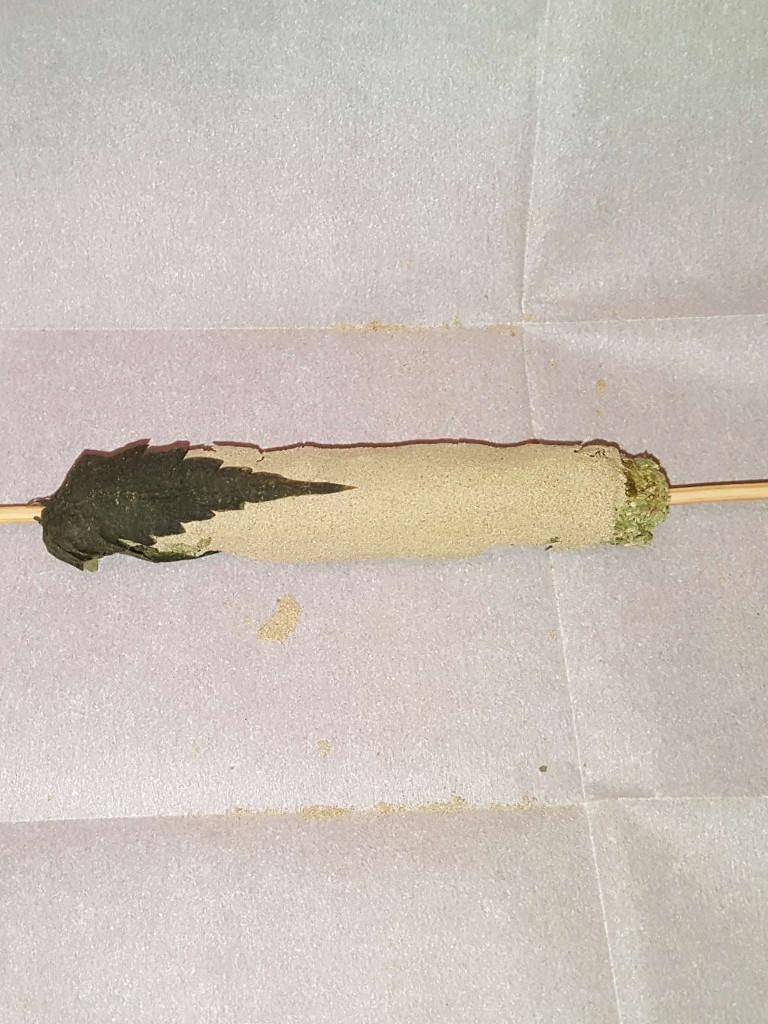
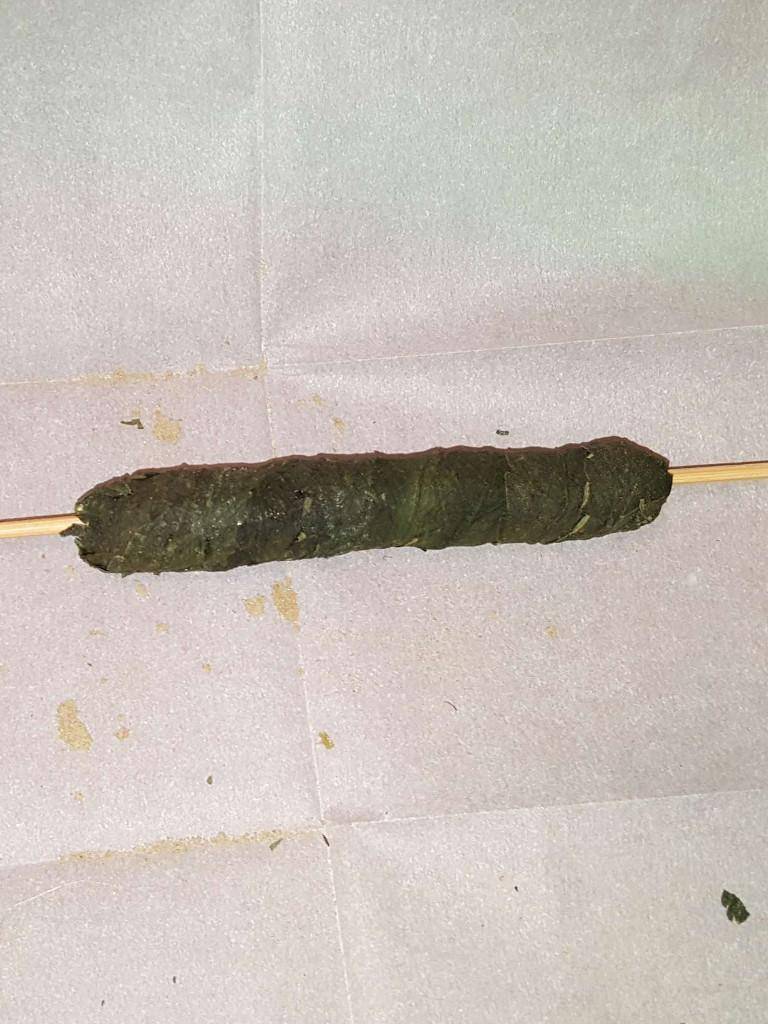
Smearing heated rosin on each leaf, I finished covering the cannagar. This was then vacuum sealed and will age until 4/20.
ReikoX's Cannagar Tutorial (2/2)
After a week or so of being tightly wrapped, I carefully removed the hemp twine and parchment paper. Now it's time to finish wrapping the buds with the leaves. For this cannagar I'll use about 7 grams of Holy Grail 69 bud, 0.5 grams of mixed kief, about 1 gram of Skunk rosin, and several Duban Poison (male) leaves.
First I pressed the dry sift between two pieces of parchment with a hand clamp. A full gram would have been better, I'll make due with what I have.
The bud was lightly covered in rosin and rolled in the pressed kief. To use the rosin, I put a dab on my dab tool and melt it with my e-nail. Then while it's liquid I can smear it on the bud or leaves.
Each of the fingers of the leaves were carefully removed. Using the rosin as an adhesive, I first made the tip of the cigar by putting a hole in the middle of the leaf and putting through the skewer.
Smearing heated rosin on each leaf, I finished covering the cannagar. This was then vacuum sealed and will age until 4/20.
~star~crash~
Active member
i don't even actually smoke, but i would toke on that piece of artwork !!
wow
wow
ReikoX
Knight of the BlackSvn
That Looks Awesome bro
ThanksLooks like Shish-Kebab of Cannabis World...")

That looks amazing bro! I bet it will kick your ads.
Can you even finish it in one session?
Nope, last year it took four people out. Finished it two sessions later.
Well there is no tobacco in it, so puff puff pass!i don't even actually smoke, but i would toke on that piece of artwork !!
wow

~star~crash~
Active member
now ur talkin' my language (sort of)
that cannagar really requires a good set of practised hands skills .... much respect 2 u
that cannagar really requires a good set of practised hands skills .... much respect 2 u
ReikoX
Knight of the BlackSvn
SolStix Build (1/2)
SolStix Build (1/2)
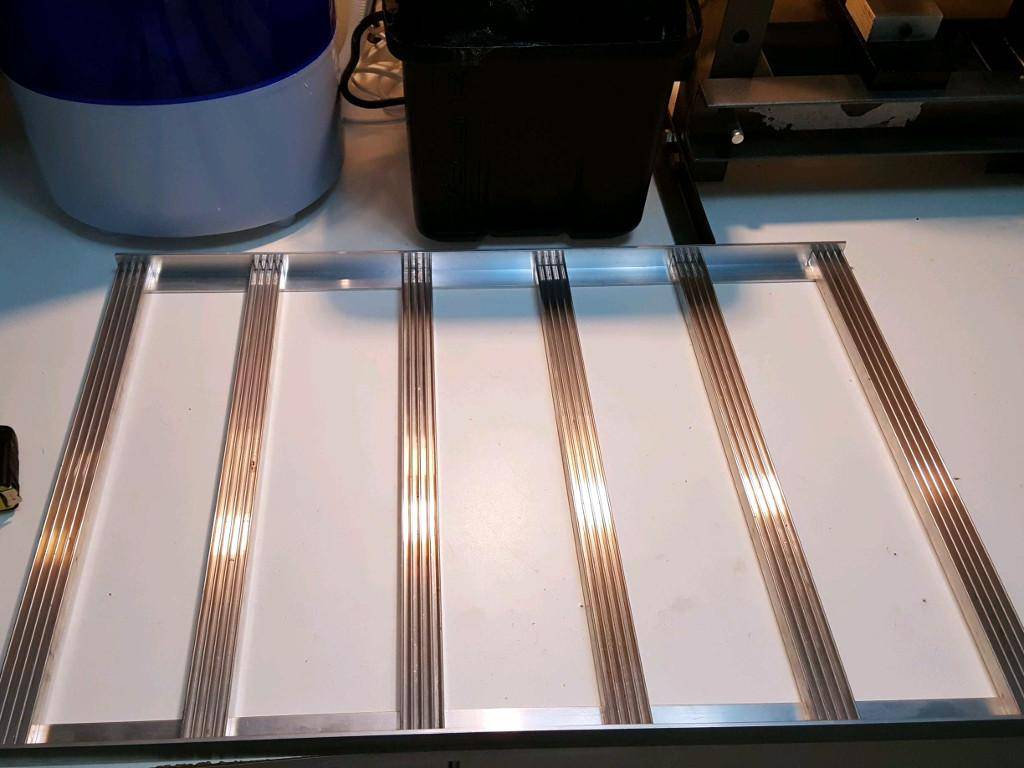
DIY lighting with the SolStix couldn't be easier. The SolStix is a strip LED PCB, the SolStrip, with a pre-drilled and tapped matching heatsink, the SolSink. They are designed for 1" angle, in my case I went with 1/8" aluminum. For this build, I plan to run six SolStix 5" apart. They need about 1/2" on either side, so both pieces were cut to 26". I laid everything out and checked my measurements.
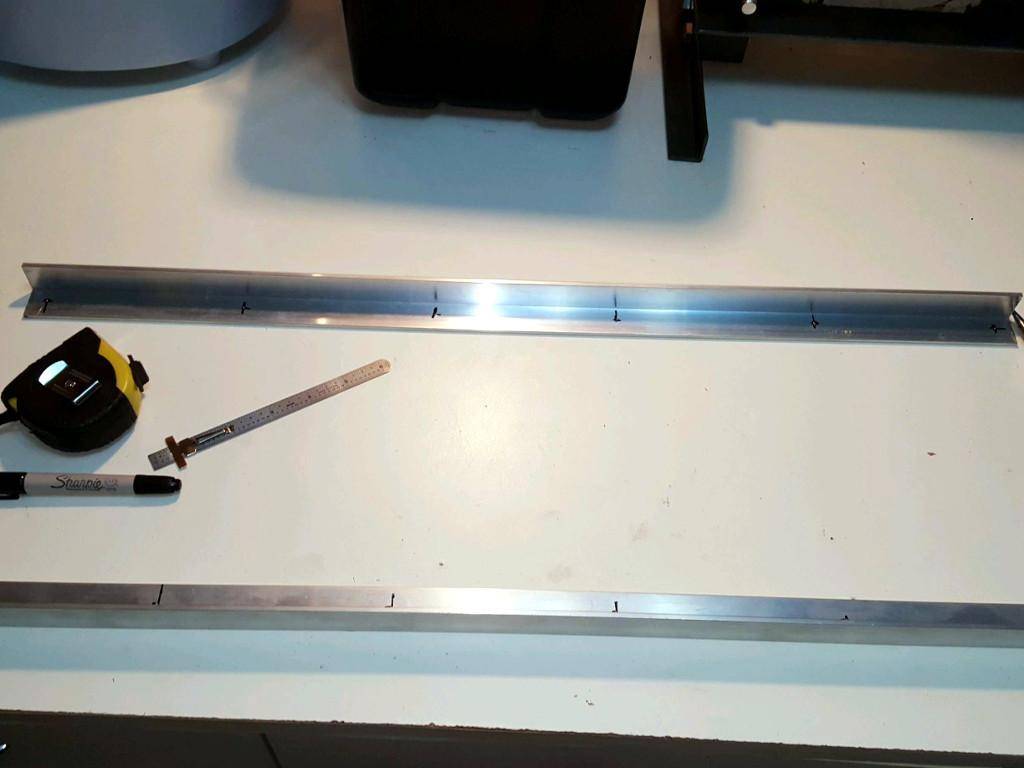
Next I measured and pre-punched my holes. A bit of hint here, measure from the inside edge, not the outside edge. The thickness of the material needs to be taken into account. Instead of 1/2" from the inner edge, I did 1/2" from the outer edge. Luckily I just flipped the piece over and re-drilled the holes. I think I forgot the old saying "measure twice and cut once", my grandpa would be disappointed.
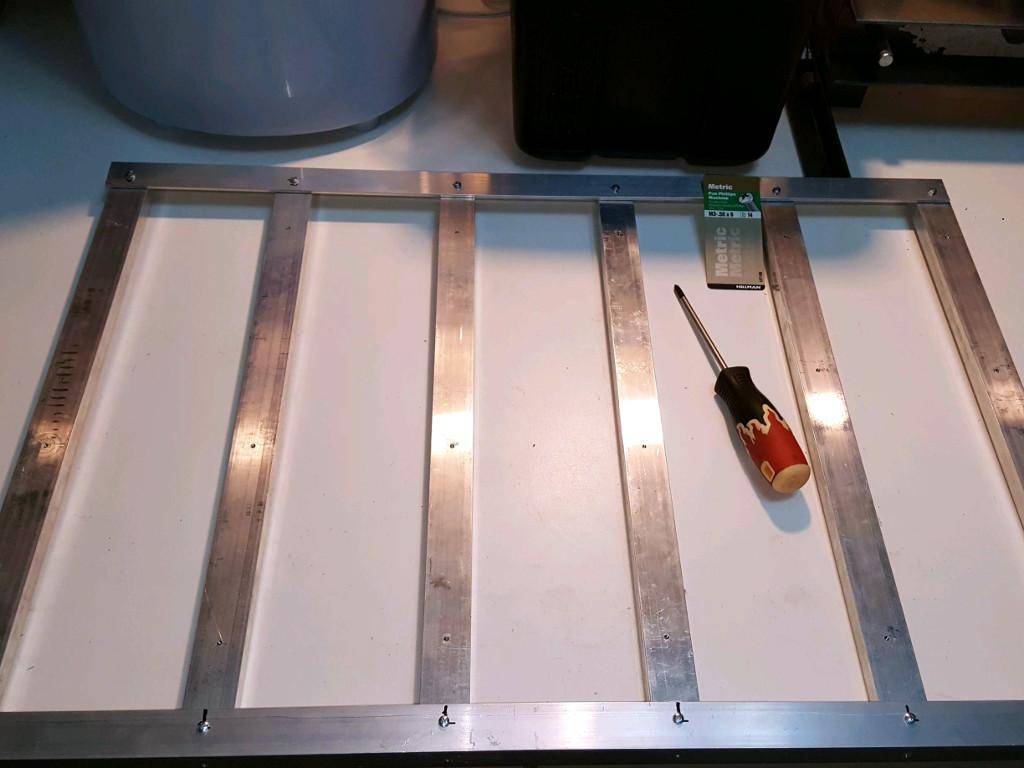
The SolStix come with hardware for mounting the strips to the heatsinks, but do not come with hardware to connect the heatsinks to the frame. They are tapped for M3 5mm screws. I got some M3 6mm to accommodate the thickness of the angle iron. Each screw was first screwed in lightly, giving some play to get all the holes aligned. After that the screws were each tightened to stabilize the whole frame.
SolStix Build (1/2)
DIY lighting with the SolStix couldn't be easier. The SolStix is a strip LED PCB, the SolStrip, with a pre-drilled and tapped matching heatsink, the SolSink. They are designed for 1" angle, in my case I went with 1/8" aluminum. For this build, I plan to run six SolStix 5" apart. They need about 1/2" on either side, so both pieces were cut to 26". I laid everything out and checked my measurements.
Next I measured and pre-punched my holes. A bit of hint here, measure from the inside edge, not the outside edge. The thickness of the material needs to be taken into account. Instead of 1/2" from the inner edge, I did 1/2" from the outer edge. Luckily I just flipped the piece over and re-drilled the holes. I think I forgot the old saying "measure twice and cut once", my grandpa would be disappointed.
The SolStix come with hardware for mounting the strips to the heatsinks, but do not come with hardware to connect the heatsinks to the frame. They are tapped for M3 5mm screws. I got some M3 6mm to accommodate the thickness of the angle iron. Each screw was first screwed in lightly, giving some play to get all the holes aligned. After that the screws were each tightened to stabilize the whole frame.

Latest posts
-

-

-

-
Sativas, Breeding long flowering racy Equitorials:
- Latest: IndicaFarmer
Latest posts
-
-
-
-
Sativas, Breeding long flowering racy Equitorials:
- Latest: IndicaFarmer
