What's new
  • Happy Birthday ICMag! Been 20 years since Gypsy Nirvana created the forum! We are celebrating with a 4/20 Giveaway and by launching a new Patreon tier called "420club". You can read more here.
  • Important notice: ICMag's T.O.U. has been updated. Please review it here. For your convenience, it is also available in the main forum menu, under 'Quick Links"!

The OBBT Grow Show!

Allright, that's been plenty enough cocking about


internet-serious-business-cat.jpg


I've been practicing my serious face. Time for actual instruction to commence!


We've spoken a lot about mediums, guys and girls we are here for this:


OBBT medium is fairly unique. Its weird, but happily easy to identify. Now before we get carried away with amendments and grades of coco and nutrients and all the supporting crap let us remind ourselves of what we are doing all this work for:


picture.php


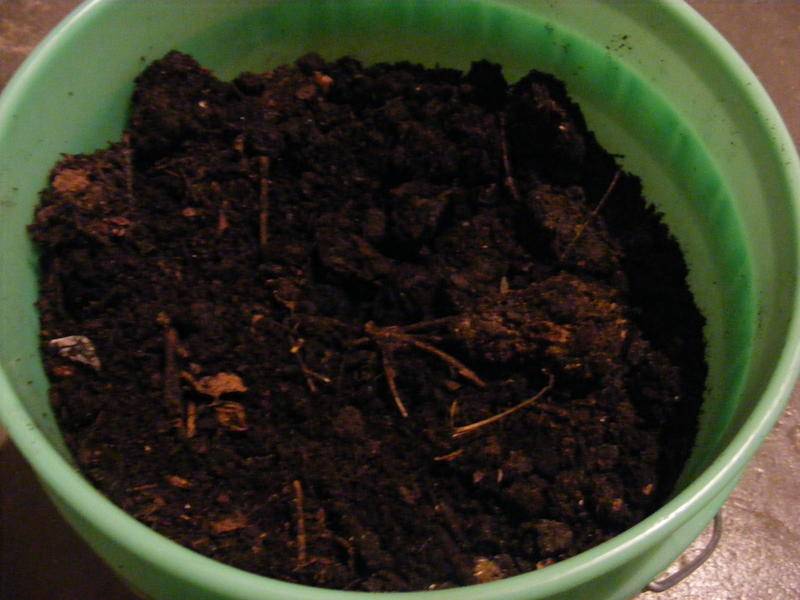
Dirt ladies and gentlemen. Soil. Take a good long look.It may be obtained from countless sources yet we all take it for granted.

So as we go along never once allow yourself to forget that we are here for Dirt. What we came from, what we will one day become again. Mother Nature then is on our side. What we are doing is coaxing her into our calm little boxes. We wish that she leave her unpredictability (and awesome fury and death) outside and come in with us to grow the ganjas :joint:

So how do we go from my bucket of epic compost into enough prime OBBT medium to fill our stashes? Well gardeners we are going to draw upon gardening industry and get ourselves as many bitchin amendments as we can get our hands on. I've been lucky to have nearly every amendment you might need or come across that is suitable for OBBT usage. Keep in mind you needn't assemble all of these to get a successful medium. The desired consistency can be obtained many ways.

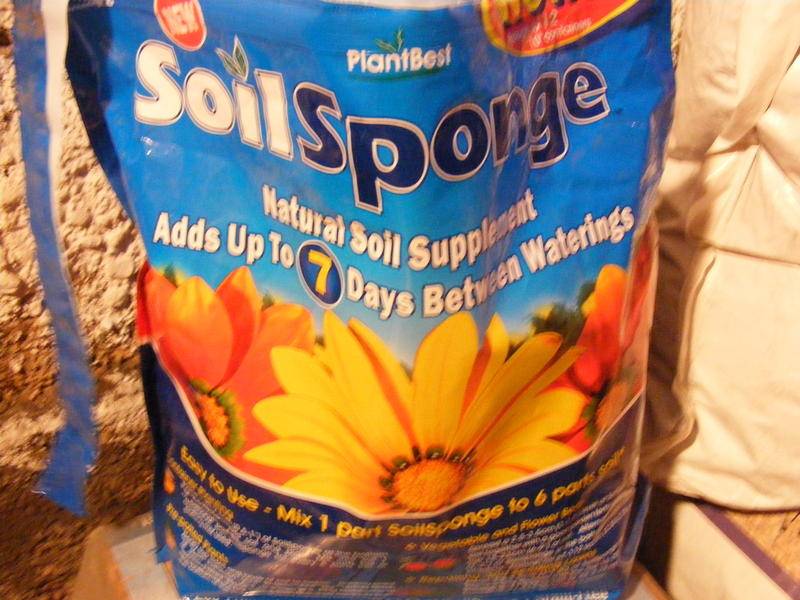
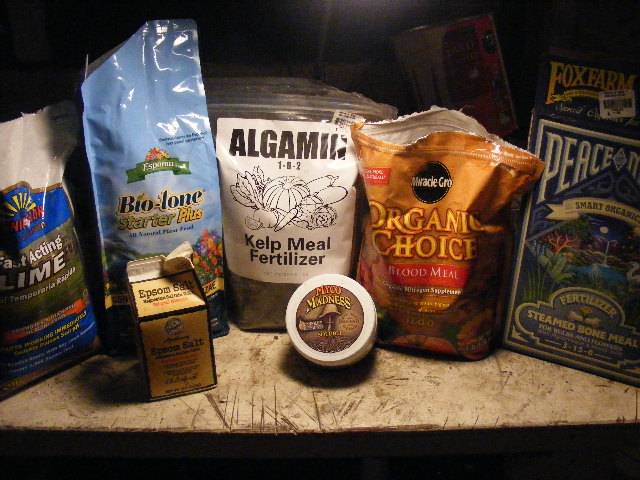
So let us recount the good stuff:


Not pictured is Hydroton. Some gardeners seem to be having success with it for supporting the bath. I don't trust it, its made by Germans.


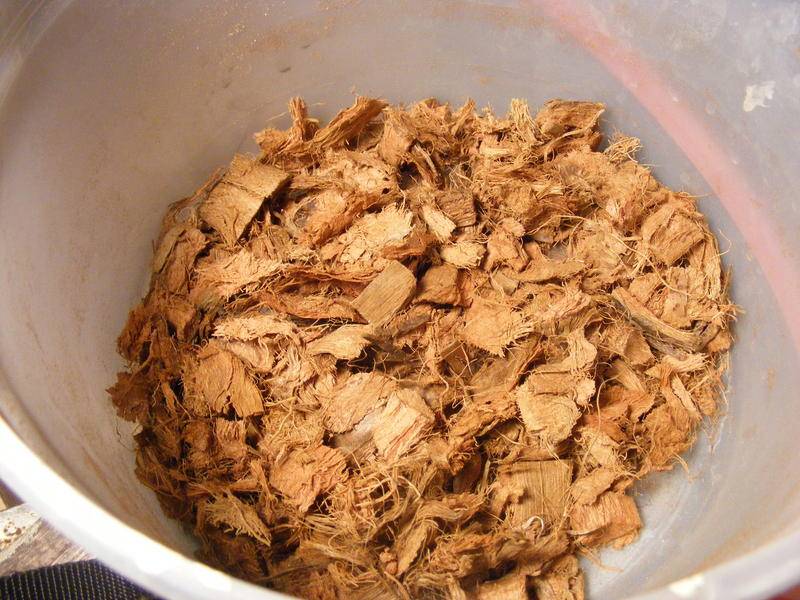
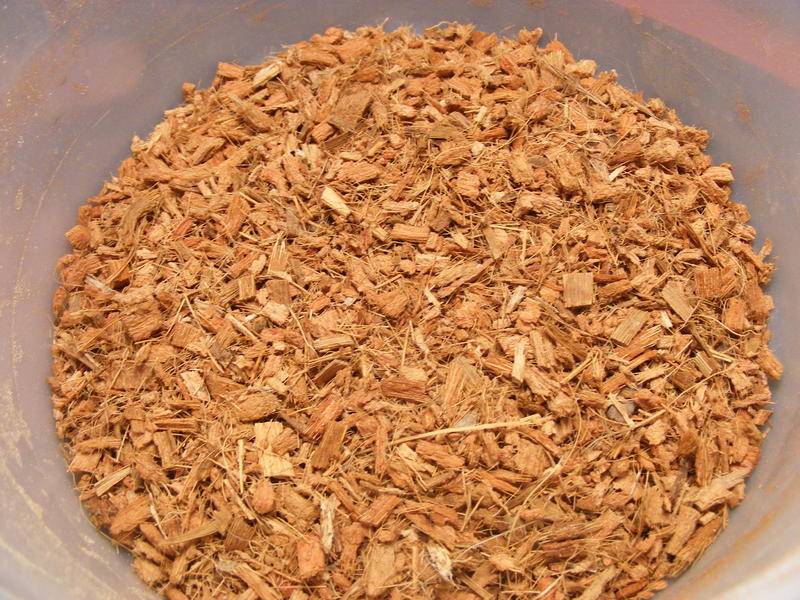
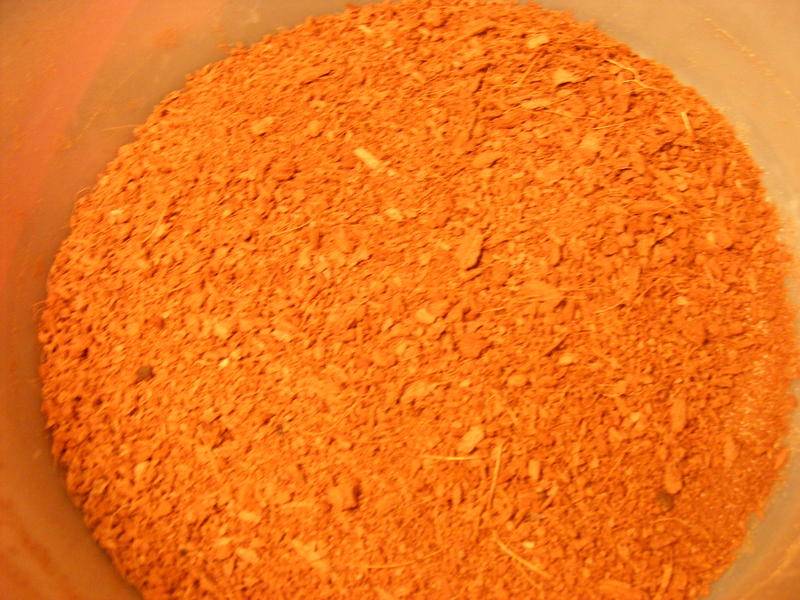
Coco Moss! Seen here in all three typical grades. From left to right we've got Coarse Medium and Fine. Coarse grade comes compressed in bricks, is cheap, easy to buy, easy to find but a bitch to work with. Salty and full of large impenetrable chunks most growers skirt it as inferior. However its consistency helps us the most in making OBBT medium and lets us use less coconut and more soil.

Break up the brick by hand and put about 1/3 of it in a 5 gallon bucket. Boil about 3 gallons of water. Apply it as hot as possible to the bucket. Let sit for several hours. When it cools of but is still warm reach in and grab up the chunks. They will have become soft and fiberous. Work them by hand as much as possible and they break up into the most incredible fluffy fiber you've ever seen.

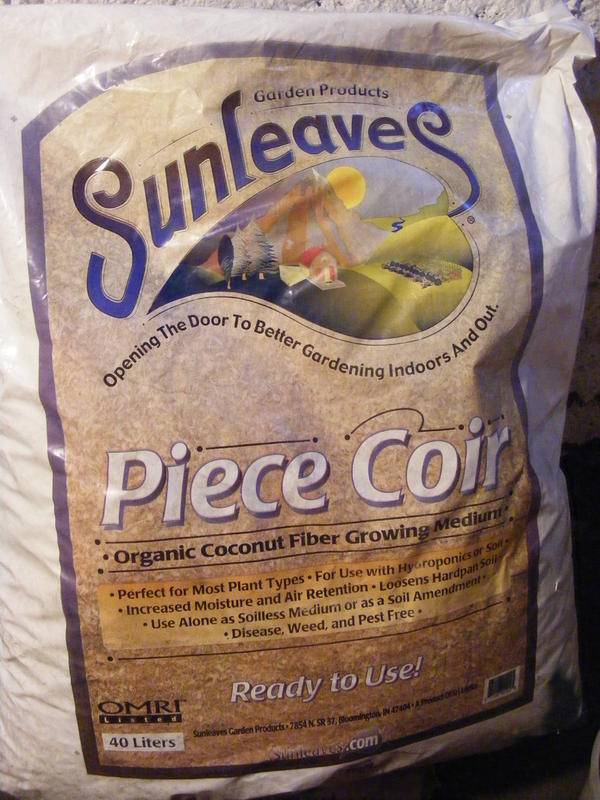
The bagged hydro-grade stuff is nice. Full of fine chips and lots of induvidual hairs. But it lacks the glorious fuzzy clumps of the steam-treated coarse stuff. Roots penetrate these big chunks like you wouldnt believe, they are more desirable than you might think.

Fine grade is coco fluff, contains few to no hairs and is not enough alone. I find though it makes a nice agregate when added to the other grades.


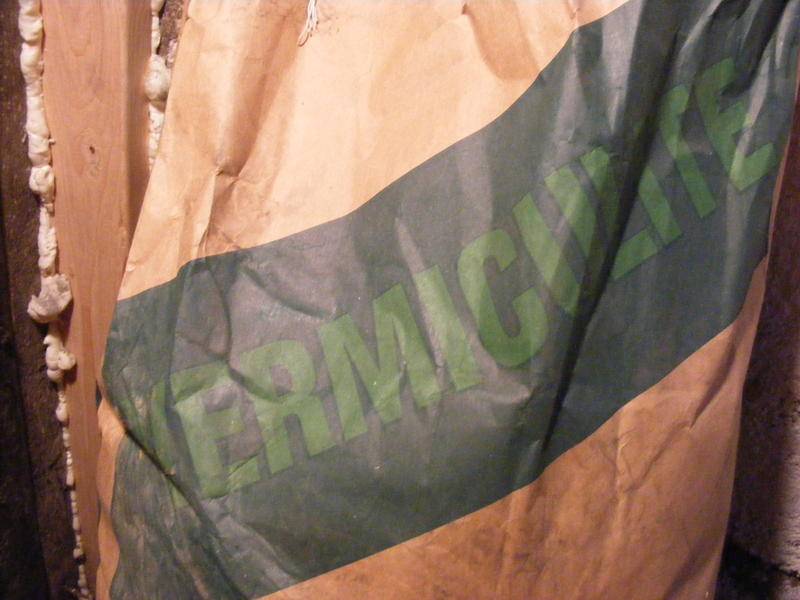
BIG CHUNKY Vermiculite. This stuff is a lot cheaper and easier to find in bigass horticultural bags. Look for it in large garden supply outlets, places that cater to landscaping companies. It is water-insoluable but grips the tiny soil particles amazingly. Its actually one of the most vital components here. I've found having more and larger chunk vermiculite in the medium is directly related to having cleaner runoff and better soil retention overeall. Even if you can only get it in a fine grade do not skip over this stuff


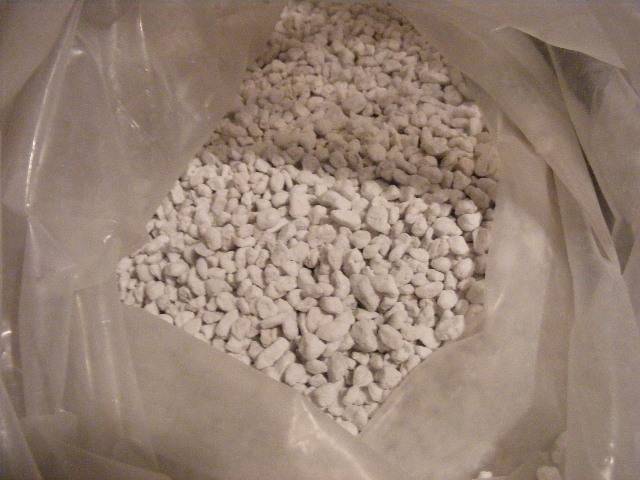
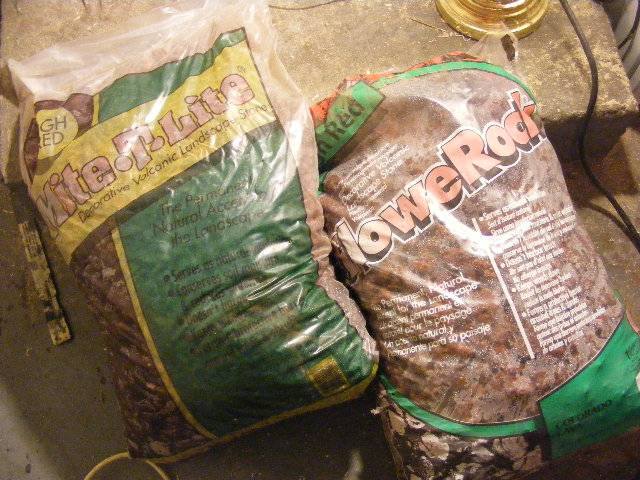
BIG CHUNKY Pearlite. Are we starting to see the big 'n chunky theme throughout my description of favored OBBT ingredients? That is very purposeful. Experience has led me to these guys over time and I have stuck with them. If you plan to run OBBTs for a while, or run a decent quantity of them you are best off investing of these big bags of big ammendments.

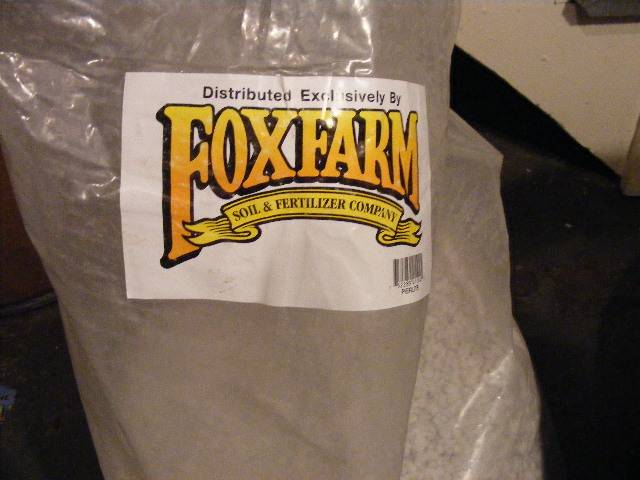
This Fox Farms pearlite is the shit! Very large granuals, easily the surface area of large hydroton balls. Foamy and lightweight with faboulous little irregular shapes. Love this stuff.

Mix these ammendments with epic soil. I use my home-brewed all-natural compost. Good strong bagged organic soil spiked with some worm castings should do just as well. In theory you could tune the soil for nute ratios by how you made it, but I've never bothered. I content myself with good nitrogen, traces galore and goodness knows what else.

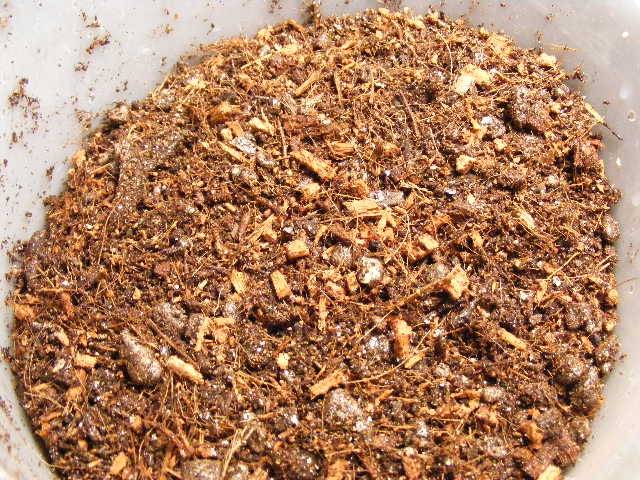
Stir em all together at a rate of 50% coco, 25% SOIL 25% Vermiculite/Perlite (I go heavier on the former)

The resulting mix is unique. Spongey but fast-draining. Take up a good wad of in in both hands. Compress it. Hard. Let go. It should spring fourth and fall down into a fluffy pile. Any excessive clumping or permanent compression means the medium is TOO DENSE!

As you mix everything up, you should be adding the pre-loaded nutes. We've talked about these a lot so now a quick run through of what I do:

*EDIT* The following recopy is VERY HOT! I think it is just about the maximum nute concentration that is safe to run. If you are new to organics, new to cannabis or just lacking in confidence then cut back the quantities of Blood Meal and Bio Tone by %20 or so. We can add more nutes later through teas, don't worry about pushing the envelope. I know this method like the back of my hand and therefore push it for all it is worth. Everyone needs to keep that in mind throughout the rest of this diary. Unless you are a serious green thumb, badass cannabis cultivator or otherwise very confident you should not try to be as aggressive as I am. Use fewer nutes, supercrop less, run a more lax timetable, don't starve as heavily, etc. I'll try to point out the times when I am seriously pushing the envelope and warn you guys to back off a bit due to a lack of experience */EDIT*


REQUIRED PER 5 GALLONS OF FINISHED MEDIUM:

3 cups Bio Tone
6 cups kelp meal
2 cups blood meal
1 Tbsp Epsom Salts
2 Tbsp Fast-Acting Lime


OPTIONAL PER 5 GALLONS

1 Teaspoon Myco Madness
1/3 cup bitchin bio-active bone meal

Now stir. Get a hugeass 25 gallon handled tub and mix it by hand, a lot. When you think you are done flip the whole thing over and do it again.

When you achieve total coating the mix will be totally homogeneous. In a single ounce of the finished medium you should be able to visually identify an expected quantity of each of the ingredients. We are making a composite. Many different grains and qualities come together to give us a medium with truly special properties. More on that in a bit.

So we have our Ultimate Organic Medium However you have chosen to bring it together. Just remember we want to run a ratio of 3 parts N to 1 part P and K for veg.

Now we need something to put it in.
 
Building and Filling an OBBT

Building and Filling an OBBT

I'm going to say it now, my rendition of the OBBTs are effective, but they suck! I ran the same tubs for years, DrunkenMess built them for me way back when. I recently grandfathered the set to a new gardener friend of mine and decided to fab some up new. Because I had most of the needed bits around I decided to just re-create the ones DM built for me way back when.

BAD IDEA

Its constructed with PVC plumbing bits and you therefore need to be a fuckin plumber to make them right so that they don't leak. DrunkenMessiah is a plumber. Never trust plumbers.

So I had a bitch of a time. I'm gonna show you anyway, but I will warn you now. Don't do it like this unless you are brave, or stupid.... or a plumber. Or any combination thereof (more common I'm sure)

Therefore this will be a hasty run-through. If you can't get a sure grasp on what I'm doing by these simple instructions then DON'T try to do it this way. Get proper grommets and sprinkler fittings or whatever. Do it like that jolly chap RipVanWeed has over in DM's thread.


Get some tubs, paint them. Square is more space-efficient. Deeper is better. At least 3 gallons. Minimum 3 inch bath.


A couple of these are handy


Tap and place 1 inch threaded PVC drain socket with threaded flat nut and rubber grommet.


Get these. From right-to-left: 1 inch threaded-to-smooth PVC fitting. 3/4 inch T with 1/2 inch runoff. 1 inch to 3/4 neck-down. Nub of 3/4 inch PVC pipe.


Assemble on the inside of the tub like such. Note the hole drilled at an angle straight into the threaded couple between the drain piece and 1 inch PVC piece. This sucks to do. Top with appropriately long 3/4 inch float-tube. Drill hole on face of tub and apply 1/2 inch overflow through the tub and into the T fitting.


Suspend in a way that is convenient. The fucker will leak, so use lots of this pre-emptively:


Its like Liquid Nails and Bathroom Sealant Had a dirty, kinky, horrible one-night stand. Amazing.


Fit a bunch of these cheap needle-valve PVC drains. Make sure to break them in before you glue them on. Do and un-do them a whole bunch of times, closing them tightly. Plumb according to your needs.

Whew! That sucked! Now time to fill them!


Previously-mentioned lava rock is the tits. I get it in a large rock grade and a gravel grade. These mix fabulously. Make sure to give them a good rinsing before placing in the tubs.


I like these tubs because they allow me to cram in 12 inch air stones. Get one appropriate for your tub and plumb it up.


Make sure your air pump has plenty of ass! That lets you run a kewl manifold like this while maintaining good flow rates.


Now cover with the stones. I graduate my stone usage with bigger ones on the bottom running up to a thin layer of very fine ones up top. This does a nice job of keeping the medium where it should be. I always fill the stones up about 1/2 inch past the overflow mark just to be safe if the medium settles a bit.


Ah, brings a tear to me eye every time!

Now flop in the medium and fire up the bubbler! Signs that you've done things right:

Put your ear down over the medium, almost touching it. You should hear the air seething out, it sounds like bubbles breaking just below your ear even though that is happening a foot away. Place your ear above the spot on the medium that is furthest from the air stone. For me this is the lower-left corner. It should sound exactly the same. The seething noise should not vary in volume as you rove about the surface.

The medium should stay moist on its own. If you have proper bubbling a sort of active osmosis goes on. As long as there is enough water in the bath to keep the bubbler submerged the medium should maintain a very uniform moisture content. Nice and wet but not too wet. No mud whatsoever. Very granular and hydro-ey, it is hard to describe.

Lots of cool things do happen though, like this:


A gold nugget! Er, its actually a chunk of pearlite coated in the smallest flecks of the medium. Vermiculite dust, dirt, and even particles of nutrient additives are all visible.

And now walk away! We must let the tubs sit in the dark and incubate. Let them bubble away while keeping the res at least half full. A week should do. Will be posting updates as visible changes become apparant.

Soon we will talk teas and foliar treatments. You might have seen DrunkenMess making some wild claims around here about running mostly female from mixed seeds. It is real and we will be discussing that very soon. I will be running 5 mixed seeds in these 5 tubs. One sprout per tub. No backups. I fully expect not to rip out a single male/hermie.

Five for five, lets see if I can nail it!
 

rrog

Active member
Veteran
I am having the BEST time with this, LadyL! Thanks for the great level of detail. Makes replicating it so easy. Thanks a lot.

I'm VERY interested in the 5 for 5. Somehow, I'm betting you get the 5.

So fine grade Coco mixed in a little, eh?


QUOTE: "...Good strong bagged organic soil spiked with some worm castings should do just as well"


Anything specific that you or others might suggest? Quantity of worm castings?

QUOTE: "...1/3 cup bitchin bio-active bone meal."

Do I look under B for Bitchin'? hahha sorry Seriously, though. Is there a "bio-active" bone meal or is it all bio-active?
 

rrog

Active member
Veteran
LadyL

I'm looking at the Pre-Load materials in your thread and DMs. You both use the same ingredients, but different quantities on some items per 5 Gallons:

Blood Meal: DM=1 Cup, LL= 2 Cups
Kelp Meal: DM=3 Cups, LL = 6 cups
Bio Tone: DM = 2 Cups, LL = 3 Cups

You've got more across the board. You mentioned you had some improvements while DM has been on sabbatical. Maybe these ratios are some of the improvements?

Regarding airflow, trying to figure out the pump size. I have 5 gal black (round) pails. I'll have 2 gal of water res in each. Can't fit 12" long airstones, but could do multiple 6"s or 8"s. You look like you have some heavy pump acton happening there.

Thanks a lot for the clarification.
 
Heh, sorry for non-specific-ness. That is Fox Farm bone meal, its from their Peace Of Mind series of powdered organic nutes. Not all bone meal is bio active, the Peace of Mind line all feature added bio beneficials. On top of that it has Humic Acid and some other cool forest product.

Dunno about suggestions for organic soil. I've always run fresh compost, hit up some of the organic gurus in the organic soil section.

Running the OBBTs for as long as I have I've drifted away from DM's specifics. I've come to run less medium (closer to 50% bath, but not quite). I've been getting braver and braver about running a very hot medium up front. You need to be running good oxygenation and have a high degree of confidence in your microbes to run the initial mix as hot as I do. Should have mentioned that. Ever since I started using Myco Madness (amazing shit by the way, more bio variety than any other product I've seen) I've been able to get quite adventurous with heating up the mix.

If you do back off for sake of making it more newbie-friendly then back off the Bio Tone first, then the blood meal. Keep the large dose of kelp meal. Kelp is a really weak fert, excessive amounts of it won't hurt anything. Its hormone content does amazing things. On top of that it contains tons of sugars and high volatility carbohydrates. These are like super-food for the microbes, they drive em crazy

You could go with 6 or 8 inch stones in a 5 gallon and be fine. For a little more money I've seen some swanky 3 and 4 inch round air stones. They have massive surface-area and could do really well in a 5 gallon bucket.

As for air pumps, go overboard. I've got a high-output 18 watt Sunleaves model. It makes phenomenal pressure but I was a little disappointed in the flow rate. Should have gone one size bigger, but it will do fine.

DM's school of thought was always to go with multiple cheaper pumps. No more than 2 tubs per pump. I said fuck that long ago. These cheap pumps fail often, vibrate excessively, get louder over time and are a nuisance in general. Get your self one bigass high-quality jobbie like mine and run a manifold instead. Axially-driven aluminum chassis pumps like mine are meant specifically for hydroponic applications. They are meant to run longer and harder than aquarium pumps. They run high surface temps but are way more reliable over time. They are a bit extra loud at first, they have a sort of "break in" period where the settle into the work. After that they are good for years.

Keep the questions coming kids, more info soon!
 
ROCKSTAR!!! Just wanted to let ya know I am loving your posts, totally got it all filed away. Can't wait to see more.

I'll keep my experiments, etc. in DM's posts and stick completely to what your presenting here.

It sounds like our "standard" coir, cocopeat is OUT. So by that your meaning Botanicare block, Canna, B'Cuzz, all the "standard" coco's etc. correct? You said hydro grade was "acceptable" but lacked the fluffy bits. I get that course is better, just trying to feel if the "standard" stuff is even doable.

I have almost an identical air pump as you. How many tubs do you feel is the max such a pump could run? Your using the manifold that comes with it, correct? Mine has 8 hoses, with control valves for each. Would 8 be the max in your opinion, or would you be able to split them with a T fitting to have 8 run 16 tubs? Mine CRANKS out air, far more then the small aquarium pumps (EcoPlus brand). Each of those air lines (8) blasts off- far more so then any of the smaller air pumps can achieve even when focused into a couple stones. So if DM is able to use the small ones with their lower air flow, would it be possible to really divide up the more powerful pumps?

Yes they are louder, its a mini air compressor- but they work owwww so good kids!!!!

OWww- even simplier! What would you say is the minimum air flow rate needed per tub?

A note to fans: the high grade air stones she mentioned are awesome, really heavy, and produce tons of bubbles. The holes are so fine it looks almost solid. I am willing to bet they stay nice for a long long time too. They are also about 5-6 times the price. About $10-$12 for a 5" vs. $1-3 for a 6" or 12" blue standard air stone.
 

rrog

Active member
Veteran
LadyL you're great with the answers here. Thank you.

I have a GH dual diaphram pump. Puts out 400GPH. I'm thinking that's enough for three 5 gallon PBBTs? Has a manifold.

Side note, whats the ideal room temp? Anything different with airflow? DM mentioned not blowing a fan directly on the plants to push females.

Thanks again. Going shopping
 
Hmmmm, hard to say. I was actually not impressed with the flow rate my 18 watt model managed. I'm doubling up on manifolds. The pump comes out with a 1/4 inch line. I break that down to four 1/8 inch lines with the stock plastic manifold. I take the central two lines (higher output) and use them to power my steel 5 port valved manifold. The other two ports on the plastic manifold are hooked up to air control needle valves. These two valves will be used to run accessories like my tea.

Closing off some of the valves made some of my air stones bubble more vigorously. That means my slightly low flow is related to the pump flow rate and NOT restrictions in my plumbing.

So I'm not sure about a minimum air number. More is better is really all I know. I would perhaps go by the guidelines set by the DWC guys. They deal with similar loads and plumbing situations as we do with the OBBTs.

There's nothing wrong with the medium grade 'standard' bagged choir. That stuff would work fine on its own. It will just require you to use more coco fiber as compared to the other constituents. We want to use as much soil in the OBBTs as possible. Using coarser coconut lets you use less coir and more soil.

I actually quite like the loose bagged stuff, it would work fine on its own. What we're talking about here is the absolute best combination of ingredients for an OBBT medium. I have gone overboard. Big chunky pearlite and vermiculite, three different grades of coco, perfect compost and two grades of lava rock. This thread is outlining the finest OBBT medium ever made. It would be possible to have success with the method while using fewer or lower quality ingredients. Experimentation is good, just make sure you stick to my nutrient ratios and medium consistency.
 
Lower room temps are better. The hotter the water in the bath is the less oxygen it holds. Certainly try to keep things under 90 F My last room kept under 82 degrees and all was well. Your pump sounds adaquite but it is a diaphram pump. Its not up to the task of full-time high-pressure high-volume air output like the axial hydro grade pumps are. It will work fine for a couple of harvests but soon it will get noisy and its output will drop. Keep this in mind for future upgrades.
 

rrog

Active member
Veteran
Hmmmm, hard to say. I was actually not impressed with the flow rate my 18 watt model managed. I'm doubling up on manifolds.

So I'm not sure about a minimum air number. More is better is really all I know.

Hell for $50 I'll get another one. Have each pump have 3 lines for 3 plants. So each plant has 2 airlines, one from each pump. In case something happens there's backup. I have those big round airstones. They are sweet indeed. 2 stones per plant.

There's nothing wrong with the medium grade 'standard' bagged choir. That stuff would work fine on its own. It will just require you to use more coco fiber as compared to the other constituents. We want to use as much soil in the OBBTs as possible. Using coarser coconut lets you use less coir and more soil.

... three different grades of coco,

So a little of all three?

Experimentation is good...

Oh no. Nope. I also like to cook and I always prefer to follow a specific recipe the first time. If that's OK.


Thanks again much
 
Oh no. Nope. I also like to cook and I always prefer to follow a specific recipe the first time. If that's OK.


Thanks again much

I used all three grades of coco and it was wonderful. Primarily coarse coco and then a liberal powdering of the two finer ones. This is expensive and hard to do. Getting all three grades together is not neccessary, just something I wanted to have a crack at.

Redundant air stones sound nice. You may be overkilling a bit, but you won't hurt anything by doing so. Better too much than not enough. As I said it wasn't the air flow I was worried about on your pump, its the longetivity. It will work fine for now but I would not invest 50 bucks in another diaphragm-style aquarium air pump. Only ten bucks more would score you a swanky hydro style pump like mine.
 

rrog

Active member
Veteran
Check on the Coco. Thanks

I was looking at the big Sweetleaves at 900 GPH

How much worm castings if I'm using store bought organic soil? 1/2 cup per 5 gal of total finished compost?
 
Nooooo idea dude. I saw someone surprised that DM thought straight wormcastings would be too hot. You might mix as much as 50/50 worm-castings/bagged organic soil.

Huzzah for bigass air pumps. Just make sure you are prepared to deal with the noise and vibration of these sorts of models. Axial hydro air pumps are awesome but they produce a huge amount of noise, vibration and heat! You need to muffle the outputs and the inlet. Then you need a way to shock-mount the pump so it doesn't shake your house down.

They can be a hassle but I love the damn things.
 
Hanging the pump from a bungee cord is a simple way to cut the vibration. Hook the bungee to an eyelet or two. For heavy things the heavy rubber bungees are pimp. I did all my fans in a similar method, very quite. Placing the pump on a piece of styrofoam works too. Mine is mounted with rubber feet that pretty much dappen vibrationally completely. Adding more doesn't help noise at all. The little fuckers compressors are loud!!

I know your not interested in larger systems, LadyL, but I have come up with a very solid model.

But a bunch of loud ass airpumps could be the deal breaker, as currently I am about good on noise and have done EVERYTHING right in terms of noise reduction construction. Mine is the 1440gph I think, as that is the 8 line. LOUD!!!

Short of insulated air cooled boxes housing them, I am not sure what more can be done to quite them down. You eluded to having some method for sound dampening them, if so I am all ears :)

The boxes work I guess, but would be a pain to build a several boxes with so many air pumps in them. I have some left over 1 1/2" R-19 foam insulation sheet, and that would surely quiet it down quite a lot.

I know it probably wouldn't work, but a cardboard box full of packing peanuts (maybe rocks?) or something of that like comes to mind too. Simpler solutions. Overheating/fire would be an issue in something of that likes I imagine.
 
Jesus Christ rrog, 58 watts? I'm getting along pretty damn well with an 18 watt model. Thats running 5 12-inch air stones with enough umph leftover to run an accessory stone or two.

Sorry to have set you off with my warnings on adequate air-flow. I know its important but in truth I've never seen an OBBT suffer from inadequate air. We've run 3 and 4 gallon OBBTs on shitty little 2 watt aquarium pumps. I suspect the absolute required minimum air flow to run an OBBT is quite low.

I'm sorry I can't give you guys hard numbers. I'm not really about that stuff. Stick with my description of what a bubbling OBBT should be like. Consistent moisture levels and listening for the seething like I said in the first posts are what to look for. There's very little extra performance to be had from excessive aeration. Aside from really fast incubation periods I've never noticed any real benefits to be had from surpassing the minimum, whatever it is.

Citizen024

I've done a shock-mounting demo over in my thread in the Room Design forums. It involves some specialty acoustic dampening material to suck up vibration. I will be doing a demo on how to use it specifically to muffle air pumps and fans very soon. Will hit you with a link when that happens.
 

rrog

Active member
Veteran
Jesus Christ rrog, 58 watts? I'm getting along pretty damn well with an 18 watt model. Thats running 5 12-inch air stones with enough umph leftover to run an accessory stone or two.

Running five 12" stones with some headroom is a good benchmark. Gives me an idea of the capacity needed.

I like overkill, and the pumps are all so cheap. But I'd like to get the smallest that will do the job with headroom to spare.

Sounds like since I'm running 3 pails, your 18 Watt unit would actually well work for me. That pumps out 600GPH. I could go to the 35 Watt. That's the next biggest at 950 GPH. I can always dial back the flow.

I guess I should keep in mind that the bigger the pump, the bigger the noise. But I can silence anything...

I'll do a specific pictorial of building a pump silencer box.
 
Nice. Yea, I would encourage going one-size-up from what you think you need. The 35 watter sounds good for your needs. Will provide enough excessive pressure so that you can upgrade and run more tubs later on. Just knowing how loud my little 18 watt guy is I shudder to think of the racket a pump with forty more watts would make!
 

rrog

Active member
Veteran
I am so grateful for you taking the time to answer my endless questions. I promise not to ask the same question twice.

I'm buying that pump today.
 

Latest posts

Latest posts

Top