What's new
  • Happy Birthday ICMag! Been 20 years since Gypsy Nirvana created the forum! We are celebrating with a 4/20 Giveaway and by launching a new Patreon tier called "420club". You can read more here.
  • Important notice: ICMag's T.O.U. has been updated. Please review it here. For your convenience, it is also available in the main forum menu, under 'Quick Links"!

"VEGETABLE GARDENING" (for fun and nutrition)

G

Guest

Managing Cover Crops on a Small Scale No-till Farm
http://www.certifiedorganic.bc.ca/rcbtoa/training/soil-article2.htm

By Chris Wells. Reprinted with author's permission. First published in the Sept 2004 volume of Compost for the Mind, the bi-monthly newsletter of SIOPA, IOPA, and ING.


I tend to talk a lot about no-till soil management in a casual way. But it seems that I often get less than casual reactions from people when I do. One question I often get is in dealing with cover crops and turning them in. Discussing no-till farming in relation to cover corps is a great way to communicate the principles of no-till farming, as cover crops likely post the biggest challenge to the no-till concept. I would like to take you through the process I use to deal with cover crops and carry that on to give you a look at the life-cycle of a no-till farming system. But first, a short introduction to no-till farming.

No-till farming and gardening are certainly not new concepts. From Patricia Lanza's Lasagne Gardening (Rodale Press) and Emilia Hazelip's concept of the "Synergistic Vegetable Garden" there are many styles of no-till gardening. And in terms of farming, Masanobu Fukuoka and his famous books: The One-Straw Revolution and The Natural Way of Farming lay down some unique techniques for larger scale no-till farming. These agricultural revolutionaries offer great insight into no-till farming, but why do they do it?

No till farming is seen as a gentler way of managing soil quality. Emilia Hazelip's methods are similar to what we would see in a forest, where nature continuously grows and dies and returns everything back to the soil. Both Hazelip and Lanza tout mulching as being one of the keys to effective no-till soil management. Mulching controls weed growth, retains water in the soil, adds nutrients as the mulch decomposes, and creates soil layers that are mixed by the movement of soil dwelling organisms.

Much no-till farming is also a direct protest to fossil fuel driven means of producing food. This means using heavy machinery and tools that require immense amounts of energy to construct, to run, and to dispose of. Such methods are hardly sustainable for long and can have many negative effects on soil quality. There are three major damaging effects that tilling can have on soil.

One major effect of tilling is damage to soil structure. Improper use of roto-tilling implements can do severe damage to a farm.s soil structure, sometimes with irreversible effects. Tilling the soil when it is too wet or too dry can cause the soil to become either clumpy or turn it into a powder. And although many farmers are quite aware of this fact, they often times have no choice but to till in order to establish their crops in time with the seasons.

The second major effect is compaction. While proper tilling and tractor use can greatly minimize compaction, in the hurried pace that is the reality on most farms, it is often easy to overlook that which you cannot see six inches below the soil's surface. While tilling may loosen the top six inches of soil and create a seemingly good quality soil, it can severely compact the subsoil and create major problems for root growth, water drainage and nutrient uptake. Many farmers are recognizing this fact and are adjusting their tilling practices, using methods such as shallow tilling, minimized tilling and using alternative tools like a spading machine or a good old garden fork instead of a roto-tiller to reduce these effects.

The third effect that tilling has on soil is on the soil food web that exists within it. Bacteria and fungi create immense networks under the soil which form symbiotic relationships with plant roots. The most well known relationship is with legumes and rhizobial bacteria. These bacteria form on the roots of plants in nodules and help .fix. nitrogen for the plant to utilize, while "borrowing" carbohydrates from the host plant. A similar process happens with mycorrhizal fungi and plant roots to help plants better absorb nutrients and water. Tilling the soil destroys these networks of bacteria and fungi, preventing them from becoming more established and thus beneficial to plant growth. This is an important aspect of no-till systems, especially when dealing with cover crops.

I believe that one of the most important aspects of is the establishment of permanent growing beds and established paths through out the farm. This means that one always walks on the paths, and never walks on the growing beds. This alone will eliminate much compaction, which is one of the reasons people till . It is often thought that the soil itself compacts over time and must be tilled to loosen it up, but my experience tells me otherwise. I can easily thrust a garden fork all the way up to the start of its handle into beds on my farm that have not been tilled in three years. Gravity and weather have very little effect on soil compaction in most cases. This will, however, differ slightly with different soil types. Mid- and small-scale farmers who till using a tractor can use this concept of paths and beds as well by ensuring that the tractor tires pulling the tiller are always in the same position on the paths and therefore never come in contact with the actual growing areas. The use of established patheays, coupled with shallow tilling, is an effective way of reducing damage to the soil structure and to the soil food web.

Establishing permanent beds also makes irrigation installation and management much easier. Drip lines do not have to be constantly moved, and there is much less risk of running over irrigation lines with the tiller as well! Drip lines that are bent often, quickly develop kinks and breaks that effect their efficiency and proper water distribution.

So, as I mentioned, managing cover crops can be the biggest challenge in no till farming. But I have a few strategies that have been successful for me...

First, is my selection of cover crops. As a general rule I do not use grass cover crops. These are very difficult to kill off without tilling. The three cover crops that I generally use are buckwheat, winter and field peas, and calendula. Buckwheat is fast growing and can add a lot of organic matter to he soil very quickly when it is killed off. It is also easy to kill off and it decomposes rapidly. Field and winter peas are good nitrogen fixing crops and are also easily killed off without tilling. And calendula is great for adding organic matter and a little bit of colour on your farm.. It is also rather cold hardy and can do very well in a mild winter, sometimes flowering in December!

Second is how my cover crops are "turned in". I use two methods, one of which can also be utilized in a tilling system. The first method is a mulching method, which is contingent on available materials. We.ll use buckwheat as a first example. When the buckwheat starts to flower, I cut the crop down with a scythe or weed-eater. I cut the buckwheat down as low as I can and then lay the cut materials over top of the soil bed and the buckwheat roots to cover them completely. I then mulch over top of the chopped buckwheat with compost or straw to finish killing it off. The mulch prevents light from getting in and allowing the crop to re-grow, and the high nitrogen content in the fresh cut cover crop causes high biological activity under the mulch, resulting in the killing of the cover crop.s root system, which is still in the ground.

The second method is more of a shallow tilling style. After I have cut the over crop down, I use an action (stirrup) hoe to separate the root from the top of the plant. This kills the roots almost instantly and only disturbs the top inch or so of soil. This methods results in faster decomposition of the cover crop. This method can be used in conjunction with the first method as well. Once the roots have been cut, then the bed can also be mulched.

Decomposition takes 2-4 weeks depending on the time of the year, obviously much longer in spring. If I used compost as a mulch, I can then seed directly into that compost. If I mulched with straw, I pull the it off the bed, rake off any remaining debris underneath to smooth out the bed, sow my seeds, then return the debris to the bed as a light mulch.

So what happens next? Well, I grow a crop! So, lets say we sowed some winter peas in September, and then mulched them with compost and killed them off in mid-March of the next year. By mid-April the cover crop is dead. We then sow some mustard greens into the compost mulch. The mustard greens are ready to harvest by late May and are removed from the bed. Compost is applied again and the area is watered (overhead, not drip) for a few days in a row (e.g. one hour each day). This watering helps the compost nutrients leach into the soil below and promote the activity of soil organisms which will move the compost down through the soil. After a few days of watering we plant bush beans into our new compost.

In mid to late September we remove the bean plants to make room for another winter cover crop - this time, calendula. When removing the beans, we can either pull the plants right out of the ground (and possibly hang them to let seed mature), or we can cut the plant off right at the base. If we pull the plant right out, we can sow our cover crop immediately afterward with no additions. If we cut the plant at the base, then we again mulch with compost and sow the cover crop into the compost right away. Our cover crop leads us to next spring, and the process can begin again.

So, as you can see, this is not only an effective method of soil management, it is also an effective method for soil building. The constant additions of organic matter, even in small amounts, build soil quality quickly and help significantly in the building of soil structure. The Organic matter also promotes biological activity which helps results in more soil food web activity and thus in healthier soil. Still not convinced? Still feel you need to till to loosen the soil to create a good seed bed or turn in a cover crop? Well, I have some 20 inch parsnips that may help change your mind. And while these exact methods may not work for you, their concepts can be applied in many situations with very positive results. Go ahead, try it out. All you have to lose is a that vibration that cuts through your body every time you use a roto-tiller.


^^^awesome!!
 

DocLeaf

procreationist
ICMag Donor
Veteran
The growing-on table :D


*old hydro-trays make good tables :yes:
**the berry plants have been potted-on for my good buddy :wink:


...a sure sign of spring, red-tailed bumblebee :wave:


keep growing ya own
peace dLeaf

"pon ya learn ya grow"
 
Last edited:

roadcam

Member
I buy Heirloom seeds from these folks in Florida ... great selection, cheap seeds, fast mailing ... Im currently starting "Sugar-Snacks" cherry tomatoes, and the huge, bi-colored "Hillbilly" ... the Hillbilly is a real low-acid and sugary tomato, orange with gold and red streaks inside ... I didnt grow enough of them last year ... http://www.tomatogrowers.com/ .. :yummy: :yummy:
 
My tomatoe plants _6 outa 7) are dieing, turning brown at the leaves and going limp. i got the average black garden soil u buy at home depot for 2$ a 40LB bag. theyve been in the garden for about 2 weeks. and my basil is turning black.
anyone knwo what this could be from?
 
G

Guest

$2 black soil from home depot is generally absolute SHIT, I'm sorry to say.

Your soil needs to be aerated (with perlite), it needs to have MINIMAL amounts of twigs/rocks/big things, it must have good organic material (worm castings or compost or composted manure) and finally it needs adequate nutrients.

not sure what your specific problem may be but ihope that helps...good luck :(
 

Mr GreenJeans

Sat Cat
Veteran
Always - I agree with ^^ Shibby, after you add the amendments I would also flush the soil either before or after you plant in it. I've had problems with some of the cheaper soils having a lot of *something* that registers high EC ( though the label did not say ferted ) and can burn out young plants. You can always flush and then check the very last of the runoff to make sure things are ok. :wave:
 
i jsut threw all my nightcrawlers in the garden. and watered the hell out of it.
yah i dont know what iwas thinking getting this soil, when i opened the bags i found nails, rusty old staples, peices of blue plastic. even 2 whtie shiney marbles lol.
but ill be sure to post with results
 

RuralRoute420

Active member
.

.

sounds like you got topsoil - which contains nothing, and is usually shitty.

i use MG potting/garden/veggie/container whatever soil, as long as it has time released nutes in it and mix in some perlite

it might be easier to go and pick up starts from somewhere versus starting from seed again....imo.
 
G

Guest

I bought a bag of organic compost called " roots". I have broccoli planted in my own extremely balanced soil and 2 in pots using "roots" See the differance? Mind blowing size differance.


Seed
 

jaykush

dirty black hands
ICMag Donor
Veteran
is anyone really good at growing strawberrys? if anyone could pm some good info, i might be able to help back *wink**wink*
 
G

Guest

Check out my onion ring defense perimeter. Its protecting my giant cabbage ( the 2 lil green spots in the middle ) from aphids and possibly loopers.
This variety of cabbage can grow 75# with a leaf span of 6'. Thats why there is only 2 in this bed.


Seed
 

DocLeaf

procreationist
ICMag Donor
Veteran
hi spreading seed :wave:

I like your companion planting with onion,,, I use garlic in the same way*

Chive (Allium schoenoprasum) makes for a nice ornamental, and is good to use in the kitchen. This chive sits ready to flower in old bio-biz soil, with a base of quarry pebble to aid drainage


* To propagate garlic: divide the garlic bulb into individual cloves and plant out in spring/autumn.
 

DocLeaf

procreationist
ICMag Donor
Veteran
This alpine strawberry (the biggest I've ever seen) has turned from a monster into a giant,,, she has already mothered many plants this year :biglaugh:


Fed on Dr Hornby Iguana Juice Bloom overwinter...

This adds lots of organic P & K to the canna-pro. mix b4 Spring
Past x2 months given plain cold water only :D

keep it growing folks,,, and remember "Grow ya own" :joint:
 
Last edited:

RuralRoute420

Active member
.

.

i'm going to try the chive in a pot this year, how long does it take to grow?

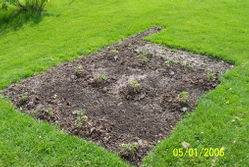
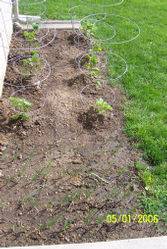
finally got my garden in over the weekend. crossing fingers on my second garden.


everything but the sweet corn has sprouted or taken. need to get the mater's staked.
 
Last edited:

Latest posts

Latest posts

Top