What's new
  • Please note members who been with us for more than 10 years have been upgraded to "Veteran" status and will receive exclusive benefits. If you wish to find out more about this or support IcMag and get same benefits, check this thread here.
  • Important notice: ICMag's T.O.U. has been updated. Please review it here. For your convenience, it is also available in the main forum menu, under 'Quick Links"!

2 Room Perpetual Basement Grow Build

Phaeton

Speed of Dark
Veteran
Twelve plant house limit in this state as well.
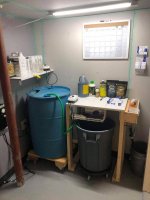
A two room perpetual was set up in 2006, remodeled bedrooms of adult children rather than purpose built.
I am in envy.

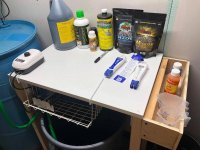
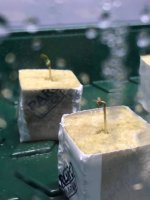
A 2' x 4' clone and seedling table in their own area made life so much easier. Special spectrum low power lights for close up work on plants under 8". Health and vigor skyrocketed.

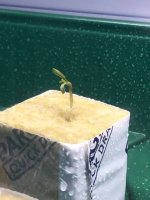
During the 'clone only' period an exact 11 day routine of cloning and advancing plants was crucial. Just a couple days late came back to bite months down the line in the bud room, ill fitting plants with feast and famine harvest times.

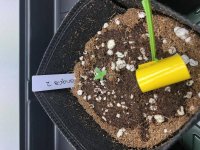
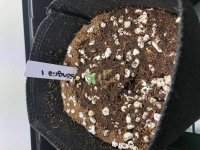
Switching to seeds lost 25% of harvest weights, plant size is a guess even with known strains. Retired and don't care, seeds give more variety.

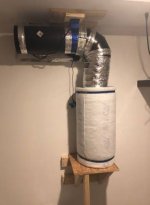
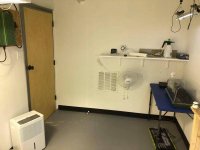
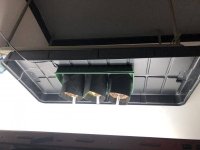
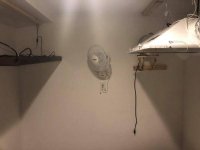
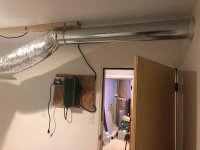
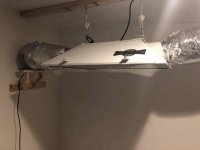
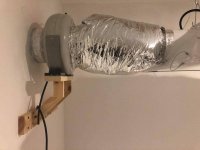
The bud room has filtered and powered intakes with variable vent exhausts. Personal preference for positive pressure due to pet cats.:kitty:

Actually putting out the effort and paying the cost of a special purpose gardening system is awesome. It is not many that do so, I came here to express how impressed I am by coooper's work.
 

coooper

Active member
Wow thanks for the kind words and your own story, for lack of a better word. I have invested many hours and dollars in to this project. Glad people enjoy reading and looking
 

Smokindogcujo

Active member
Great work! Thanks for sharing. You give me hope! LOL Just got a new place and have a 25 x 11 space to work with! I'm excited to get started!
 

gladysvjubb

Active member
Veteran
I run 2 separate areas in the basement. I have a large cabinet with heating mat for germination and growing on under 24 hour flouro shop lights. Give them 3-5 weeks of that and then move to the 12/12 area until harvest. I have a perpetual grow. I need it.
 

coooper

Active member
I’m currently in the process of building a grow shed. What did u use on ur walls to cover the framing and why. I was thinking of plywood and painting it to resist mold and mildew. What’s the purple stuff u r using.

The purple stuff is drywall, but it is mold/mildew resistant drywall used for bathrooms and things like that where there is more water usage and humidity than say a bedroom or hallway. Pricey stuff but worth the investment to me. About 15$ per 4x8 sheet. I also used mold/mildew resistant paint for the walls.
 

coooper

Active member
Turns out this all costs a lot of money, who would’ve guessed?��. I will be using only the smaller room for a few runs until I need the other room. Last year was all over the place for me money wise so I haven’t gotten started in the room yet but as far as equipment goes I’m almost done setting up everything I need. Last thing I need to get set up is my watering station. Will be using a fresh water res to have at all times and a separate res for nutes for feeding time. Sub pump w/ watering wand attached to garden hose for easy watering. Will update with pictures tomorrow.
 

coooper

Active member
Work work work..

Work work work..

:dance013:
 

Attachments

  • 51503750_242726173280633_3904192943568715776_n.jpg
    51503750_242726173280633_3904192943568715776_n.jpg
    22.6 KB · Views: 16
  • 51487262_740348923032225_5213919121422417920_n.jpg
    51487262_740348923032225_5213919121422417920_n.jpg
    38.3 KB · Views: 13
  • 51723330_552779531886500_2305419091646611456_n.jpg
    51723330_552779531886500_2305419091646611456_n.jpg
    27 KB · Views: 13
  • 51996428_312121072768975_5939975787963744256_n.jpg
    51996428_312121072768975_5939975787963744256_n.jpg
    38.5 KB · Views: 11
  • 51503750_242726173280633_3904192943568715776_n (1).jpg
    51503750_242726173280633_3904192943568715776_n (1).jpg
    22.6 KB · Views: 8

coooper

Active member
H20

H20

Getting my watering area all set up. Big blue on reserve fresh water duties. Brute can for mixing nutes. shelves for nutes.
 

Attachments

  • 1.jpg
    1.jpg
    18.5 KB · Views: 23
  • 2.jpg
    2.jpg
    17.4 KB · Views: 21
  • 3.jpg
    3.jpg
    21.5 KB · Views: 24

Biologist

Active member
Thank you for sharing all these pics, really helps me think about my own new growroom and how to set it up.
 

coooper

Active member
Hey guys, know its been quite a while. Been busy lately with life getting into a new career and all that good stuff. But finally been able to get back down to it. Got the rest of the little things i needed to feel comfortable getting started. Planted 4 seeds yesterday of a strain called "Sangria". Picked up from a dealer at a local festival. Never heard of it or smoked it but the description sounded nice and has a short flowering time. I have two other strains that I am saving until after these sangria seeds for 2 reasons. 1- to see if i can actually get these ones going without fucking up. and 2- i know how good the genetics are because my buddies used to grow them and they are from a top notch dealer called TGA Genetics. The strains are Space Candy and Qrazy Train. Anyways, i have some picture updates for you guys, will take more once my seeds pop up.

I decided to germinate in rockwool cups in a propagation tray with a heat mat and dome. Paper towel method and plastic cup of water method just doesnt appeal to me.

Also on a side note, i was concerned the whole time through this project that my water was going to be too hard. Its well water and theres quite a bit of sediment in it. BUT upon finally getting over my fears i tested it, comes out at pH level of 5 (couldnt ask for better) and a PPM of 220-240, under the preferred 300ppm threshold of having to filter it.
 

coooper

Active member
Picture Updates

Picture Updates

Dont worry about the wires, they will all be stapled up and out of the way. Any questions about the equipment i got are welcome. And i will update with more photos soon. Thanks for following :tiphat:
 

Attachments

  • 4.jpg
    4.jpg
    36.7 KB · Views: 24
  • 3.jpg
    3.jpg
    40.2 KB · Views: 20
  • 2.jpg
    2.jpg
    60 KB · Views: 32
  • 1.jpg
    1.jpg
    48.4 KB · Views: 25

coooper

Active member
Also, these pictures were taken a few hours before i cleaned up wires and other things, and before i popped the seeds, hence the heat mat on the floor.
 

coooper

Active member
We have ACTION

We have ACTION

Not sure if I have mentioned this yet, but this will be my own first grow. Ive had schooling on all this and have been involved with others in the industry for quite some time now but have never taken on this journey myself. Here are some pics three days after planting 4 seeds in rockwool to germinate. :woohoo: hoping they perk up and they arent already having problems. We'll see. I saved the better genetics I have incase i mess these ones up.
 

Attachments

  • 1.jpg
    1.jpg
    33 KB · Views: 31
  • 2.jpg
    2.jpg
    26.4 KB · Views: 26

coooper

Active member
Im worried these are damping off :/ any insight from experienced people would be appreciated in addition to what ive seen and read.
 

coooper

Active member
Ok scratch my last comment I was just being overly nervous. After observing I decided they just needed the humidity dome removed and the light lowered and they loved it. The next day I saw a single root poking out of each cube, so I decided it was time for them to graduate. Moved them up to 1 gallon smart pots with a coco perlite mix under the big T5 where they’ll stay for a while. Watered with cal mag water. They’re doing great. In the light fixture I have 2 LEDs that are too bright so I only have half the fixture turned on with only a few T5 bulbs on.
 

Attachments

  • 4F102C7B-368C-4A73-B118-EC222B42B4E7.jpg
    4F102C7B-368C-4A73-B118-EC222B42B4E7.jpg
    38.3 KB · Views: 27
  • E6BFE530-B599-4845-9279-4169611BD9C9.jpg
    E6BFE530-B599-4845-9279-4169611BD9C9.jpg
    93 KB · Views: 28
  • E1A88D25-2611-4F6B-84B3-9C49A0EBF178.jpg
    E1A88D25-2611-4F6B-84B3-9C49A0EBF178.jpg
    97.3 KB · Views: 33
  • AD74F08E-EF35-4EFF-A356-29D59FDBBD4E.jpg
    AD74F08E-EF35-4EFF-A356-29D59FDBBD4E.jpg
    98.1 KB · Views: 22
Top