

OK, so before the flames start to roar, I admit it. It’s not a true R.O. unit. However, if you are taking the time to check out this post, then it might be just right for you. So here’s the story…
I often felt that I was caught between two worlds. The world of the micro-grower, who buys a gallon of distilled water from time-to-time, and that of the serious farmer who relies on a steady supply of good water and often uses a true Reverse Osmosis filtration system to provide it. If you’re familiar with my set-up, you know that I run 6 very small bubblers in a continual staggered harvest. As such, I really need decent water, but not all that much. Additionally, because of health issues, it is often difficult for me to drag home several gallons at a time from the store. The cost of an R.O. system, compounded with its installation, storage, and upkeep really wasn’t warranted. However, who wants to pay a buck a gallon to buy water? Not me for sure.
Now don’t get me wrong, a true R.O. system is fantastic. When working properly, it not only removes all suspended and dissolved solids from the water, but it also eliminates many pathogens. The fact of the matter is I really don’t worry about the pathogens. Why would I worry about sterilizing my water when I’m just going to pour it into a reservoir or planting medium that’s exposed to the open-air on a full-time basis? I’m more concerned with eliminating the suspended and dissolved minerals so that when I add my own salts, I know exactly what my plants are getting and I can track by TDS or EC readings just what they are using. With my home tap water running about 300 PPM, before I add nutrients to it, there is little chance for me to know what’s going on with my plants and be able to adjust their bath accordingly. So I needed to come up with an alternative, and this is my solution.
This is my totally portable and very easy & cheap to build and maintain water filter.

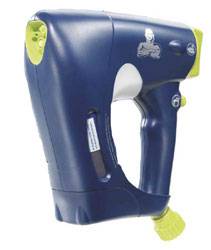
There are many different water filters available at the home centers, and when my search began, I tried a bunch of them, and researched the specs on even more. Their main problem was that they were designed to make your water taste better, not remove minerals. Many of them are charcoal based. In fact, if I took a TDS reading after the water was processed, there was often little change. Then one day while looking for a bottle of H2O2 I'd left in my garage I spotted something and got my idea. Sitting in a plastic bucket were my son’s car washing supplies, and right on top was the “MrClean AutoDry” carwash system. It’s really a ridiculous contraption, and we all had a good laugh after he won it at work. The idea of the unit is that after it sprays a ton of soapy water on your car at high pressure, you flip a switch and rotate a nozzle and it sprays clean water on your car to rinse it off. However, you can let this clean water air-dry without wiping it and its guaranteed not to leave water spots. So I say to myself “all water spots are, are residual minerals taken out of suspension and out of a dissolved state. And if the spots are gone, then so are the minerals.” Well it was just a simple matter of checking the output of the unit by taking a TDS or EC reading to confirm what I believed. I was right, the cheap-ass cartridge filter inside the unit was doing a great job, and almost everything had been removed.
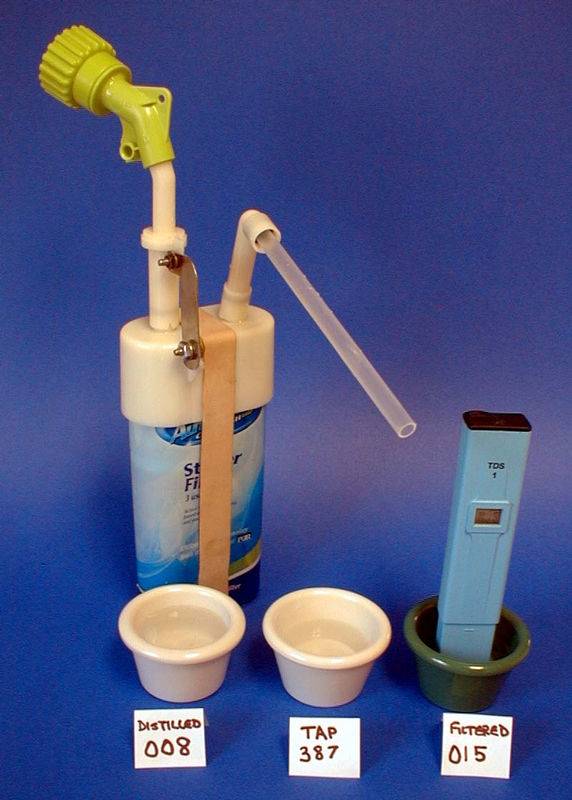
From that point on, a screwdriver, a little glue, a scrap piece of metal, and 15 minutes of work was all it took to complete the project. With the exception of the metal bracket, everything you see was reused from inside the unit. Granted it’s totally reconfigured, but all of the pieces you need are in there. In fact, if you don’t mind looking at the stupid thing, and you don’t mind feeling like a dweeb, you could probably use it right as it is without any modifications. However the shape and design is really a PITA so invest 15 minutes. All of the tubes have o-ring connections and need no glue, they’re “plug-n-play.” You can get rid of my metal bracket by attaching the associated tube with silicone. But before you do consider this. That first tube (shown on my finished filter) below the green connector is a must! It contains the flow restrictor / pressure reduction valve. Without it, your device will blow apart and get you soaking wet. I speak from personal experience. When you open the original unit, you'll find it in a different area. Other than the restrictor, how you configure it is up to you. When you open the unit, you’ll be surprised just how many different tubes and connectors are available for your use.
So here’s the bottom line… The unit with a starter filter can be found on sale for well below 20 bucks USD. And even less if purchased online. A replacement filter runs about $4 and takes exactly 1 second to change. According to the manufacturer, replacement filters last about 3 to 4 times as long as the starter-filter. So far, I ran about 20 gallons of water thru a filter and there has been no increase in TDS in the output. If I get another 5, my cost per gallon will be less that 16 cents and require no lugging of water jugs from the store. Not too shabby!
When I did the test pictured here, my meter had not been carefully calibrated. That's why the distilled water shows a few PPM. Or it might be that there were still remnants of the Bennigan's Monte Cristo jelly still left in my "borrowed" cups. Either way, the numbers speak for themselves. Fifteen PPM is more than good enough for me to start with.
Look, I know this isn’t for everyone. But for those on a budget, and those with smaller requirements, it’s a great alternative. Hope you found this of interest. If you have any questions or comments, I’d love to hear them.
Regards to all, Grow Safe & Grow Smart! PD
Last edited:
 You're my hero
 to you instead. Take care man stay safe


