What's new
  • Happy Birthday ICMag! Been 20 years since Gypsy Nirvana created the forum! We are celebrating with a 4/20 Giveaway and by launching a new Patreon tier called "420club". You can read more here.
  • Important notice: ICMag's T.O.U. has been updated. Please review it here. For your convenience, it is also available in the main forum menu, under 'Quick Links"!

Team Microbe's Living Soil Laboratory - Round 2!

Status
Not open for further replies.

Team Microbe

Active member
Veteran
Greetings all :tiphat:


This thread will consist of my 2nd no-till cycle in organic soil, you can find my 1st cycle over at Team Microbe's Living Soil Laboratory if you wish to start from the beginning of the journey...


picture.php


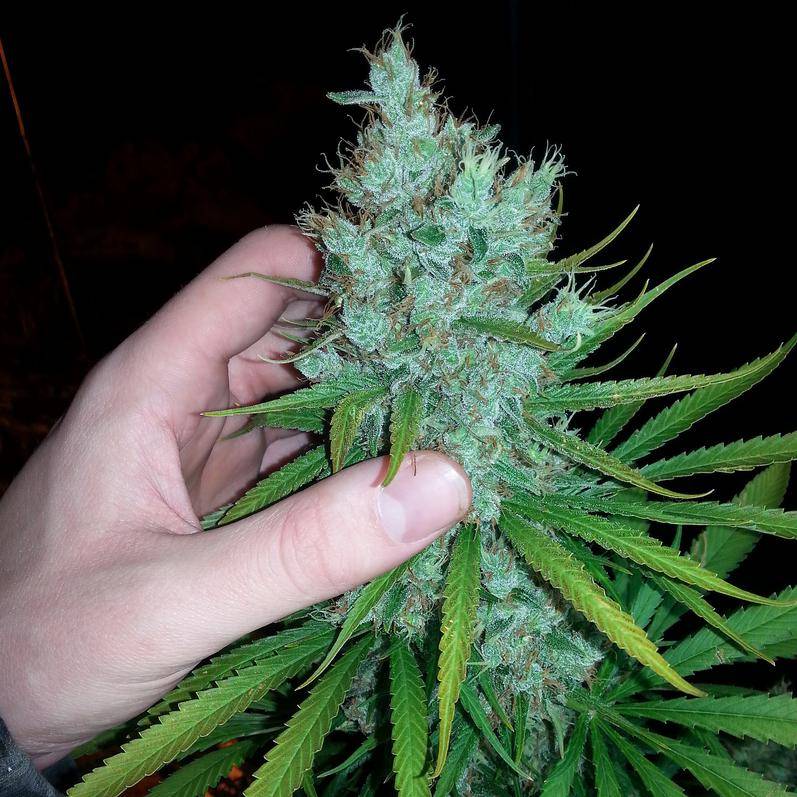
^ This grow was the funnest run I've had to date. Everything is easier when you don't have to battle pests or disease; all the work was done during the soil mixing process in the beginning. From there on out it was just water and compost tea (for the most part)


picture.php


Converting to soil for me was like wrapping my ego up in a shirt, setting it on the ground, and smashing it to pieces like my mom would smash my glass bubblers back in the 7th grade. It's humbling as hell, and it really makes you look at life outside of the garden in a completely new spectrum as well. That's a topic for another day though...


picture.php

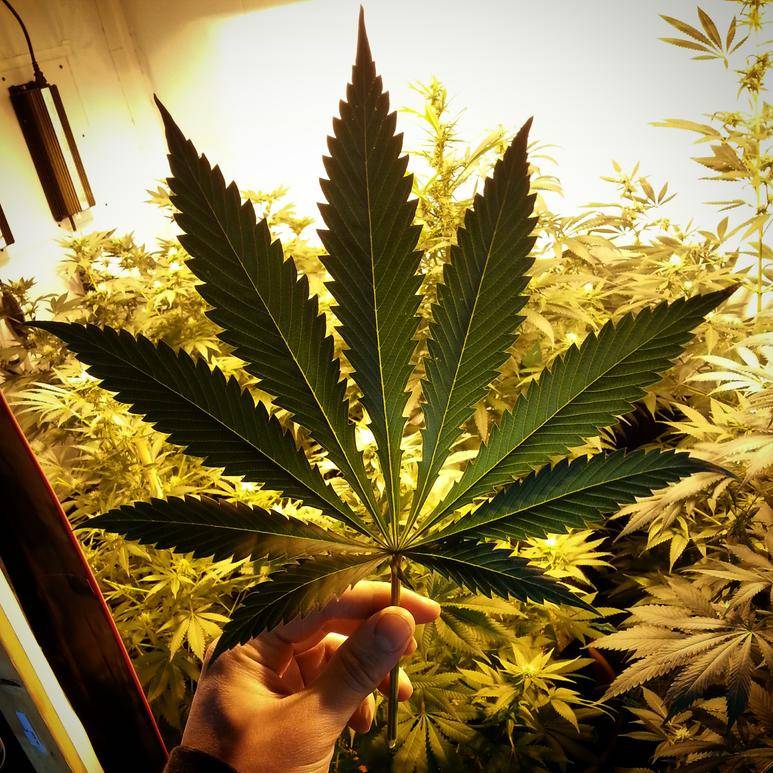
Some clover ready to inoculate the clone I transplant tonight - this will be the 2nd cycle in this 7 gal


I decided to move my 2nd cycle's thread over here to the Organic Soil forum instead of the Indoor Grow forum to find more insight from a more like-minded crowd, I feel like it's more fitting now that I'm beginning to nerd out a little bit - I feel more accepted over here lol. I'd like to make this not only a platform for novices to learn from, but a platform for myself and many others to learn from the soil vets out there that have something to pass down to the up n' comers. The ladder of knowledge; I like to call it. Ahhh, what a beautiful thing.


Anyways, lets pick up where we left off... shall we?
 

Team Microbe

Active member
Veteran
Quick Re-cap

Quick Re-cap

So here I am, I've harvested my plants, hung, and dried them into jars for the cure. Instead of throwing away my leaves and stems, I drop them down on top of the straw mulch left to decompose into microbe-loving carbon


picture.php


I'll continue to water pots as usual until transplant day so I don't kill off my soil biology. All I need to do to start the next run is add the following in a top dress:

picture.php


- 2" of earthworm castings
- a handful of cover crop seeds
- 1 tbsp kelp
- 1 tbsp neem or karanja meal
(they're the same in a horticultural setting, karanja is cheaper most of the time though)


picture.php


I'll pull half of the mulch back, and lay a few inches of humus down. I chose Rocky Mtn EWC in this case since my worm bin isn't ready to harvest quite yet. This stuff is black gold - a priceless additive.


picture.php


Then a light sprinkle of cover crop seed. I don't like to go thick anymore on this stuff because it causes problems with airflow and harbors bugs better when it's too dense. Just a small handful is all that's needed here. This seed will germinate on it's own with regular waterings under the thick layer of straw and leaf mulch on top. On top of the cover crop seeds I sprinkle the kelp & neem/karanja, then work everything into the castings evenly. Once this half of the pot is dressed, I'll simply repeat this process on the other side.
*Note that I only lay down 1 tbsp of kelp/neem per pot, not per side.


From this point, I'll take rooted cuttings or seedlings and dig a small hole right next to the existing root stalk, and transplant directly into the top layer. That's it! After a few weeks of watering, the cover crops will work their way up through the mulch and will begin not only forming relationships with the plant's mycorrhizae, but will retain moisture and begin converting atmospheric nitrogen into plant available nitrogen. Cover crops also add carbon to the soil for microbes to eat, and I'm pretty sure it builds soil structure too by root penetration. It's safe to say that cover cropping has been one of the best additions to my garden, and I highly recommend looking into it if you grow in soil.


Right now I'm using a 40% clover blend from Buildasoil:

Oats - Rockford
Flax - Brown
Clover - Yellow Sweet
Clover - Duch
Clover - Medium Red
Clover - Crimson
Lentils - Indainhead
Safflower
Hairy Vetch
Vetch - Common
Rape - Dwarf Essex
Buckwheat - Mancan
Pea - Forage


picture.php


After laying down a few handfuls of straw on top of the old straw, I'll drench with a worm casting tea to kick start the biology in the pots once again.

The idea behind the cups inside the pots in the back of the picture is to not disturb any cover crop mycorrhizae upon transplanting, that way I can transplant smoothly from each beer cup to the beer cup templates these will leave behind. I applied this technique before with a barley cover crop and the transplants blasted off into veg faster than I've ever seen before...

Now I'll wait for cuttings to root, pick out the next run's line up, and wait for cover crops to peak up through the mulch before transplanting into this 2nd cycle.
 

Team Microbe

Active member
Veteran
We've got roots mon'

We've got roots mon'

To find the cloning routine I use (to the tee), visit How To Clone Organically - ditch the rooting hormone products for a detailed tutorial and recipe.


picture.php


picture.php


I clone with rapid rooters (until I run out of them, then I'm changing to root riots because these fall apart easily) in a humidity dome, placed on top of a heating mat with some T5's about 3'-4' above the dome. Nothing fancy...


picture.php


I'll remove the dome for 15 minutes twice a day to circulate fresh air inside - usually once when I wake up and once before I go to sleep. I then mist the inside to retain humidity levels (especially since my climate is so dry during the winter). Besides keeping a little water in the base of the tray, this is all I do until I see roots 10-14 days later. That's it!


picture.php


From here I'll enter a self-inflicted hash coma until clones root out fully and it's time to come back to reality and get to transplanting :woohoo:
 

Team Microbe

Active member
Veteran
The end? Or just the beginning?

The end? Or just the beginning?

picture.php

The old stalk is already beginning to decay, not more than 2 weeks after the chop!

Upon exiting hash hibernation I notice some clover popping up... Let the games begin! From here I'll plant cuttings or seedlings right next to the old stalk.


picture.php

Here's a Blueberry Headband seedling a day before transplanting into the 10 gallon's 2nd cycle


picture.php

.... and here we're at 1 week after transplant. I'm excited to watch how fast this girl grows through veg!


picture.php

The same Blueberry Headband seedling


picture.php

The cover crop is loving the top dressing I lied down underneath it
 

Team Microbe

Active member
Veteran
picture.php

This is the Silver Lotus keeper pheno from last run. Great uniformity in this strain, as well as a STRONG super silver haze influence that really brings out those limonene terpenes that every connoisseur enjoys


picture.php

Keeper pheno mother plant


picture.php


picture.php

After a 5 week cure - ready for consumption!

The high is immediate, head hitting, and euphoric with some body stone that creeps up about 30 minutes in. The taste can be described as lemony fuel with thick, hazy undertones. It's a very dense pheno, but not rock hard dense. I mainly use this strain to wake up to and to get work done during the day when I need a clear head, but want that extra motivation or creativity.
 

Microbeman

The Logical Gardener
ICMag Donor
Veteran
Nice rundown TM. The fast vegetation period (IMO) is key to a plant's vigour and ability to ward off pathogens. We never went beyond 2 weeks (growing small plants) vegetation.

What is the broadleaf plant in your companion group?
Is your straw barley?
 

Team Microbe

Active member
Veteran
What's up Croptober? Nice to have you bro

LLB you would get front and center :laughing:

here we go! love those cover crop pics. real beautiful plants my friend.

Thanks man, I love taking mulch shots so expect a lot of them!

Nice rundown TM. The fast vegetation period (IMO) is key to a plant's vigour and ability to ward off pathogens. We never went beyond 2 weeks (growing small plants) vegetation.

What is the broadleaf plant in your companion group?
Is your straw barley?

Thanks MM :tiphat:

How tall did your plants get when you ran that 2 week veg? That's pretty appealing for a lot of reasons, I could squeeze in another crop per year if I did do that...

The broad leaf is called Dwarf Essex Rape - I've read that it helps prevent soil diseases and fights off parasitic nematodes. I love how it looks, broad leaves of any kind catch my eye pretty much.

I'm not sure if it's barley or not actually, I grabbed a bale of it from my local nursery and it was just labeled "Straw". If I had to guess I would say it's not barley
 

Former Guest

Active member
Hay is cut from grass,clover,alfalfa. Straw is wheat and oats. Hay is used for food for animals while straw is use for bedding for livestock. Hay would be preferable I would think but like mm inquired, straw can contain barley.

Signed,
Country bumpkin
 

xmobotx

ecks moe baw teeks
ICMag Donor
Veteran
Llb is right. Typically barley straw is offered as such. Just "straw" can be all manner of stubble. Barley's pretty common though
 

Team Microbe

Active member
Veteran
got an aisle seat, sweet!
I'm in for this tm.

Cheers fellas :tiphat:

Did you use a buildAflower top dress kit when you flipped your last grow?

Nah I had the ingredients already, I'm not sure what's in their top dress kit but it may work well for that

Llb is right. Typically barley straw is offered as such. Just "straw" can be all manner of stubble. Barley's pretty common though

Yeah I'm glad MM brought that up because I never did ask them when buying it last summer, this year I'm gonna bring it up and make sure there's no tacking agents or anything added to it


Dude that blew my MIND after reading over. I always thought the opposite... that soil microbes aren't healthy to be ingested to the human body. Go figure it's the very opposite :laughing:

I'm gonna start rubbing compost all over my face when I run out of weed for that extra pick-me-up for now on.
 

Team Microbe

Active member
Veteran
10 new 25 gallon no-till pots

10 new 25 gallon no-till pots

picture.php

An inch or two of lava rock will lay on the bottom of each pot to allow for drainage


I'll be finishing the soil build this week for these new 25 gallon geo pots. SO excited to get these up and goin, I feel like some potential has been withheld since the first cycle out grew their pots towards the end. I might have just vegged too long, but either way I think going a little bigger can only help my cause here.


I'd like to post my mix now to allow some time for tweaking before I begin mixing later this week. It's pretty much the same mix that I ran in Team Microbe's Living Soil Lab. The only thing that has changed here is I've taken out the fish bone meal, and added the worms and bio char.

Base Mix: (1 cu. yard)
- 1 pt. Peat Moss
- 1/2 pt. Rice Hull
- 1/2 pt. Pumice
- 1 pt. Compost


Additives:
- CC Kit
- 16 gal Bio Char (pre-charged)
- 1 lb. reg wigglers/European nightcrawlers
- 40% clover cover crop blend (from BAS)


If you could change or add anything, what would you do - and why?
 
Status
Not open for further replies.

Latest posts

Latest posts

Top