Rocketman64
Member
I needed a way to grow that didn't require me babysitting the plants as I'm out of town three days a week for work. After researching the PPK system D9 has developed I decided I would give it a try on a much smaller scale. I only grow three or four plants a year for my own personal consumption so I really didn't need anything taking up a lot of space or requiring crazy light schemes. This whole system probably only takes up about 10 sq.ft. This will only be the third plant I've ever grown indoors as my entire 30 years of growing experience has been in soil outdoors. This years plants were found and stolen forcing me to move operations indoors. I'll miss the giant plants I've been able to produce outdoors over a summer but hey, this gives me the chance to learn a new technique and a chance to grow year-round. All I really need is a couple 1 or 2 oz. plants to supply me for six months so this system fits the bill perfectly. Here are some pics showing my current setup in operation:

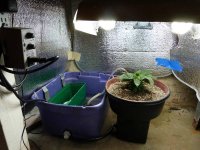
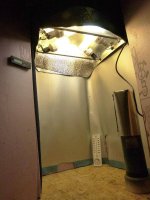
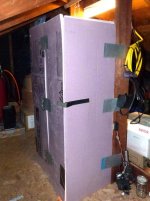
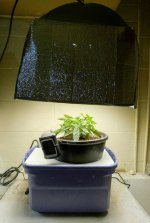
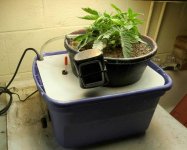
This shows pretty much the whole thing including the ART DN-E cycle timer, plant in floor-dry grow media, reservoir below plant and reservoir with float valve.

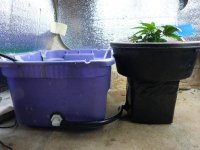
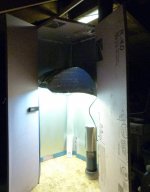
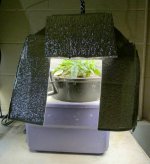
This is the reserve tank connected to the reservoir with the float valve. The tank sits on bench top above the system and gravity feeds the reservoir as demanded by the float valve. I can regulate the flow with the ball valve inline.

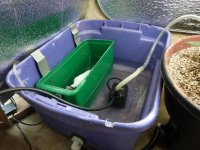
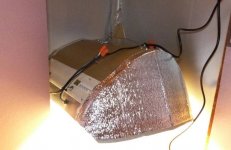
Closer shot of the valve reservoir and the small Sunterra pump for feeding the plant.

Closer shot of how the reservoir and the plant are connected via 3/8" hose. The planter is a solid rubber, low-profile dish found at Tractor supply (same as D9's planter only smaller). The basin below the planter is a square $2 plastic container without the lid.

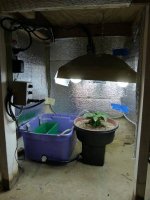
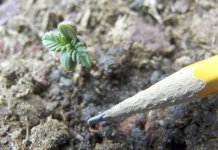
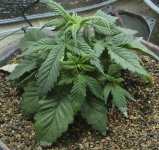
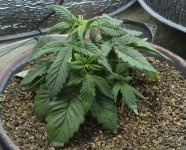
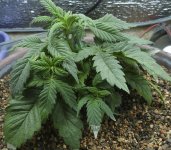
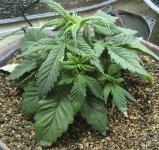
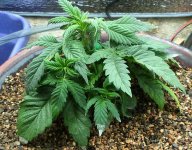
This little guy is my first victim. This is a feminized Shackzilla that really had me wondering. The seedling was the smallest I've ever seen and it really looked distorted for the first week of it's life. I really didn't give this thing much of a chance to live but as you can see from the pics, it's doing just fine in the mini PPK.
Lighting is provided by four 42w 6500K CFL's in a homemade reflector. Timing for the light is 18 hrs. on 6 off. Watering is every 45mins. for aprox. 2 minutes at a time. I'm running nothing but Jack's Classic and CalNit at 600ppm. PH sitting around 6 for now. The Jack's seems to be a slam dunk, no-fuss solution for this type of growing, Once I've got the PPM's right, the PH takes care of itself. I'm seeing a couple inches of growth per day.
Comments, questions and suggestions are welcome! Thanks for taking the time to check it out.
This shows pretty much the whole thing including the ART DN-E cycle timer, plant in floor-dry grow media, reservoir below plant and reservoir with float valve.
This is the reserve tank connected to the reservoir with the float valve. The tank sits on bench top above the system and gravity feeds the reservoir as demanded by the float valve. I can regulate the flow with the ball valve inline.
Closer shot of the valve reservoir and the small Sunterra pump for feeding the plant.
Closer shot of how the reservoir and the plant are connected via 3/8" hose. The planter is a solid rubber, low-profile dish found at Tractor supply (same as D9's planter only smaller). The basin below the planter is a square $2 plastic container without the lid.
This little guy is my first victim. This is a feminized Shackzilla that really had me wondering. The seedling was the smallest I've ever seen and it really looked distorted for the first week of it's life. I really didn't give this thing much of a chance to live but as you can see from the pics, it's doing just fine in the mini PPK.
Lighting is provided by four 42w 6500K CFL's in a homemade reflector. Timing for the light is 18 hrs. on 6 off. Watering is every 45mins. for aprox. 2 minutes at a time. I'm running nothing but Jack's Classic and CalNit at 600ppm. PH sitting around 6 for now. The Jack's seems to be a slam dunk, no-fuss solution for this type of growing, Once I've got the PPM's right, the PH takes care of itself. I'm seeing a couple inches of growth per day.
Comments, questions and suggestions are welcome! Thanks for taking the time to check it out.