What's new
  • Happy Birthday ICMag! Been 20 years since Gypsy Nirvana created the forum! We are celebrating with a 4/20 Giveaway and by launching a new Patreon tier called "420club". You can read more here.
  • Important notice: ICMag's T.O.U. has been updated. Please review it here. For your convenience, it is also available in the main forum menu, under 'Quick Links"!

Repuk 3d Take on Stealth Grow: Garden Shed

repuk

Altruistic Hazeist
Veteran
Previous Run Defficiencies
Funny but just as was on the final rips of a Krystalica vaping session it struck me I've made several mistakes:

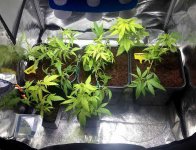
1.- Too small pots for blumats (would be fine for DTW).
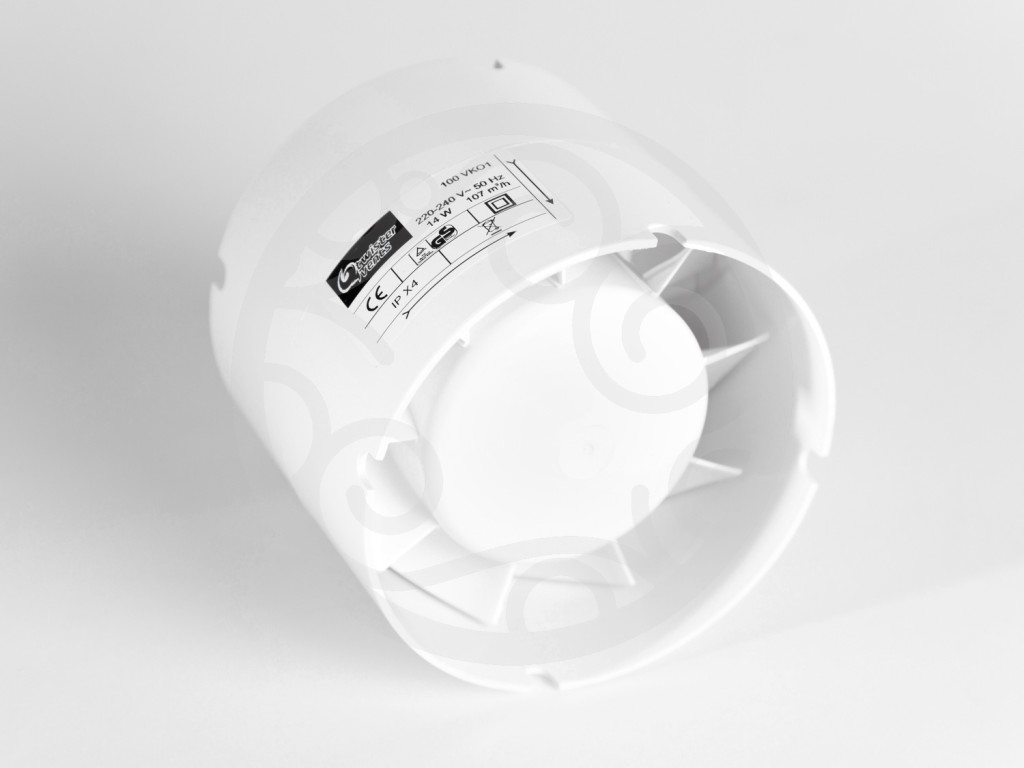
2.- Extractor may have been too much for the tent. I'm using a speed regulator now to lower it.
3.- Not frequently enough daily feeds when hand fed, and while using blumats, set them on a lowish side to make matters even worse...

I think all this allied to produce a Vapor Pressure Deficit issue that will explain why plants had such difficulties to "eat".

Keepers
I've made finally my mind.

I'm only going to keep BB #1 and Kalichakra, which so far are the only plants worth for a mom IMO (fast rooting and (re)vegging, high vigor) with unique traits. Love Krystalica high and aroma, but so far all looked pretty homogeneous and I'm short on space.

BB #2 clone is still half revegging, and stalks are rather woody, clones are slow... not suitable for a mom. It will be flowered, then I will run the rest of my seed stock to locate unique moms.

Seed stock:

Just received the Satori and Mandala*#1 seeds from Mandala Seeds, plus some freebies!


Mandala Seeds (all reg)

  • 6 Beyond the Brain
  • 8 Krystalica
  • 20+ Kalichakra
  • 10 Satori
  • 14 Mandala #1

ACE
  • 6 Honduras
  • 6 Lebanese
  • 6 Ethiopian
  • 6 Tropical Mix
  • 4 Zamaldelica
  • 4 Nepal Jam
  • 3 Violeta
  • 4 ErdPurt fem
  • 1 Panama fem
  • 1 Malawi fem
  • 1 Zamaldelica x Kali China fem
  • 1 Orient Express x Nepal Jam fem

New grow
Getting a DR120 to run perpetual flowering, where will run four kind of different lightning at the same time: HPS400, my HML, 4 Cree CXA3070 COBs, and around 200W in SILs, each to cover 60x60cm (about 24"x24"). Thinking on putting 1 clone of a given mom under each of the four for a "live comparison".
 
Last edited:

repuk

Altruistic Hazeist
Veteran
Both Violetas sprouted and doing fine, I think I finally dialed in the seedlings/clones tent... also slowly re-getting the "hang of it" after years without growing.

Repotted BB #1, #2 and Kalichakra to 11L pots this time (about 3gal) instead of the 3.2L pots (3x the volume).

I re-tied them to keep on with the LST... (my first time)

BB #1, BB #2, Kalichakra (rest are clones I'll give away)
attachment.php


As always BB #1 has shown incredible vigor outgrowing the rest, much more advanced in LST.

The flip window for the ACE strains is closing, or I'll have problems overgrowing my tent. Will repot the fem ACEs on Monday and will move them to the medium flowering tent.

Didn't pay attention while ordering, the E27 multipliers and 10x Philips 13W SILs will arrive by April... :wallbash:

Having a situation... by monday I'll repot ACE's to 3.2L containers, will need to start 11/13 ASAP; options:

- throw the three ACE fems on the medium tent, and switch to the HPS / flip to 11/13 until SILs and rest of gear arrives.

- If DR120 is already here, set it up with either my HML, move HPS there, or use my COBs, and move all ACEs there switching to 11/13.
 

Attachments

  • IMG_4035r.jpg
    IMG_4035r.jpg
    108.3 KB · Views: 24
Last edited:

repuk

Altruistic Hazeist
Veteran
Guawi, Tai-Chi and Kali China Repotted, next to flip

Guawi, Tai-Chi and Kali China Repotted, next to flip

Repotted Guawi, Thai-Chi and Kali-China, intend to flip to 11/13 tomorrow.

I'm being on the too diligent side at repotting, went to the opposite side of the spectrum from previous run; as soon as I see enough tap roots popping from pot bottom, I repot.

They went straight from 1L pots to 7L ones and to the SILs vegging tent, but Kali-China still needs some vegging, so got repotted to 3.2L and kept at the CFL vegging tent, she will get the flip later.

I'm being mercyful, allowing for them to adapt to their new shoes prior to flipping the switch. Shouldn`t I to fight stretch? My reasoning was stressing the plant may even be worse?

Here they are, three lovely ACE ladies:

Ms. Guawi, topped previously, prior to her new shoes.

picture.php


Ms. Thai-Chi, prior to re-pot:

picture.php


The joyful Kali-China, gorgeously fatty and curvy already on her new 3.2L pot:

picture.php


Waiting for the other tent to reach me, next will LST'ing the regular zamaldelicas and nepal jams to take clones prior to flowering them.

One Nepal Jam is a monster in veg, almost twice the size of the rest: huge Nepal Jam on the left, biggest Zamaldelica on the right (both have been topped):

picture.php


The other Zamadelica is almost the same size, whereas the Nepal Jam #1 is well proportioned, healthy green, but I'd say 60% the size of the Zamaldelicas, and 25% of Nepal Jam #2.
 
Last edited:

repuk

Altruistic Hazeist
Veteran
Cheap and effective insulation material: sand

Cheap and effective insulation material: sand

BonaFortuna, I recall discussing cheap insulation materials, I recently noticed, while drying the very fine sand I got from a water well (I use it for my hens bath "tub", they love it!) that it's a great insulator: bare sand, the finest the grain, the better.

Guess micro air spaces between crystals make for a great insulator, the thickest the layer, the better.

So a cheap (but heavy) way of adding insulation would be building the shed walls leaving air chambers sandwiched between walls, to be filled with sand afterwards.
 
Last edited:

repuk

Altruistic Hazeist
Veteran
20x SIL hood made from pallet scraped timber

20x SIL hood made from pallet scraped timber

The salts I ordered came with a small pallet, had to recycle it...

My take at recycling pallets: 4 scrap wood blocks and a hammer, same technique as this guy.

Only power tool I use is for cutting the protuding nails and smoothing out the remnants (I don't remove them) after all timber is dismantled.

I specifically used an angle grinder which means:

- Use googles
- Use your brain (Sober!!)
- Be cautious!

A dremel, or any other tool is equally useful for this.

picture.php


I torched the timber to sanitize it, also provides a nice finish when properly done (not my case).

picture.php


First Build Stage

I like to work "in series", as it's more efficient and less error-prone:

1.- I drilled all the wire passages on the timber.
To mark the drill points, take a cleat, undo the wire retaining screws so that you can see through, position the cleat, then use a nail or similar to pass it through the wire-retainer and mark the timber (watch out for nail remnants and reposition socket to avoid them if required).

2.- Cut all wire strips to lenght, stripped both ends

3.- Fixed wiring strips to all sockets (dissasembled)

4.- To mount each cleat, I passed its cables through the timber: this way wires will act as a self-positioning guide for the cleats; I used a pair or wood screws to fix the cleat to the timber from the inside.

Forgot to take a picture with the two wires attached, this one was taken for detail.

picture.php


E27 Cleat Sockets went for 80cents each.

All sockets assembled:
picture.php
 
Last edited:

repuk

Altruistic Hazeist
Veteran
Second Build Stage: Wiring
Once all cleats are fixed, I flipped the hood over, and wired everything. Used 12 Wago 5-terminal and 2 3-terminal units to connect everything. Absolutely in love with them!!

Wiring Diagram:
picture.php


Tip:
1.- Grab a pair of 5 terminal wagos, and wire each hood corner (four SILs) first. (blue lines, only one cleat wiring shown on each corner for clarity)
2.- Once all corners are wired, grab another pair of 5-wagos, and complete the wiring for upper and lower hood halves (orange lines) and the "lone" pair of SILs on each halve (blue lines).
3.- When both halves are wired, grab a pair of 3-wagos, and wire the hood halves (green lines) and power cord (black lines)

SILs Populated:
picture.php


10x Philips 11W 2700K
6x German brand 15W 5000K
4x Philips 13W 6500K

picture.php


Total power draw:

picture.php


Around 34W per sq feet.

Complete Hood:
picture.php


Feel free to ask for help on your SIL project!
 
Last edited:

repuk

Altruistic Hazeist
Veteran
Gracias Gantz! :tiphat:

Truth is I'm veeeeery happy with the outcome.

The more I think about SILs, the more I'm in love with them for its ubiquity and flexibility.

Something I didn't add: even as it's "reconfigurable" in a matter of seconds by e.g. partially unscrewing some SILs when not needed, it would be easy peasy adding switches to this design, eg on green lines to instantly switch a halve off.

Shed Flowering Tent

Blumats setup and dialed-in.

Forgot to add a picture just as I installed it:

picture.php


Preparing the big tent, once it's ready at least 4 plants will go there (currently rather jammed!). Aiming at having 5 plants here.

The switch to Canna A+B + Yara SOP as per Absolem advice made an incredible change. The SILs produce really thick stems and leaves, Guawi got FIMmed rather than topped, and its sprouts (huge) look as yummy as lettuces!

I'm going full salts on the big tent (Hakaphos Basis 4/Calcinit/MKP). Will run Canna A+B + SOP + PK 13/14 until I run out of Canna's, I'm guessing by the end of the garden shed tent crop, which I intend to flip on Monday.
 
Last edited:

bsgospel

Bat Macumba
Ditto- that SIL build and wiring diagram should be a sticky thread in itself. For bums like me who don't know about wiring, you make the DIY seem super easy.
 

repuk

Altruistic Hazeist
Veteran
Ditto- that SIL build and wiring diagram should be a sticky thread in itself. For bums like me who don't know about wiring, you make the DIY seem super easy.

:tiphat: That was my goal, really happy to be of help! :thank you:

The point was doing it safely too, and if done as depicted, the only exposed metal parts with live electricity will be the inside of the cleats where the bulbs make contact, all the rest is securely isolated but for the metal parts on the exposed SIL PCB.

Tip: Use hot glue to cover any exposed metallic points on SILs PCB at dome-popping time.

I edited the posts to include building order and tips to make it easier to follow.

Thanks again Gantz! A pleasure having you here :tiphat:
 
Last edited:

Gantz

Smoke weed and prosper
Veteran
Didn't do anything mate. No need to thank me.

I love these grows and I'm just looking for inspiration. I got sound isolation problems so I'm looking at what other people are doing.

But with this good weather I might do an outdoor grow this year. :tiphat:
 

repuk

Altruistic Hazeist
Veteran
Not sure if I will be able to grow some outdoors (really looking into it), but already weeded out all the orchard... 40% of it were 1,5m tall nettles, compost pile is about 2x2 x 1,5m! I'm sure they will thrive here as all fruit trees or the vegetables garden will :biggrin:

gonna look your posts for the sound isolation issues
 

repuk

Altruistic Hazeist
Veteran
Second tent set up

Second tent set up

Didn't find any posts related to noise Gantz, what's your issue? I'll have to deal with it in this tent, the RVK extractor (125E2-L 340m3/h) sounds like a jet (no carbon scrubber yet).

Once I fit the scrubber (sucking from it) the options I will consider:

Dampening:
Building/purchasing a silencer box
Using dampened ducts

Ducts make a big difference in noise. Sometimes 90 degrees routing on exhaust duct can help dampening extractor motor/propellers "projected noise" outside of the tent if that's your issue, though not optimal for airflow. Sometimes the more straight, the less "air speed" noise.

Third option: using a speed regulator circuit using triacs. Thinking on experimenting with this and mycodo PWM outputs for smooth extraction throttling.

Second Spot

I rigged up a temporary SIL hood with the octopus cables, multipliers and the SILs left (4x 2700k 11W + 6 6500k 13W) while I set up the COB and rewire the HML:

picture.php


wow... what a pleasure fitting and working comfortably inside the tent! :woohoo:

ACE
All ACE regulars (unsexed yet) were repotted to 7L pots and moved there with the fem Kali China (11L).

Malawi and Panama (fem) were sowed yesterday :biggrin:

Thinking on trying a DTW setup instead of blumats here. This way any big drum at floor level with a pump will do as reservoir, and hopefully will require less checkups than blumats.

Thinking on using a 120x120 tray to collect the runoff, and place something under the pots to elevate them so that they don't sit on it, then pump it to another drum, or directly to the outdoor garden.

Anyone used condensation pumps for this? The same used to evacuate AC water, they auto-sense the liquid level and won't activate on dry. Problem is I don't think they'll like dirty water. Another way would be using a regular (aquarium?) pump activated using some sort of external level sensor.

Hesitating between a garland square tray (rigid) or a Nutriculture Flexi Tray (flexible, foldable). Tips welcome! :)
 
Last edited:

repuk

Altruistic Hazeist
Veteran
DIY COB Hood w/ Cree CXA3070

DIY COB Hood w/ Cree CXA3070

Parts specs and details: https://www.icmag.com/ic/showpost.php?p=6675123&postcount=82

Hood and heatsinks have been assembled, next will come the wiring.

I recycled an aluminum window profile for the hood "frame":

Building the frame was easy peasy, just cut and rivet. It's an H, each side being 30cm/12in (sized to cover 60x60cm @50w/sq ft - 80x80cm @30w/sq ft area)

picture.php


Heatsinks were drilled and taped for m5 screws, in order to fix it to the frame.

I already had the tools so went that route, a less cumbersome approach would have been using cold "solder" epoxy for metals (same kind used to fix pierced exhausts, radiators...).

Bottom view:
picture.php


Top view:
picture.php


I used Alpine 11GT rev2 heatsinks, note the orientation of the chamfer in the heatsinks finning where the fan cable exits (preventing rubbing the cables against the sharp fins) towards the frame.

Fans assembled (motherboard legs clipped):
picture.php


Coming next:

1.- Soldering wire strips to the COB chips prior to fixing them to the heatsinks, otherwise soldering will be tricky as the heatsink will dissipate the heat from the COB solder pads.

attachment.php


2.- Gluing them using thermal epoxy to the heatsinks

3.- Complete the wiring of the driver, and the 12V PSU for the fans.
 
Last edited:

Gantz

Smoke weed and prosper
Veteran
I've got one of these

WEBExtractor-100-VK01_0001wtmk-1024x768.jpg


It makes quite a bit of noise. I'll just buy a 105 soundproof ducting, drop it inside, use zip ties to hold it in place, then throw that into a wooden box filled with Rockwood or something.
I'll see.

Thanks for looking out for me mate.
Cheers:tiphat:
 

repuk

Altruistic Hazeist
Veteran
*visiting Repuk's house- frames and heatsinks fall out of every closet*

hahahah just envisioned that ala Marx Brothers crowded cabin scene from a Night in the Opera! :laughing: Missus says I'm worse than Wall-E!

@Gantz:

I'm sorry to say this, but those extractors are crap...

I still have the last one somewhere, problem being too cheap construction, flimsy plastics and horrible tolerances, the propeller axis/motor are unbalanced, causing vibrations and even if you manage to conceal the "air noise", background rumble/vibration is almost impossible to conceal and really annoying as it will propagate through walls, etc.

I dissasembled it to tune it and try to balance the armature, but apart from not being worth, didn't find a way of achieving that (I'm handy with electric motors, but design is really crude)

Something I didn't try was using rubber grommets to fix it to a silencer box, or even springs so that it doesn't transfer vibrations to the enclosure.

After going through two of those (TT or Vents) I got a RVK Systemair Sileo 100E2-A1: the difference is night and day and worth the investment: it will outlast a dozen of those.
 
Last edited:

Gantz

Smoke weed and prosper
Veteran
Thanks for the input. They say you get what you pay for... And I didn't pay much for this so... It kinda makes sense.
I did drop it in a soundproof duct and most of the noise went away. There's still some minimal vibration noise but that goes away behind a closed door.
Cheers:tiphat:
 

repuk

Altruistic Hazeist
Veteran
DIY COB Hood w/ Cree CXA3070 Final assembly

DIY COB Hood w/ Cree CXA3070 Final assembly

COBs
After soldering the wire strips to the COBs, I degreased them.

Heatsinks were buffed where the thermal pad is with a dremel, then degreased too.

This is possibly the most critical step, as if something goes wrong ungluing them will end up possibly with a broken cob. We seek an even coverage, avoiding any hotspots that would end up ruining the COB.

I mixed the two part (artic alumina) for one COB at a time, spread it over the COB back as if it were a toast for an even coverage, then pressed the COB over the heatsink (fingers on oposing corners, do alternate) with a twisting motion until excess epoxy appeared, removing it with a razor.

picture.php


Fans power supply
Next came the wiring, PSU, etc for the fans. I recycled an old external hdd psu, cut its output connector and soldered dupont male jumper wires in parallel to each polarity.

Used heatshrink to isolate and reinforce the "octopus".

This way each fan can be (un)plugged individually. PSU provides 9 volts, fans are absolutely silent.

picture.php


Fan PSU power draw:

picture.php


Preliminary wiring done, using wagos of course; COBs wired in series:
picture.php


...and there be light
picture.php
 
Last edited:
Top