
Hello everyone! I'm excited to announce a new organic soil project. I had a 250W HPS overhead and 256W of T8 shop lights around the sides of this chamber, but I was not happy with the power of that HPS. I bought a ballast core and upgraded the parts in my home-made ballast. I now have a 400W HPS overhead and for now the 256W of T8 shop lights(two tubes in each corner).
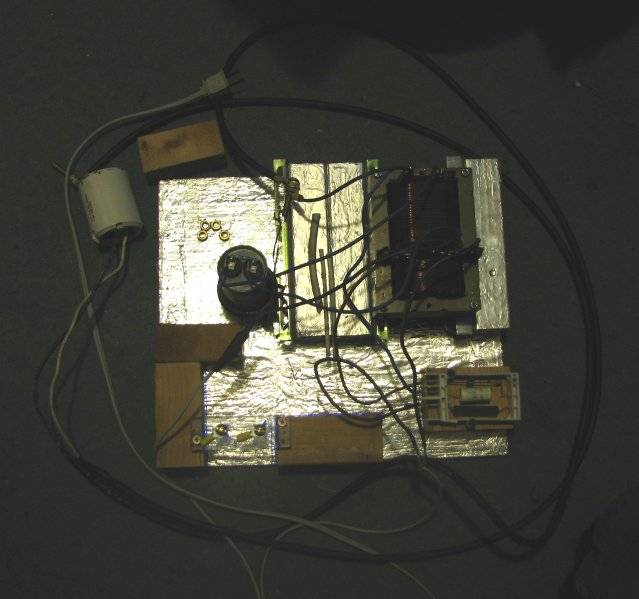
My DIY ballast when it was a 250W(a couple parts haven't been put on yet in this shot):
My soil is not a precise mix. I have a lot of coir in there, probably 35-40%, possibly around 15-20% peat, and probably about a 40% mix of verm, perlite, sifted scoria(lava rock), marble dust, and then from time to time, I add in a bit of composted llama manure(3 years composted), some horse manure, or some aerated compost tea from time to time, so the exact amounts are unclear. I try to treat my bin as a living project. I let the soil cook, keep moisture in there, and turn it from time to time. I amend with bio-tone starter plus, and Jobes organic tomato fertilizer(has beneficials in small amounts). I not only use aerated tea on the bin, but I give it to the plants too. I brew mine with a small pump in a kitchen drink pitcher and a nylon full of starters(I put the air stone in the nylon with the feedstock and bury that all under aquarium rock).
My flowering chamber is about 6.5 square feet of floor space, with a total budding area of close to 8 square feet(there's a rim around the bottom). It's about 6 feet floor to ceiling, so I'm focusing on training out a nice branchy canopy. Some day I may start a SCROG if I can figure out how to work it into my method, but for now I do all the training by hand, both through LST, and I FIM top them.
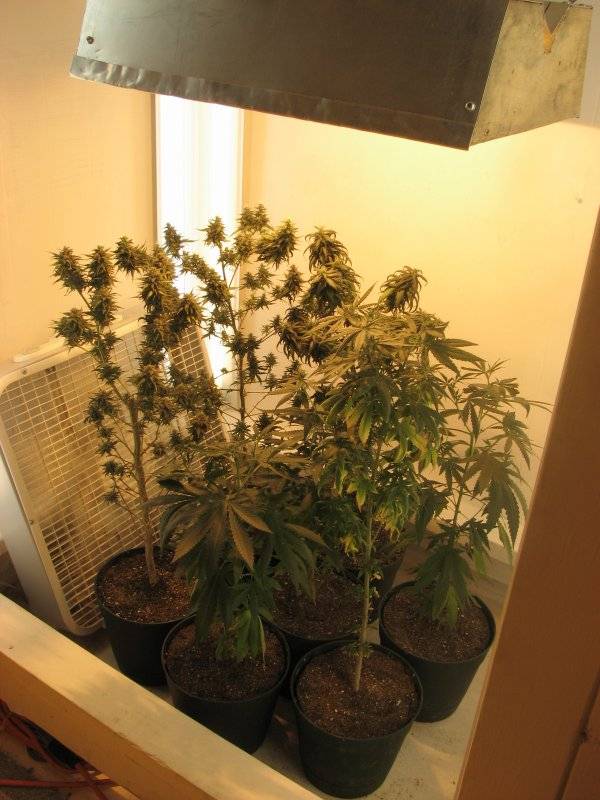
Flowering chamber(picture is from an old grow):
I veg in progressive pots. I start with a cottage cheese/yogurt containers or party cups(I only fill it half way to start with). Once the roots colonize that half cup, I turn them over and they come right out, usually without anything falling off the root ball. I drop in some dirt to fill the bottom half and then put the plant back in the cup with more dirt around the sides of the existing root mass. After this I move them to a 52oz convenience store cup. Obviously the stress level involved is low because I never have to break up the existing roots. Plus, I can use the same lids for most of these containers, and lids are awesome because they help the roots reach higher up into the soil, plus they create a humidity/air zone between the soil and the lid that sometimes causes roots to grow out of the surface of the soil. When I transplant them for flower, they get buried a tad bit deeper, so this works out really well!
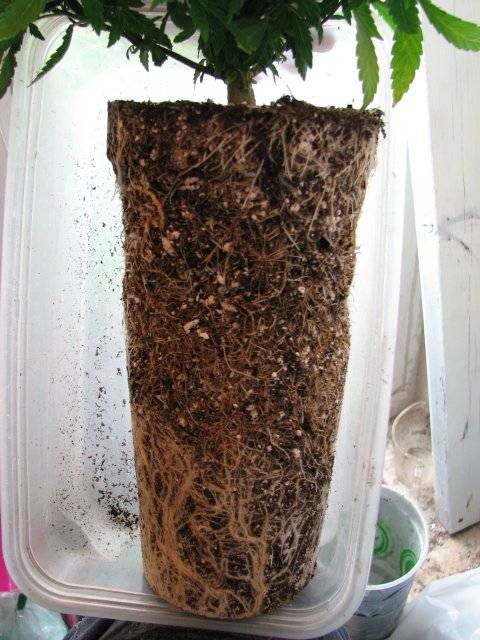
Here is an example(not the greatest, but the only one I have a picture of right now):
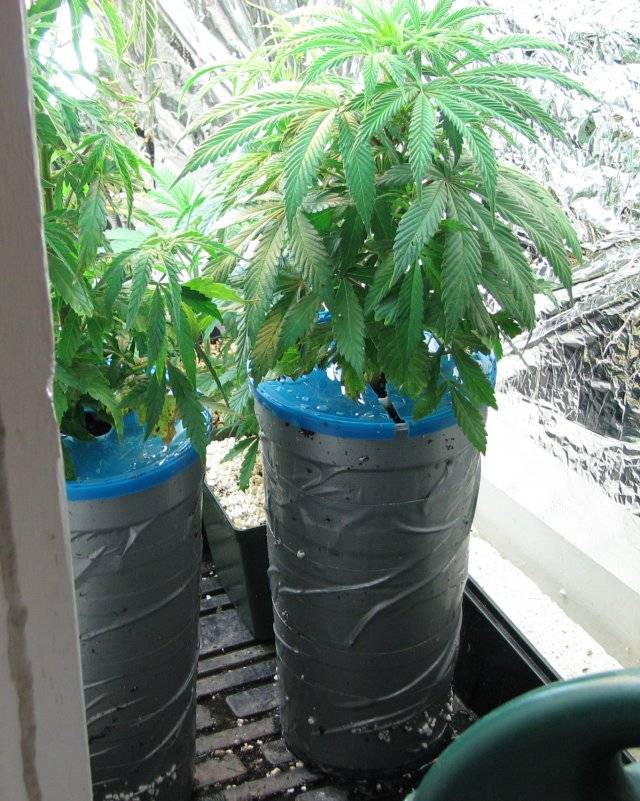
Here's a pic of the cups:
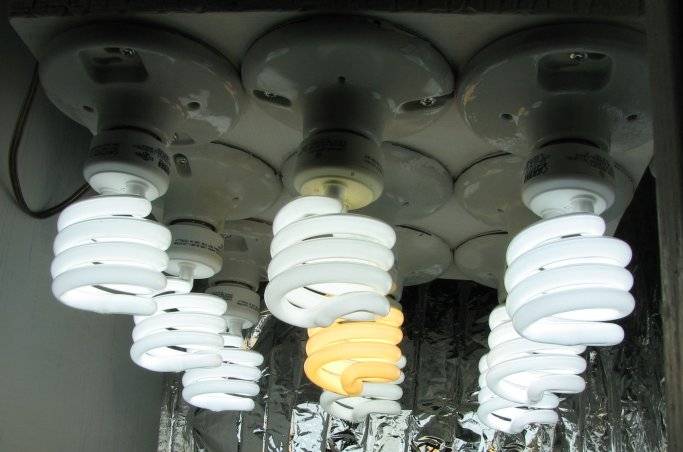
After the plant is big enough and rooted well, we will be transplanting to the grow bags we just made(thanks honey!!!(even though she won't read this.... lol)). The bags are made from doubled-up landscaping fabric(chemical-free(very important!!!!!!!)), and they are square with an 8x8 inch base, and 12 inches tall with a strong folded rim that also works as handles. These hold about 2.75 US dry gallons, or about 12.5 liters for our international friends.... I should be able to fit about 15 of these in my cabinet for a bit over 41 gallons total in there. The really sweet part is they are tall enough so when I put the root mass from the 52oz cups in there, it leaves about 3 inches to colonize in every direction. The downside to this being a transition from .3 gallons to 2.75 gallons with no in-between step. My veg setup is nowhere near big enough to veg them in planters that large to start with. I'm going to seriously need to upgrade my veg space. I have about 3 sq. ft. of veg space, with about 200W of CFL overhead. It's pretty small.
Here's a shot of that veg light:
I have some exciting new genetics. Right now I have:
4 Blue Hash(Dinafem) females
2 Northern Lights #1 females(local breeder)
1 NL#1 of unknown gender(same breeder)
1 NL#1 male
2 (fem?) Jamaicans(IBL actually from Jamaica),
1 Shiva(???? seed from my cousin, not sure and can't contact him at the moment)
Then I have one each of the following feminized:
Critical(Dinafem)
Jack Herer(Dinafem)
Pineapple Chunk(Dinafem)
Vintage 2006(CH9 seeds)
White Shark(Dinafem)
White Widow(Dinafem)
The problem with these is I am starting them for someone else, so I am trying to get clones right now. I clone in coco coir pucks, and I use honey as my rooting agent. I am taking two cuts from every plant I am going to flower or give away. I already did cuts of all but one of the Blue Hash, and most of those feminized lines. The heat wave has been hurting my girls though and reducing how many useable branches there are for cloning. I want to get these done soon so I can free up the space if nothing else.
Anyway, there's more to come, including pictures. I should be putting 6 plants into 12/12 in the next couple days when the chamber is fixed up and ready. I may veg them a week or two under the HPS since my perpetual is not going yet. Eventually I want them vegged in those grow bags so they are all ready for flowering.
Thanks for stopping by!
My DIY ballast when it was a 250W(a couple parts haven't been put on yet in this shot):
My soil is not a precise mix. I have a lot of coir in there, probably 35-40%, possibly around 15-20% peat, and probably about a 40% mix of verm, perlite, sifted scoria(lava rock), marble dust, and then from time to time, I add in a bit of composted llama manure(3 years composted), some horse manure, or some aerated compost tea from time to time, so the exact amounts are unclear. I try to treat my bin as a living project. I let the soil cook, keep moisture in there, and turn it from time to time. I amend with bio-tone starter plus, and Jobes organic tomato fertilizer(has beneficials in small amounts). I not only use aerated tea on the bin, but I give it to the plants too. I brew mine with a small pump in a kitchen drink pitcher and a nylon full of starters(I put the air stone in the nylon with the feedstock and bury that all under aquarium rock).
My flowering chamber is about 6.5 square feet of floor space, with a total budding area of close to 8 square feet(there's a rim around the bottom). It's about 6 feet floor to ceiling, so I'm focusing on training out a nice branchy canopy. Some day I may start a SCROG if I can figure out how to work it into my method, but for now I do all the training by hand, both through LST, and I FIM top them.
Flowering chamber(picture is from an old grow):
I veg in progressive pots. I start with a cottage cheese/yogurt containers or party cups(I only fill it half way to start with). Once the roots colonize that half cup, I turn them over and they come right out, usually without anything falling off the root ball. I drop in some dirt to fill the bottom half and then put the plant back in the cup with more dirt around the sides of the existing root mass. After this I move them to a 52oz convenience store cup. Obviously the stress level involved is low because I never have to break up the existing roots. Plus, I can use the same lids for most of these containers, and lids are awesome because they help the roots reach higher up into the soil, plus they create a humidity/air zone between the soil and the lid that sometimes causes roots to grow out of the surface of the soil. When I transplant them for flower, they get buried a tad bit deeper, so this works out really well!
Here is an example(not the greatest, but the only one I have a picture of right now):
Here's a pic of the cups:
After the plant is big enough and rooted well, we will be transplanting to the grow bags we just made(thanks honey!!!(even though she won't read this.... lol)). The bags are made from doubled-up landscaping fabric(chemical-free(very important!!!!!!!)), and they are square with an 8x8 inch base, and 12 inches tall with a strong folded rim that also works as handles. These hold about 2.75 US dry gallons, or about 12.5 liters for our international friends.... I should be able to fit about 15 of these in my cabinet for a bit over 41 gallons total in there. The really sweet part is they are tall enough so when I put the root mass from the 52oz cups in there, it leaves about 3 inches to colonize in every direction. The downside to this being a transition from .3 gallons to 2.75 gallons with no in-between step. My veg setup is nowhere near big enough to veg them in planters that large to start with. I'm going to seriously need to upgrade my veg space. I have about 3 sq. ft. of veg space, with about 200W of CFL overhead. It's pretty small.
Here's a shot of that veg light:
I have some exciting new genetics. Right now I have:
4 Blue Hash(Dinafem) females
2 Northern Lights #1 females(local breeder)
1 NL#1 of unknown gender(same breeder)
1 NL#1 male
2 (fem?) Jamaicans(IBL actually from Jamaica),
1 Shiva(???? seed from my cousin, not sure and can't contact him at the moment)
Then I have one each of the following feminized:
Critical(Dinafem)
Jack Herer(Dinafem)
Pineapple Chunk(Dinafem)
Vintage 2006(CH9 seeds)
White Shark(Dinafem)
White Widow(Dinafem)
The problem with these is I am starting them for someone else, so I am trying to get clones right now. I clone in coco coir pucks, and I use honey as my rooting agent. I am taking two cuts from every plant I am going to flower or give away. I already did cuts of all but one of the Blue Hash, and most of those feminized lines. The heat wave has been hurting my girls though and reducing how many useable branches there are for cloning. I want to get these done soon so I can free up the space if nothing else.
Anyway, there's more to come, including pictures. I should be putting 6 plants into 12/12 in the next couple days when the chamber is fixed up and ready. I may veg them a week or two under the HPS since my perpetual is not going yet. Eventually I want them vegged in those grow bags so they are all ready for flowering.
Thanks for stopping by!


