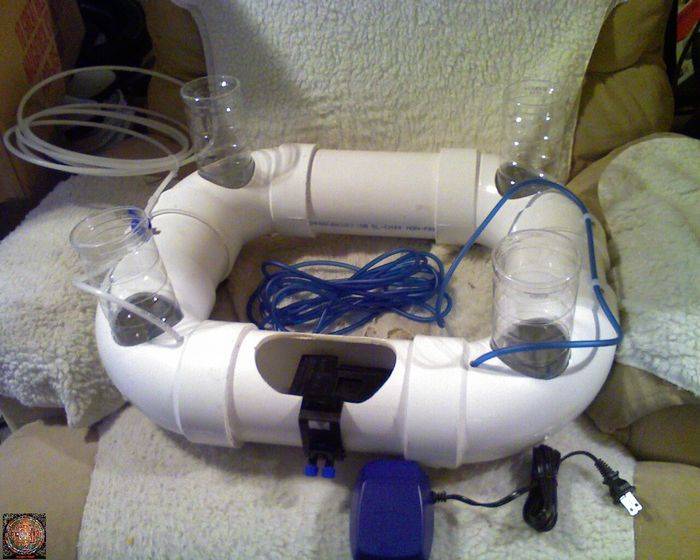
I am building a hydro system for my cab.
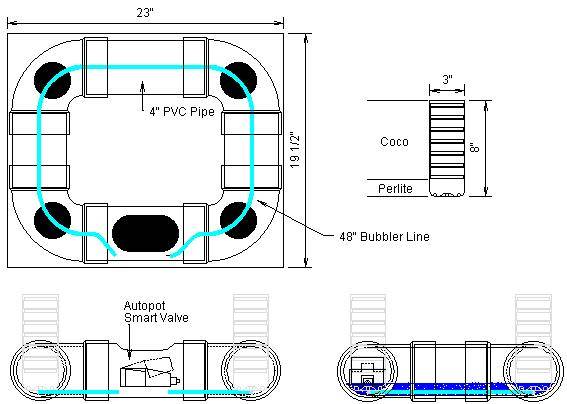
This system is very inexpensive and should allow me to be able to leave the grow for a couple of days or more with no worries. The 4" 90's run about $4 ea and the pipe is $7 for 5ft. I purchased a 3" hole saw for $18.
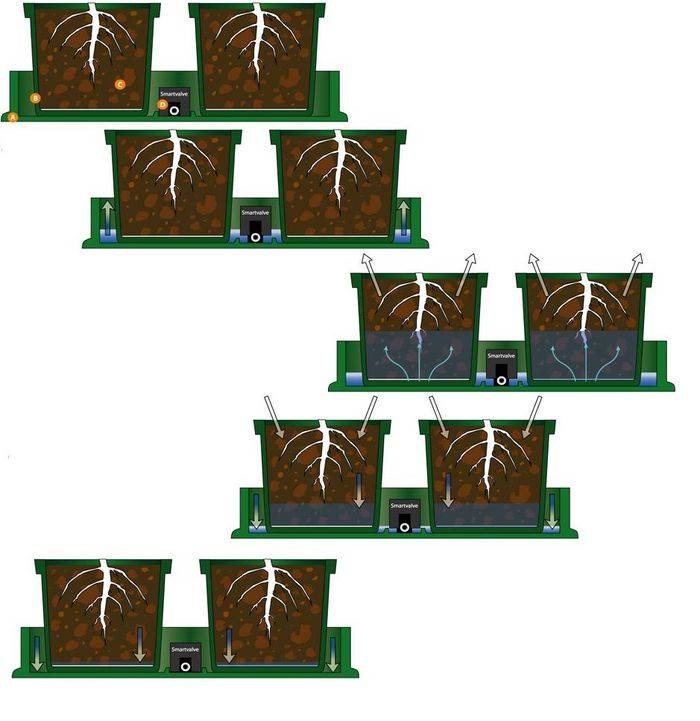
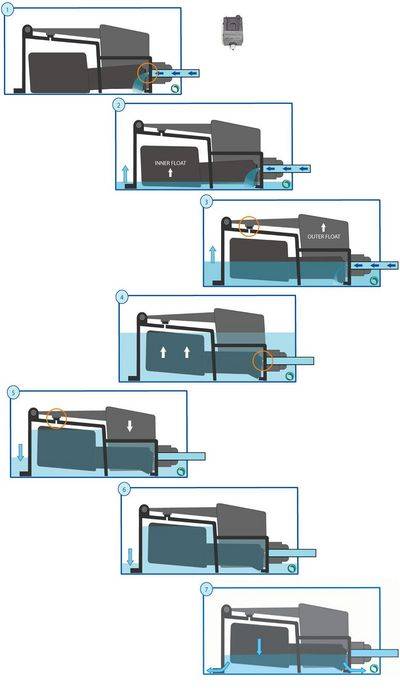
Air pump ~$16, silicone tubing for air lines $8, nylon tubing for water nute feed $pennies, Autopot Smart Valve $20
I had the res, but it is about a $30 item. (few bucks for fittings, valves and such)
My flower area is only approx. 1 sq meter of floor space. I have a vertical tube with 2 HID's that will be in the center of this set-up.
The rooting pots will have a couple of inches of perlite in the bottom and the rest straight coco.
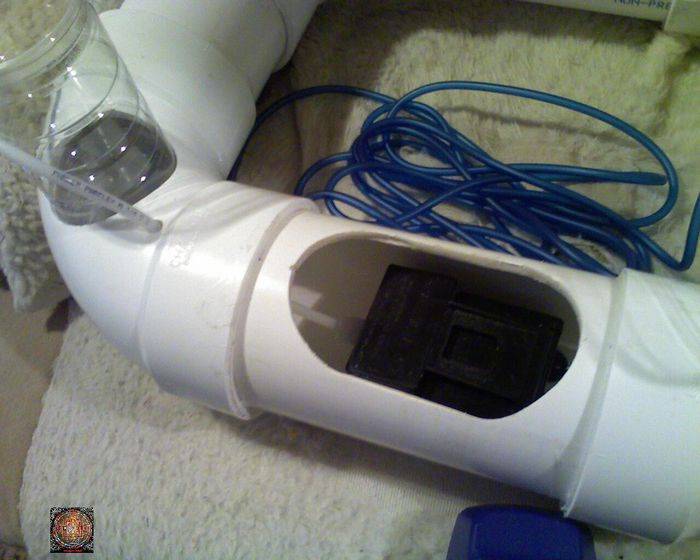
I will have a 48" air bubbler line that will run beneath all the root pots, and an additional air stone in the res.
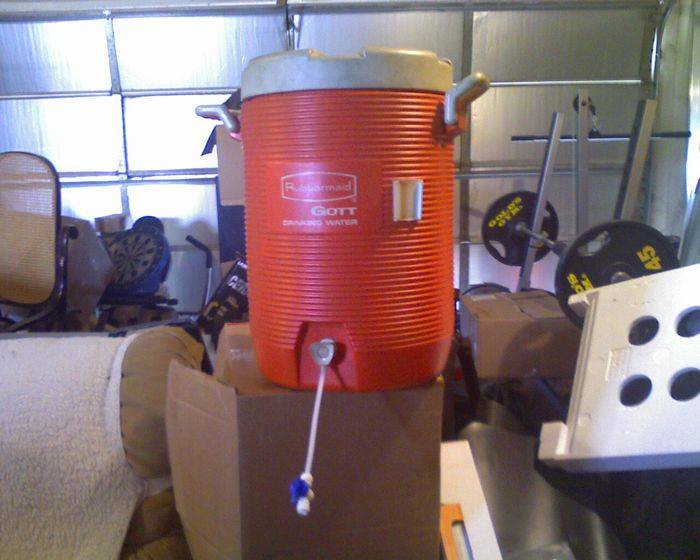
The res is a DIY using a water dispenser.
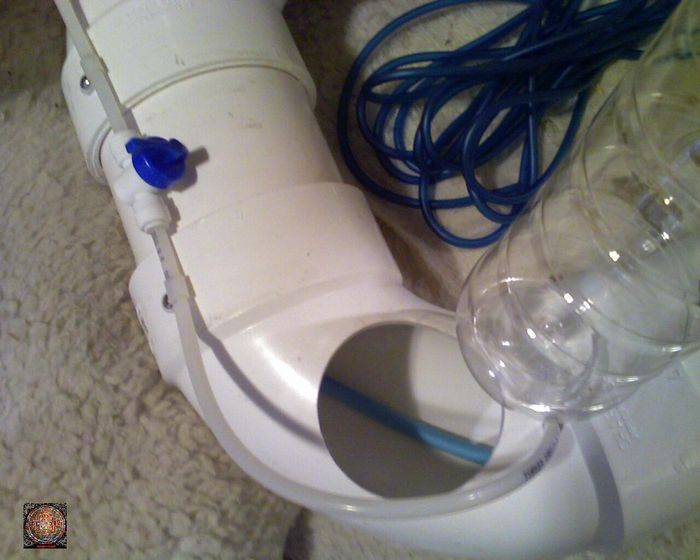
I have epoxied the valve open, and have connected a 1/4" nylon line and a shut-off.
This res will set on a shelf next to the cab. (lines running to back of cab for stealth)

I think I have the prototype of this jewel figured out. I have all the materials and am ready to construct. I will not be putting the system in place until the latter part of next month. I want to invite anyone and everyone to comment on this system before I actually start gluing pipe together.
There are a couple of issues that I am aware of that I think will be worked through just fine, but it is always a good idea to get input from other growers for some comment and suggestion.
Please feel free to critique this set-up. Good, bad, or ugly.
This system is very inexpensive and should allow me to be able to leave the grow for a couple of days or more with no worries. The 4" 90's run about $4 ea and the pipe is $7 for 5ft. I purchased a 3" hole saw for $18.
Air pump ~$16, silicone tubing for air lines $8, nylon tubing for water nute feed $pennies, Autopot Smart Valve $20
I had the res, but it is about a $30 item. (few bucks for fittings, valves and such)
My flower area is only approx. 1 sq meter of floor space. I have a vertical tube with 2 HID's that will be in the center of this set-up.
The rooting pots will have a couple of inches of perlite in the bottom and the rest straight coco.
I will have a 48" air bubbler line that will run beneath all the root pots, and an additional air stone in the res.
The res is a DIY using a water dispenser.
I have epoxied the valve open, and have connected a 1/4" nylon line and a shut-off.
This res will set on a shelf next to the cab. (lines running to back of cab for stealth)
I think I have the prototype of this jewel figured out. I have all the materials and am ready to construct. I will not be putting the system in place until the latter part of next month. I want to invite anyone and everyone to comment on this system before I actually start gluing pipe together.
There are a couple of issues that I am aware of that I think will be worked through just fine, but it is always a good idea to get input from other growers for some comment and suggestion.
Please feel free to critique this set-up. Good, bad, or ugly.
") .
.