What's new

Dr.Nonagon - Complete LED build - Like a Pro -

Dr.Nonagon

Member
In this guide we will be building a COB LED as pictured

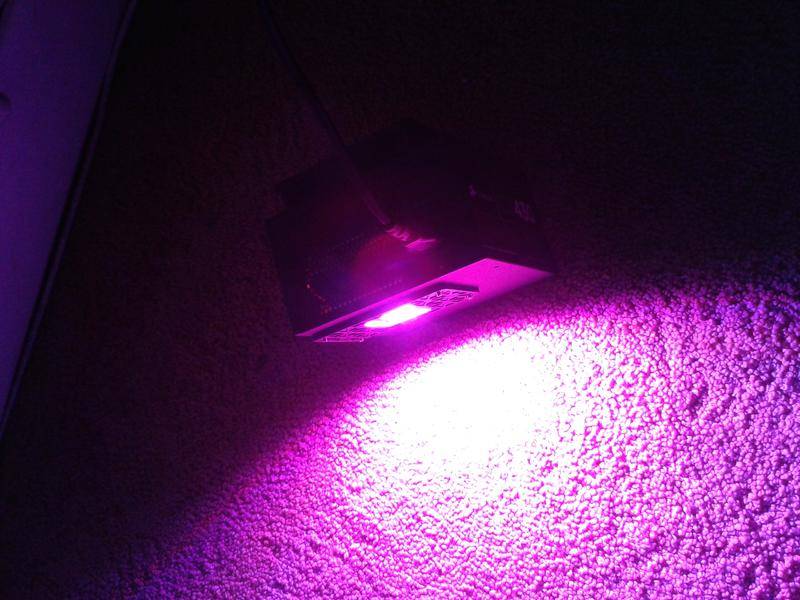
It was simple and fast, and the best part is - almost anyone can do it too. Let's get started!

What you will need.

Hardware:
-COB LED
-Compatible constant current driver
-12v 1a or under constant voltage driver or power supply AC/DC (for Fans)
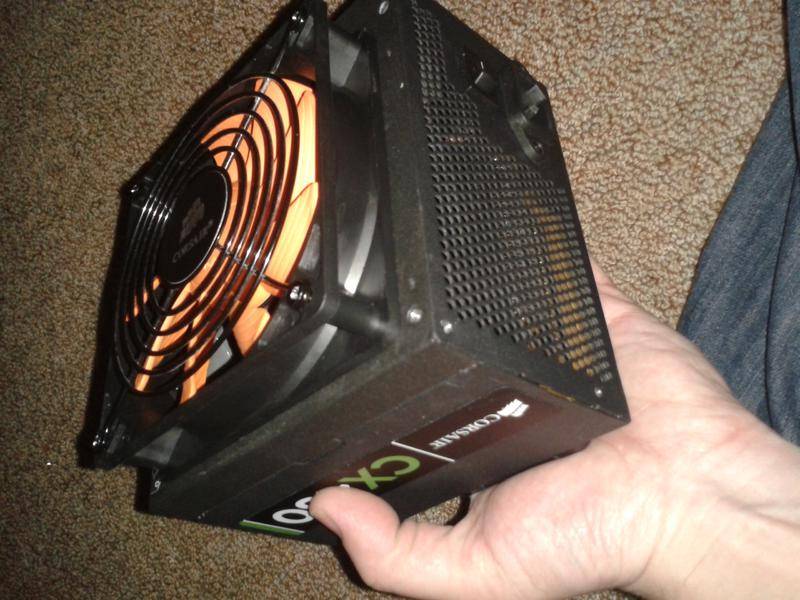
-An old discarded PSU from a PC - this will be the case
-A heatsink and fan with bracket - this will be mounted to the case
-22-16AWG butt splice - for wire connections
-thermal paste
-machine screws

Tools:
A dremel or equivalent with cutting blades
Drill with drill bits
Screw tap 4-40 or whatever fits your screws
Wire cutters, Hand crimper


-------


Finding a scrap Power supply (PSU) is simple. Call your local PC store and ask if they have any dead PSU's - it saves the store having to recycle them and they are almost perfect for our project. If they ask just tell them that you want it for a project box. You can also find them in most dead or unwanted PC.


Make sure before you start with this that the PSU has been left unpowered for two days. The capacitors inside can give you quite the surprise is they still have juice in them.


After we open it up (normally just 4 screws) we gut it all but keep the switch and power plug wires intact. Also the wires can be salvaged for other projects.


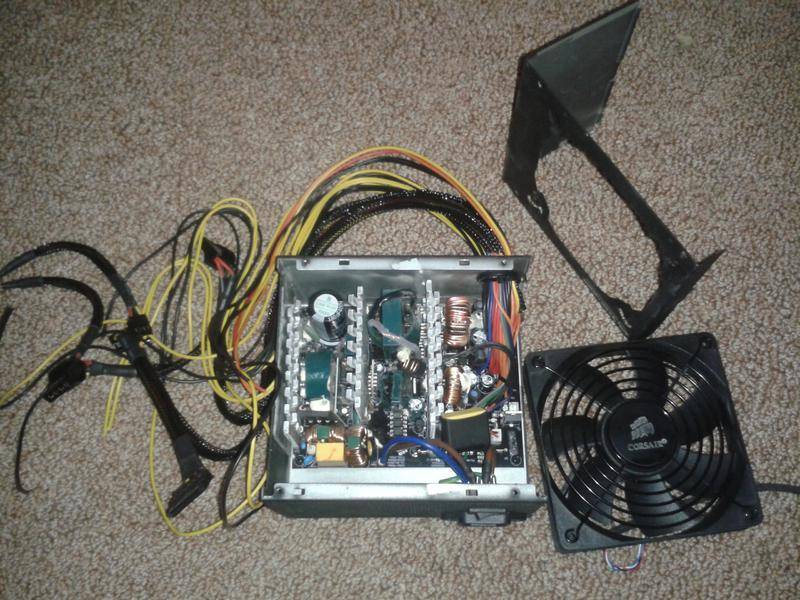
You will want a vacuum ready as the PSU can be pretty gross inside


----------
 

Dr.Nonagon

Member
Let's pick a heatsink.

There are really hundreds if not a thousand to choose from. Copper, aluminum, active, passive, extruded, stamped, bonded, folded, heatpipe, waterblock. You see where I'm going here right?

To simplify this the best- cheapest heatsinks are active cooled with really thin fins (stamped) and with a heatpipe. They are found in most of today's computers, but active cooled extruded heatskins from computers 2004-2008 should function well up to 100w COB's and are less expensive often under $10.

Be aware that a cooler with a heatpipe can cause LED mounting issues. The heatpipe contains fluid and if punctured during mounting becomes useless! Extruded heatsinks will not suffer from this issue.

For this build I will be using an active cooler with four heatpipes. It is a stock socket AM3 cooler. The COB I am using is listed as 64x3w so I will need to cool around 90w of heat. Placing the chip on the heatsink will show us where to drill. Being mindful of the heatpipes I will drill and tap the holes.


I am using 3/32 drill bit and a 4-40 tap.

There will be some extra metal debris that must be removed sto the chip fits as flat as we can get it. A utility knife works well or we can grind and polish it with our dremel.


At this point make sure you have your wires attached to your chip unless you are using a cob holder. (Im just using one screw for a demo, you need to use all four)
Apply thermal paste and screw the chip to heatsink. To apply thermal paste is fairly simple. Apply paste in a “X” pattern to the heatsink. Spin the chip around a few times and screw it down. You need very little paste.

If you want a guide one can be found here. http://www.pugetsystems.com/labs/articles/Thermal-Paste-Application-Techniques-170/
After checking the plastic bracket to make sure the wire fit, I cut down the four feet to get the heatsink more flush with the inside of the box. I used a diamond cutting disk for this. A grinder or knife could also be used. The foot on the left is cut down in the pic.
Taking note of how all the parts will fit in the box I use the plastic bracket as a guide for the holes.

I had to cut an extra hole because there was a PCB header that was built in and it was in the way. Again I cleaned up around the holes I made.
 

Dr.Nonagon

Member
Checking the heatsink bracket against the retaining bracket I marked my hole for the chip and cut it out with a metal cutting disk and a Kavo handpiece.


There is also no reason why a drill with the proper hole cutting attachment cannot be used and therefor no handpiece would be needed.
As I found out later the little piece of black plastic from the retaining bracket that was exposed got very hot.

I had to cut back the retaining bracket a few millimeters. It was actually starting to melt. This is a problem with using the retaining bracket for AM3. The hole is too small. Socket 478 has a much larger hole and is great for extruded heatsink options. It’s also good to note that no retaining bracket needs to be on the outside of the box but I like the way it looks.
After this it’s fine to screw in the brackets and install the heatsink with the COB attached.
 

Dr.Nonagon

Member


In this case I mounted the 120mm fan on the outside of the case blowing in. I replaced the stock fan with a new one as I am sure after many years of use the fan was passed its best before date. But a few bucks can be saved by reusing the stock fan.
Install the driver(s). I used hot glue for this because I know they will be coming out again in the future and the glue is actually pretty good. Of course metal brackets can be used to mount the drivers, but for me it’s not worth the time and when I switch out parts I’m going to be a sad panda when it won’t all fit later..

Wire the DC led driver(s) to your lamp and DC fan driver to the fans. Bring the AC ends of the drivers together black to black and red to red. Butt splice the red wires to the brown on the switch and the black to the blue.
A couple of zip ties later – pop the lid on and the four screws back in (you didn’t lose those right?) and you’re done.

Pros:
-Safe, fire resistant
-Great airflow
-easy to power up
-great for cabinets
-about as cheap as it gets
Cons:
-Standard PSU’s don’t all look alike, most are not this pretty
-Won’t fit a driver bigger then 135mm
-for small COB LEDs (sub 50w) space could be better utilized using other methods

Hoping I didn’t forget anything because I can’t figure out how to edit my posts
 

Dr.Nonagon

Member
Here is the build placed in the cabinet with a 2 day old bean sprout.


10 5w cree xt-e on each side with a 50w 7-band in the middle and a lady on day 15


The same light from the top. Everything is tightly packed in almost to the millimeter so the intake fans have been moved to the fronts using 80mm fans.
 

PetFlora

Well-known member
ICMag Donor
Veteran
Nice tutorial

Funny thing though, the Multispectrum chip is unnecessary, and creates potential issues like dissimilar heat dissipation requirements within the chip, as well as questionable quality of the individual band diodes= longevity issues

DIYers on other sites are flowering quite nicely using only Cree and Bridgelux WW cobs, which are full spectrum, though not necessarily perfectly balanced for both veg and flower
 

Sforza

Member
Veteran
Nice tutorial

DIYers on other sites sites are flowering quite nicely using only Cree and Bridgelux WW cobs, which are full spectrum, though not necessarily perfectly balanced for both veg and flower

The perfect is the enemy of the good.
 

Dr.Nonagon

Member
Nice tutorial

Funny thing though, the Multispectrum chip is unnecessary, and creates potential issues like dissimilar heat dissipation requirements within the chip, as well as questionable quality of the individual band diodes= longevity issues

DIYers on other sites are flowering quite nicely using only Cree and Bridgelux WW cobs, which are full spectrum, though not necessarily perfectly balanced for both veg and flower

Funny thing though, I asked you this exact question in one of your threads and you told me to go ask Cree.
 

Dr.Nonagon

Member
Apparently, you did not heed my advice

Yeah, I just asked someone helpful instead. Besides this thread is about building an enclosure for next to free. This will work with any COB 100w easily. And that covers whatever chips the builder wants as seen in the pics. Including the Cree xte pictured.
 
QUOTE-----Dr. Nonagon-- "Yeah, I just asked someone helpful instead."


LOL, me too :)

Again Dr N. , I really love the work you've done here on this project! . Very nice box. How is that setup doing for you? Plants happy?
 
Last edited:

Dr.Nonagon

Member
Well the lamp in this build has been running on 20-4 for the last 17 days without issue.

My 1 day old sprout has turned into a 18 day old plant. Funny how that is.


The cabinet is running good. My first test (which pre-dates this build) is on flower day 30 but I almost killed her with hydro temps getting too high as the weather got warmer. I transplanted to sunshine mix and flowered her. I'm not going to be able to use hydro with this cab without going to an external res or a peltier cooler. With the heat of the summer coming I will see how this cab actually runs.


I've also managed to get 200w of LED on to one heatsink. When I get that up to 300w I will do a build guide, but 400 is my goal.
 

Latest posts

Latest posts

Top