What's new
  • Happy Birthday ICMag! Been 20 years since Gypsy Nirvana created the forum! We are celebrating with a 4/20 Giveaway and by launching a new Patreon tier called "420club". You can read more here.
  • Important notice: ICMag's T.O.U. has been updated. Please review it here. For your convenience, it is also available in the main forum menu, under 'Quick Links"!

DIY Waterfarm-styled Hydrokit

weedygreen

New member
Hi(gh),

I'm very impressed by Waterfarm-Grows and I'd like to grow with a DIY version of it.

As my future cabinet will be height-restricted (about 30 ") my plan is like this:

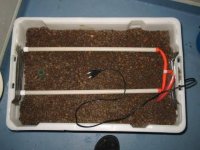
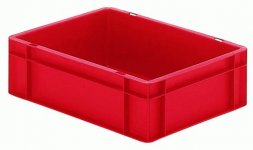
I will take two of those attached boxes and put one above the other, the bottom one will be the water reservoir while the one on the top will be filled with hydro correls.

My prob is the following: I can buy the boxed with height of 3" or 5".

Of course, the best thing would be using two boxes with 5" each but there's my height limit once more...

So I'd like to use one 3" and 5"...which one would you recommend as the water reservoir and which one for the root mass growing in the correls?

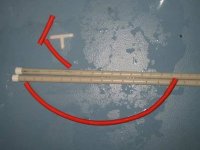
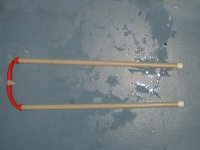
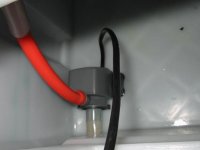
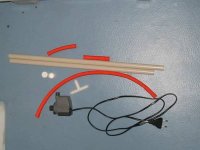
And did someone try to build a Waterfarm-like water column for the dripping ring? Any idea is appreciated, folks!

Happy smoke!:tiphat:
 

Attachments

  • StapBox5.jpg
    StapBox5.jpg
    15.1 KB · Views: 11

hempfield

Organic LED Grower
Veteran
Why don't you go for a DWC system instead of waterfarm ? They are using basically the same principle, waterfarm being just a little more complicated than DWC.

In both systems the major part of the roots are submersed on the water so the top container of the waterfarm became useless after the roots grow outside of it.

I also grow in height restricted space and I use 20cm (8") height reservoirs and there is enough space for the roots and water ( up to 25 Liters).

If you decide to use a waterfarm, the 3" box is the best choice , as you want the roots to go down into the water as soon as possible.

The water column is very easy to build, just use a 6 to 8 mm plastic tube or hose, attache a T spliter on top of it , connect it's ends to a drilled hose, insert an air line at the bottom and that's all.

Keep in mind that in DWC the roots receive more air that in waterfarm and they are kept cooler, being totally emerged in water.
 

Bigge

Member
Hijacking old thread to post my DYI Biggie-Farm

Biggie styled air-pots.....I call it a Biggie-Farm! This post is to describe my twist on the waterfarm. I'm happy to contribute this to this comunity that has been such a help....hope this is as innovative as I think it is...calling this a Biggie- farm may sound to some egotistical...it is :)

What is it? Bucket based growing system that uses air for watering via an air-column and also provides a submersed air-hose for additional oxygenation of the bucket. This post assumes reader has knowledge of what an air-column dripper is...previous poster describes how to make one.

What's different about this from a Waterfarm with an air stone? The pot...I use two three gallon air-pots to make an interior pot that provides a bed for the medium and an air column. This means one self contained bucket with air pruning holes that will stimulate lateral root growth inside the medium.

The difference to growth? I don't yet know...Not sure if it even works yet....first plant is 4" tall clone...maybe calling this a Biggie-Farm might not be a good idea....to late now :)

Materials-
5 gallon bucket, two 3 gallon air-pots (red base), air-column, hydroton, air pump (big enough to run two air lines), one white or transparent blue 2 foot length of 1" flexible air tubing (for drain and viewing water depth), black flexible 1/4" air tube for air bubbler and air-column, 1" grommet and 1" elbow with barbs, and a pack of zip ties.

Tools-
Sharp pair of normal sized scissors.

Overview of Basic outline of steps. Details and pictures to follow in subsequent posts.

1. Modify bucket.
a. Create hole at bucket base with scissors. Draw needed diameter hole At desired location and puncture bucket with open scissor pointed end, spin scissors in circle to carve out drawn hole. Insert grommet, elbow and view/drain tube. (err on to small hole size....don't go to big)
b. Use ruler and small cup to draw center line on lid and a hole in center of lid. Cut lid in half and cut out center hole. I used PVC cutters...scissors should work.

2. Create center air-pot. Air-pots that I use come disassembled, perforated panels that fold around the base. I take two 3 gallon pots and make one inner pot. I wrap the first pot panel with the base in the middle of the first panel (imagine a pot with its bottom equidistant from the top and bottom). I then put the second base at the bottom of the first pot (now I have a single pot with a base at the bottom and a base in the middle). I then zip tie that pot at the top (zip ties work to lock pots together after wrapped). Now I use the second Air-pot panel to wrap around the constructed pot to form a base just tall enough to put the top of the airpot at the top of the five gallon bucket (so that you can put on the lid with air-column inserted). Zip tie this second panel at the bottom of the pot.

3. Modify Center Air-pot.
a. Cut hole in air-pot bases to allow air column to pass along inside of inner wall. Insert air-column and zip tie air column to air pot inner wall.
b. Cut three triangles off of air-pot base. These should allow water to flow into the center of the air-pot...3-4inches tall. One should be lined up with the air-column. The air-pot should still stand level inside of the bucket when complete. You should now have roughly a 12" cylinder with two bases inside...the first base about 3"down and the second base about 6" down..then triangular cutouts at the base for good water flow. The bottom of the upper base is the fill line.


That's it...insert air-column, aeration hose, place modified air-pot in bucket. Add hydroton, clone ( can be pretty small as its roots are top fed) and nutes (5.4 ph/1200ppm). Connect air pump and there you have it..reservoir/buckey holds ~4 gallons of fluid.top off with water first day and nutes of same ph/ppm as above the next day. Clone Strain is Platinum GS Cookies. I'll add up some pictures of construction by next week....I'm making some more for a controller based system so I'll photo for any interested.
 

supermanlives

Active member
Veteran
dwc and waterfarms are totally different . I have built and done both.. I did recirculating dwc before it was cool lol.. I modded waterfarms too and made my own .. airlifts are simple.. but them trays are real shallow . ebb and flow/drip would prob be better.. put external res and use both trays lol
 
Last edited:

JamesFrancohaha

New member
I would recomend DIY version of 'aquafarm' or what ever you call this, but it works very very well. Had some massive plants growing in this system years ago and it is very simple and if there is something you don't like, it is easy to modify as well. One the top box you should drill holes as many you can for making good drainage for the water to fall to the bottom box, but, personal preference would be skipping those holes on bottom of the upper container and replacing them with maybe 50mm pvc pipes and make them go to bottom of the lower container and drill holes around the pvc pipe, just to reduce the noise that all the dripping water makes. Good thing is that you need only run it maybe once in every one or two hours for 15min or so.

This is all the gear you need producing big buds!


This is how it looks when built up


Parts for the dripper and holes drilled out for the dripper.


Boxes on top, could be any box really, these are maybe 100l.


And waterpump(not sure how good pump, but you won't need big for using dripper)


I am not sure why that pump looks to be in funny way there, but you get the idea for sure. This is my friends system, but i had so similar, same parts, but different color. And there is also overflow pipe(50mm diameter) connecting that upper box to the bottom box, incase something happens, but if you have good drainage it should never happen.

I have tested DWC's, NFT, Soil and this dripper system and this is by far the best and most vigorous growth I never seen in my life. Had some nice Papaya from nirvana growing in it, 400w and got 1g/w from two plants in this system. 3 week veg and heavy pruning, flowering and


So happy growing

Ps. This is easy and cheap system to grow and build! I like when things are simple and results are magnificent!
 

Attachments

  • Kasaus.jpg
    Kasaus.jpg
    34.6 KB · Views: 9
  • Kastelija.jpg
    Kastelija.jpg
    23.7 KB · Views: 13
  • Kastelija2.jpg
    Kastelija2.jpg
    22.7 KB · Views: 10
  • Laatikot.jpg
    Laatikot.jpg
    18.3 KB · Views: 12
  • Pumppulaatikossa.jpg
    Pumppulaatikossa.jpg
    15 KB · Views: 13
  • Tarvikkeet.jpg
    Tarvikkeet.jpg
    30.8 KB · Views: 11

Latest posts

Latest posts

Top