
-
Happy Birthday ICMag! Been 20 years since Gypsy Nirvana created the forum! We are celebrating with a 4/20 Giveaway and by launching a new Patreon tier called "420club". You can read more here.
-
Important notice: ICMag's T.O.U. has been updated. Please review it here. For your convenience, it is also available in the main forum menu, under 'Quick Links"!
You are using an out of date browser. It may not display this or other websites correctly.
You should upgrade or use an alternative browser.
You should upgrade or use an alternative browser.
MrAwder's Basement Grow 3.0
- Thread starter MrAwder
- Start date
Synthetic ferts kill the beneficial microbes...
They hinder the growth of certain microbes if over applied, but by no means do they kill them all if used properly. I assure you my chow mix is teaming with all kinds of microbes in spite of me using synthetic nutes. The real key to achieve what I believe you're looking for in organics, is to learn to build/sustain the complete soil food web
 . Once this is well established all kinds of good things happen
 ")
I didn't say that they would kill them all dead... but you're messing with the Nitrogen cycle, which ultimately effects the microbes. N is free from the air when you have everything working right.
I'm happy its not just me that nit-picks you..
I'm happy its not just me that nit-picks you..
Mostly clarifying for others that might read that. I know you'll come across the correct answers as your studies progress. Generalizations are kind of a pet peeve of mine, especially coming from somebody that knows better .and nit-picking each other just insures we're sharing our best information
.and nit-picking each other just insures we're sharing our best information Yes there is lots of benefits to running semi-organic. The beneficials just don't thrive like they would in a completely organic grow.
I see someone has found the neg rep button for me again... Lol
I see someone has found the neg rep button for me again... Lol
Purple turtle
Member
They hinder the growth of certain microbes if over applied, but by no means do they kill them all if used properly. I assure you my chow mix is teaming with all kinds of microbes in spite of me using synthetic nutes. The real key to achieve what I believe you're looking for in organics, is to learn to build/sustain the complete soil food web
TOTALLY AGREE im doing it right now my coco,all my water has beenies in it as well as trichoderma,not only in the water but also sprinkled on the top it stops fungas gnats and others but causing lesions(cuts)in their body,i was taught to use low ec when using 'synthetic' nutes in combination with beenies, ive never had issues ever ,just pearly whites!!the mold came from another garden and another clone!now i now prevention, prevention!!
pt
Yes there is lots of benefits to running semi-organic. The beneficials just don't thrive like they would in a completely organic grow.
I see someone has found the neg rep button for me again... Lol
Wasn't me
, or if it was I need my eyeballs checked (possible, i'm old as dirt after all  )
)Mr A - Bobble is 100% correct here.
D
DaveTheNewbie
OMG your all turning into organic hippies!
something ive wanted to do for years ....
EDIT : someone here (ozzie?) has a link in thier sig about using neem oil in the nutes regularly as a preventative ... that could be what your after?
something ive wanted to do for years ....
EDIT : someone here (ozzie?) has a link in thier sig about using neem oil in the nutes regularly as a preventative ... that could be what your after?
MrAwder
Member
I was not actually looking for anything in particular, just figured it was an appropriate time to ask for some advice since everything is still vegging out at the moment. Waiting on these clones to root so I can get a count of females.
I'm pretty excited about these bennies. Website ordering is down right now, but I will be picking up some packs as soon as I can.
I'm also nearly out of MaxiBloom... from what I hear Jack's is where it's at now? Going to check out a local place and see if they have it. Not really a hydro shop but hoping I'll get lucky. How well does Jacks dissolve? I swear that is the worst part about MB.
You can order the bennies on ebay as well, same price, just type in "for the farm"
I find jack's and mb equally difficult to dissolve. Hot water helps speed things up.
I find jack's and mb equally difficult to dissolve. Hot water helps speed things up.
MrAwder
Member
Thanks bobble. I usually do the same with the hot water. I mix in 1/4 tap with my RO so I get 4-5gal of hot from there and dissolve it all then mix with RO in the res. The jet mode on my water hose hooked up to the tap does a pretty decent job of mixing it all up.
Just ordered up a bunch of 1/4" top-hat grommets and a 295gph pump. This will be enough to get the first manifold setup. Already have tons of PVC and fittings laying around. What size drill bit is recommended for the 1/4" top-hats?
The Orca plus the 2x4's I already have on hand should be all I need to get the wall framed and chamber sealed up. Drywall can go up after since I only plan on drywalling the outside of the room for now. Electric will be done this weekend.
Still debating and changing my mind about how I want to handle DTW. It has to cross the room to the shower, preferably just along the back wall. Options that sound good right now:
- Bato buckets. 2 x 1 1/2" drain manifolds hooked up together and plumbed over to the shower drain. Drawback is investing in the buckets and always having a set limit of sites.
- DIY Dutch bucket - essentially the same thing but more like a hempy bucket plumbed together with grommets, 1/2" fittings and tubing.
- DIY drain table. None of the commercially available drain tables will fit this design. Drawback is a typical drain table would cover the bottom resevoir area which I was hoping to draw cool air up from.
- DIY-improved drain table. Build a drain table with the middle taken out. Basically like a bunch of leach trays around the edges of the chamber (but again - leach trays wont fit). This leaves the middle open to mount a honeywell fan and draw up cool air from the floor. edit: added model.

In both cases the drain table offers a significant advantage: I intend to run 2 gal smart pots with 2 basket drippers per. A table or common drain surface would allow me the flexability of filling in with 1 gal smart pots and 1 dripper per if I was doing a pheno hunt or had more clones available. This gives me the flexability to run anywhere from 4-16 plants per donut for improved dialage per-strain when monocropping. If using hempys or batos I am not totally limited, but much harder to change things like plant count on the fly.
Another idea I have been kicking around: Instead of draining from the bottom, leave a 2" resevoir in the table. Fill with perlite or clay balls and set the smart pots on top. DTW with a group hempy resevoir. Similar to what Alien Dawg is doing with his PPKs but not actually burying the pots and hempy style instead. I think bobble also had something going like this with buckets tho.
I really want to try that idea and don't really since how it could cause any problems since even if the res is empty or lacking O2, you still have a full pot of healthy roots. But all bad ideas started off as a good idea...
Just ordered up a bunch of 1/4" top-hat grommets and a 295gph pump. This will be enough to get the first manifold setup. Already have tons of PVC and fittings laying around. What size drill bit is recommended for the 1/4" top-hats?
The Orca plus the 2x4's I already have on hand should be all I need to get the wall framed and chamber sealed up. Drywall can go up after since I only plan on drywalling the outside of the room for now. Electric will be done this weekend.
Still debating and changing my mind about how I want to handle DTW. It has to cross the room to the shower, preferably just along the back wall. Options that sound good right now:
- Bato buckets. 2 x 1 1/2" drain manifolds hooked up together and plumbed over to the shower drain. Drawback is investing in the buckets and always having a set limit of sites.
- DIY Dutch bucket - essentially the same thing but more like a hempy bucket plumbed together with grommets, 1/2" fittings and tubing.
- DIY drain table. None of the commercially available drain tables will fit this design. Drawback is a typical drain table would cover the bottom resevoir area which I was hoping to draw cool air up from.
- DIY-improved drain table. Build a drain table with the middle taken out. Basically like a bunch of leach trays around the edges of the chamber (but again - leach trays wont fit). This leaves the middle open to mount a honeywell fan and draw up cool air from the floor. edit: added model.
In both cases the drain table offers a significant advantage: I intend to run 2 gal smart pots with 2 basket drippers per. A table or common drain surface would allow me the flexability of filling in with 1 gal smart pots and 1 dripper per if I was doing a pheno hunt or had more clones available. This gives me the flexability to run anywhere from 4-16 plants per donut for improved dialage per-strain when monocropping. If using hempys or batos I am not totally limited, but much harder to change things like plant count on the fly.
Another idea I have been kicking around: Instead of draining from the bottom, leave a 2" resevoir in the table. Fill with perlite or clay balls and set the smart pots on top. DTW with a group hempy resevoir. Similar to what Alien Dawg is doing with his PPKs but not actually burying the pots and hempy style instead. I think bobble also had something going like this with buckets tho.
I really want to try that idea and don't really since how it could cause any problems since even if the res is empty or lacking O2, you still have a full pot of healthy roots. But all bad ideas started off as a good idea...
Purple turtle
Member
Thanks bobble. I usually do the same with the hot water. I mix in 1/4 tap with my RO so I get 4-5gal of hot from there and dissolve it all then mix with RO in the res. The jet mode on my water hose hooked up to the tap does a pretty decent job of mixing it all up.
Just ordered up a bunch of 1/4" top-hat grommets and a 295gph pump. This will be enough to get the first manifold setup. Already have tons of PVC and fittings laying around. What size drill bit is recommended for the 1/4" top-hats?
The Orca plus the 2x4's I already have on hand should be all I need to get the wall framed and chamber sealed up. Drywall can go up after since I only plan on drywalling the outside of the room for now. Electric will be done this weekend.
Still debating and changing my mind about how I want to handle DTW. It has to cross the room to the shower, preferably just along the back wall. Options that sound good right now:
- Bato buckets. 2 x 1 1/2" drain manifolds hooked up together and plumbed over to the shower drain. Drawback is investing in the buckets and always having a set limit of sites.
- DIY Dutch bucket - essentially the same thing but more like a hempy bucket plumbed together with grommets, 1/2" fittings and tubing.
- DIY drain table. None of the commercially available drain tables will fit this design. Drawback is a typical drain table would cover the bottom resevoir area which I was hoping to draw cool air up from.
- DIY-improved drain table. Build a drain table with the middle taken out. Basically like a bunch of leach trays around the edges of the chamber (but again - leach trays wont fit). This leaves the middle open to mount a honeywell fan and draw up cool air from the floor. edit: added model.
[URL=https://www.icmag.com/ic/picture.php?albumid=46962&pictureid=1109628]View Image[/url]
In both cases the drain table offers a significant advantage: I intend to run 2 gal smart pots with 2 basket drippers per. A table or common drain surface would allow me the flexability of filling in with 1 gal smart pots and 1 dripper per if I was doing a pheno hunt or had more clones available. This gives me the flexability to run anywhere from 4-16 plants per donut for improved dialage per-strain when monocropping. If using hempys or batos I am not totally limited, but much harder to change things like plant count on the fly.
Another idea I have been kicking around: Instead of draining from the bottom, leave a 2" resevoir in the table. Fill with perlite or clay balls and set the smart pots on top. DTW with a group hempy resevoir. Similar to what Alien Dawg is doing with his PPKs but not actually burying the pots and hempy style instead. I think bobble also had something going like this with buckets tho.
I really want to try that idea and don't really since how it could cause any problems since even if the res is empty or lacking O2, you still have a full pot of healthy roots. But all bad ideas started off as a good idea...
did you come up with that while toking a FAT ONE! ,so simple yet does its job!,why didnt i think if that when i was battling couple months back with my donuts and run-off.....THANKS MR A!
PT
MrAwder
Member
So while the "improved" drain table looks cool... it will probably cost like $80 to build. I found botanicare makes Outer Diameter tables at 3x3. Can get them for like $50 but shipping is prohibitive. I might have to make a drive if any shops close have them. Then I would run a 6" intake duct in each corner and just set the fans on a paving stone in the middle of each tray.
Today I got the sink shortened up to make room for the wall. Electric tomorrow. This was today's other project:
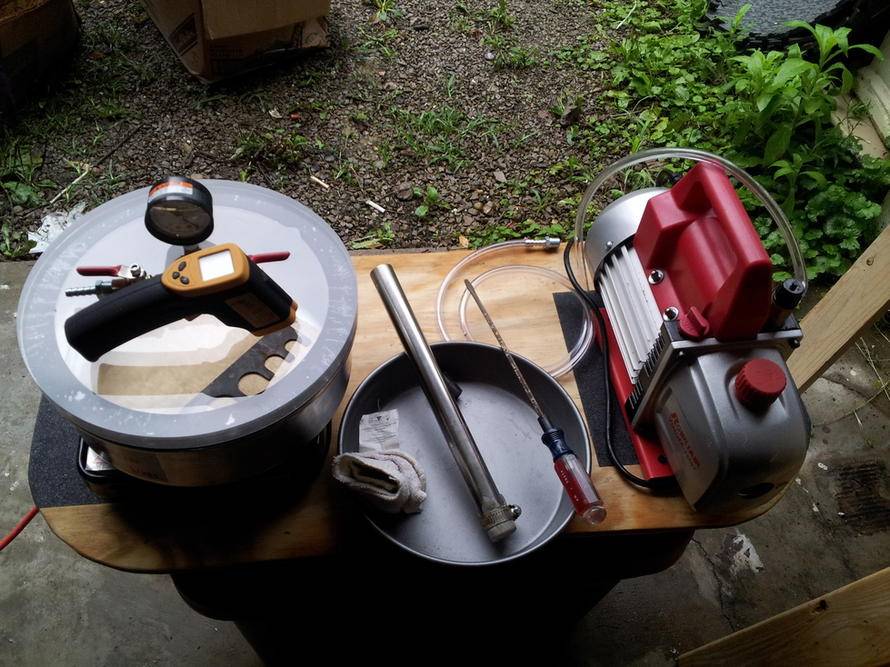
Some old slightly nasty trim

Checking the temp

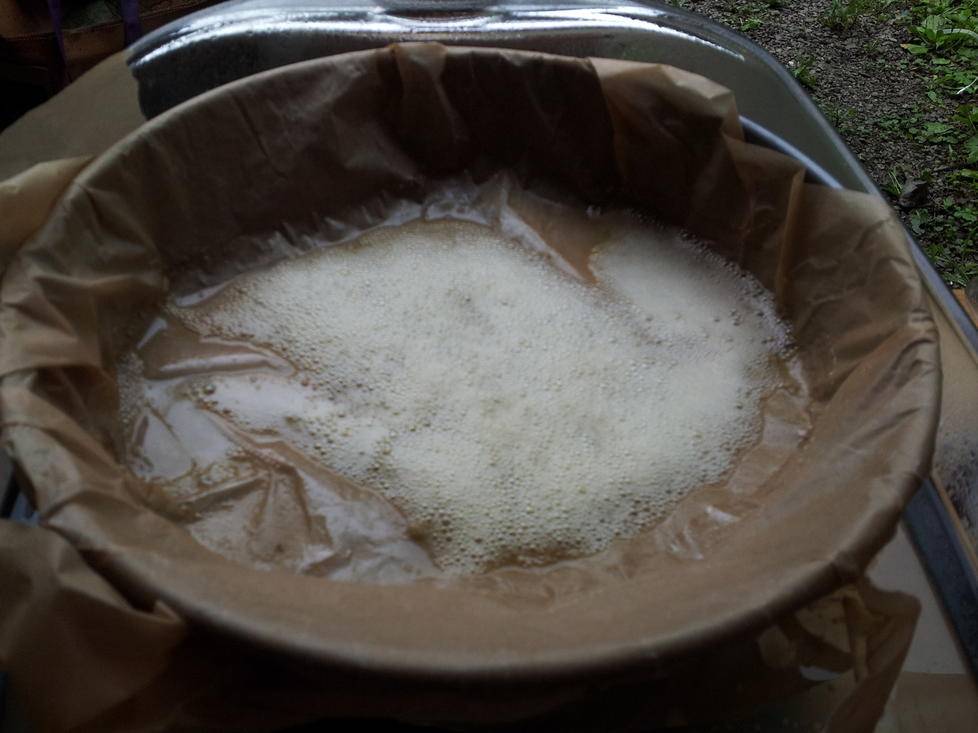
Hot water bath
Under vac, second time
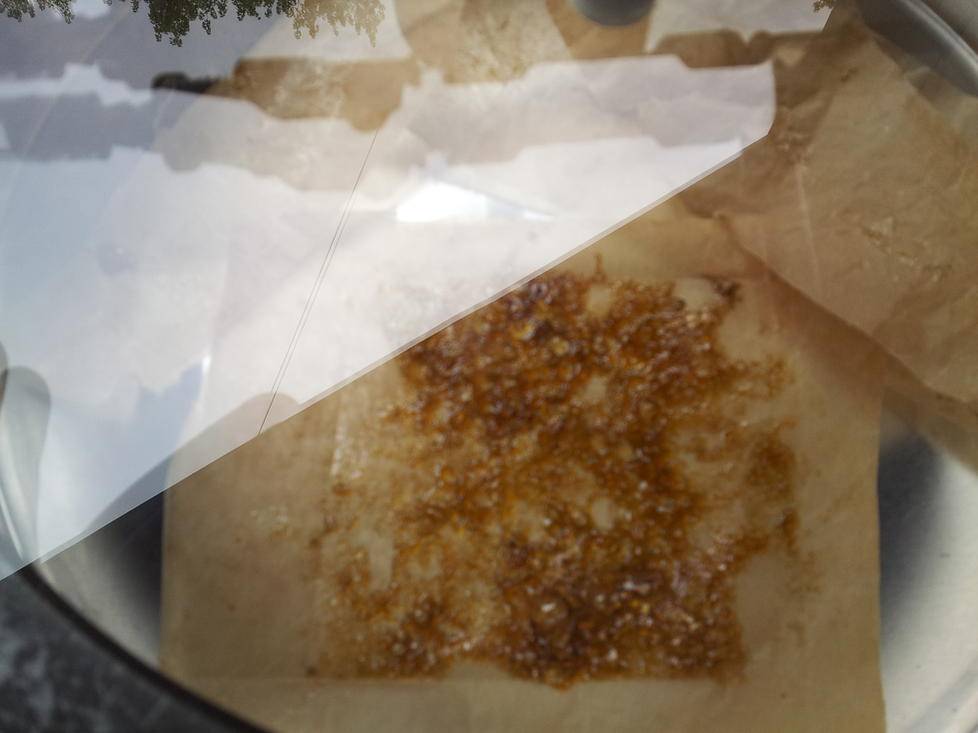
Probably 2-3 grams of oil here. I do small runs because it lasts me a long time. I do 3-4 vacs @ 120 degrees, and usually hold each vac 15-20 minutes. The last one I will turn off the hotplate and let everything cool down under vac for a while. I'll try to get a finished product pic up later. Running like this typically gets me a nice sap/shatter. A little bendy but shears apart if you twist or yank on it.
Today I got the sink shortened up to make room for the wall. Electric tomorrow. This was today's other project:
Some old slightly nasty trim
Checking the temp
Hot water bath
Under vac, second time
Probably 2-3 grams of oil here. I do small runs because it lasts me a long time. I do 3-4 vacs @ 120 degrees, and usually hold each vac 15-20 minutes. The last one I will turn off the hotplate and let everything cool down under vac for a while. I'll try to get a finished product pic up later. Running like this typically gets me a nice sap/shatter. A little bendy but shears apart if you twist or yank on it.
MrAwder
Member
Long day but in pictures it sure doesn't look like a whole lot.
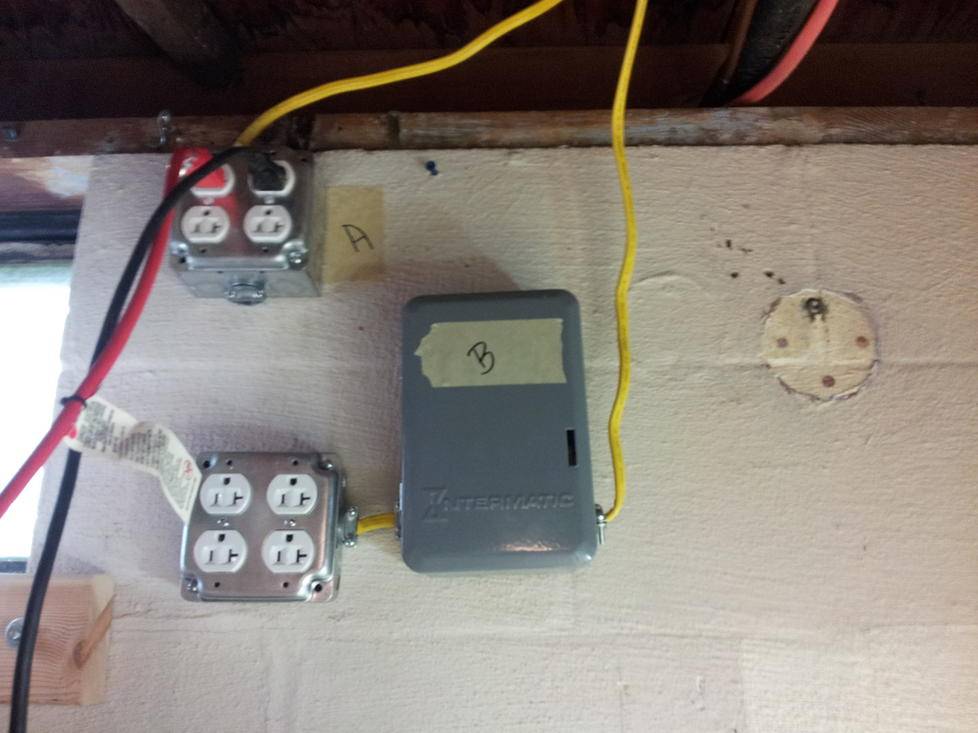
First I worked on electric. I thought there was an existing circuit I could just rewire with new 12/2 romex. I realized it was not worth it because it would required an extra 25' of romex compared to just putting in a new dedicated 20A breaker. Basically the same cost and now I have 2 dedicated 20A circuits here.
Old wiring. You can see the romex for the new run hanging.

New setup. Left original box in place - 4 outlets = Circuit A. Moved the timer to the new circuit and hooked it up to 4 outlets = Circuit B.
Finished shortening up the sink and cleaning up. Swept, shop vacced, mopped with bleach:
Hauled in some cinder blocks and the new 32 gal RO res:

Now time for a shower and a dab...
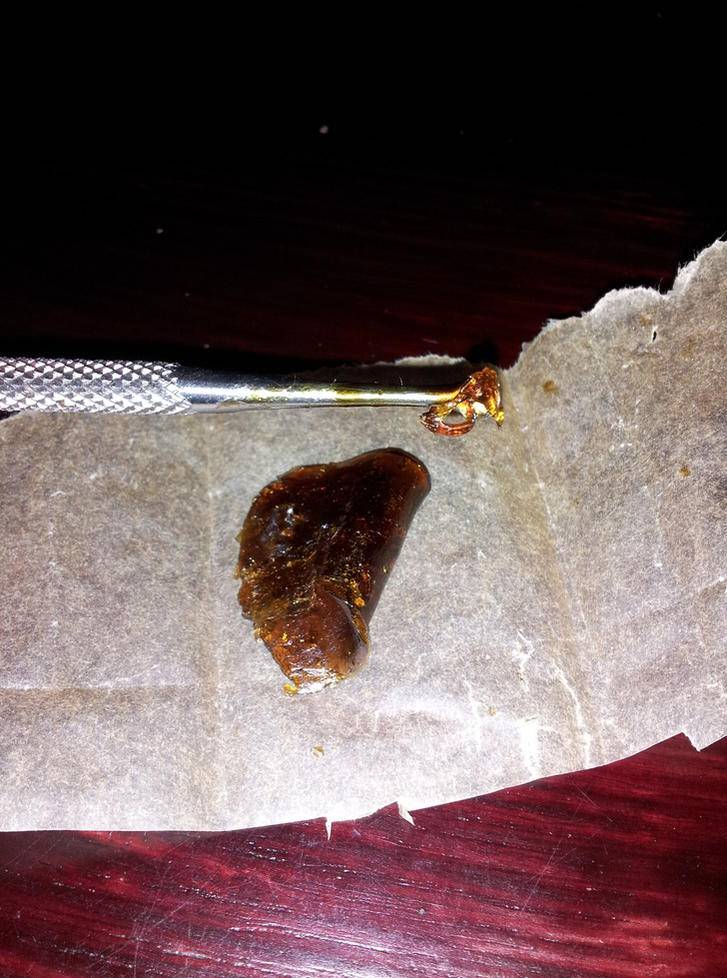
Looks a little dark because I fold it together a few times. My friends say that not only is it potent, but it has a tendency to make people look very stoned - regardless of tolerance.
Next steps:
- clean RO filter, mount, plumb to res
- wire shelves in veg
- remount veg lights
Will get some shots of veg up tonight or tomorrow once I get it re-arranged.
First I worked on electric. I thought there was an existing circuit I could just rewire with new 12/2 romex. I realized it was not worth it because it would required an extra 25' of romex compared to just putting in a new dedicated 20A breaker. Basically the same cost and now I have 2 dedicated 20A circuits here.
Old wiring. You can see the romex for the new run hanging.
New setup. Left original box in place - 4 outlets = Circuit A. Moved the timer to the new circuit and hooked it up to 4 outlets = Circuit B.
Finished shortening up the sink and cleaning up. Swept, shop vacced, mopped with bleach:
Hauled in some cinder blocks and the new 32 gal RO res:
Now time for a shower and a dab...
Looks a little dark because I fold it together a few times. My friends say that not only is it potent, but it has a tendency to make people look very stoned - regardless of tolerance.
Next steps:
- clean RO filter, mount, plumb to res
- wire shelves in veg
- remount veg lights
Will get some shots of veg up tonight or tomorrow once I get it re-arranged.
Everything looks nice man. Cool setup you got with the bathroom in the basement... Always thought bathrooms were perfect for growing... and everyone already knows basements are the best...
Glad to see the vert heads finally understanding how awesome organics is... I will always run organic. Until synthetic nutes come out that are 100% ph-stable and impossible to overfeed with, I'll stick with organics...
To each their own though. Do what works best for you.
Glad to see the vert heads finally understanding how awesome organics is... I will always run organic. Until synthetic nutes come out that are 100% ph-stable and impossible to overfeed with, I'll stick with organics...
To each their own though. Do what works best for you.
MrAwder
Member
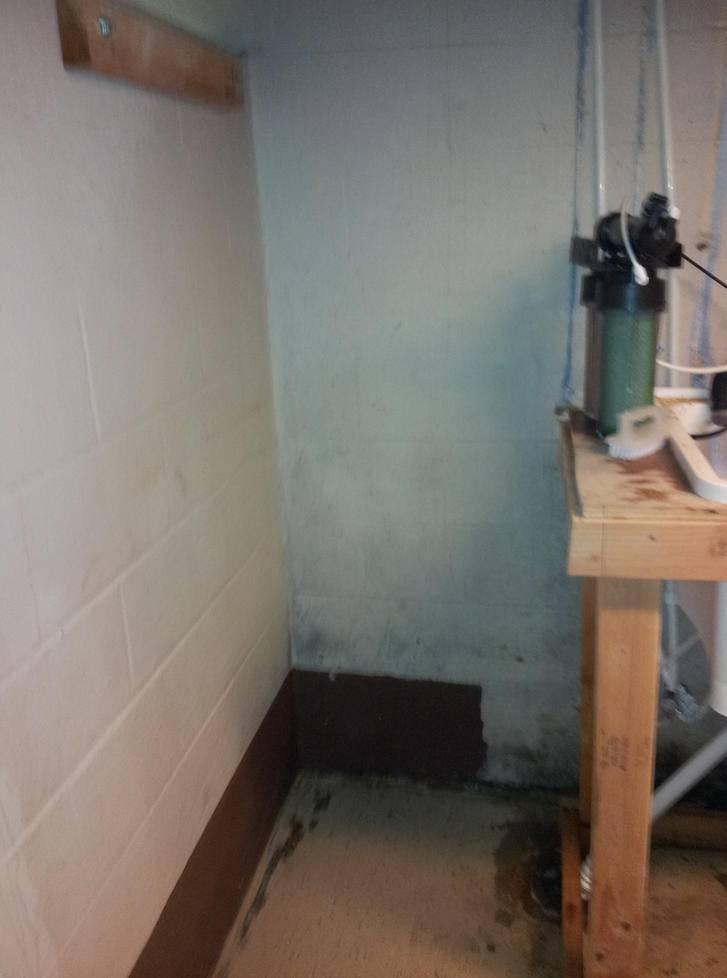
Hey soursmoker thanks for taking a look. Basements have their advantages and disadvantages. Stay nice and cool in the summer but humidity can be an issue. Also dealing with a lot of rain here lately and some flooding problems. Got it under control now though.
So I lost some pics I took tonight. Only have 2 but not a lot going on. First up, I got a unibit. Where has this been all my life. Can't believe I waited so long to get one.
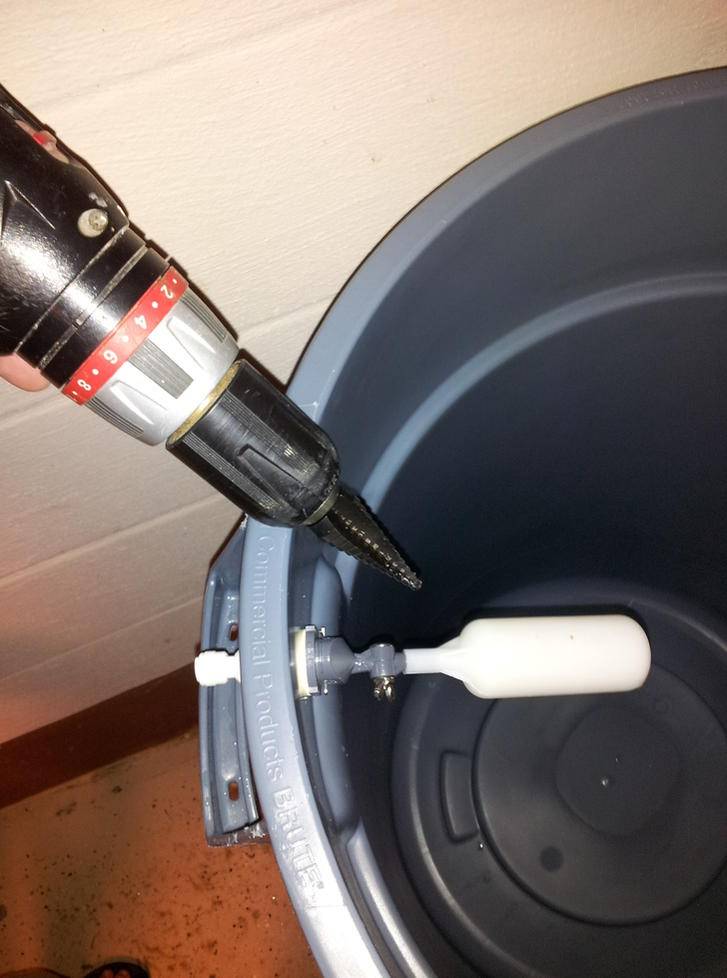
So the bulkhead and float were installed on the RO res. I also remounted and cleaned the RO filter (missing pic). Bad news is I did not have enough tubing to make it from the filter to the float valve. Also it looks like the bulkhead may be leaking. Thinking of replacing it with another I have but need to use up the 10gal of RO in there.
Next, I tore up the shelf that used to be the veg tent. I planned on making 2 PL-L panels, but while taking apart the shelves I broke some of the 2G11 sockets. Decided to just run the single ballast @ 220W plus a little 26W CFL off the side for clones. Just pushes up the timeline on getting the 400 MH in.
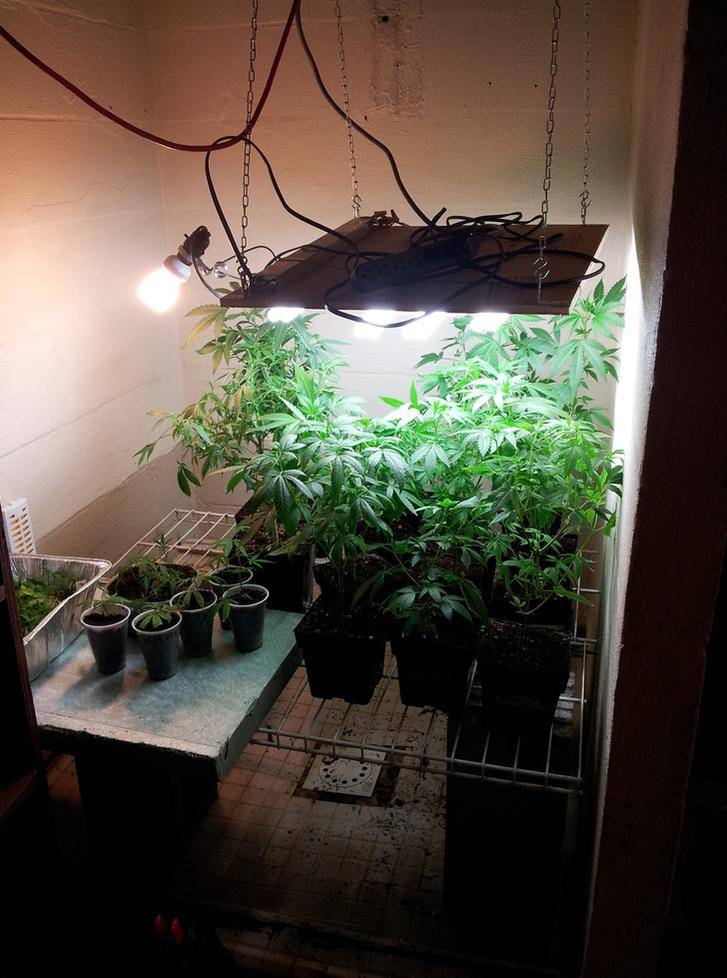
Also used some cinder blocks and wire shelving to get everything up off the ground. Not the final layout because it is hard to work in. I'll see what works best when I get the new light in.
So everything in veg is looking good. Clones are showing root bumps. Probably almost time for a haircut and take another round of clones soon.
Next up:
- run ventilation outside
- framing
- orca
So I lost some pics I took tonight. Only have 2 but not a lot going on. First up, I got a unibit. Where has this been all my life. Can't believe I waited so long to get one.
So the bulkhead and float were installed on the RO res. I also remounted and cleaned the RO filter (missing pic). Bad news is I did not have enough tubing to make it from the filter to the float valve. Also it looks like the bulkhead may be leaking. Thinking of replacing it with another I have but need to use up the 10gal of RO in there.
Next, I tore up the shelf that used to be the veg tent. I planned on making 2 PL-L panels, but while taking apart the shelves I broke some of the 2G11 sockets. Decided to just run the single ballast @ 220W plus a little 26W CFL off the side for clones. Just pushes up the timeline on getting the 400 MH in.
Also used some cinder blocks and wire shelving to get everything up off the ground. Not the final layout because it is hard to work in. I'll see what works best when I get the new light in.
So everything in veg is looking good. Clones are showing root bumps. Probably almost time for a haircut and take another round of clones soon.
Next up:
- run ventilation outside
- framing
- orca
MrAwder
Member
for the ingenuity MrA. Sometimes ya have to work with what's at hand
Thanks Mister D. I do love it when a hair-brained idea comes together and costs nothing to boot. One of the advantages of medicating while you work


