
T
trem0lo
Hey GP7, thanks for stopping by, your links are great!! 
Happy Friday everyone I finally got some free time to work on my cab and build the scrubber I had in mind, as things are starting to smell a little.
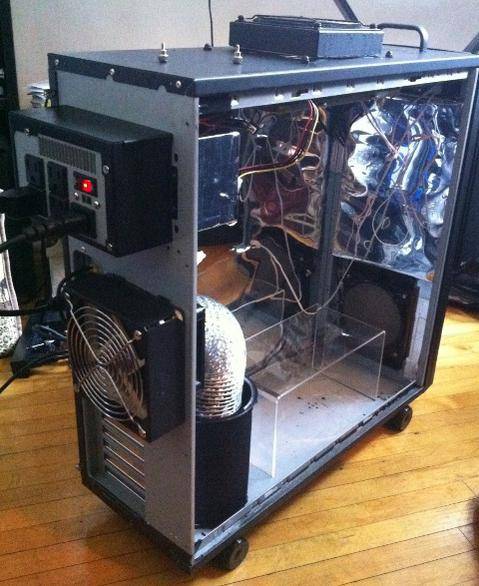
Here is the new improved PC case. I was getting tired of sliding the case around the floor (and scratching it in the process) so I added some Lian-Li case wheels and a handle. They have a lock so my garden won't roll away on me I was not content with zipties holding my expensive lamp up, so I bolted it to the top of the case and added a filtered fan as an intake to dump fresh, cool air on it (very low CFM of course). This improves temps and gives me more vertical space.
Previously I had disabled the PSU fan and kept it as a passive intake. Still, it was getting pretty toasty so I broke open the PSU, soldered together the power and ground leads of the motherboard connector (so it always turns on) and removed most of the excess wiring save for a 12V molex lead. I plugged the fan back in and covered all vents except the one on the side, which now acts as a fresh air intake and doesn't pull from the grow room. I had to saw off part of the PSU extender (another Lian-Li case mod, who knew??) off but it turned out well and it stays nice and cool now.
I was tired of plugging/unplugging each array to turn it on and off, so I wired a couple switches up, cut a few holes in the 3.5" drive bay cover and now can turn them on and off without opening the case.
My wife calls it The Robot. I tend to agree.


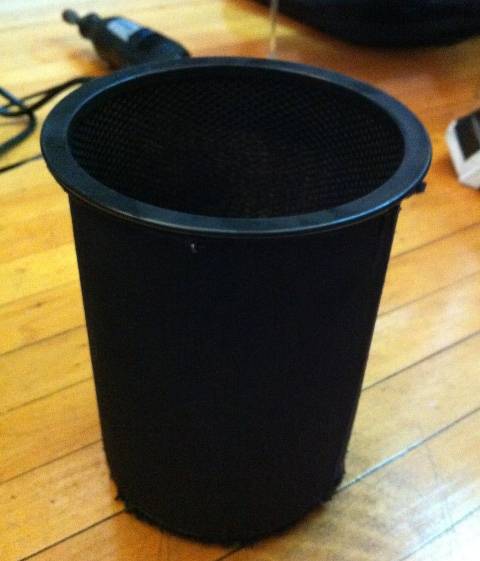
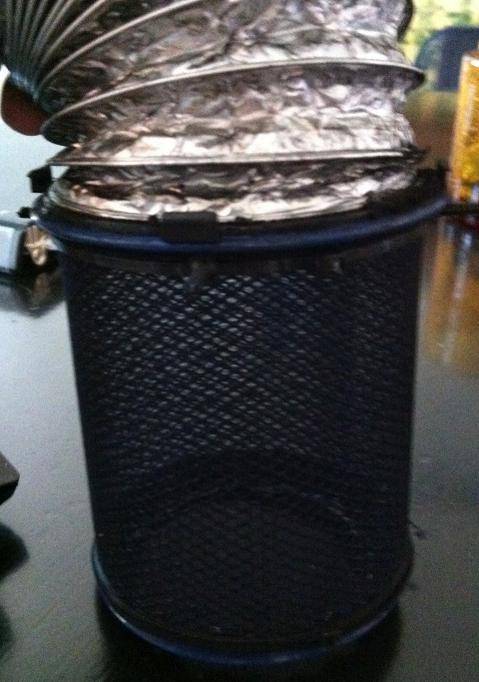
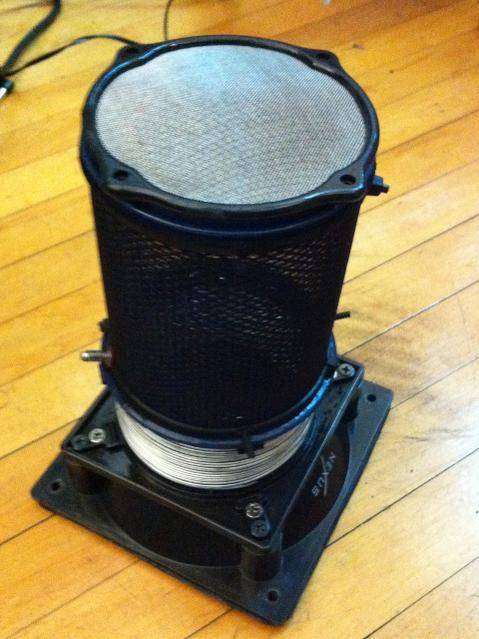
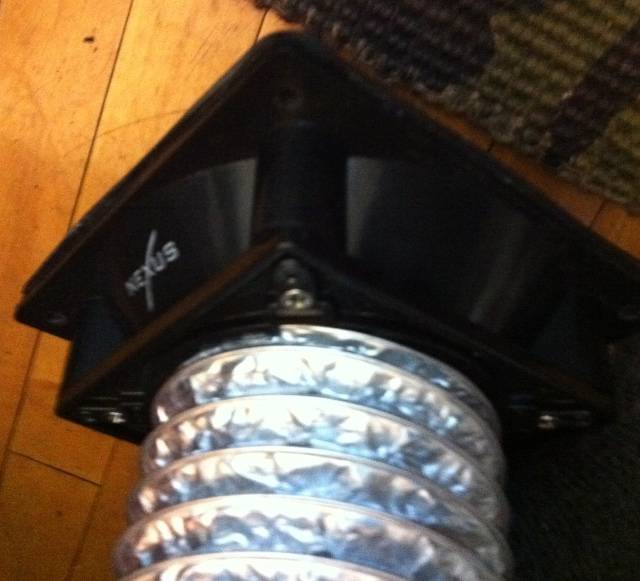
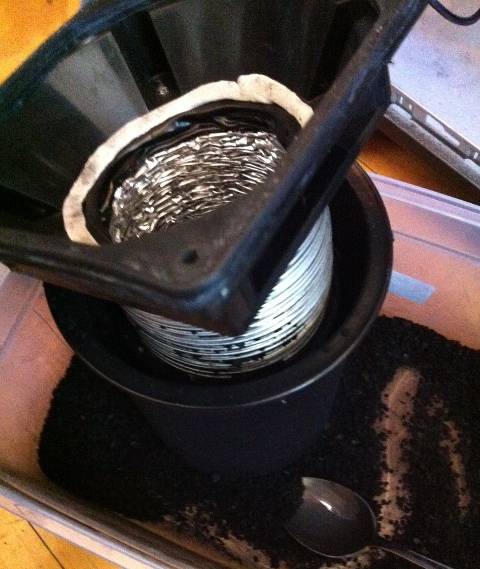
Here is my scrubber. I based it on the CAN designs and other great DIY tutorials. It's basically a 120mm to 80mm fan reducer, some 120mm rubber vibration pads (for an airtight seal), an 80mm duct, and a couple pencil holders with nylons ziptied to them. I cut a hole in the bottom of the smaller holder and glued a mesh 80mm fan filter to it. Sticky caulk seals up all the little gaps. The Noctua fan does a good job pulling through the 20mm/.8in layer of carbon, although piggybacking two gives double the pressure for a higher airflow if needed.
One thing about LEDs is that you don't have to water nearly as much... and I found out the hard way. Unfortunately this has set my SDOGs back about a week in growth after transplanting to a bigger container. The runt I thought would never pull through but it's still hanging on... it has a wonderful earthy/spicy aroma so I hope it lives... the others are a mix between fuel and candy sweetness.
I feel a little ashamed for neglecting the babies but there is some healthy new growth so I'm optimistic.
Happy Friday everyone
I finally got some free time to work on my cab and build the scrubber I had in mind, as things are starting to smell a little. Here is the new improved PC case. I was getting tired of sliding the case around the floor (and scratching it in the process) so I added some Lian-Li case wheels and a handle. They have a lock so my garden won't roll away on me
I was not content with zipties holding my expensive lamp up, so I bolted it to the top of the case and added a filtered fan as an intake to dump fresh, cool air on it (very low CFM of course). This improves temps and gives me more vertical space. Previously I had disabled the PSU fan and kept it as a passive intake. Still, it was getting pretty toasty so I broke open the PSU, soldered together the power and ground leads of the motherboard connector (so it always turns on) and removed most of the excess wiring save for a 12V molex lead. I plugged the fan back in and covered all vents except the one on the side, which now acts as a fresh air intake and doesn't pull from the grow room. I had to saw off part of the PSU extender (another Lian-Li case mod, who knew??) off but it turned out well and it stays nice and cool now.
I was tired of plugging/unplugging each array to turn it on and off, so I wired a couple switches up, cut a few holes in the 3.5" drive bay cover and now can turn them on and off without opening the case.
My wife calls it The Robot. I tend to agree.
Here is my scrubber. I based it on the CAN designs and other great DIY tutorials. It's basically a 120mm to 80mm fan reducer, some 120mm rubber vibration pads (for an airtight seal), an 80mm duct, and a couple pencil holders with nylons ziptied to them. I cut a hole in the bottom of the smaller holder and glued a mesh 80mm fan filter to it. Sticky caulk seals up all the little gaps. The Noctua fan does a good job pulling through the 20mm/.8in layer of carbon, although piggybacking two gives double the pressure for a higher airflow if needed.
One thing about LEDs is that you don't have to water nearly as much... and I found out the hard way. Unfortunately this has set my SDOGs back about a week in growth after transplanting to a bigger container. The runt I thought would never pull through but it's still hanging on... it has a wonderful earthy/spicy aroma so I hope it lives... the others are a mix between fuel and candy sweetness.
I feel a little ashamed for neglecting the babies
but there is some healthy new growth so I'm optimistic.


