
G
Guest
____________________


ilife said:Instructions for Using Fresh Dried Cannabis Material in Ice-water extractions.
You have three options in preparing your Cannabis material for Ice-Water Extraction. Here are my instructions for using fresh dried cannabis material. These instructions are for using dried cannabis in extraction purposes only.
This process is intended for somebody with basic knowledge in Ice-water extraction.
First you want to harvest the plant at the peak time. Remember your main goal in hash making is to harvest the fruit of the cannabis plant, the Resin Glands. In these instructions the goal is to not "bruise the fruit" until the time of smoking.
With this process there is no settling time or squeezing/pressing of the wet resin to “get the water out”
"When making ice-water extractions the less time your resin is in the water the better your resin will be."
The tools I prefer to you with this system are:
1. Super quality indoor grown resin covered cannabis material.
2. 1 / 150µ silkscreen, 1 / 77µ silkscreen, and 1 / 43µ silkscreen
3. Mini-washing machine (10 to 14 liter water capacity)
4. 2 / 220µ Zipper bags with Zipcro locking strap
5. Payload Bags PRO-KIT 13 bag set
6. 3 buckets (5gal(19L) or 32gal(80L)) depending on the size of filter bags.
7. Bath tub and shower nozzle with hose attachment
8. Kitchen shami's and paper towels
9. 23µ silkscreen with custom feet attached on the corners. (To raise screen for air circulation)
10. Ice and water (RO preferred)
11. Plastic credit card style card
12. Stainless steel trays or bowls
This process with the second run included should take no more than 1.5 hours. Including setup and clean-up time. Although after 24 hours or when all tools are completely dry you will need to pack and carefully store away until your next water extraction.
Instructions:
1. Clean the plant before it has wilted of all the non-hash making leaves. (These can sometimes be used for cooking purposes.)
2. Hang plant upside down in a clean, low temperature, with air circulating environment. 5 to 10 days depending on area temperatures.
3. Trim all Hash making material off of plants over a 150µ silkscreen to catch all resin powder that is broken off in the manicuring process. Save resin powder in freezer to be cleaned up later with your 77µ and 43µ silkscreens.
4. Try and store all resin covered cannabis material on a stainless steel tray or bowl until its is time to make your ice-water extraction. (To help collect any broken resin easily)
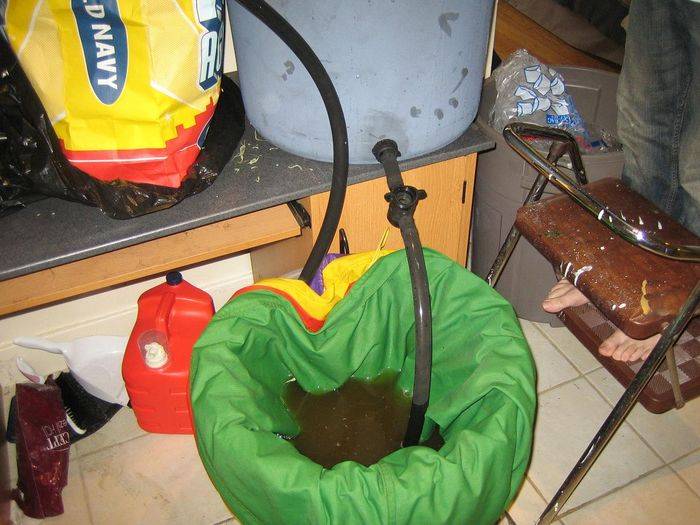
5. Place you filter bags in the bucket. Then add cold water until the bucket is a little over half full of water. Then add ice then your resin covered cannabis. (When using 220µ zipper filter bags for the inside of washing machines fill the 220µ zipper filter bag with ice then fill with resin covered cannabis and place in the washing machine with cold water and ice already in it)
6. If you have outdoor, dirty or small pieces of cannabis material, you can double the top screens for extra protection from contamination. Example-220um,190um,190um,160um,160um,120um......
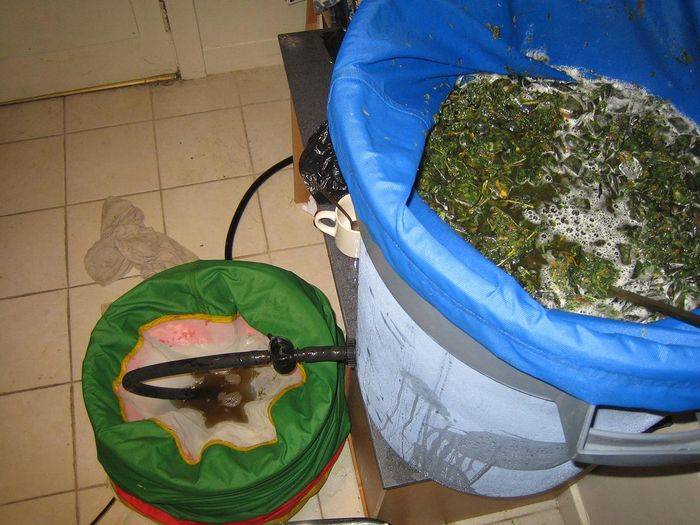
7. Agitate for 6 minutes for a nice personal quality with flavor!!.(If using kitchen mixer agitate on no more than medium speed.)
8. Filter resin water through filter bags.
9. When using a mini-washer drain the resin water into the filter bags, but at the same time grab all the bags together and pull up softly bouncing them up and down at the same time the water is draining. By the time the machine is finished draining, your bags will also be drained. (Less time resin is sitting in the water the better the quality) (Rinse machine with cold clean water to retrieve any resin that is left in the machine)
Note: total time your resin is in the water using the mini-washer on the 6-minute run is around 10-minutes and for the 30-minute run about 35-minutes.
10. Now take your complete stack of drained bags and place them in the empty bucket.
11. Before taking the bags out from each other rinse the bag with water, because wet resin will stick to the bottom of the top bag from sitting on top of the wet resin in the bag below. (If you live where you have water with a lot of calcium you should think about using RO water.)
12. Rinse every filter bag screen individually with clean water.
13. When rinsing screens individually I prefer to do this in another empty bucket with one 160µ and one 25µ filter bag screen in the empty bucket. (Work bucket) I do this because you will force some resin through the screen when rinsing, but do not worry because it will be caught in the 25µ filter bag.
14. After rinsing each filter bag individually let the water drain out until you have nothing more than a few drops coming from the pile of resin in the bag. (Do not squeeze/press the resin; trying to get the water out, this will only bruise the resin) Do not “bruise the fruit”
15. Place the filter bag with the resin in it on a shami or stack of paper towels. To absorb all the loose water. Pick filter bag up and move to a dry spot on the shami.
16. Use a plastic credit style card to collect (harvest) the resin from the filter bag.
17. Place the wet resin on a 23µ silkscreen with little legs placed on the top four corners so you can flip it over and use the inside to dry you wet resin on.
18. Take the empty filter bag that you just harvested from and rinse all the resin caught in the screen into the "work bucket" the bucket with the 160µ and 25µ filter bags. Then hang filter bag up to dry.
19. Do this for the 120µ, 73µ, 45µ, 25µ and you will have a nice mixed pile of resin in the end. You can also filter all the resin water that was filtered once a second time through the "work bucket" the 160µ and the 25µ filter bag screens to catch any resin that was forced through the filter bag screen. Doing this step will make a higher percentage of quality resin.
20. The 160µ bag makes excellent food grade resin.
21. Go back to the 23µ drying silkscreen with all your wet resin qualities on it. Take the plastic card and break up the wet resin so it can dry evenly.
22. Take a couple of paper towels and fold them up in to a square. Then take the folded paper towels and gently press up under each pile of wet resin. From underneath the 23µ silkscreen absorbing any more loose water. Do this a few more times along with breaking up and moving around the wet resin powder until you can absorb no more loose water. (Touch paper towel if wet than do it again a little later)
23. Start second run and agitate for 30 minutes. (Follow same process.)
24. Leave your 23µ silkscreen/drying screen in a dry, dark air-circulating environment for 24 to 48 hours. If you plan on storing your resin powder then let it dry for 5 to 7 days and then place it in the freezer until wanted.
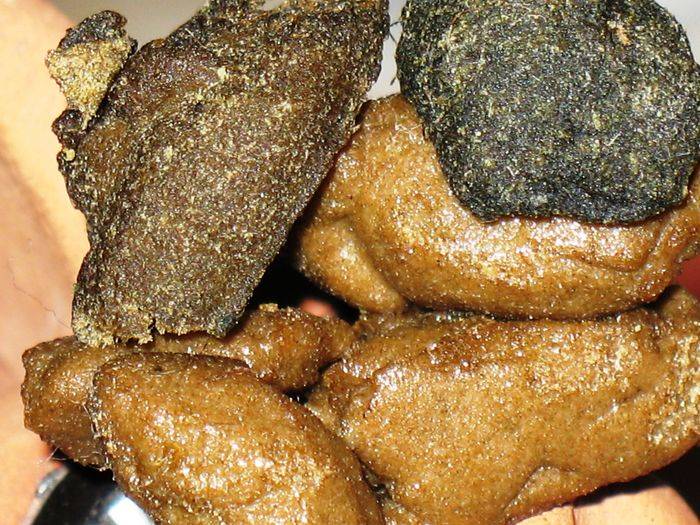
I only do one 6-minute run and one 30-minute run, in total 2 runs. With this I am satisfied with the overall quality and quantity of my Ice-water extractions. With these instructions your percentages should be around 12% to 13% on normal. Although I have made 17% and 18% often. You can process it more times, but quality and quantity will decrease greatly.
With this method and using quality resin covered cannabis you will end up with a superior resin powder that is amber in color and can be pressed between the fingers into a thin transparent sticky piece of hashish. This piece of hashish should snap when broken.
My instructions will change with time, for I am always looking and trying new ways to improve my Ice-water extraction techniques. High-Tech Hash making is a never-ending adventure. You will always be seeking the highest quality resin you can make. With every resin making experience you will keep on progressing with knowledge.
Your other options although I do not prefer these are:
2. Using really dry cannabis material: It will have more contaminants and will not be as soft and oily.
3. Using Frozen Fresh cannabis material: when using frozen fresh cannabis material you will more than likely end up with a white clump of resin that will never feel like it has dried completely. And will crumble at the touch. Never sticking together properly.
This is just my opinion from my own experiences.
Very nice detailed instructions!!
Thanks!!
HACHIS


