What's new
  • Happy Birthday ICMag! Been 20 years since Gypsy Nirvana created the forum! We are celebrating with a 4/20 Giveaway and by launching a new Patreon tier called "420club". You can read more here.
  • Important notice: ICMag's T.O.U. has been updated. Please review it here. For your convenience, it is also available in the main forum menu, under 'Quick Links"!

Browser goes Guerrilla

Browser

H8ters gonna h8
ICMag Donor
Veteran
Hello folks :tiphat:

After being able to grow rather comfortably outdoors for a couple of years, different circunstances mean that I'll need to move my OD growing to the guerrilla scene.

And so I did some extra reading, seeing the wealth of information that there's here, and got myself sorted.

I'll try to update regularly, posting what has worked for me and what hasn't. Please feel free to share some of your own experiences here.

Step 1 Plot scouting:
As soon as the weather allowed me to, I went out, scouting different places to collect more details. I was particularly looking for signs of other people having been there, the quality of the soil, access, and sunlight.

And so I found some possible places:


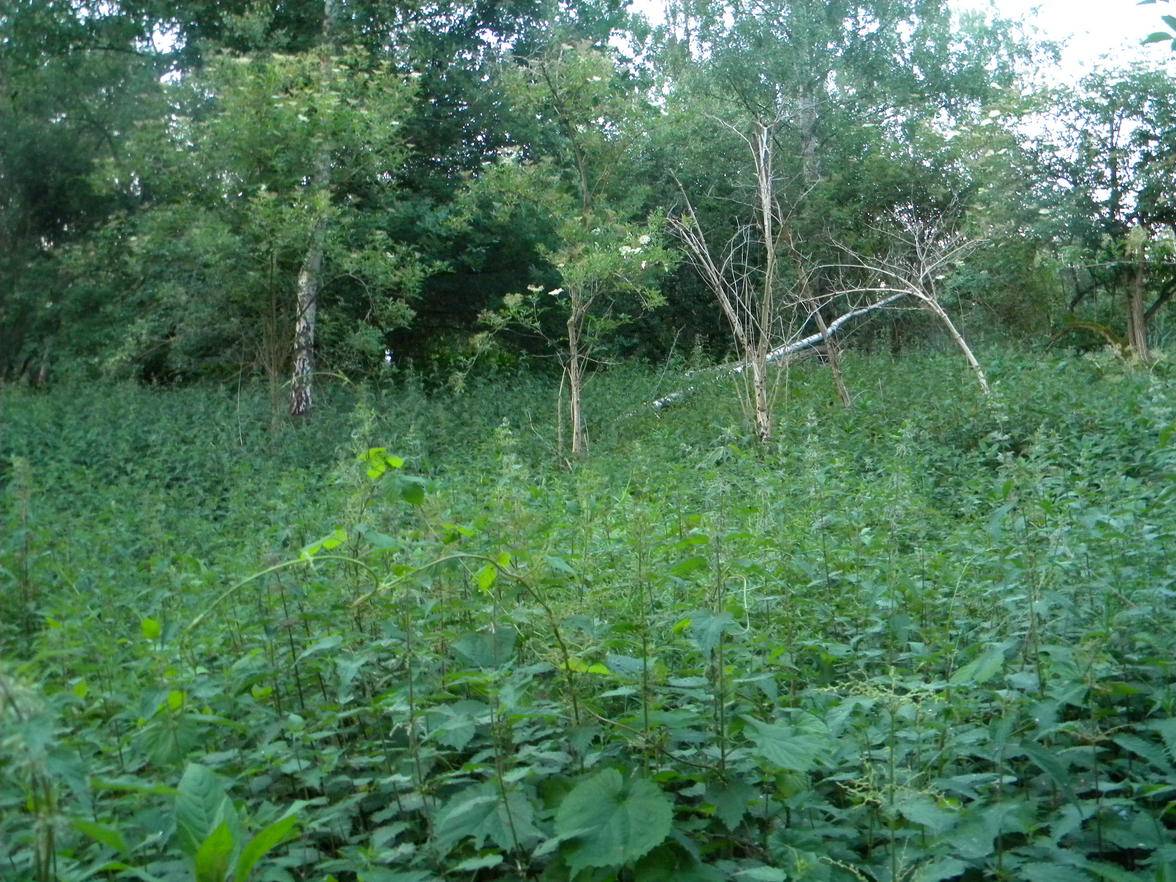
I haven't been back to all places, and constantly keep an eye open to new options. Let's remember that I'm in a fairly urban setting, despite the impressions that the pics might give.

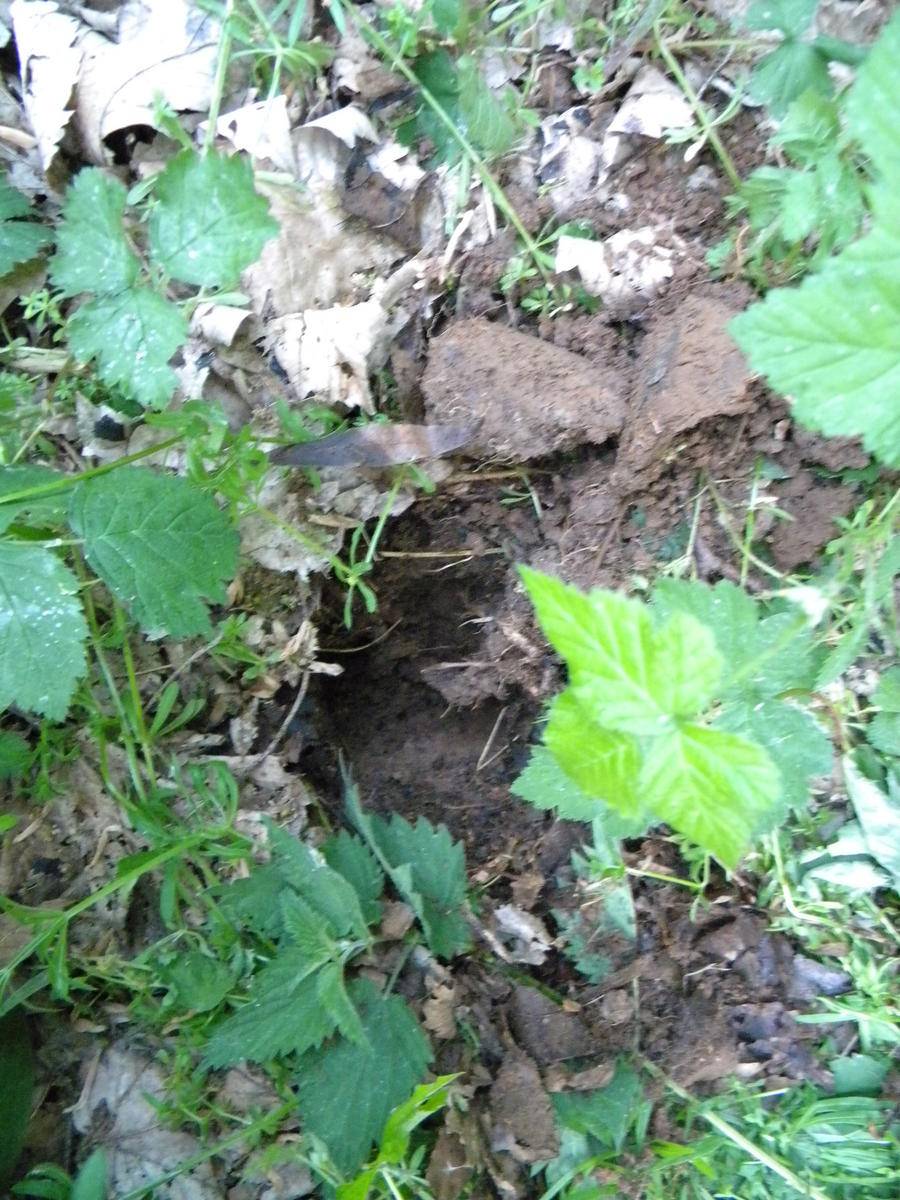
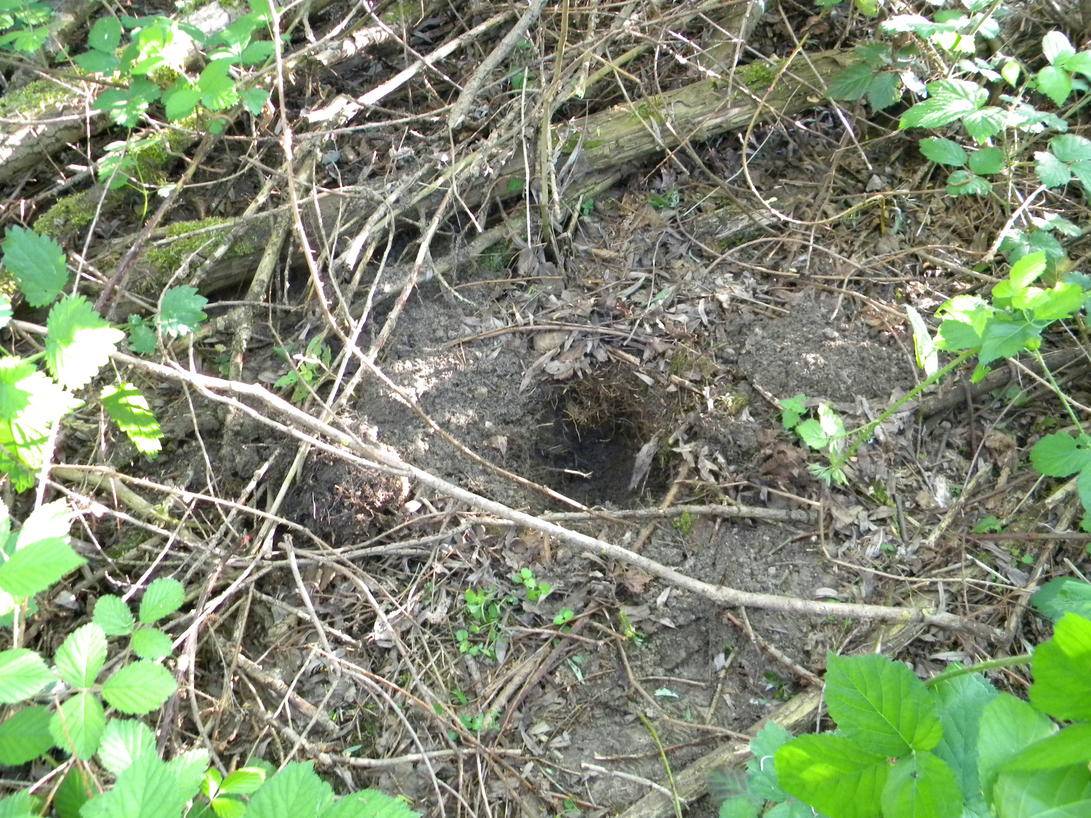
Step 2 Get there and dig those holes!

So after choosing 1 place were to focus my 1st efforts, the next step was to dig holes, and prepare the soil. I'm using orginc slow release nutrients for "aromatic" plants :laughing:, some pellets to regulate any ph issues, and water polymers (sp?), as I won't have the oportunity to water them as often as required.

These are some holes that I digged in scouting trips


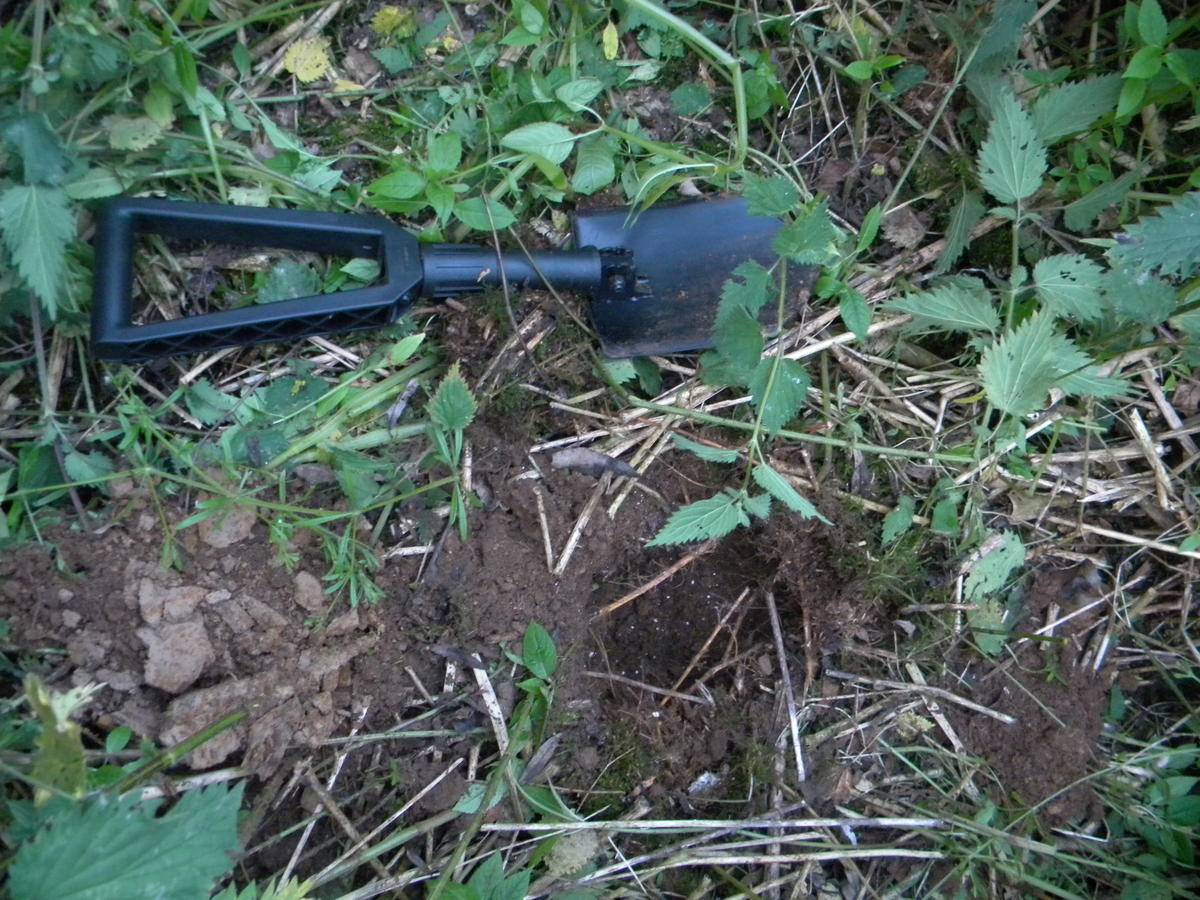
A garden shovel is small and light, but nothing like a proper showel to dig big holes in less time!


My ultimate goal is to get 300-400 grams for my personal use, that will last until the next season, when I hope to be high and optimistic, rather than disapointed and dry. I'll try trying different spots, and different techniques, and will report the progress in here.

Keep it green!


:wave: B
 

gaiusmarius

me
Veteran
those are some beautiful spot man, should be a great season for you. yeah i notice very quickly that not all folding spades are the same. first one i got bent the first day i used it. have fun digging those holes and lugging that soil, lol.

good growings :wave:
 

esbe

hybridsfromhell
Mentor
Veteran
happy to see this! i will be with you all the way and hope you will be able to harvest a lot of bud. hope you have a lot of small spots, that highers the posibility of succes
 

GAME

Member
Excellent, let us know more when you have updates. As for the folding shovels, like gaiusmarius said, some of them are real garbage. I actually snapped the haed of one in half this season after digging a couple holes. I then went with the Gerber Gorge and have had no problems whatsoever, very strong and durable, can't recommend it enough. Good luck this year !
 

THC123

Active member
Veteran
btw browser

i would topdress about 1 square meter around your hole with some lime and slow release pellets(npk) this way by the time the roots start expanding , with the rain , the surrounding soil will be full of goodness
 

Browser

H8ters gonna h8
ICMag Donor
Veteran
Hello folks :tiphat:

Thanks for tagging along with me on this ride to the unknown... :abduct:

GM I won't be bringing any soil to my spots, but I'll be working with the local soil + ammendments. I was able to scout enough places, so that I could dispose of the ones with issues such as poor soil.

Paddi and Esbe great to have you here :yes: You both are an inspiration to me and to many people in this community. If it wasn't coz of people like you show showed us that it can be done (and how), we wouldn't be doing this... So in a way, this is your fault! :D

THC Thanks for the tips! I'll certainly will be re-reading some of your threads from past years, to pick up a tip or 2. At 1st I thought that it wouldn't be possible, but now I think that it can actually work! :jump:

If you read my 1st post, you'll see that I'm using slow release nutrients, but I'm using them directly on the holes that I digged, rather than on the general area. In doing so, I hope to prevent the plants from being asfixiated (sp?) by the native flora. If I need more cover, I can always use liquid food on the areas desired.

Claude
Thanks for joining, and best karma to you and your plants too. I really enjoyed your follow up of that Vertigo, and I bet you really enjoyed it once she was ready :canabis:

Game Welcome onboard. I haven't got any experiences with shovel, but did some serious reading before getting one, and decided to drop a bit more to go for a Finish brand. So far, it excelled on it's first try, so I'm very happy with it. More to follow on that.

I'll go smoke some Maui, and I'll be right back!

B
 

Browser

H8ters gonna h8
ICMag Donor
Veteran
Step 3 Getting 'em plants there

This step is self explanatory, yet maybe a bit too simplistic. There are spots where I simply took seeds in a peat pot with germing soil, digged a hole, threw in the amendments, placed my pot, and moved on.

I'm doing this simply coz it's WAY easier than bringing in grown plants, but I have no idea of how effective this will be. Having said that, this is a spot where I don't expect (many) predators, namely snails or rabbits, which are a concern in other spots. I'm also using hardly seeds on this spot, all from HFH :D

In the spots where I'm putting plants directly, they were started earlier indoors, with the idea of being able to sex and take cuts, but let's just say that I didn't get as far as I wanted with that :)


Still, I was able to grow big enough plants, so that they could be taken outside with a well stablished root system. For most, I used 1L airpots, for others, I used the same peat pots that I used in the previous spot to plant seeds only.


Something that I try to follow very close each year, but not always succeed to, is to label plants. I think this is important, not only to know what works best, not only in the terrain, but also in the head :smoke:

And so, as I was wondering how to make sure that my plastic tags wouldn't get lost, I came with a solution:


I have this "gardening tape" and a permanent marker. I used the tape to make a label, which I placed against one of the branches. My good feeling is that the tape will allow for the branch to grow (become thicker) without asfixiating it... But I'll keep an eye on them anyways. Any experience on this respect is much welcome!

BTW, the items above are some of the things that I am using: The old labels, the garden shovel (for scouting trips), and water polymers.

Here's a close up of the labels:


There's a bit of everything in there (from Mosca, HFH, bagseed and crosses I've made) but they're not all. The labels read:
- Green Devil (Tiki) x Erdbeer hybrid
- Mazar-i-sharif (freeby from SB)
- Jamaican cross x Erdbeer hybrid
- Sonic Fly (Mosca)
- Bagseed, and
- Grapefruit x Old Time Moonshine (Mosca, tester)

So, getting everything ready to get there and plant the plants was not easy. At this spot rabbits and mice were jumping off the bushes as you walked, so the plants are going in in cages, for their own safety.

For that, chicken wire was used to make a 2.5 feet (give or take) long tube, to go around the plants. And this was something else to carry, together with some snail pellets and water.

Since the holes where already made, the planting work was relatively easy, yet not less sweaty, as the plants came out of the transport containers ( a bit grumpy) to be put in the middle of the cage/tube and then in the ground. I found this more easy than putting the plant in the ground 1st and then trying to put the tube around it. This way it's also possible to control how deep you want the cage to be, having read that rabbits and mice might try to dig under them.

While doing this, I always kept an ear open for helicopters, always making sure not to leave any equipment visible, in case of the need for a quick hide-out.


And so they went in, were given some water (little waterings at a time, so that the polymers could absorb it) and slug bait was sprinkled around the area.

I'll stop here for now, but please feel free to drop any advice, suggestion, or questions that you might have.

Till next time :wave:

B
 

THC123

Active member
Veteran
they are at a perfect size for guerillia , and good that you use chicken wire , damn deer:moon:


:tiphat:
 

ChaosCatalunya

5.2 club is now 8.1 club...
Veteran
Hey Browser

Going to enjoy watching this rumble in the jungle my friend, good luck with Mother Nature and Wild Life in general.

:)

C
 

gaiusmarius

me
Veteran
yeah that's the one thing i'm a bit worried about, i put mine out very small and weak this year. yours are looking nice and strong.
 

GAME

Member
Browser, regarding the labels. I had the same issues when I wanted to label my plants. Then again, I didn't want to leave my handwriting on a tag out there either. I simply brought a piece of paper out there with me and drew an outline of the area with the first letter of each strain marking it's approximate location. Pretty simple, yet effective.
 

Browser

H8ters gonna h8
ICMag Donor
Veteran
Hello again friends,

Chaos Thanks for tunning in :tiphat: and please do drop any advice you might have. Circunstances might not be identical, but I'm sure I can learn a thing or 2 from you :)

Gaius & THC These pics are actually from 2-3 weeks after they were planted. When they were planted, they where not taller than 1/3rd of the tube's height, so there was some promising growth already :D

While size is important, it's also a hinderance for transport, so I concentrated more on them having a good strong root system, which will allow them to best adapt into their new houses.

However, I also want them to get as tall as possible, to be able to best compete with the native flora, and therefore I didn't top them, but instead bent 'em, in the same way as in the pic with the 1l airpot from earlier.

Game Thanks for the suggestion :yes: and best lucks on your adventures too, I've been browsing :) I would agree that making a map would be the best not to leave any traces, but it was not practicable for me. I have all the time I want before I get to the g spot, but once I'm there, don't want to be there anymore than I need to.

As usual, I'll go dose myself before I continue the journal

:wave:
B
 

dimodz

Elite StrainCloneHunter
Moderator
Veteran
nice see your spot
The Jamaican cross x Strawberry hear hybrid is interesting, the hope is ready in time bro

peace & green vibes
 

Core

Quality Control Controller
ICMag Donor
Veteran
shit mate i did't know you did guerrillia style...count me in for shure....:jump:
 

Browser

H8ters gonna h8
ICMag Donor
Veteran
Hello folks,

Well, it looks like that little dosing of mine took a bit longer than expected, but it's good to see new faces poping up :thank you:

Hey Dimodz the Jamaican cross x Erdbeer hybrid should be on time. I should look at my lists to see what's excatly behind the jamaican cross, but it's basically a cross of 2 Jam hybrids that finish at about 9 weeks. I grew the mom last year and she finished at the end of Oct, despite the very early cold, giving very nice full colas... It was one of the first jars to go, I still have about 5 seeds of the original cross. The Erdbeer hybrid is even earlier, well aclimatized to cold and has very good mold resistance, aside from putting up nice purple buds :canabis:


Sup Core bro! :tiphat: Man, it's more of a circunstance than a choice, tho I do love the outdoors, so its a good excuse for me to get my arse out there... Something that I haven't done in quite some time, but I get a feeling that they're still doing ok.

HighLow
Welcome, I hope you enjoy the show :D

Step 4: Checkin on 'em plants

So, after going thru all the trouble of picking a site, preparing the soil and getting the plants out there, the next important step is to make sure that they're doing ok, in terms of setting into their new home.

This means that they're rooting well, receiving enough light, not being attacked by predators, or infected by bugs.

In this sense, I have to say that I'm very happy with the asimilation success with the plants in airpots. I lost 1 of the plants transported in a peat-pot, but it could also have been related to soil chem factors (tho all holes got the same).

But enough words, let's jump to some pics. No reference as to the strains this time, seeing that tried to use my time on site as efficiently as possible, and keep it as short as possible.

Instead, they were watered, sprayed, protected with snail bait and photographed for this thread :) What follows below is a side shot and then a top shot of the same plant, the metal cage is about knee high.

Plant 1 (side)


Top view


P2


Top


P3


Top


P4


Top


P5


Top


P6


Top


This last visit was quite a couple of weeks already, and the next one will be to spot and remove males. I'm not really looking forward to the trip there, the vegetation was chest high last time... and trips to the stop need to be kept to a minimun, to prevent making a trail for others to follow.

There is also the other spot where I just dropped some seeds, which I should be checking on too, also to spot and remove any males, yet I need to find a balance between making sure that all plants have sexed by the time I get there (so that I don't have to return a 2nd time), and making sure that no serious pollination has taken place, making all this effort a seed grow :laughing:

Until the next time :wave:

B
 

two heads

Active member
Veteran
Good luck Browser. I hope you meet your yield target; there's nothing better than a fall with full mason jars!

Seeing your thread reminded me I hadn't replied to you after my vacation. It looks like you have passed on the swamp option but let me know if you want to continue with a swamp discussion. Cages and slug bait - good proactive measures no matter where you grow!
 

Latest posts

Latest posts

Top