What's new
  • Happy Birthday ICMag! Been 20 years since Gypsy Nirvana created the forum! We are celebrating with a 4/20 Giveaway and by launching a new Patreon tier called "420club". You can read more here.
  • Important notice: ICMag's T.O.U. has been updated. Please review it here. For your convenience, it is also available in the main forum menu, under 'Quick Links"!

Cab of DOOM!

LoKey

Member
Well maybe not doom but definitely enjoyment. :tiphat:


This is my latest cab its 15"x13" by 48" tall, but 50" once the top cover and feet are factored in. The flower chamber is 28" tall from floor to roof and will have 8" tall pots, the veg chamber is only 12" but that has worked fine for me in the past. For lighting ill be running two 55w pl-ls (not full power though) and a 23w or 13w cfl for veg. Ventilation is done by a temperature controlled 120mm computer fan, we will see if its good enough, if not ill go to a higher static pressure fan. For features it has a built in scrubber, with a speaker fabric top cover, also has a hidden magnetic lock for keeping it shut, and adjustable feet for raising, lowering and leveling, depending on where its located , say hardwood to kushy carpet.

The whole cab with everything on only consumes around 115w, it fluctuates between 110-117, and when only the veg chamber lights are on it consumes around 23w, go figure its a 23w bulb. So as you can figure out the 55w pl-l's arent getting full power, but thats due to the ballast, but its fine with me, If i ran only one 55w it consumes a full 55w. My original plan was to run one 55w pl-l and overdrive it if needed (accepting the inefficiency that is caused from over-driving), but with the ballast i have, it turns out that its alot more efficent to run either just one bulb at full power or two bulbs at less power, so for the first run i decided on two bulbs.


My ideal goal is the same as my last cab, 1 gram per kWh used in total. I will have to measure it over a week to get a more accurate figure, but looks like i would need to get roughly 90g every 60days


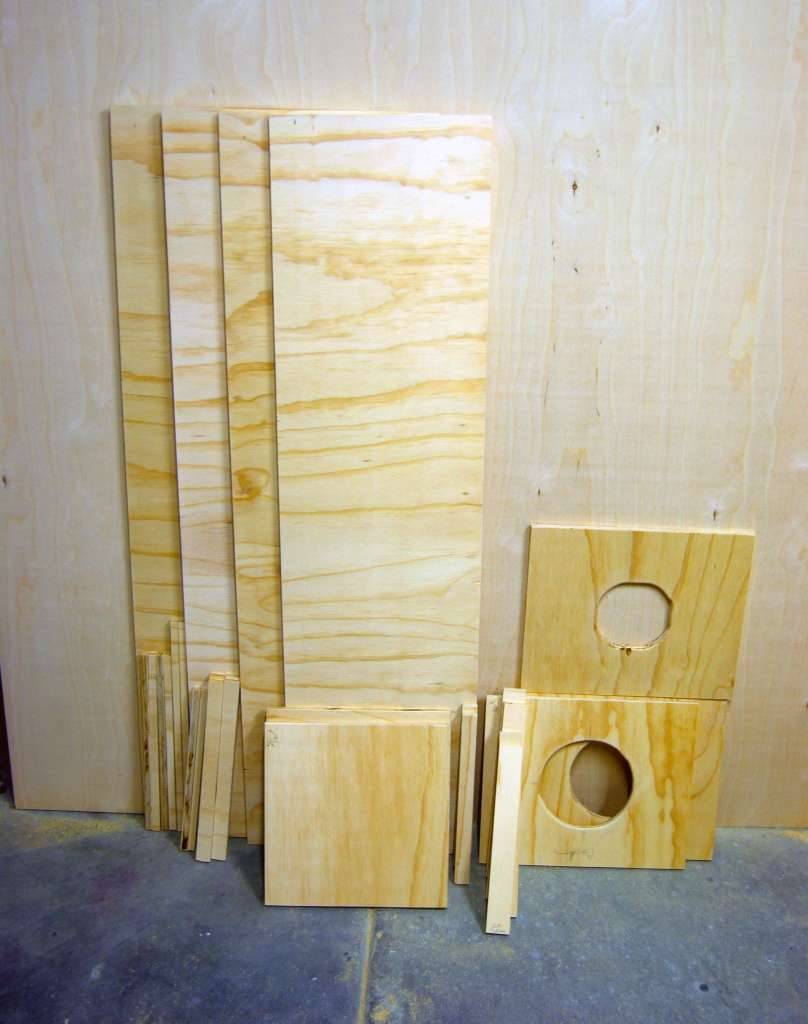
I still need to do some tweaks, and get a few things such as carbon, speaker fabric for the top cover, and some 12"x12" trays if i can find any if not ill make them.

Ill be retiring my old cab once its current run is done, and will be using this one, with the plan to make another one of these cabs.

anyways here's the pics
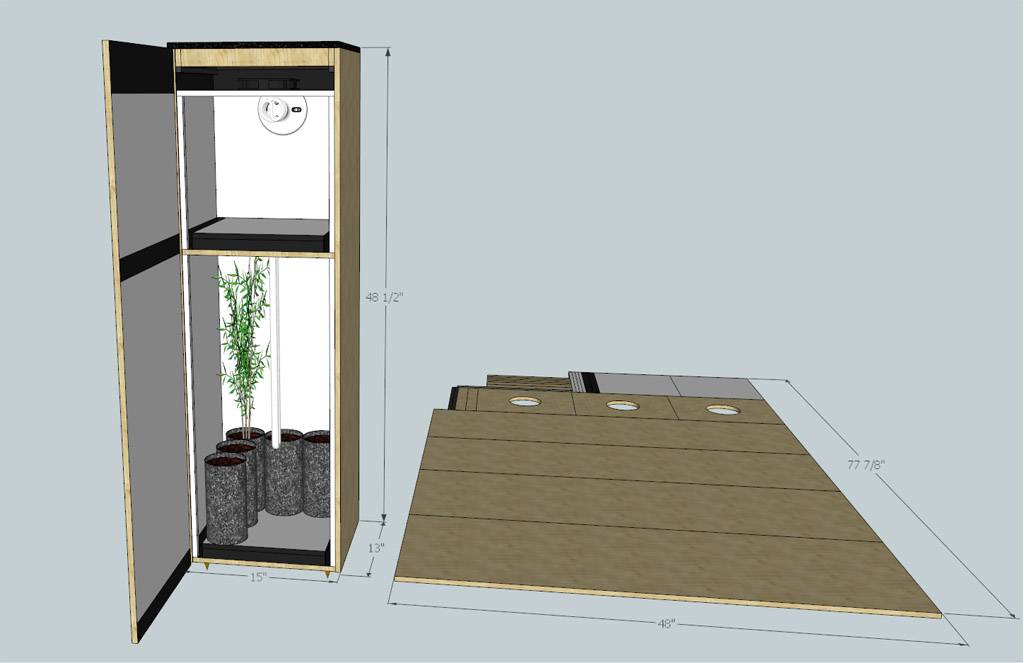
 
A

auto guerilla

well i guess it is the cab of doom if you consider the life of the plants going in it. their fate is inevidable...bit better design than your last one. this is similar to my setup very efficient. if your feeling game why dont you run both cabs.. or at least give the old cab to a friend so it gets used.
 

BC Chronic

Paging Dr.Greenthumb
Veteran
that is an awesome cab LoKey:tiphat:...really excellent work on building/planning it too:)
I will most definately be watching!!
 

LoKey

Member
It looks like the bottom trays for both the flower and veg chambers are about 1/2"-1" smaller on the sides and rest about an 1" above the intake ports.


Correct, there is a 1inch gap along each side, air flows through a center 6" hole then gets parted to go out two 12 x 1 inch gaps on the side of the next chamber, and then out the 4 3/4" fan hole at the top through a scrubber, so if you do the math its not an ideal intake of at least 2 times the size of the exhaust, but was done to make it as small as possible, so the fan will be working a bit harder than in an ideal situation.

The next cab i think im gonna see if i can increase the gap to 1.5" and a 7" hole, or similar area rectangle to get better airflow, as sometimes you just have to jump in and build something to see what needs to be refined or tweaked for the next one.

There is also a tiny bit of light reflection between the two chambers but that doesn't really matter due to similar light on/off patterns and once there are plants in veg it will block out alot of the already minimal reflected light, either way it can easily be worked around with some carbon filter material if it is actually a problem, but i dont think its needed, well at least for any strain ill be growing in it, as to me there is no point in a touchy strain, it needs to take any abuse i throw at it.


i might eventually upload a sketch-up model with cut out sheet for it and write a build guide, but that would be after i tested it and made improvements, and so long as i can upload it safely.


well i guess it is the cab of doom if you consider the life of the plants going in it. their fate is inevidable...bit better design than your last one. this is similar to my setup very efficient. if your feeling game why dont you run both cabs.. or at least give the old cab to a friend so it gets used.


For now i will be eventually running both cab, i just took a bunch of cuttings the other day for this new cab, so it will be a couple weeks before anything is really in it, the other cab will be housing all the seedlings and a clone or two im running through at the moment, which happens to be two clones one i might kill (last of the B mother/line) and one i like, plus 4 flowering girl seedlings, genetics all known, and 4 more seedlings that aren't old enough to show sex yet.

so who knows i might just make a revised version in a month or so and transfer all the plants to it, and retire the old cab.

In the past i have given some of my old cabs away to people and might do so with this one so long as anyone i know who wants to grow, who doesn't already wants it, as i wont be scavenging any parts from it.


and to bc cronic, drunknug, tdog4, and hush thanks
 

LoKey

Member
This design was also initially planned to be a modular system, so if say you wanted to do some breeding or wanted to produce enough for say a wife, best friend, sick relative, it could easily be expanded with another box, well up to a certain point where bigger lights would be more beneficial ,as in 400+ watts.
 

Kirby_Tokin

Member
"Ain't nobody dope as me I'm dressed so fresh so clean
(So fresh and so clean clean)"

Awesome cab LoKey..! Really nice setup.. Keep on rockin:pimp3:

Kirby
 

ProfGerbik

Active member
sweet i was waiting for this, cant wait to see it in action. your one of my favorite micro growers around, im always recommending people to check out your grows and setup when they ask how to grow in compact spaces.

keep up the excellent work. cheers.
 

blynx

WALSTIB
Moderator
ICMag Donor
Veteran
Nice cab!

What strain(s) are you going to run in it first?

Soil? Hydro?

When are the plants going in?

How long ya gonna veg? Any training?
 

LoKey

Member
Nice cab!

What strain(s) are you going to run in it first?

Soil? Hydro?

When are the plants going in?

How long ya gonna veg? Any training?


Guess i could of added that in seeings how alot of people might miss my other thread.

But ill be running my own pollen chucking crosses with hopefully some new genetics, just have to make an order, but the strains are some combo of mandala#1's Safari mixes and Jamil Sayidda, all inexpensive strains, as i didn't see the point in dropping cash of expensive genetics when i would probably just kill them, or knowing specifically what i wanted in a plant.


Method. organic soil medium, more or less LC mix #1 but with home compost, chunky coir, peat, alfalfa, bonemeal, kelp, ewc , and dolomite lime, basically a shit mix, that works pretty decent.

Now this seems contradictory, but i sometimes use chemical ferts for feeding the plants, as i haven't got a good handle on nutrient teas yet that can be sourced locally or made (dont you know i have a bat cave, it has alot of guano in there plus some pretty neat tech..... shhhh you didnt hear that,

But yeah normally my teas are fine for outdoors due to the soil volume but due to my small container volume for the cab, there isn't alot of buffer for ph-swings, no matter how organic you might be.

which brings me to ideally i would like to be using pre-fertilized (if needed) pure compost for a medium with only having to feed with straight water.

But due to the small container volume i think i might have to mix a separate hotter mix and just do a two stage transplant if i only want to water feed.


so that brings us to cuttings and veg, my cuttings typically root in about 10 days then they get transplanted into mini DIY smartpots, and are usually ready to be transplanted again with in a week to two, but i sometimes top them in veg if i need to stall them for the next slot in flower, (i can easily make more cuttings than i need with the tiny mother&veg chamber i have) So really whenever a cutting looks good to go into flower it will, but i tr and do all my work on the sunday of the week just as a timeframe point and to even things out so i dont need to do stuff during the week other than one or two watering which takes all of 2mins

as for training, none unless they get unruley, then ill lst, supercrop, top, and prune to just try and get them under control, but i do prefer a topped plant if the genetics allows it, as smaller nugs fit better in jars.


hopefully in a week ill have a couple clones to put in, and hopefully another group a week to two after that, gives me time to make tweaks to the cab, get carbon, and or make another one, then i can transfer the current plants from my old cab to the new one to finish out.
 

LoKey

Member
Oh ive decided im gonna just run one of the 55w pl-l for flower as that's what i designed it for (cooling as well) as it seems to be running a bit hotter than i would like for the veg chamber than i would like, but that's what a new cab with bigger air passages is for ;), Would only cost about $35 to make a new box
 

LoKey

Member
sweet i was waiting for this, cant wait to see it in action. your one of my favorite micro growers around, im always recommending people to check out your grows and setup when they ask how to grow in compact spaces.

keep up the excellent work. cheers.


thank you, im defintely not one to watch though lol, well other than seeing a person go through a learning experience, and see what works and what doesnt.

You've outdone yourself again my friend.

mad props on your carpentry skills.

Thanks, i forgot i had a nail gun, so the whole thing was put together with brad nails and glue, its really solid and was really quick to build, plus with matching wood filler, you don't even know where its nailed
 
Top