
How To: Build a 2x4 & Poly Veg/Clone or Small Flower Box/Cab. Cheap/Simple/Effective
This will be a basic guide or "How To" (if you may), to go about building your own Veg/ Clone/ Small Flower Room out of 2x4s and Poly. Not much else is needed but some basic tools, a little bit of patience and some will power. The goal for this box is to A. Work. B. Be cheap, simple, and effective. C. Grow some medical Marijuana.
I reckon this would be geared toward more of a beginner so theyd have something to roughly go off of, or build off of. I see a lot of threads about what to do for a box or cab itself, an intake, and especially numerous threads about how to deal with the heat in their cab in which was just built.
Please take it with a grain of salt as my ideas are not like yours...Plus, over time ive grown these theories about making Cabs/Boxes that seem to help me out, hard to describe yet they do work. I literally spent $0 on this project, it was all stuff ive had lying around and acquired over previous times. Figured i havent seen one of these on here so id give some others some help if theyre up in the air as to what to do, or how to do it.
I will try to be as thorough as possible, yet i didnt fully document every move and cut, so there are some things that are skipped, though i will go over those.
Ive looked at tons and tons of build threads on here and other sites and have always remembered what i thought was a decent idea and try to incorporate all them into what im doing at the time. That being said, dont be afraid to go out on a limb and change something to your requirements in or on the box. Youre building it for your needs here, im just here to help give ya something to work off of or guide ya through.
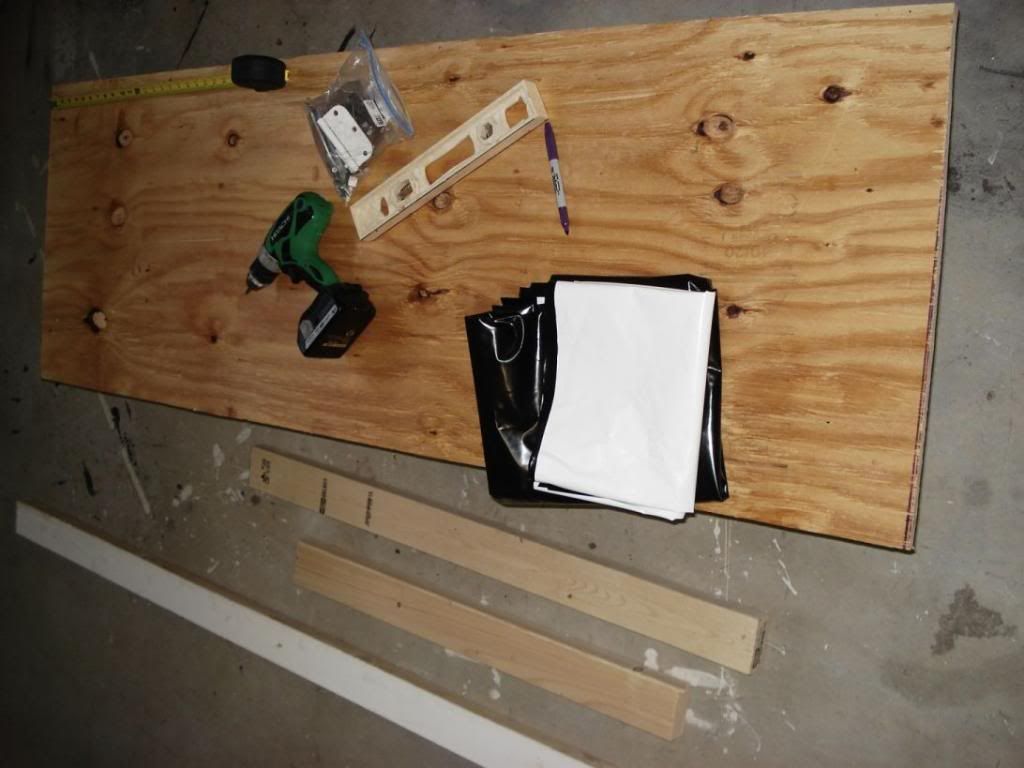
Materials:
1-2 days time
1-3 (80-93in) 2x4's (depending on size of your cab/box)
1-3in Wood Screws
1-2 Rolls of Duct Tape
White Poly
Saw
5/8 Drill Bit
Plywood
Drill
Level
Tape Measure
Exhaust Fan (I used a Radio Shack 75CFM PC fan)
Staple Gun (I used T25)
CFL Fixtures of some sort
X amount of Extension Cords to wire to fixtures
Base- Measure your space in which youll be putting your Cab/Box. You may have to compensate the base measurements a little bit to fit your needs in your area, you dont want to make it too tight of a fit, especially if your intake or exhaust will have no room to breath. Let it be comfortable in its own state.
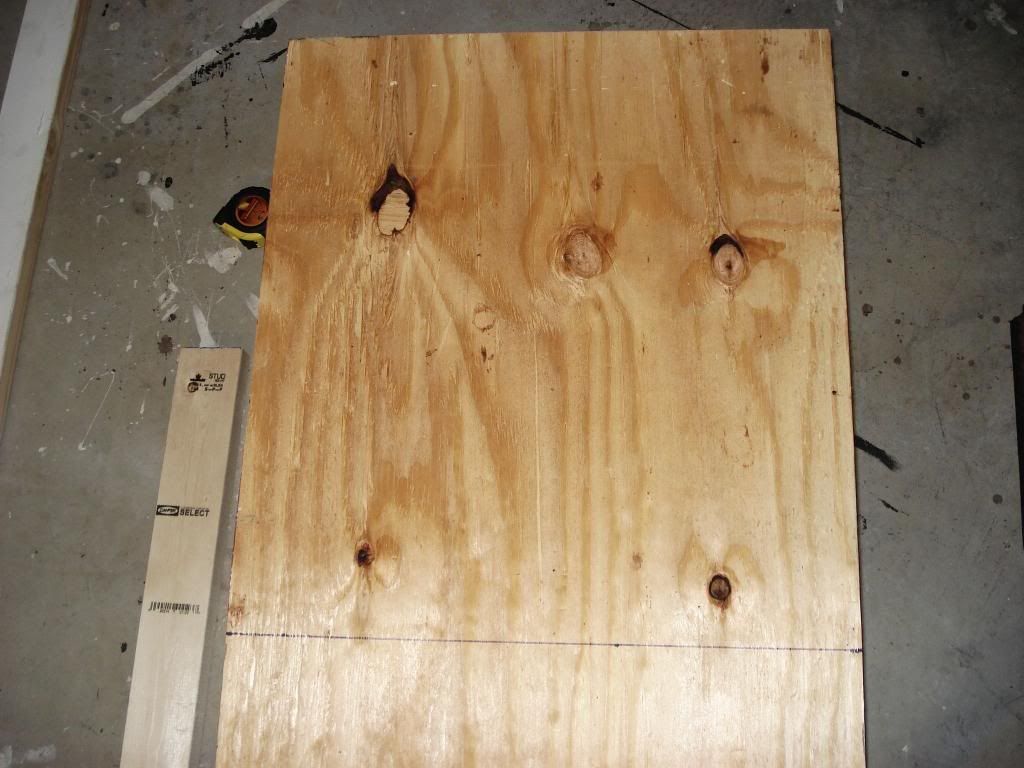
Whatever size base you decide on, make another for the roof if you decide to go that option.
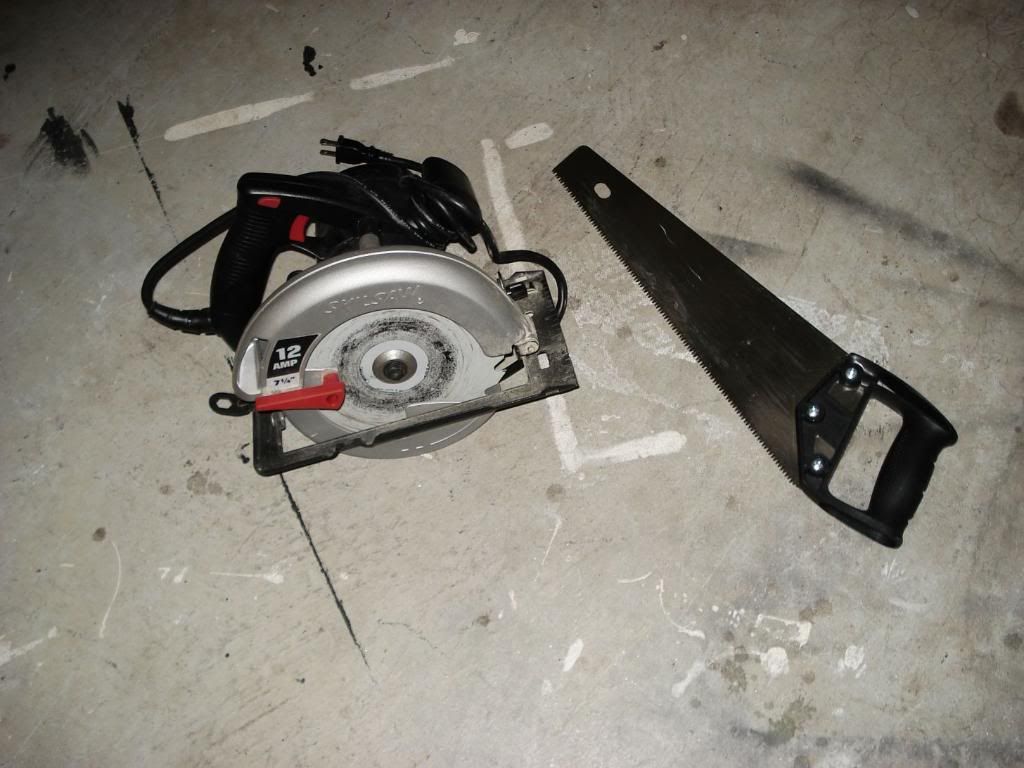
Use whatever you may please to cut your wood with. I chose the manual way this time.
This would also be a good time, if you havent, to decide what size pots youll be using and how many plants youll be wanting to grow/ store/ or clone. Take into consideration the height at the top of the pot to how low the lights will hang, and from there on. A lot of times people just decide on say, a 2x3 box thinking they have the full 3feet of height to work with, which is not true, yet if they decide to flower in there, a lot of times theyll run of out room just due to the plants size...So before we get into that problem, decide on what your height limit will be, and what this box will be used for. For me, i dont anticipate them on getting over 12" in this box so i topped my height restraints at that.

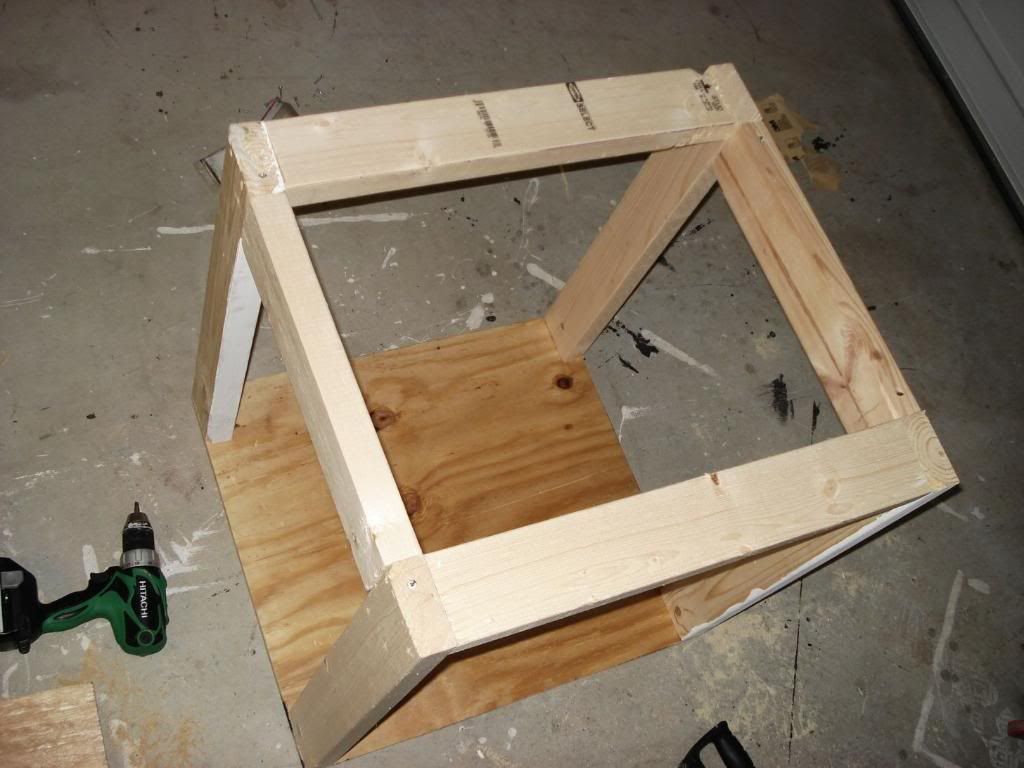
After thats done, go ahead and attach your legs that eventually become the frame of your box to come. I just put 2 screws in the ends of the 2x4s, not much needed for security. Make sure theyre stable and youre set.

I made what id call "cross braces" or supports none the less, for the box and the poly itself, we cant have a flimsy box and saggy poly now, not acceptable. I measured from the inside of the 2x4s(legs) and made my cuts there to fit in between.
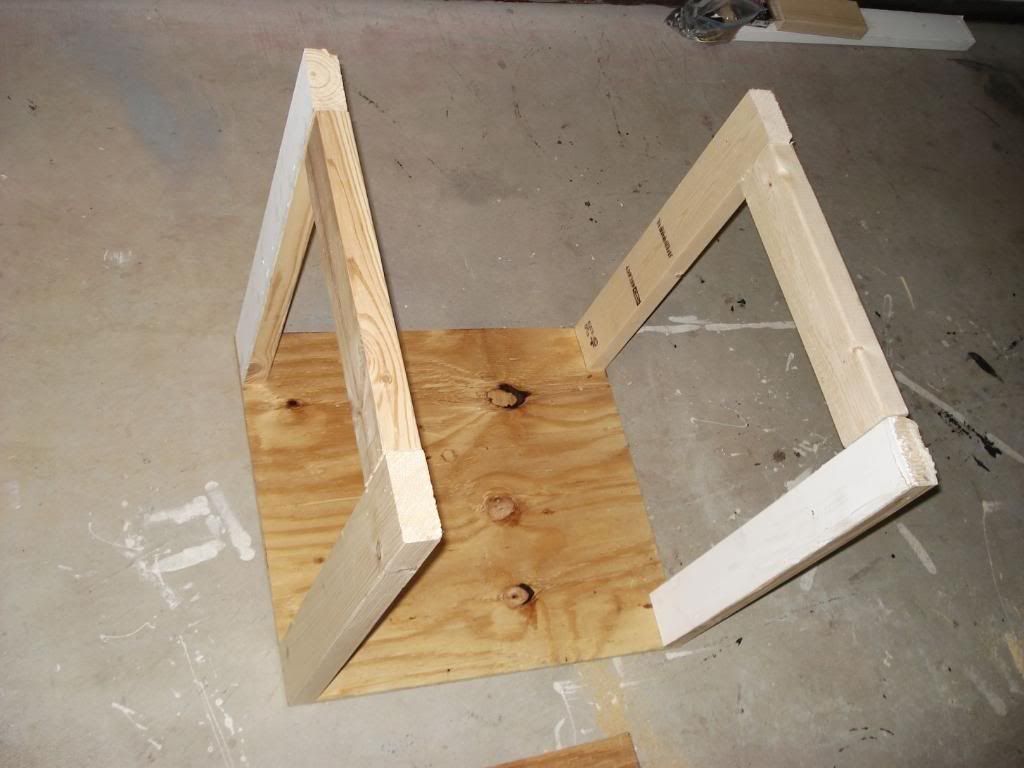
I attached the two more 2x4s at the top to create the actual "Box" itself. Tada.
Now that you feel good about yourself and the way things are looking, congratulate yourself with some always needed treats. Definitely helps get the ideas stirring.
Now that youre feeling better, get ready for some wiring if youre doing it this way. Get some basic Interior/Exterior X-Cords from Lowes, HD, where ever, and snip the female ends off. Strip the coating back and separate the two. Now, on the extension cord, there will be obviously, 2 separate wires, yet, one is smooth all the way around, and the other is ribbed...Look closely, and be amazed!
Twist the wires up tightly and get ready for the fixtures, next.
Remember, Smooth to Brass screw. Ribbed to Silver screw. And youre good to.
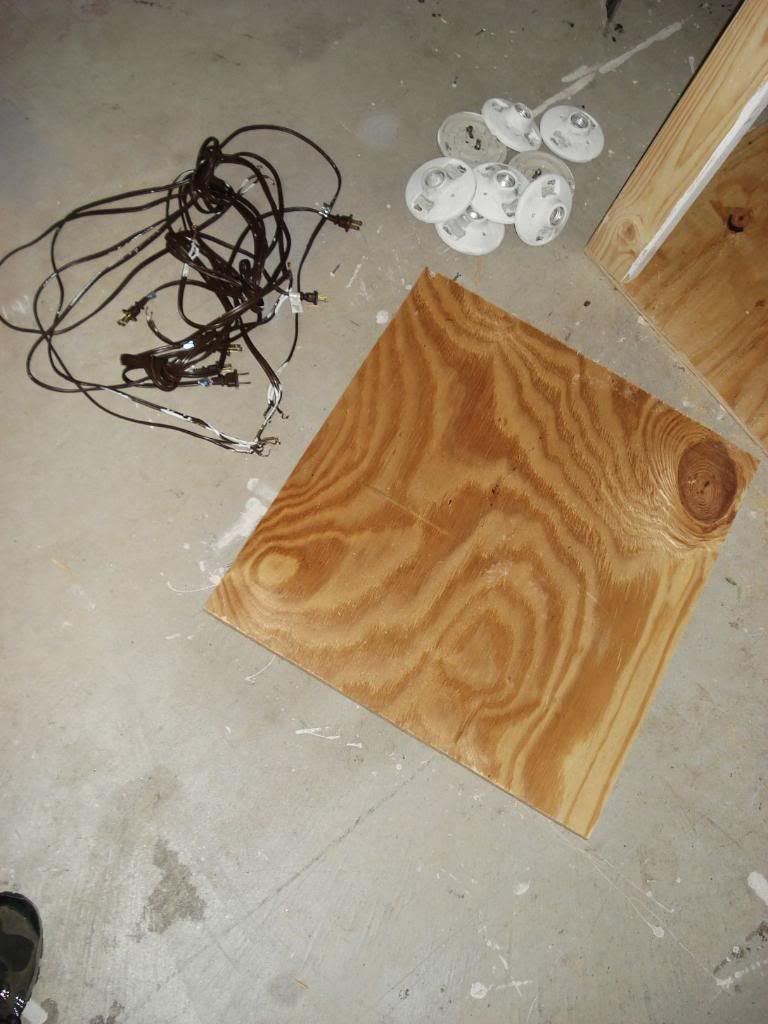
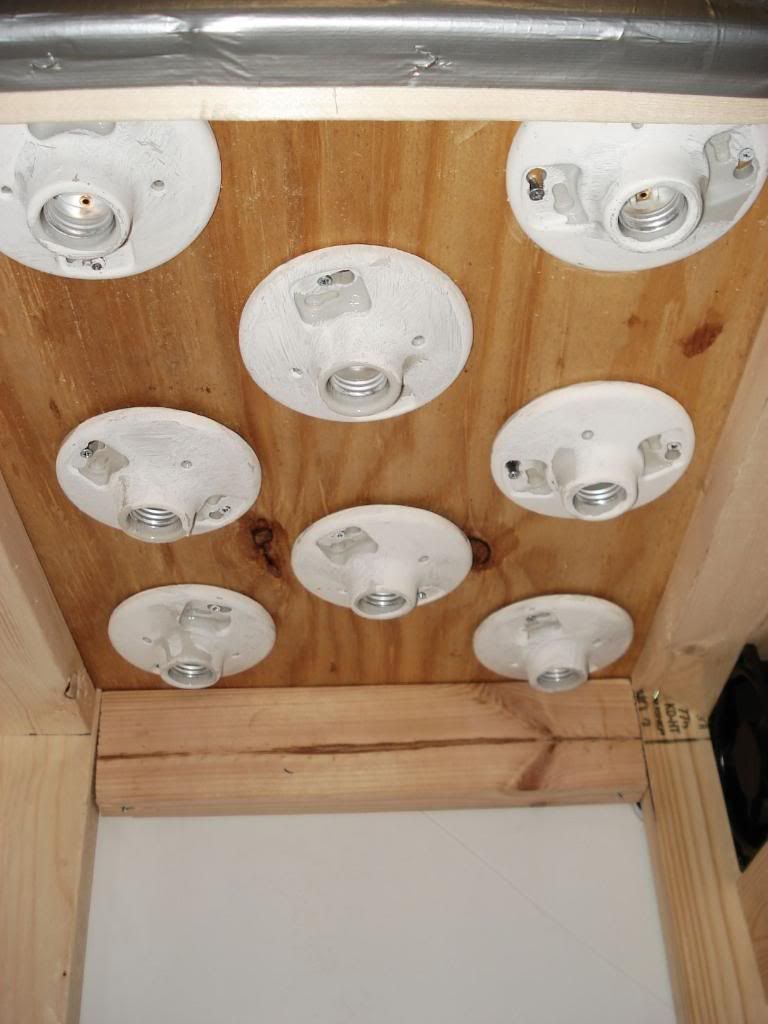
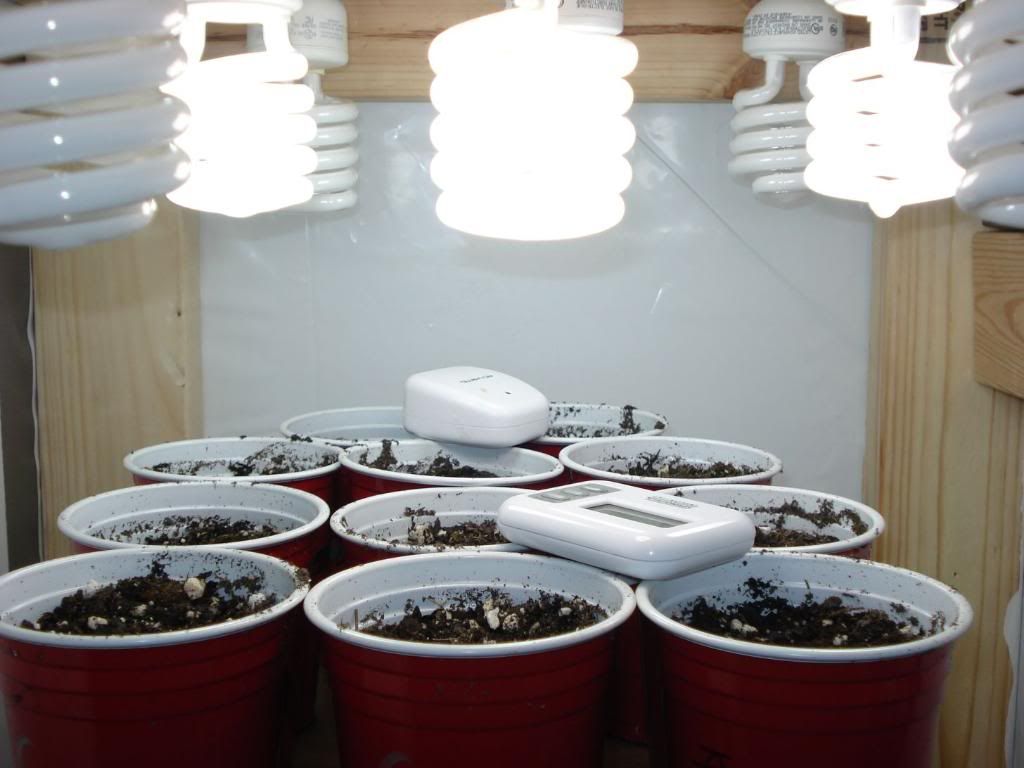
Now, for the light fixtures, i went to Lowes a while back a bought a dozen of the porcelain fixtures. Ive used them in many cabs and boxes, theyre portable, easy to use, strong, and theyre porcelain...they look clean. $1.19 i think, worth it.
Decide or put the lights however you may please upon the roof of the box. I personally dont think theres any "better" ideas than the others to mount CFLs, so no matter how you do it you good to go imo.
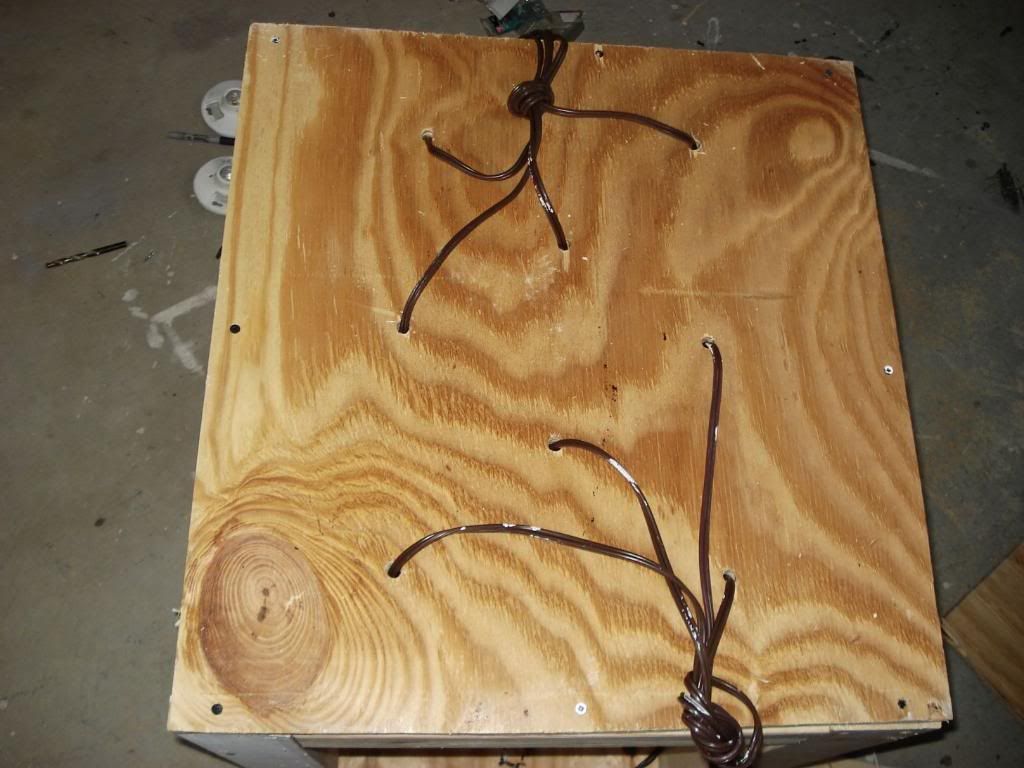
Mark your places on the plywood roof of where you want them to go or be mounted, and with your 5/8 drill bit ( or which ever size fits the X-Cord though) ), drill holes where the middle of the fixture would be through the roof. Now run your wires through, Remember: Smooth to Brass screw, Ribbed to Silver screw. Once youve wired your fixtures up, go ahead and screw them onto the roof.
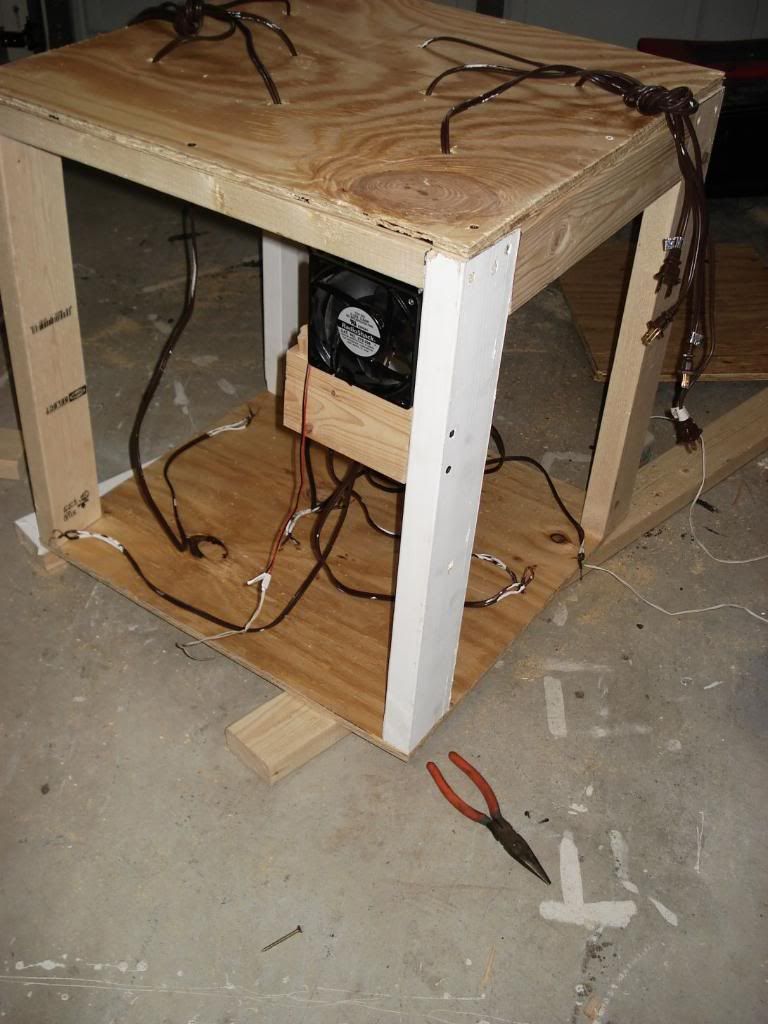
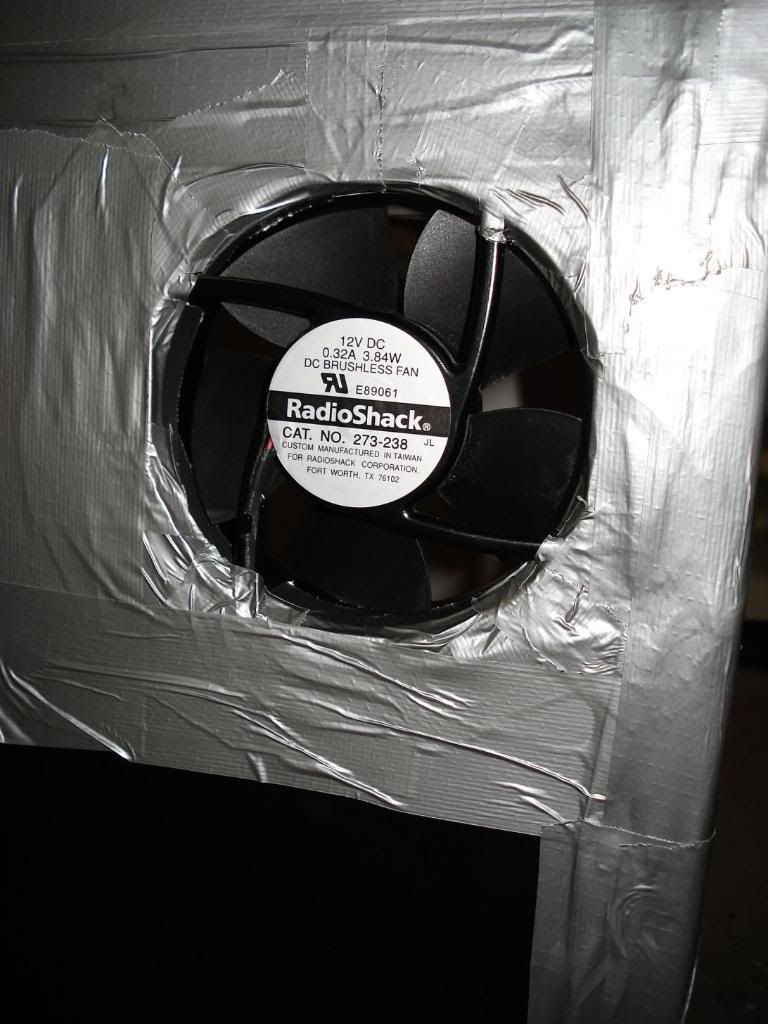
For my Exhaust, i used a Radio Shack 120mm, 75CFM PC fan. Ive had them since ive built my first cab and theyve done me well, so ive been reusing them and they work like a charm. I debated whether to mount the fan at the top, flush with the roof or on the side of the cab, where itd be a little easier to mount. One of the things that drew me away from mounting it on the roof was itd take away from X amount of light space, which im going for all that usable space i can get, and id of had to of notch the roof out for the fan itself which can lead to more work.
Took me a minute to figure how to secure the fan on the side, then i happened to look over and pick up a small butt end of a 2x4 and 2 screws and attached it to the leg so the fan fit nice and tight between the roof and newly screwed in 2x4 butt.
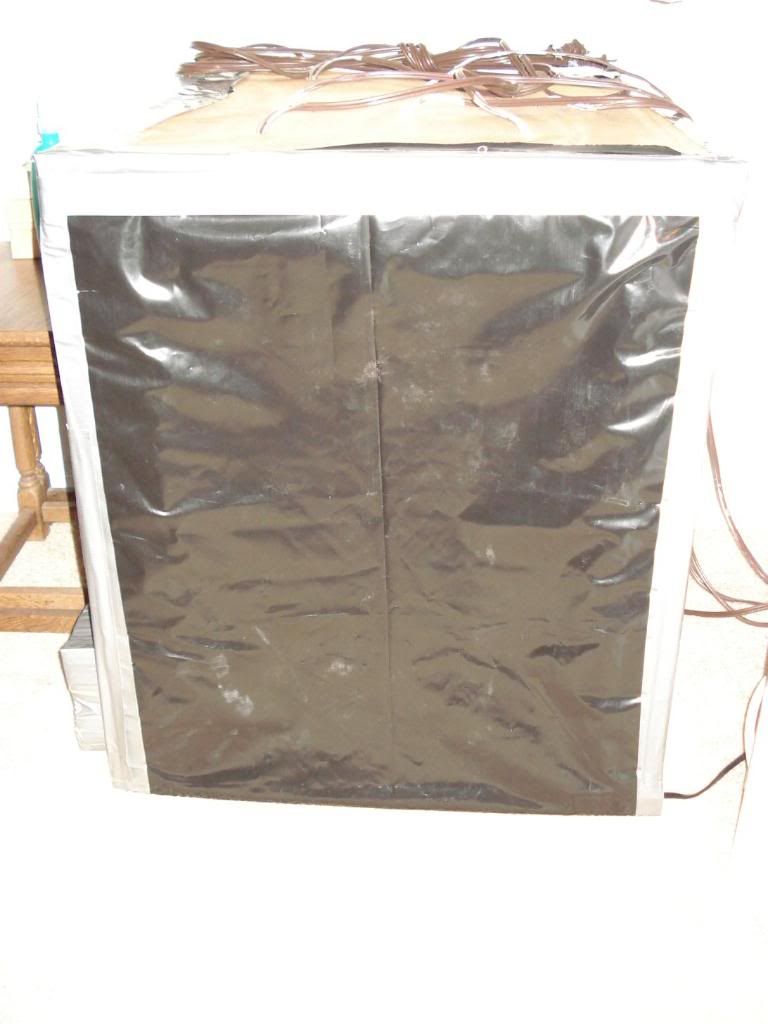
Once youre done with that, go ahead and however you may please or feel you have to do it, wrap your box in poly. I did one side at a time with one single layer, i didnt double layer any sides. For instance id align the top, pull it tight and staple the top so youll have something to work off of. Dont pull too tight or youll rip it obviously, yet nice and gently going down the sides and stapling. Make sure the poly isnt saggy or its that much space youll lose on the inside from negative pressure, or maybe a light hitting the poly if its too close which can lead to some major problems.
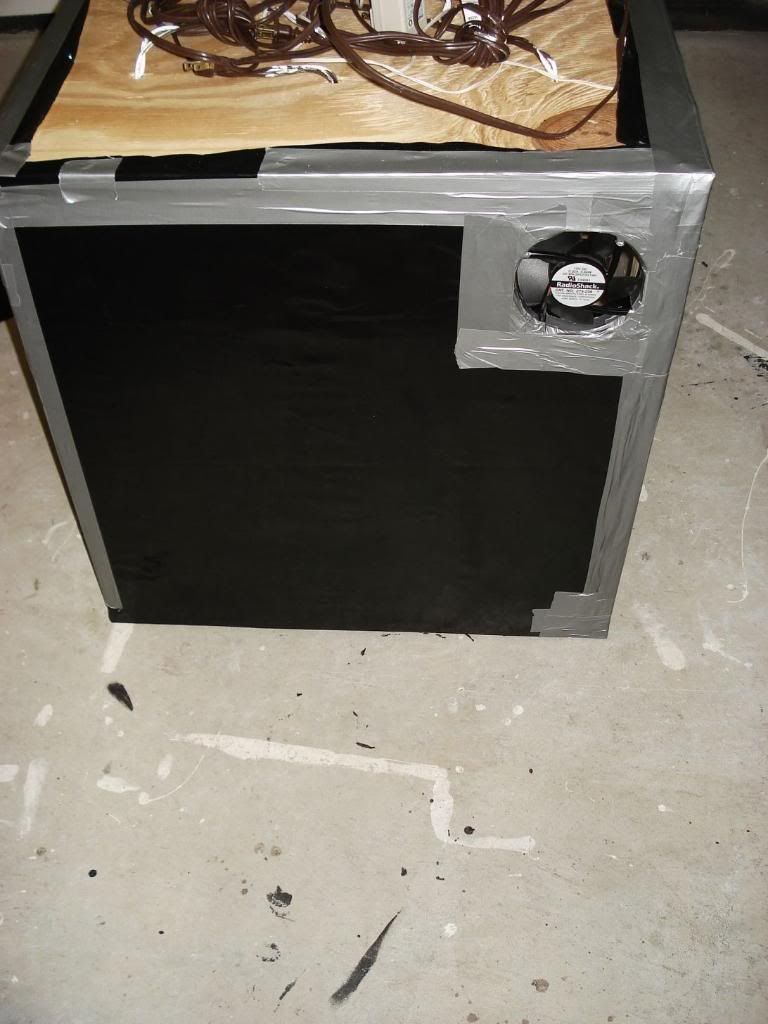
Once youve stapled one side with poly completely, turn the box around and do the same, yet being careful of the newly attached poly and not to rip. I did the 2 plain sides first and left the door and intake side for last. I covered my exhaust fan completely with poly and then with a razor, cut out the circle where the actual blades are on the fan.
Now, im not sure what YOU have in mind for your intake, or what youre wanting to do, yet ill go ahead and show you mine. Now everyones is going to be the same, not everyone will work the same, no 2 boxes are alike. There are a lot of variables to take into consideration as well.
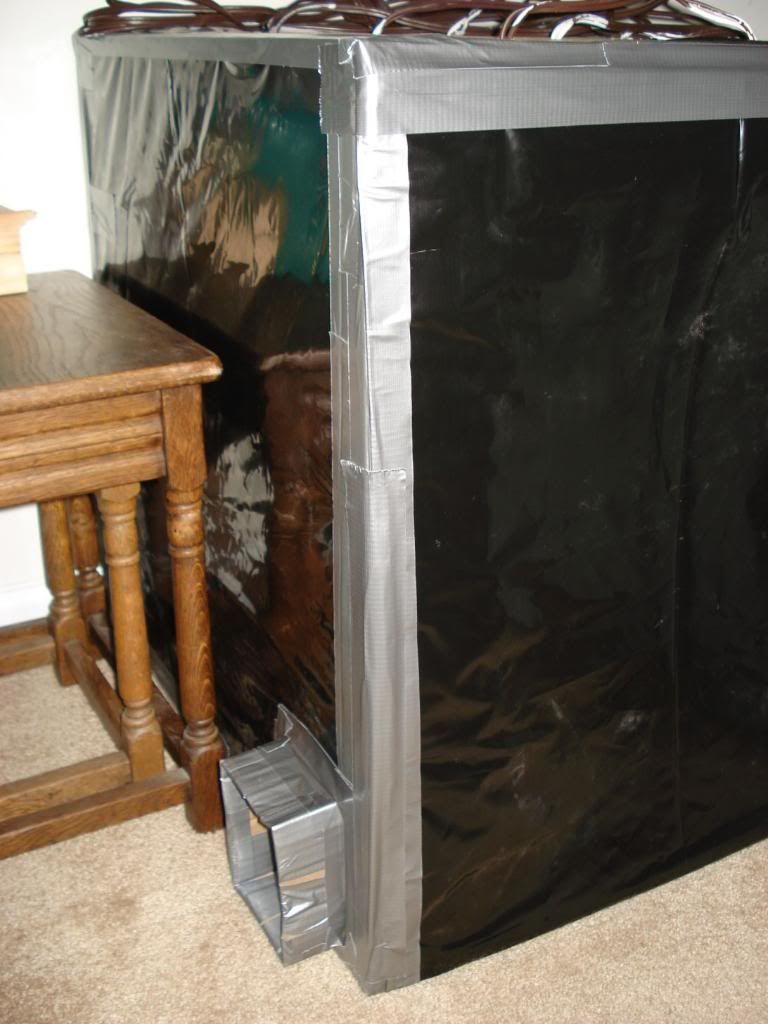
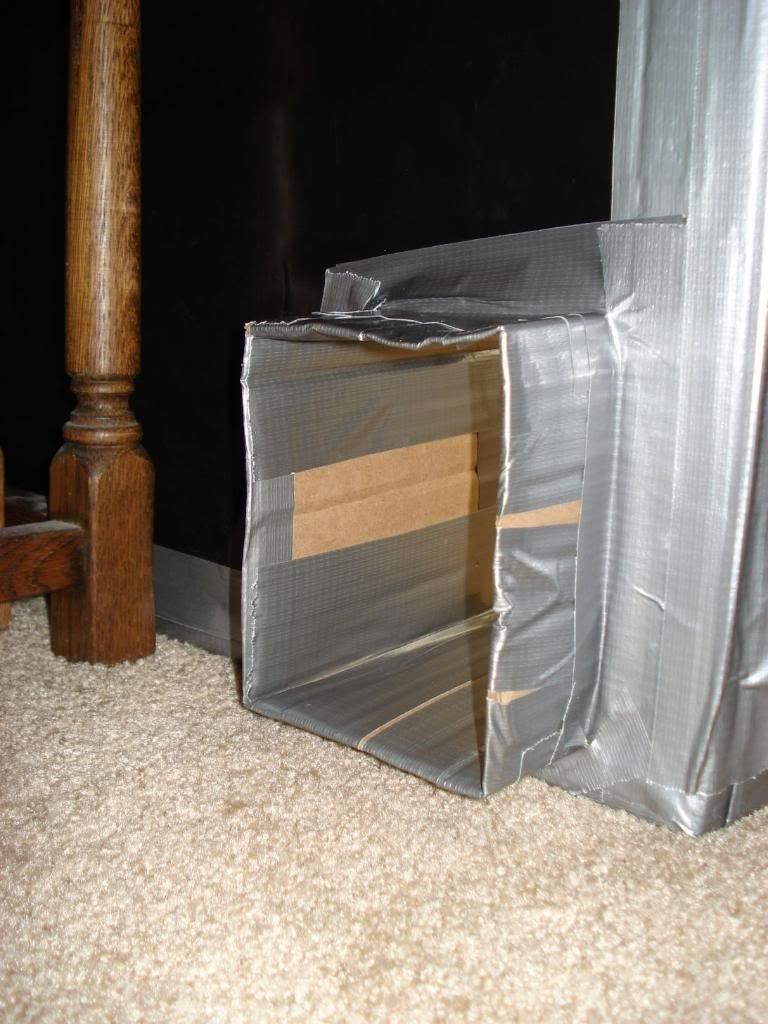
I built my Intake from a cardboard milk box that i got at the local grocery store. They work good for making intakes, light traps, and angling your exhaust to point in which ever diretion you may need, no shit. A little will power and creativeness always helps as well.
I made just a basic rectangle (i reckon), cut out the same size rectangle on the bottom of the left side near the door and made my rectangle out of cardboard inside that hole, so itd fit accordingly and snug.
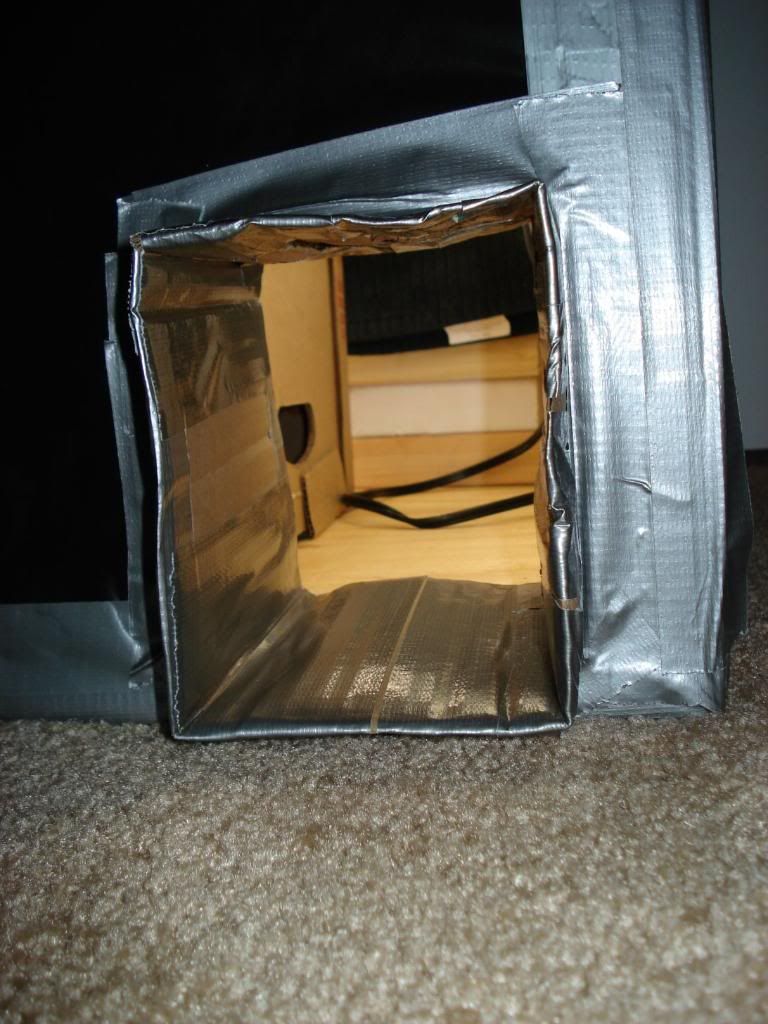
I have my theories about Intake/Exhaust, so youll need to measure your own intake needs or figure out how many and how big of holes youll need. My intake and exhaust are on opposite sides of eachother on opposite walls. I like my air to travel all the way across the cab to exhaust, another reason why i like my exhaust on the side rather than the roof, I feel the air goes up and out immdiately with the fan on the roof and with it on the side, the air rather has to travel across the plants more so giving the oxygen and more so across the whole room. Werd.
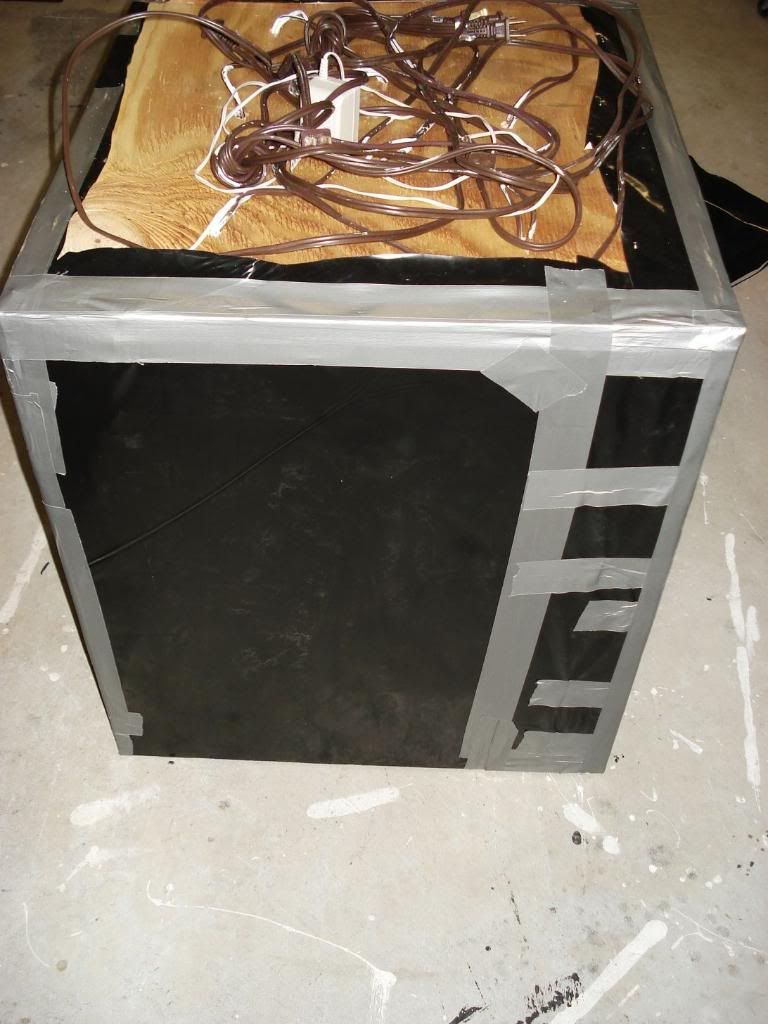
Now that thats all done. Get yer Duct Tape. Duct tape all the sides, all the staples, all the ripples, make it tight, make it nice, make it to your needs now. This is basically sealing it all up, preventing light leaks, and like said, making it tight. We like tight around here.
For my door, i literally fit a piece of poly to the outside of the door, cut it to length with 2-3 extra inches on the bottom and double wrapped the sides of the poly with duct tape just to strengthen it, yup, thats it. It worked a lot better than i had anticipated and its pretty sturdy. I stapled the top of the door to the top of the cab and duct taped over those to make it strong and secure granted it was to get pulled on or happened to almost get yanked off.
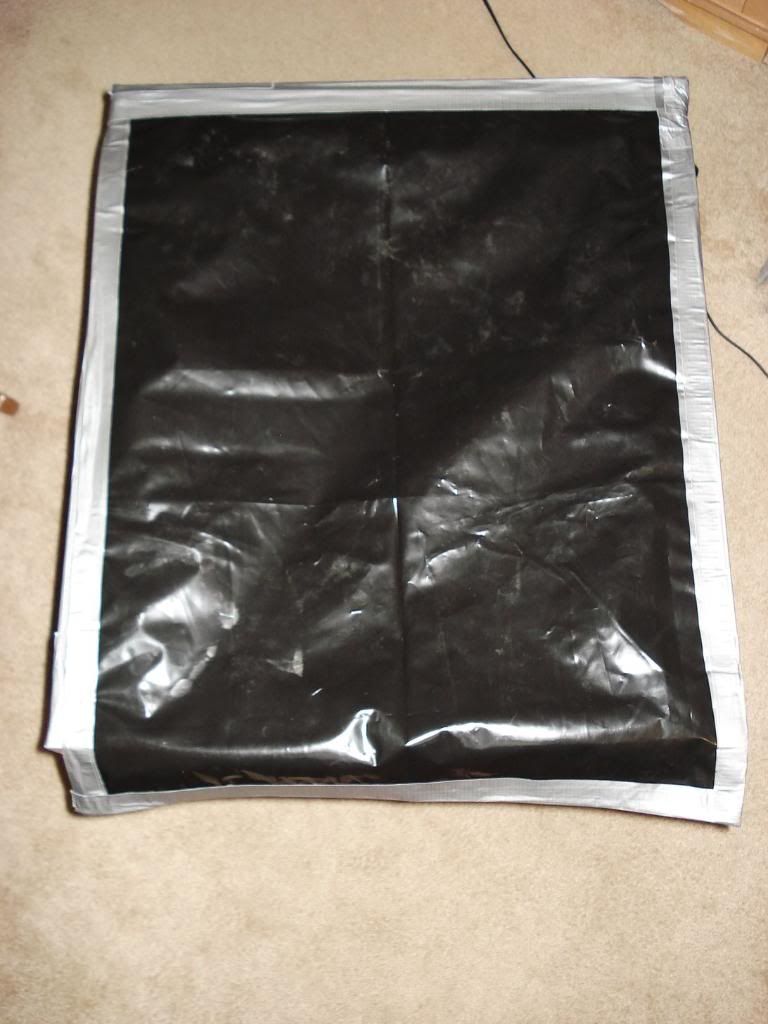
When i put the poly down over the "door" or opening, ill slide the rest of the poly under the box/cab to somewhat seal it, and put round about 1ft of duct tape on the sides to "seal" and secure it. Works like an absolute charm. I was originally wanting to do a velcro door, yet the velcro wouldnt glue nor staple to the poly. You can do whatever youd like for a door. You could even cut another piece of plywood the same length as your base and roof and fit it to the opening with some hinges and weatherstrip it. Seal it off with a sliding lock or something similar. Whatever is at your easiest convenience.
To give you an idea of the door.
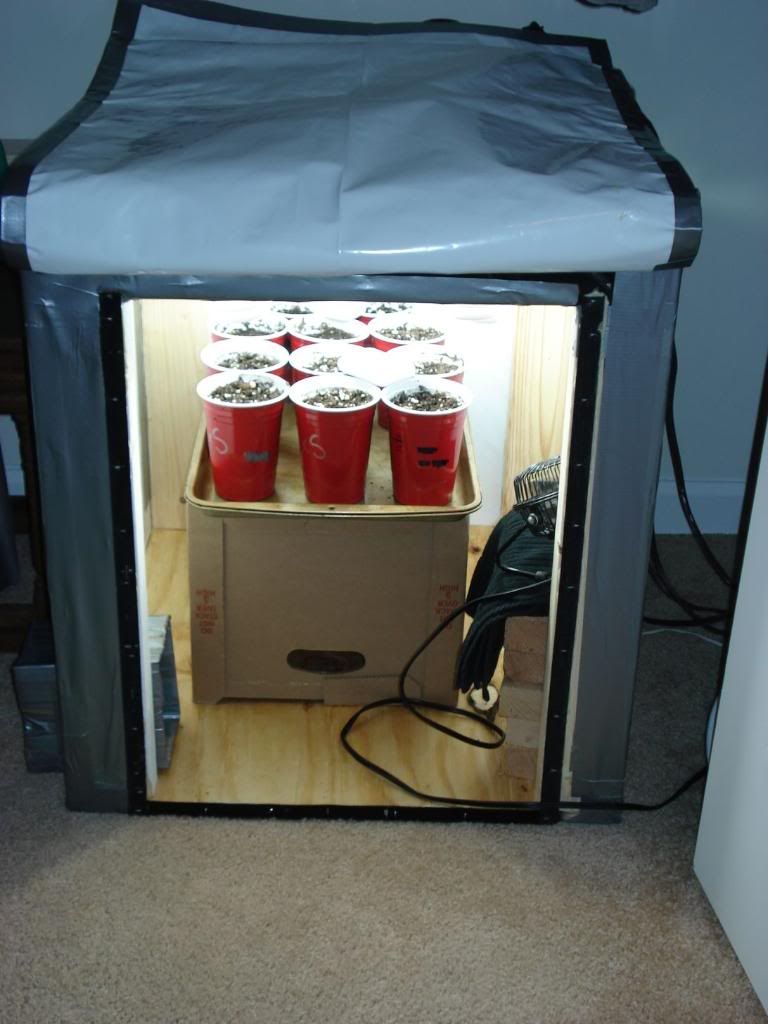
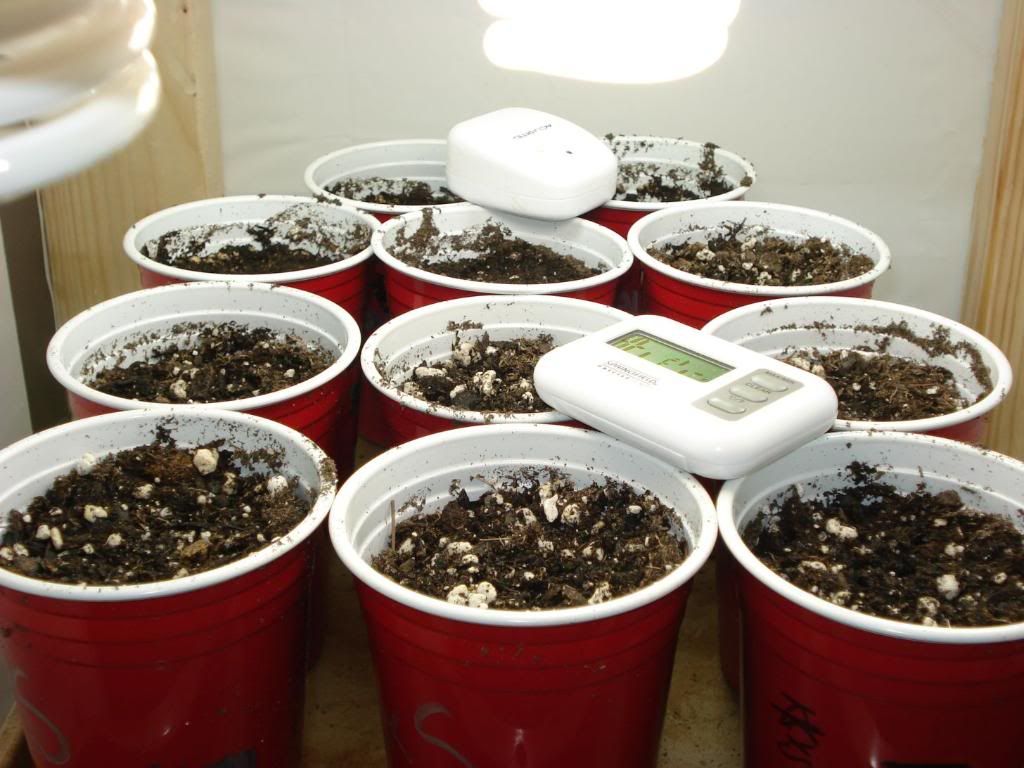
Thats it folks. I did not paint anything nor put up any mylar on the inside. Remember, cheap, simple and effective this was. I didnt want to put anymore time into and I felt the poly was enough for the light to bounce off of. This box is perfect for the intentions i had in mind and is currently and already serving its puropse sitting with 11 Solo Cups waiting for seeds to pop.
My temperature with 4 CFLs on ranges from 76-78, so when the additional 4 are turned on, temps should steady right around 78-81 which is exactly, i mean exactly where i like it. Plus, if any of you would like to know, my ambient temp in the house or room the box/cab is in is around 69-70 degrees. Its also set inside a closet with 1 door closet and the other open with the intake taking on fresh air.
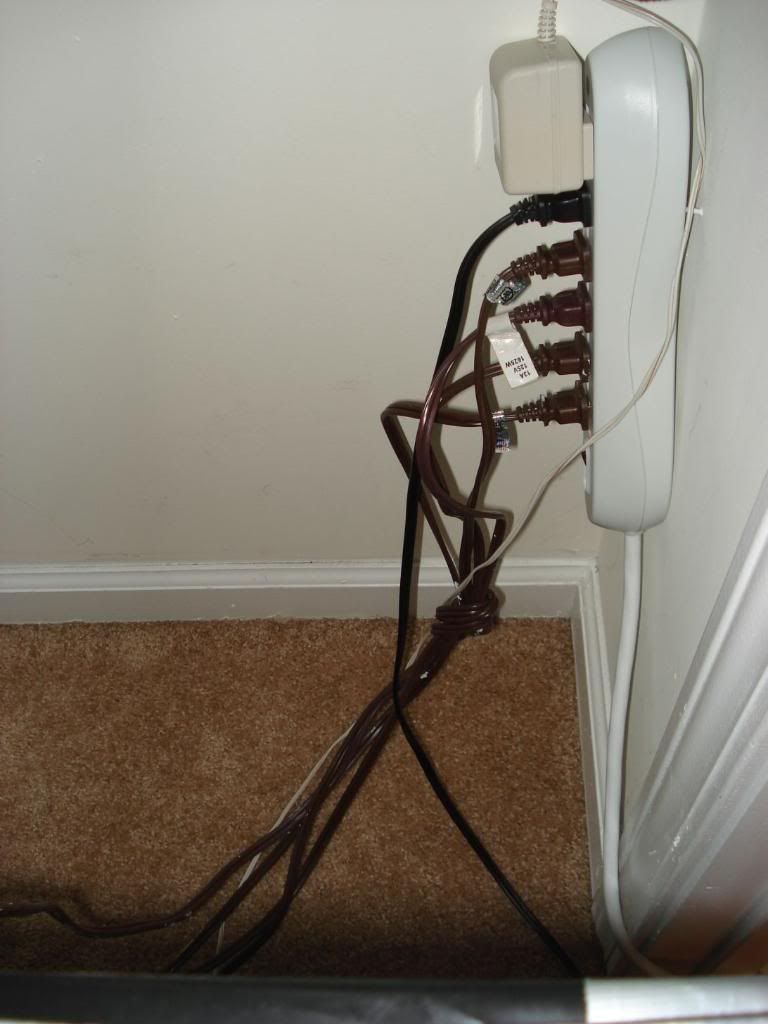
Remember to get all of your electrical "stuff" off the floor, just in case. You never know what could or what will happen. Always a good precaution.
I hope i didnt overwhelm anyone and i do hope i was able to help someone out there.
If you have any questions, need any help or want me to assist you in a cab or box, feel mor then free to give me a shout via PM or state your needs about in this thread. Thank you for keepin up with the ol Ramblin Man, as i do ramble.
Thanks.
This will be a basic guide or "How To" (if you may), to go about building your own Veg/ Clone/ Small Flower Room out of 2x4s and Poly. Not much else is needed but some basic tools, a little bit of patience and some will power. The goal for this box is to A. Work. B. Be cheap, simple, and effective. C. Grow some medical Marijuana.
I reckon this would be geared toward more of a beginner so theyd have something to roughly go off of, or build off of. I see a lot of threads about what to do for a box or cab itself, an intake, and especially numerous threads about how to deal with the heat in their cab in which was just built.
Please take it with a grain of salt as my ideas are not like yours...Plus, over time ive grown these theories about making Cabs/Boxes that seem to help me out, hard to describe yet they do work. I literally spent $0 on this project, it was all stuff ive had lying around and acquired over previous times. Figured i havent seen one of these on here so id give some others some help if theyre up in the air as to what to do, or how to do it.
I will try to be as thorough as possible, yet i didnt fully document every move and cut, so there are some things that are skipped, though i will go over those.
Ive looked at tons and tons of build threads on here and other sites and have always remembered what i thought was a decent idea and try to incorporate all them into what im doing at the time. That being said, dont be afraid to go out on a limb and change something to your requirements in or on the box. Youre building it for your needs here, im just here to help give ya something to work off of or guide ya through.
Materials:
1-2 days time
1-3 (80-93in) 2x4's (depending on size of your cab/box)
1-3in Wood Screws
1-2 Rolls of Duct Tape
White Poly
Saw
5/8 Drill Bit
Plywood
Drill
Level
Tape Measure
Exhaust Fan (I used a Radio Shack 75CFM PC fan)
Staple Gun (I used T25)
CFL Fixtures of some sort
X amount of Extension Cords to wire to fixtures
Base- Measure your space in which youll be putting your Cab/Box. You may have to compensate the base measurements a little bit to fit your needs in your area, you dont want to make it too tight of a fit, especially if your intake or exhaust will have no room to breath. Let it be comfortable in its own state.
Whatever size base you decide on, make another for the roof if you decide to go that option.
Use whatever you may please to cut your wood with. I chose the manual way this time.
This would also be a good time, if you havent, to decide what size pots youll be using and how many plants youll be wanting to grow/ store/ or clone. Take into consideration the height at the top of the pot to how low the lights will hang, and from there on. A lot of times people just decide on say, a 2x3 box thinking they have the full 3feet of height to work with, which is not true, yet if they decide to flower in there, a lot of times theyll run of out room just due to the plants size...So before we get into that problem, decide on what your height limit will be, and what this box will be used for. For me, i dont anticipate them on getting over 12" in this box so i topped my height restraints at that.
After thats done, go ahead and attach your legs that eventually become the frame of your box to come. I just put 2 screws in the ends of the 2x4s, not much needed for security. Make sure theyre stable and youre set.
I made what id call "cross braces" or supports none the less, for the box and the poly itself, we cant have a flimsy box and saggy poly now, not acceptable.
I measured from the inside of the 2x4s(legs) and made my cuts there to fit in between.
I attached the two more 2x4s at the top to create the actual "Box" itself. Tada.
Now that you feel good about yourself and the way things are looking, congratulate yourself with some always needed treats. Definitely helps get the ideas stirring.
Now that youre feeling better, get ready for some wiring if youre doing it this way. Get some basic Interior/Exterior X-Cords from Lowes, HD, where ever, and snip the female ends off. Strip the coating back and separate the two. Now, on the extension cord, there will be obviously, 2 separate wires, yet, one is smooth all the way around, and the other is ribbed...Look closely, and be amazed!
Twist the wires up tightly and get ready for the fixtures, next.
Remember, Smooth to Brass screw. Ribbed to Silver screw. And youre good to.
Now, for the light fixtures, i went to Lowes a while back a bought a dozen of the porcelain fixtures. Ive used them in many cabs and boxes, theyre portable, easy to use, strong, and theyre porcelain...they look clean. $1.19 i think, worth it.
Decide or put the lights however you may please upon the roof of the box. I personally dont think theres any "better" ideas than the others to mount CFLs, so no matter how you do it you good to go imo.
Mark your places on the plywood roof of where you want them to go or be mounted, and with your 5/8 drill bit ( or which ever size fits the X-Cord though) ), drill holes where the middle of the fixture would be through the roof. Now run your wires through, Remember: Smooth to Brass screw, Ribbed to Silver screw. Once youve wired your fixtures up, go ahead and screw them onto the roof.
For my Exhaust, i used a Radio Shack 120mm, 75CFM PC fan. Ive had them since ive built my first cab and theyve done me well, so ive been reusing them and they work like a charm. I debated whether to mount the fan at the top, flush with the roof or on the side of the cab, where itd be a little easier to mount. One of the things that drew me away from mounting it on the roof was itd take away from X amount of light space, which im going for all that usable space i can get, and id of had to of notch the roof out for the fan itself which can lead to more work.
Took me a minute to figure how to secure the fan on the side, then i happened to look over and pick up a small butt end of a 2x4 and 2 screws and attached it to the leg so the fan fit nice and tight between the roof and newly screwed in 2x4 butt.
Once youre done with that, go ahead and however you may please or feel you have to do it, wrap your box in poly. I did one side at a time with one single layer, i didnt double layer any sides. For instance id align the top, pull it tight and staple the top so youll have something to work off of. Dont pull too tight or youll rip it obviously, yet nice and gently going down the sides and stapling. Make sure the poly isnt saggy or its that much space youll lose on the inside from negative pressure, or maybe a light hitting the poly if its too close which can lead to some major problems.
Once youve stapled one side with poly completely, turn the box around and do the same, yet being careful of the newly attached poly and not to rip. I did the 2 plain sides first and left the door and intake side for last. I covered my exhaust fan completely with poly and then with a razor, cut out the circle where the actual blades are on the fan.
Now, im not sure what YOU have in mind for your intake, or what youre wanting to do, yet ill go ahead and show you mine. Now everyones is going to be the same, not everyone will work the same, no 2 boxes are alike. There are a lot of variables to take into consideration as well.
I built my Intake from a cardboard milk box that i got at the local grocery store. They work good for making intakes, light traps, and angling your exhaust to point in which ever diretion you may need, no shit. A little will power and creativeness always helps as well.
I made just a basic rectangle (i reckon), cut out the same size rectangle on the bottom of the left side near the door and made my rectangle out of cardboard inside that hole, so itd fit accordingly and snug.
I have my theories about Intake/Exhaust, so youll need to measure your own intake needs or figure out how many and how big of holes youll need. My intake and exhaust are on opposite sides of eachother on opposite walls. I like my air to travel all the way across the cab to exhaust, another reason why i like my exhaust on the side rather than the roof, I feel the air goes up and out immdiately with the fan on the roof and with it on the side, the air rather has to travel across the plants more so giving the oxygen and more so across the whole room. Werd.
Now that thats all done. Get yer Duct Tape. Duct tape all the sides, all the staples, all the ripples, make it tight, make it nice, make it to your needs now. This is basically sealing it all up, preventing light leaks, and like said, making it tight. We like tight around here.
For my door, i literally fit a piece of poly to the outside of the door, cut it to length with 2-3 extra inches on the bottom and double wrapped the sides of the poly with duct tape just to strengthen it, yup, thats it. It worked a lot better than i had anticipated and its pretty sturdy. I stapled the top of the door to the top of the cab and duct taped over those to make it strong and secure granted it was to get pulled on or happened to almost get yanked off.
When i put the poly down over the "door" or opening, ill slide the rest of the poly under the box/cab to somewhat seal it, and put round about 1ft of duct tape on the sides to "seal" and secure it. Works like an absolute charm. I was originally wanting to do a velcro door, yet the velcro wouldnt glue nor staple to the poly. You can do whatever youd like for a door. You could even cut another piece of plywood the same length as your base and roof and fit it to the opening with some hinges and weatherstrip it. Seal it off with a sliding lock or something similar. Whatever is at your easiest convenience.
To give you an idea of the door.
Thats it folks. I did not paint anything nor put up any mylar on the inside. Remember, cheap, simple and effective this was. I didnt want to put anymore time into and I felt the poly was enough for the light to bounce off of. This box is perfect for the intentions i had in mind and is currently and already serving its puropse sitting with 11 Solo Cups waiting for seeds to pop.
My temperature with 4 CFLs on ranges from 76-78, so when the additional 4 are turned on, temps should steady right around 78-81 which is exactly, i mean exactly where i like it. Plus, if any of you would like to know, my ambient temp in the house or room the box/cab is in is around 69-70 degrees. Its also set inside a closet with 1 door closet and the other open with the intake taking on fresh air.
Remember to get all of your electrical "stuff" off the floor, just in case. You never know what could or what will happen. Always a good precaution.
I hope i didnt overwhelm anyone and i do hope i was able to help someone out there.
If you have any questions, need any help or want me to assist you in a cab or box, feel mor then free to give me a shout via PM or state your needs about in this thread. Thank you for keepin up with the ol Ramblin Man, as i do ramble.
Thanks.

