What's new

Toast gives vert a go

toastfighter2

Active member
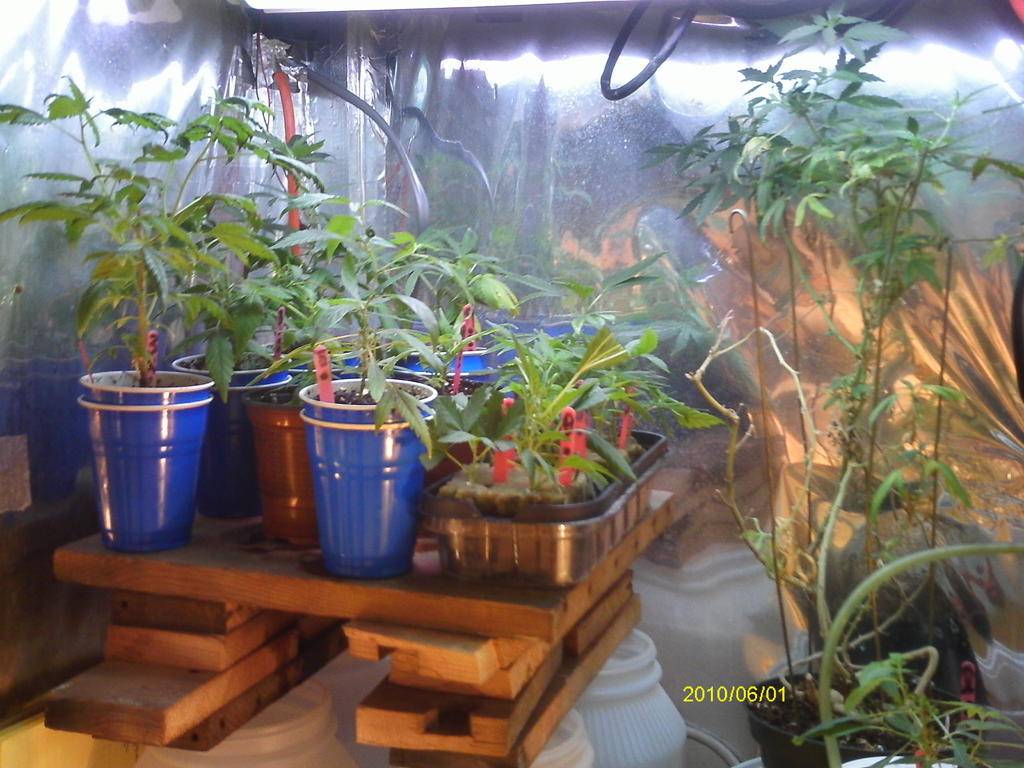
Up till now, I have been growing in a small cab with a 150w light with a couple cfl's to even it out a little. I have been running around 10 plants in a perpetual sog, each in its own 1 gallon RDWC container(I have been prototyping a rdwc system that will work in vert grows). So far, this system has worked out great, and yielded quiet well, but I am a heavy smoker, and it just can't keep up with the demand.
I have been planning on buying a new light for a while, and had actually started to save up to get one. Well, I woke up the other day and decided to search craigslist to get an idea on what a used one would run, and after digging through a couple weeks worth of listings, I found a post for a 400w high bay light for $20. I immediately emailed the guy, and about an hour later he wrote back that if I could come pick it up soon, he would let it go for $10, just to get it out of his garage. So needless to say, now I have a 400w high bay light setting in my basement(soon to be remote ballasted, more than likely in 2 weeks). Today I went to the thrift store to look for work clothes, and I found a dual 65w clf grow fixture that was marked $20, but when I plugged it in and pulled the chain to turn it on, the bulbs would only flash on for a second, so I talked to the manager, and I walked out with it for $10. With in 10 minutes of getting home(5 of that was looking for a tiny wire nut), I had the bad switch completely removed, and now it works, and might I add just one of those 65 watters seems brighter than my 150w hps light. I plan to stack them all together vertically 65/400/65.
I have decided to go with a 4 sided, 3 tiered shelving setup for the plant that is roughly 5' by 5', that will be constructed entirely out of cement blocks and 2" by 6"s. I do plan on integrating my RDWC system into it, but between the feed bars and extra tubing, that will have to wait for a minute, just like the light.
I don't have anything built yet, but I should have most of it together Saturday, after a quick trip to the hardware store. I will put together a parts list and take pictures of the construction as I go. For now, just some boring picks of the stuff I have put together right now.
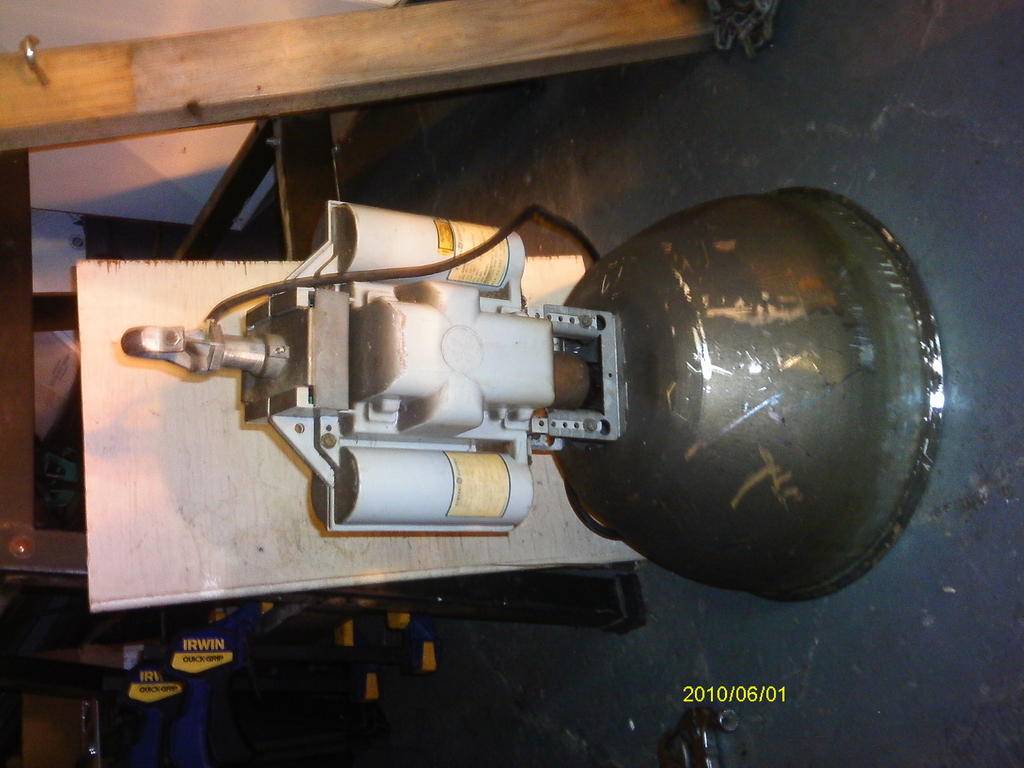
400w hps high bay
picture.php

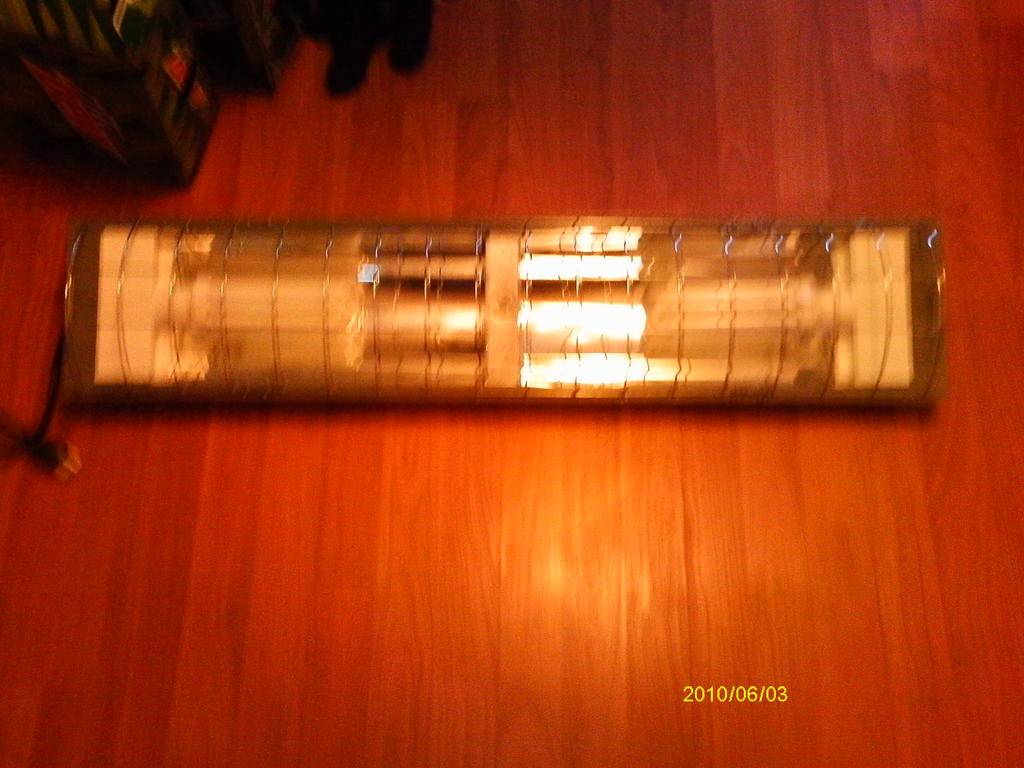
Dual 65w cfl fixture, before removing 2 way chain pull style switch
picture.php

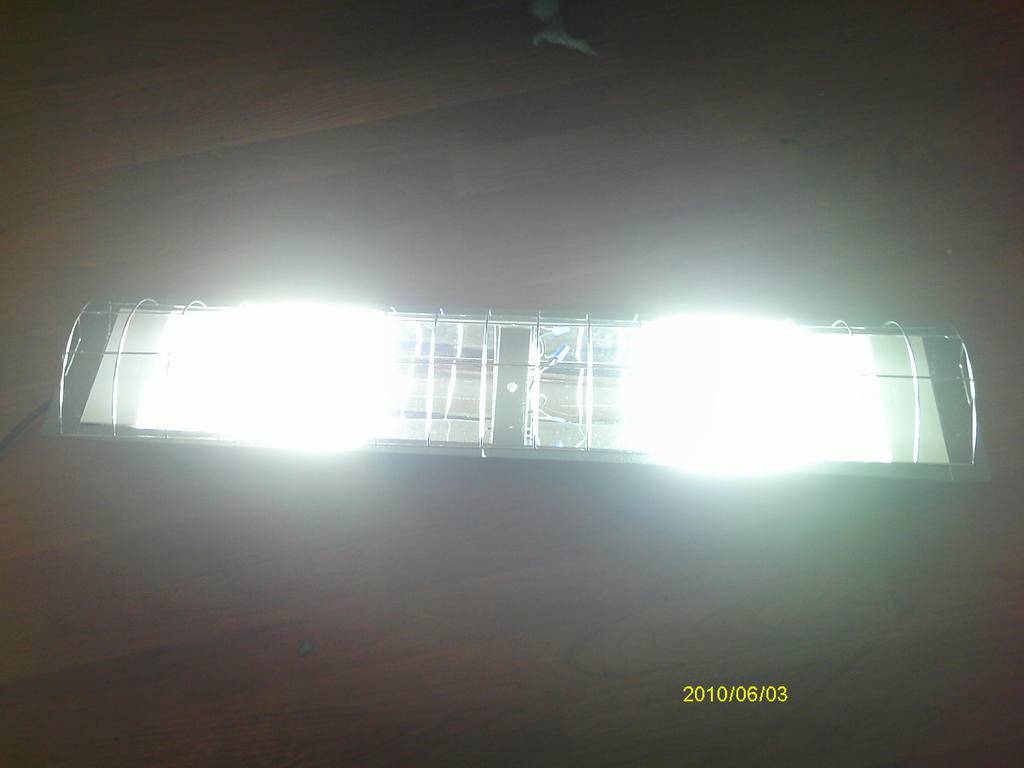
After removing switch(Oh no, both have to be on at the same time(for now at least)
picture.php

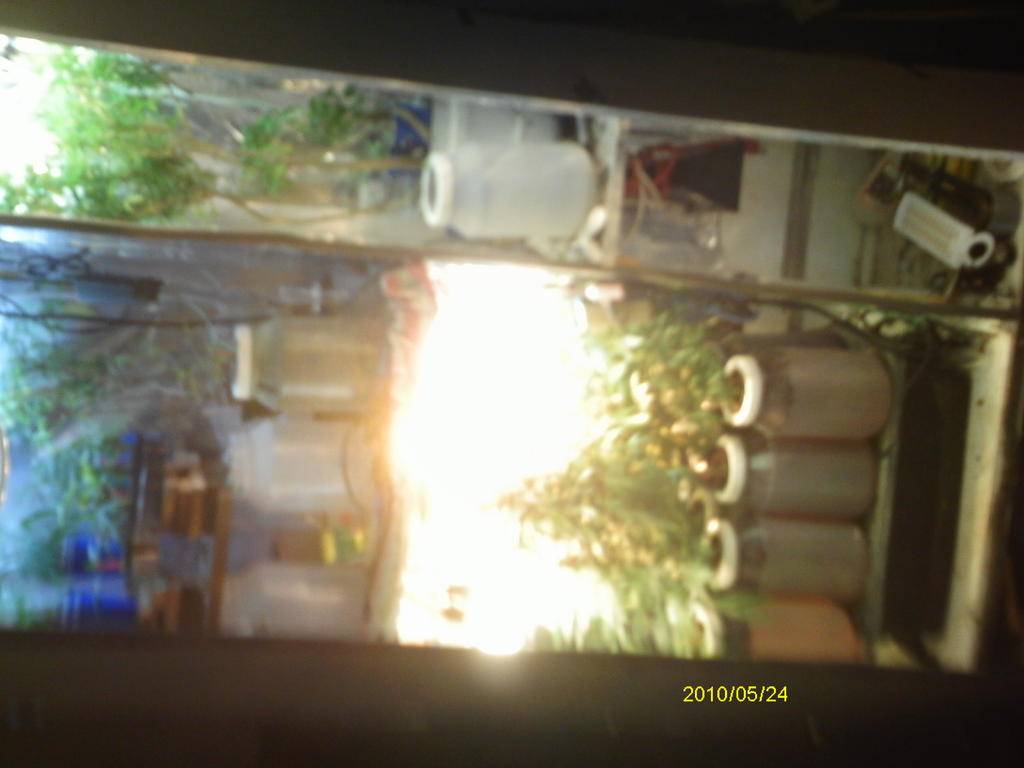
My old cab, soon to be retired
picture.php

Clones and mothers ready to go
picture.php
 

toastfighter2

Active member
Today I started in on making a temporary home for my vert setup. I eventually will get a design put together for a cab for it, but for now I can get by with a room made of a giant tarp. I also now have the light mounted and pretty much ready to fire up, minus removing the reflector(for now it is a great way to set it down). Here's some pics of today's progress(plus one of the biggest non-water messes you can make going in hydro)
Before(huge mess in my way)
picture.php
Dnoe except for a couple 2x4's in the corners and a pallet for the bottom
picture.php

Sometimes even I don't trust my own skills, but it is always better to be safe than sorry
picture.php

Stupid big feet
picture.php

I hung the cfl bar in there to make sure it wouldn't trip the breaker(or make the wires warm for that matter, and then I felt sorry for my babies blooming under the 150w light
picture.php

I just threw this up on the board I used to mount my light, not interesting,but worth mentioning
picture.php

Not quite as light proof as I hoped, but once the mylar is up, it won't matter.
picture.php
 

Natagonnaworrie

If you love life, don't waste time. For time is wh
Veteran
those plants are pretty big for beer cups. u must me watering a lot..

cant wait to see this up and running.
 

toastfighter2

Active member
I actually only have to water them once every 2 days, but they are starting to get a little big. I didn't make it to the hardware today(my roommate w/the van is out of town), but none the less, I just got out of work, and I am going to go spend some time in the basement moving crap around, and setting up a temp room for this project.
 

toastfighter2

Active member
Well, since I haven't made it to the hardware store yet, I figured that I should at least do something, so I potted up two of my clones from beer cup to a 4" square pot and a half a 2 liter bottle. The one in the 2 liter I plan on using to replace it's mother, and the other will be bloomed once it gets potted up once more. I also started putting up mylar, but I ran out of tape after just one wall(didn't even get it up as well as I would have hoped, but its a start). On a side note, I can already see that the 400w buds are going to blow away the buds that I got from the 150w. The tips of most of the buds are swelling out to about twice the size around as the rest of the same bud(I should have taken a pic but didn't, yet)(
picture.php

picture.php

picture.php
 

toastfighter2

Active member
Well, everything is still pretty much the same as before, except for a massive boast in budding. Last weeks plant didn't show much change from the 150w, but this week's plant you can see exactly how tall it was when it was thrown under the 400w lamp. Not having a car is a pita, or else this thing would have been put together already. Hopefully tomorrow I can pick up most of what I need to get it up and running "fully vert". Right now I am stuck between going with longer tubing for the drains, or just rigging up gutters under them.
You can see where the cola starts to get really fat
picture.php
 

toastfighter2

Active member
One cola from next weeks baby just refused to keep away from the light, no matter what way I turned it or bent it down. I mean two days ago , I bent the branch nearly in half, but when I checked on them today, the whole middle of it was burnt for heat stress/light bleaching.From how it looked, I thought that I had lost a decent amount of bud to it, but after trimming it up a bit, it actually wasn't that bad. Here is the before and after shots-
picture.php

picture.php
 

toastfighter2

Active member
Well, I made it to the hardware store, picked up all the tubing I needed and some closet racks. I couldn't carry cement blocks in the car though,but for now I will just use some stuff from around the house, and just get them later, as I am(was) sick of waiting to get this going. So after a couple hours in the basement, I have everything all hooked up and running, but since I am lazy and my camera was all the way upstairs, no pics yet, but I still have some stuff to finish out tonight, so I will try to remember.
 

toastfighter2

Active member
It just that cross actually. I don't like the way that it looks, and it kinda smells like old gym socks, but it is one of the best smoking that I have so far. This weekend one of my friends is bringing me some strawberry cough cuts, some dumpster, and I can't remember the last one that he is bringing over, so I will be phasing out some of my bags seed plants( a couple are keepers though).
 

toastfighter2

Active member
I really wish I did, but it is from some bag seed that I picked up from one of my friends that was moving a ton of killer stuff. He was actually saving every seed that he found splitting it up, along with at least a joint sized nug, all in separate baggies for me(I have some pretty good friends). I ended up with enough to start two flats(144 seeds), and from there I have narrowed it down to just 4 from them, and I made a couple crosses from them. I do have some seeds I made from some Ohio Fog that a buddy got me a clone of, but it took so look to finish(14+ weeks). I am glad that I did that(made some seeds) because as it looks, I won't be able to get another cut.
I managed to get some pics of the garden in it's near finished state. I need to make a manifold for the water going in(my diy nute bottle one just isn't cutting it anymore, leaks too much), and I have to get some black tubing to replace the air pump tubing that I originally was using for the feed lines.
Here is a quick peek into my garden, now 100% really vert
picture.php
 

toastfighter2

Active member
Yeah, it is pretty ghetto fabulous right now, but I will be the first to admit it.
Now that I have it all fired up and running, a couple parts of my original plans have changed. For one, the 400w light is a hell of a lot brighter than a 150w, but not near enough to support three shelves, so two will have to do. I was going to use 2x6's for all of the shelves too, but I saw this closet rack system, and it was just easier to use(didn't have to drill 10 holes in them), get better air flow, and if need be, I can adjust them up to 6" back individually without pulling out the drains. For the second shelf, I have been looking into the pot rack design that Kootenay came up with(or is at least using), and running at least 12 plants in one gallon grow bags, just to keep something simple
 

toastfighter2

Active member
For those of you that noticed the big open spot in the back, I do have a plan for it. I have had a mother plant going for about 3 years now, and it is starting to get a little unruly.Tomorrow I plan on taking some more cuts of her(I already have clone of her all ready to take her place), along with giving it a good trim, and then about Thursday, I plan on transplanting it into the biggest container that will fit in that spot that is open, and giving it another two weeks to grow some new roots, then blooming her. So far this will be the biggest plant that I have put into bloom ever, and I can't wait to see how she does.
 

toastfighter2

Active member
Well I was just about to walk out the door today, and I had a gut feeling to check my babies. Good thing I did, they had drank down at least five gallons from the res in the past three days, and the pump was just starting to make a vortex&pump some air bubbles. Now I know that I need to setup some sort of control bucket to keep it topped up.
 

toastfighter2

Active member
Sorry if anyone was waiting on a update, just been busy as hell lately. Not a whole lot has changed since my last post, except that they are still drinking water like crazy. I did pick up another light though. It is just a 250w, and once I have it remote ballasted, it will be mounted base down to the fan in the center. I did add in a soil plant, and that mother I was talking about is nearly ready to go in(I had to take about 15 more cuts than I wanted to off of her, and it took a minute for her to snap back)
 

bobblehead

Active member
Veteran
Looks like something I would have done a few years ago... Keep going, you're getting there. I don't see a carbon scrubber or ventilation fans (other than the one under the lamp, and that doesn't count). I found that good air flow is just as, if not more, important as good lighting. To stick with the theme, I'm sure you could get a blower off an old appliance from a scrap yard... or modify a stanley blower. I'm just saying even if you don't drop the money on the scrubber, $40 for a Stanley Blower + some ducting, and you're in business as far as moving the heat that 400w is producing.

Looking good. Keep us posted.
 
Top