
Tonyton
Active member
Hello everyone, this will be my 6th time making one of three designs of carbon scrubbers I have came up with in the past 10 some odd years. This is the best one I have made do to trial & error of making it work better and better and so on. I know there are alot of designs on the mag and alot of them are very good but what make mine so speacial? it works with your pocket! Alot of the things you will need you might already have and if you don't I will tell you were you can get it from. OKay, Lets get the show on the road. This is a picture of the tools and materials you will need.


Here are the item you will need
1- 6" to 4" reducer
1- 6" end air duct cap
1- 4" air duct cap
1- Rivet gun
1- box of 1/8 inch rivets
2- 6" Clamp collars
1- bag of poly-fil
1- box hex screws
1- 9/64 inch drill bit
1- drill gun
1- pair of aviator snips
1- Yard stick ( or measuring tape)
1- pair of panty hose
1- fine point sharpie
Activated carbon per measure of your scrubber
and a 3'x3' purfurated sheet metal for radiators. Ok, first we measure the metal to your specs. The good thing is you can make it as big or as small as you like.

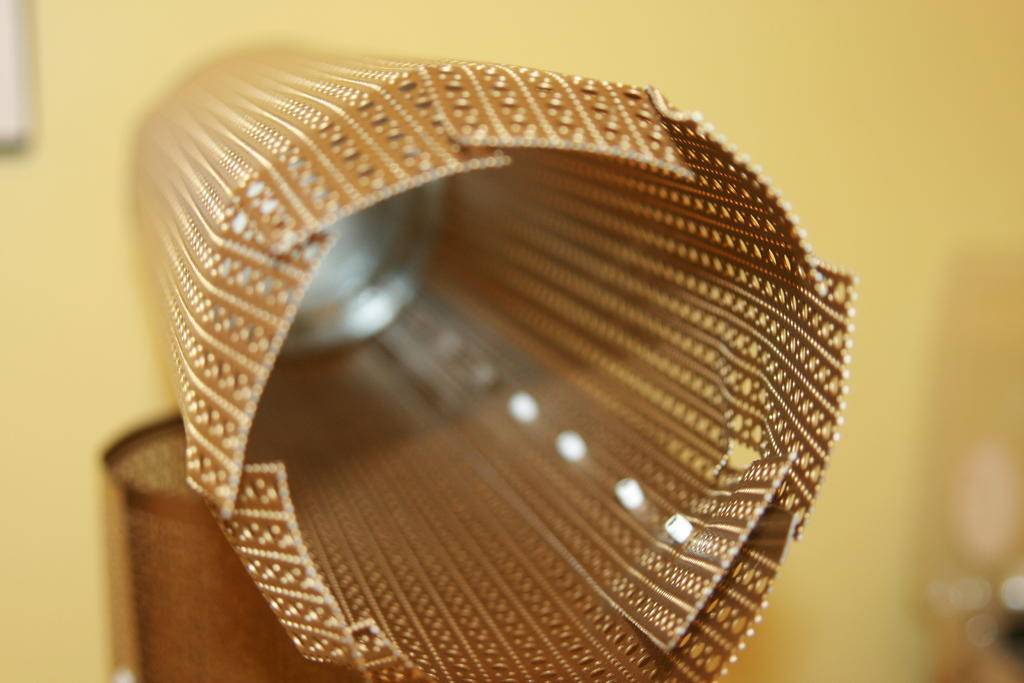
I am making it around 16" to 17" tall give or take a 1/2 inch. So i'm making the screen one foot (12") and 20" long to measure around the 6" cap. Mold the screen before you start to use the drill like this.....

This makes it alot easier to handle the cap and the screen. Mold the screen to the cap while overlapping it to aline the holes together. Take the fine point sharpie and make a mark in the first hole on the screen drill a hole were you marked and put a rivet in it like this..

If you find it hard to handle the rivet it, take some rivets and put them up the spine of the metal sheet first like this..

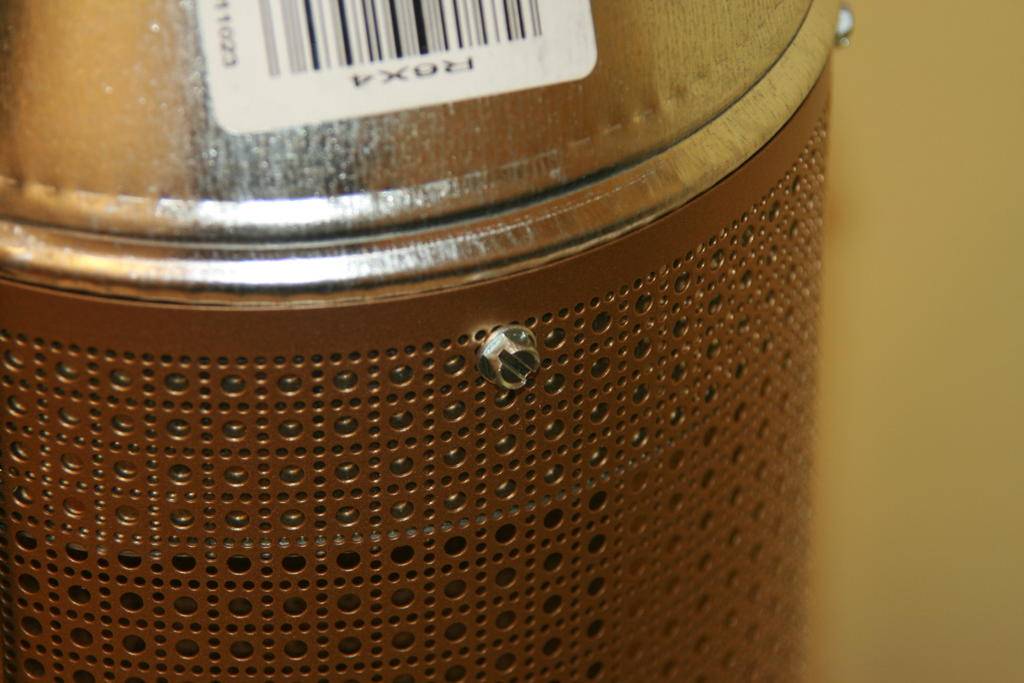
When doing this make sure that the bottom cap and the 6" to 4" reducer is on and that it make a snug fit not to tight. Your going to need to take the reducer off to fill and refill. Rivet the spine and do the same for the 4" cap but your going to have to measure the screen for height so it will fit in the reducer, witch was 16"1/2. high.

Do to the tightness of the reducer I mad ajustments to the inner screen...

Next you will need to drill a hole in the center of the 6" cap and the
4" cap, make sure it is centered...


Take the panty hose and put it on the inner screen like this...

after you finish that you should have three parts to put together...

Put the inner screen in the outer screen and take a rivet and put it in the hole and align the two caps so the rivet fits both caps...


Next put it all together, make some mesurements around the top of the scrubber so you can take the sharpie and every 5th or 6th hole make a mark in one of the holes you should have 5 or 6 holes. once finish drill the holes and put the screws in each hole like this...

Once the reducer is secured take the poly-fil lay it down and streach the scrubber across it...

the poly-fil should be thick enough that you will only need to use one layer of it. Cut and measure to fit and add the collars to the top and the bottom of the scrubber like this...


And there you go your personal Carbon scrubber for what ever size you need. It is easy to size the screen because it is preforated

so you can bend it with out cutting yourself or making a mistake. it will be best to use a yard stick while doing it. Most of the materials I got them from Home Depot, the poly-fil from Wal Mart. The activated carbon will be measured to the hight of your scrubber and your reducer. Note: when you fill the scrubber with carbon shake it until it settles and it don't shake anymore. Take a peace of poly-fil and put it around the top of the carbon replace the reducer and make sure that the screws fit into place and you will be up and running.
The surface space of the scrubber is 10" high x 20 wide x 1"thick will give you 200 inches (0.12 feet) surface space. This one should last for atleast 3 months, more or less depending on the carbon you use and your setup.The setup I have that the scrubber will be housed in is
70" high x 19" deep x 47" wide, it is 36.17 feet squared. If anyone have any questions please ask. Coming Next my Inline Scrubber
Here are the item you will need
1- 6" to 4" reducer
1- 6" end air duct cap
1- 4" air duct cap
1- Rivet gun
1- box of 1/8 inch rivets
2- 6" Clamp collars
1- bag of poly-fil
1- box hex screws
1- 9/64 inch drill bit
1- drill gun
1- pair of aviator snips
1- Yard stick ( or measuring tape)
1- pair of panty hose
1- fine point sharpie
Activated carbon per measure of your scrubber
and a 3'x3' purfurated sheet metal for radiators. Ok, first we measure the metal to your specs. The good thing is you can make it as big or as small as you like.
I am making it around 16" to 17" tall give or take a 1/2 inch. So i'm making the screen one foot (12") and 20" long to measure around the 6" cap. Mold the screen before you start to use the drill like this.....
This makes it alot easier to handle the cap and the screen. Mold the screen to the cap while overlapping it to aline the holes together. Take the fine point sharpie and make a mark in the first hole on the screen drill a hole were you marked and put a rivet in it like this..
If you find it hard to handle the rivet it, take some rivets and put them up the spine of the metal sheet first like this..
When doing this make sure that the bottom cap and the 6" to 4" reducer is on and that it make a snug fit not to tight. Your going to need to take the reducer off to fill and refill. Rivet the spine and do the same for the 4" cap but your going to have to measure the screen for height so it will fit in the reducer, witch was 16"1/2. high.
Do to the tightness of the reducer I mad ajustments to the inner screen...
Next you will need to drill a hole in the center of the 6" cap and the
4" cap, make sure it is centered...
Take the panty hose and put it on the inner screen like this...
after you finish that you should have three parts to put together...
Put the inner screen in the outer screen and take a rivet and put it in the hole and align the two caps so the rivet fits both caps...
Next put it all together, make some mesurements around the top of the scrubber so you can take the sharpie and every 5th or 6th hole make a mark in one of the holes you should have 5 or 6 holes. once finish drill the holes and put the screws in each hole like this...
Once the reducer is secured take the poly-fil lay it down and streach the scrubber across it...
the poly-fil should be thick enough that you will only need to use one layer of it. Cut and measure to fit and add the collars to the top and the bottom of the scrubber like this...
And there you go your personal Carbon scrubber for what ever size you need. It is easy to size the screen because it is preforated
so you can bend it with out cutting yourself or making a mistake. it will be best to use a yard stick while doing it. Most of the materials I got them from Home Depot, the poly-fil from Wal Mart. The activated carbon will be measured to the hight of your scrubber and your reducer. Note: when you fill the scrubber with carbon shake it until it settles and it don't shake anymore. Take a peace of poly-fil and put it around the top of the carbon replace the reducer and make sure that the screws fit into place and you will be up and running.
The surface space of the scrubber is 10" high x 20 wide x 1"thick will give you 200 inches (0.12 feet) surface space. This one should last for atleast 3 months, more or less depending on the carbon you use and your setup.The setup I have that the scrubber will be housed in is
70" high x 19" deep x 47" wide, it is 36.17 feet squared. If anyone have any questions please ask. Coming Next my Inline Scrubber
Last edited:


