
First of all, mad mad props to Mr Bojangles' thread for alerting me to this. I've always been a fan of 3d images but had no idea it was so easy to make photos like this. However a lot of you may understand the basic process, but are possibly having uh, "communication issues" with the software to actually get the images together. So I've prepared this guide using a free multi platform image editor called GIMP. Download it here, available for windows, mac, and linux. I'm using the Windows version and the focusing instructions etc are for a standard auto point and click digi camera.
You can also use any other image editor I would think. Probably even MS Paint if you've got mad skillz with that. Lets get started anyway.
Taking the Pictures
First you must take the two pictures. Plan for a shot with lots of perspective and depth. Aim it up but try and find some sort of feature, a clump, a red hair, a bud, something. Take the first one from the right side. Press lightly on the shutter button to activate the auto focus, then take the shot. Keep the camera as still as possible afterwards, and immediately half press the button to focus again, so you have the same focal point and lighting compensation etc. Keep it focused and move the whole camera to the left about as far as your eyes are apart. Take the shot, trying to keep the whole pic/frame exactly the same as the previous shot.
Editing the Pictures AKA the hard but not all that hard bit
Paste both pictures somewhere by themselves. Rename the first shot (from the right) to r.jpg, and the second one (from the left) to l.jpg so you don't get mixed up. Open r.jpg in Gimp. I do this by right clicking and choosing "Edit with GIMP".
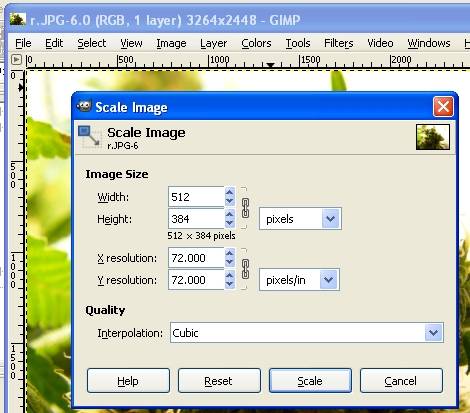
First of all resize it by choosing up top - Image > Scale Image. ICmag's maximum resolution, for me at least, is 1024 x 1024. Since we want two pics side by side, we scale the width to 512. Then just click once in the Height box and it should scale that back to keep the whole image in scale. Click "Scale".
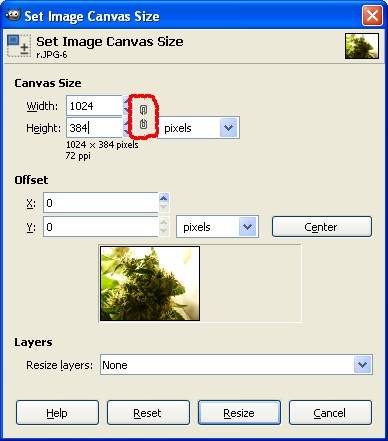
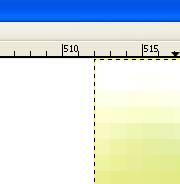
Now we need to make space for the pic beside it. Up top choose Image > Canvas Size. Then click the lock/link icon (shown in red) to unlink it. Make the width 1024, then click the height box and the height should remain unchanged and it shows a preview with blank space to the right. Click "Resize".
Now, leave that there for a bit. Go back to where the pics were pasted and right click on l.jpg, yes, the other one. Choose to edit it with gimp and then choose Image > Scale Image, and make the width 512. Leave the icon linked, and click the height box and check it scales back. Click "Scale. Then choose up top Edit > Copy, and you can now close that window, no need to save it.
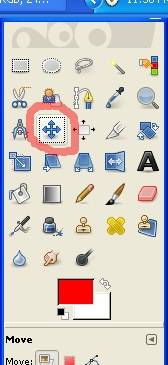
Go back to the original pic we edited, r.jpg, and choose up top Edit > Paste As > New Layer. Then in the toolbox pallete choose the Move tool indicated in red.
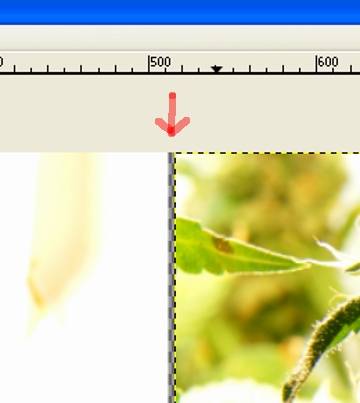
Click and drag the pic to the blank section on the right and you will see the original image underneath. Drop it so there's a tiny sliver of blankness between the two images as shown.
Now choose up top View > Zoom > 1600%. Scroll up to the very top and with the Move tool still selected drag it pixel by pixel so it fits nicely.
Choose View > Zoom > Fit Image In Window, and there we see the product of our labour. In the title bar of the window it should say 1024 x 384 (or whichever height your particular photo autoscaled to). Choose File > Save As. Rename it to whatever.jpg and Save. A window pops up about exporting - click Export. Then in the new window put a check mark next to "Show preview in image window". Then adjust the slider bar and it shows you the size the file will take up when it's saved. Slide it so the filesize is just below your maximum ICmag filesize. We want all the detail we can get after all this work! Choose Save. Quick! Before that cheap timer you bought overloads and blows the circuit board out and you lose the lot!
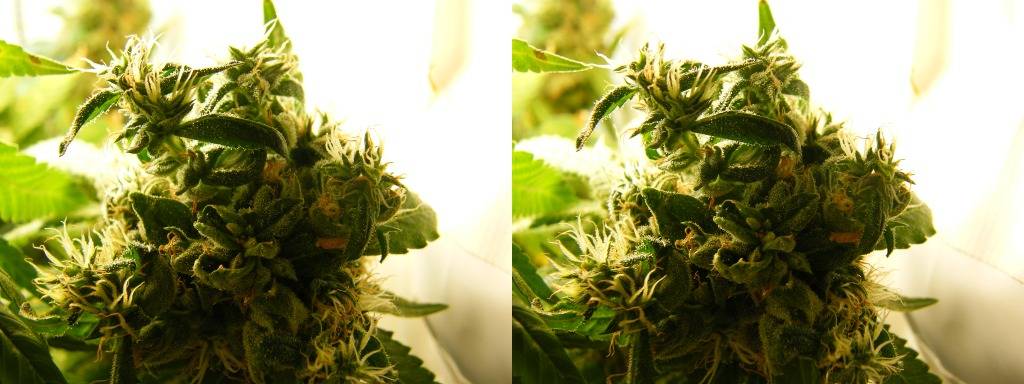
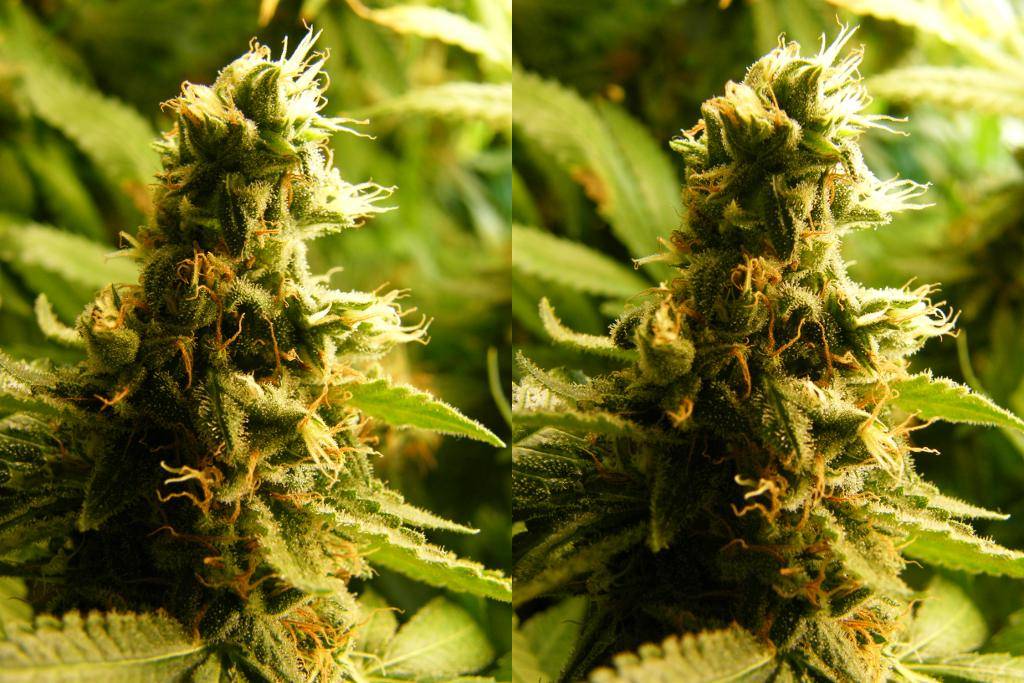
Here is the final product, it's the most heat affected bud in my box and has rad foxtails") A great subject for this.
A great subject for this.
PROBLEMS
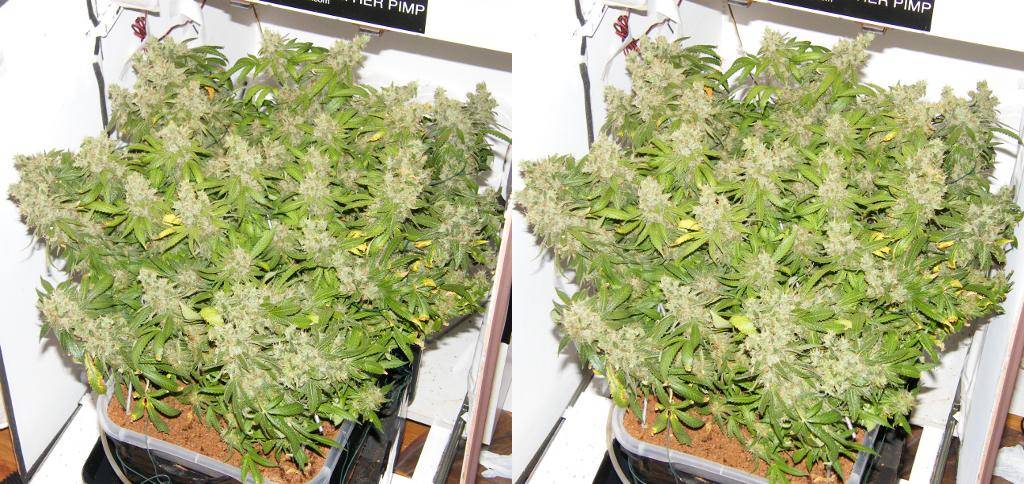
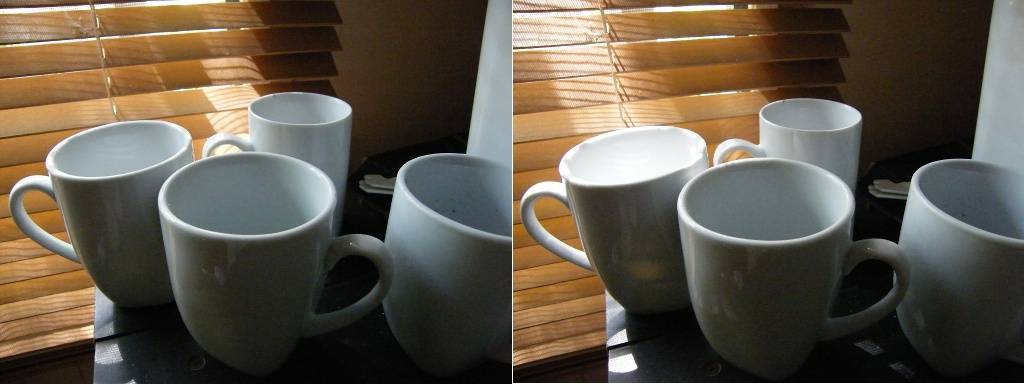
And here is an example of one that's "just not right".

You can also use any other image editor I would think. Probably even MS Paint if you've got mad skillz with that. Lets get started anyway.
Taking the Pictures
First you must take the two pictures. Plan for a shot with lots of perspective and depth. Aim it up but try and find some sort of feature, a clump, a red hair, a bud, something. Take the first one from the right side. Press lightly on the shutter button to activate the auto focus, then take the shot. Keep the camera as still as possible afterwards, and immediately half press the button to focus again, so you have the same focal point and lighting compensation etc. Keep it focused and move the whole camera to the left about as far as your eyes are apart. Take the shot, trying to keep the whole pic/frame exactly the same as the previous shot.
Editing the Pictures AKA the hard but not all that hard bit
Paste both pictures somewhere by themselves. Rename the first shot (from the right) to r.jpg, and the second one (from the left) to l.jpg so you don't get mixed up. Open r.jpg in Gimp. I do this by right clicking and choosing "Edit with GIMP".
First of all resize it by choosing up top - Image > Scale Image. ICmag's maximum resolution, for me at least, is 1024 x 1024. Since we want two pics side by side, we scale the width to 512. Then just click once in the Height box and it should scale that back to keep the whole image in scale. Click "Scale".
Now we need to make space for the pic beside it. Up top choose Image > Canvas Size. Then click the lock/link icon (shown in red) to unlink it. Make the width 1024, then click the height box and the height should remain unchanged and it shows a preview with blank space to the right. Click "Resize".
Now, leave that there for a bit. Go back to where the pics were pasted and right click on l.jpg, yes, the other one. Choose to edit it with gimp and then choose Image > Scale Image, and make the width 512. Leave the icon linked, and click the height box and check it scales back. Click "Scale. Then choose up top Edit > Copy, and you can now close that window, no need to save it.
Go back to the original pic we edited, r.jpg, and choose up top Edit > Paste As > New Layer. Then in the toolbox pallete choose the Move tool indicated in red.
Click and drag the pic to the blank section on the right and you will see the original image underneath. Drop it so there's a tiny sliver of blankness between the two images as shown.
Now choose up top View > Zoom > 1600%. Scroll up to the very top and with the Move tool still selected drag it pixel by pixel so it fits nicely.
Choose View > Zoom > Fit Image In Window, and there we see the product of our labour. In the title bar of the window it should say 1024 x 384 (or whichever height your particular photo autoscaled to). Choose File > Save As. Rename it to whatever.jpg and Save. A window pops up about exporting - click Export. Then in the new window put a check mark next to "Show preview in image window". Then adjust the slider bar and it shows you the size the file will take up when it's saved. Slide it so the filesize is just below your maximum ICmag filesize. We want all the detail we can get after all this work! Choose Save. Quick! Before that cheap timer you bought overloads and blows the circuit board out and you lose the lot!
Here is the final product, it's the most heat affected bud in my box and has rad foxtails
A great subject for this.PROBLEMS
- Man I can't see the window you described or everything is out of scale: All the seperate windows will be on the taskbar, just click around. Zooming is all controlled via View > Zoom and can be changed any time to suit your needs.
- Man I did it but the 3d effect doesn't work: I would suggest taking the pics again. By viewing them before deciding the ones you'll use, you can flick between them rapidly and look for the ones that look exactly the same, only with a little tilt in angle.
- Man it sort of worked, but my eyes hurt to look at it, somethings "not quite right": Again, you probably just need new pics taken better. If there's a change in the wrong angle between shots, it will screw it up like that.
- Man it worked great: No problem then. Please go post your results in Mr Bojangles' thread linked at the top. And please post some here too. I hope you get as much satisfaction as I did. Don't be scared off by the seemingly detailed process - it's very simple in principle and I've outlined it so in depth for the people who really are lost with PCs.
And here is an example of one that's "just not right".


