What's new

DIY Ebb & Flow/Drain 2 Waste Buckets

MJ-IN-BLOOM

New member
This is a tutorial on how to turn regular 5 gallon buckets into an easy cheap DIY Ebb and Flow sytem or efficient drain to waste system.

I got the idea for this because of having to put up with 3 grows of frustration at not having a sufficient system to deal with run off. Up untill this point i have never been able to water sufficiently to flush salt residues out and i can tell that my girls have suffered.

From researching how i could build my own DIY ebb and flow bucket system to deal with the run off dilema i decided that ebb & flow in hydroton was going to be the best sytem for me.

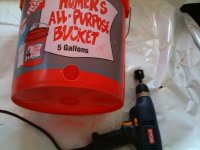
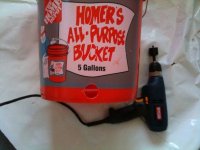
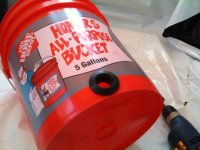
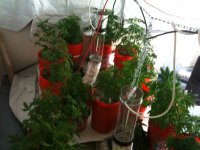
I wanted to be able to build my system using 5 gallon buckets since i plan on growing semi large plants and i dont want yield to suffer because i get rootbound. Since there are no 5 gal bucket systems available i set out to find out how to make one.

I found another post with a guy who uses the same setup but instead he uses a bulkead that fits perfectly to the flat bottom of the home depot buckets he used. Because of my setup i could not use his idea because it required an elaborate homemade stand to allow the bulkhead fitting to come out while the bucket still stood fine.

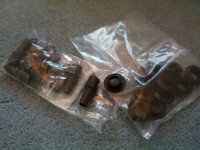
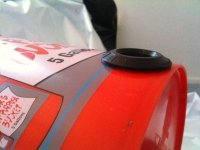
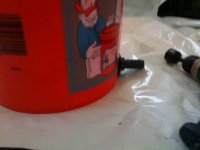
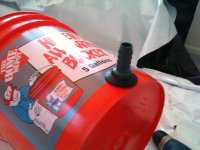
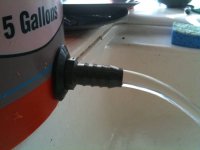
Then i saw another post where a guy wanted to know how to secure a flat bulkhead on a curved resevoir. A guy said that he used something called a Uniseal for the exact same thing. Supposedly they are better than bulkheads and cheaper. After taking a look at them i got the idea for this build i am about show you.

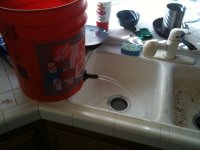
I have only used the uniseals to make an efficient drainage system for the present grow, but as soon as this one is finished i plan on using the same priciple and concept to build my own ebb and flow system.

PICS NEXT
 

MJ-IN-BLOOM

New member
Materials

-3/4" Uniseals
http://verticalhydro.com/index.php?main_page=product_info&cPath=3_4&products_id=6

-3/4" barbed spiggot
http://verticalhydro.com/index.php?main_page=product_info&cPath=3_4&products_id=12

-2 five gallon buckets from home depot
http://www.homedepot.com/h_d1/N-5yc...splay?langId=-1&storeId=10051&catalogId=10053

- 1 1/4" hole saw (get a decent hole saw. To prevent leaks we want to make sure we have a quality hole cut with now burrs)

- drill


Uniseals and spiggot

attachment.php


Drill 1 1/4 inch hole with hole saw at the bottom of bucket. Make the hole so it is 1/4" off the bottom of the inside of the bucket.
attachment.php


attachment.php

attachment.php
 

Attachments

  • photo 2 (6).jpg
    photo 2 (6).jpg
    54.4 KB · Views: 18
  • double leafing
    double leafing
    78.9 KB · Views: 27
  • photo 5 (4).jpg
    photo 5 (4).jpg
    42.6 KB · Views: 21
  • photo (5).jpg
    photo (5).jpg
    41.2 KB · Views: 28

MJ-IN-BLOOM

New member
Insert Uniseal into hole and snug it up against the side of the bucket.

attachment.php

attachment.php

attachment.php
 

Attachments

  • photo 3 (5).jpg
    photo 3 (5).jpg
    50.2 KB · Views: 22
  • photo 3 (6).jpg
    photo 3 (6).jpg
    25.9 KB · Views: 23
  • photo 4 (5).jpg
    photo 4 (5).jpg
    33.7 KB · Views: 25
  • photo 5 (5).jpg
    photo 5 (5).jpg
    40.9 KB · Views: 30

MJ-IN-BLOOM

New member
Next we use some dish soap or windex to lube the inside of the uniseal and the outside of the spiggot insert. Firmly twist the fitting into the uniseal. Once the fitting is inside you are done with the bucket.

attachment.php

attachment.php
 

Attachments

  • photo 4 (9).jpg
    photo 4 (9).jpg
    30.2 KB · Views: 22
  • photo 3 (10).jpg
    photo 3 (10).jpg
    48.6 KB · Views: 30

MJ-IN-BLOOM

New member
I had to make 18 of these. Since this is my first time using uniseals i wasnt sure if they would leak or not. I read that they were awesome but i began to test each bucket as it was completed by filling it up with 4-5 gals of water while plugging the spigot with my finger. To my surprise there were no leaks at all. THESE THINGS ARE AWESOME! So awesome in fact that i deemed i need not even test the rest of them for leaks. Im positive they have got the job under control.


attachment.php
 

Attachments

  • photo 2 (4).jpg
    photo 2 (4).jpg
    27.6 KB · Views: 26
  • photo (4).jpg
    photo (4).jpg
    35.8 KB · Views: 17

MJ-IN-BLOOM

New member
Now let me show you how i have these buckets laid out in my setup. I decided to go with a vertical figure 8.

attachment.php

Keep in mind that i dont have the 3/4" drainage tubing hooked up in these pictures. Also keep in mind that i have this set up as a drain to wated bucket system. Each plant is potted in soiless mix in a 5 gal bucket. The bucket has multiple large bore holes drilled in the bottom for drainage. Each bucket is then placed inside on of the buckets we just made that has been fitted with a barbed spigot. This will keep our soil medium and roots from clogging the 3/4" drain hole/tubing and it will also make it so that the plants are movable from site to site.
attachment.php


attachment.php


attachment.php
 

Attachments

  • photo 2 (4).jpg
    photo 2 (4).jpg
    73.6 KB · Views: 25
  • photo 3 (4).jpg
    photo 3 (4).jpg
    71.7 KB · Views: 24
  • photo 5 (4).jpg
    photo 5 (4).jpg
    58.9 KB · Views: 26
  • photo 5 (6).jpg
    photo 5 (6).jpg
    74.6 KB · Views: 28

MJ-IN-BLOOM

New member
Now...

I told you that this could also be setup to make an ebb and flow system. Well at least this is what i plan to do after i get through with this soiless drain to waste run.

On the same hydro site where i got the uniseals they also sell a DIY Ebb & Flow controller bucket.

http://verticalhydro.com/index.php?main_page=product_info&cPath=3_5&products_id=4

EbbandFlowControlKitJul07Medium.jpg


This is going to be perfect for me because all the aftermarket ebb & flow controller units are over $200 and they are only for smaller 3-3 1/2 gallon bucket sizes. If you want to make a 5 gal controller bucket then you have to buy one of the expensive ass controller boxes and modify it to fit a larger bucket.

This thing here is awesome because it lets you create the brains of the ebb and flow control bucket using float sensors and relays. Using this kit you can turn any container into a control module for any ebb and flow sytem. So i basically will just add this thing to my buckets next to finally make the switch to higher yielding hydroponics!

I have more pics for you guys but my tubing, elbows and connectors are coming today so i will get er finished and take some pics.
 

MJ-IN-BLOOM

New member
WOW guys. I figure out how to deal with a stupid problem that has been bothering me ever since i started growing... so I make a grow journal to share with you how i built it, and no one has anything constructive to say? No one has any ideas on ways i could make it better?

To the pessimist who posted above me...

Whatever,

sorry if this sounds like an ad. I was trying to speak in plain english to make it clear on how to replicate this. I dont care if anyone tries to make one of these or not. Im just happy i solved the problem with drainage that i had.

If anyone cares i will post pics of the completely finished setup later.
 

MJ-IN-BLOOM

New member
but then again i take back my apology. Fuck it if it sounds like an advertisment. the damn site helped me out. So fuck yeah ill shout em out. They sell some good shit.
 
2

2fast4u2

i think your setup is pretty cool, someone should have told you that ebb&flow was the way to go from the beginning.

Never had anything but problems until i let the plants water themselves.

Building a vertical grow right now, 250w. Im shooting for 6-8 ounces the first go, and maybe more if i find a strain that yields right.

good stuff mang!
 
2

2fast4u2

ps, you will notice that the most negative people are just as new as you are to the site, dont pay them any attention.
 

:-(

Member
@MJ-IN-BlOOM, its all good bro... I was just speakin my mind, nothin personal. Good job puttin the word on the street.
 

BigGreen

Well-known member
Veteran
Looks kinda like what Im thinking of doing. What kind of yield do you expect out of this setup and are thos 1ks?
keep the pics coming and nice thread.
BigGreen
 

Latest posts

Latest posts

Top