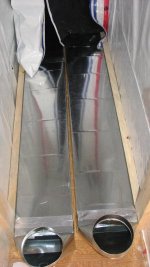
What's new

I'll have what's behind door#1 please!

MJ Maven

Member
Welcome to my garden ICMag :D I figured it was time I introduce myself over here :)

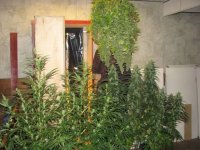
Some of you may already know me from another site ... but for those of you that are interested ... here's a garden tour to get you up to date on what I do and how I do it :)

The Stats:

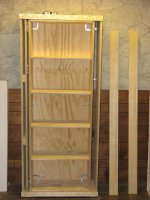
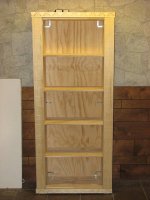
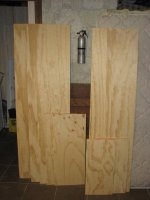
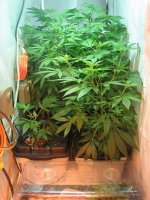
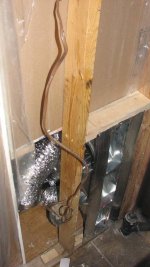
Veg side ---> 400 watt MH for mothers, clones, and SWC's

Flower Side ---> 1600 combined watts (1 KW hortilux + 600 watt digi HPS) for perpetual DWC

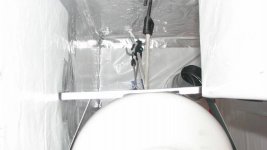
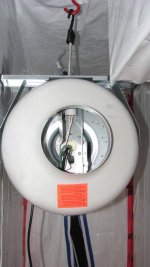
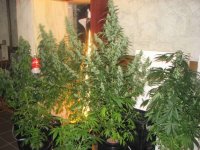
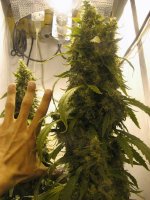
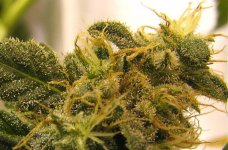
Here's a couple bud shots to wet your appetite :p

attachment.php


Both pics are of my SkunkWidow x AK47 (SWAK) :D

attachment.php


Garden pics coming momentarily ... gotta roll a joint before I upload the rest :lol:

Maven
 

Attachments

  • IMG_1322.jpg
    IMG_1322.jpg
    77.2 KB · Views: 6
  • IMG_2238.jpg
    IMG_2238.jpg
    88.8 KB · Views: 6

MJ Maven

Member
Day 1 - Moved existing wall 2' 5.5" away from its original location. If you look closely, you can see that in two locations, in the new framing, I used 4"x4" posts ... more on those later. After double stuffing with sound insulation (notice the bulge :p ) ... I gave everything a wrap in clear poly.

Looking back towards the construction access door. After putting up the false wall, I had to get all building materials through that 2' space :lol: Made for some interesting and awkward moments :p

attachment.php


Looking in from the construction door:

attachment.php


Every single square inch of interior space is then covered with Fire Rated 3/4 inch drywall ... and then taped off.

attachment.php


Add the B&W poly, and a lot of foil tape, and it is starting to look like a grow room :)

attachment.php
 

Attachments

  • IMG_4264.jpg
    IMG_4264.jpg
    52.3 KB · Views: 9
  • IMG_4332.jpg
    IMG_4332.jpg
    52.2 KB · Views: 7
  • IMG_4341.jpg
    IMG_4341.jpg
    31.3 KB · Views: 4
  • IMG_4359.jpg
    IMG_4359.jpg
    45 KB · Views: 8

MJ Maven

Member
Day 2 - Raised the floor to make space for air-in ventilation. Used 2"x4" (turned on its side) as support for my 1/2 inch sub floor. Then ran furnace wall ducts along the floor ... both going to flower room.

Sub floor going in over ventilation pathways:

attachment.php


Sub floor and ventilation pathways complete:

attachment.php


FR drywall added:

attachment.php


Inputs for flower room ventilation:

attachment.php
 

Attachments

  • IMG_4877.jpg
    IMG_4877.jpg
    39.9 KB · Views: 6
  • IMG_4885.jpg
    IMG_4885.jpg
    23.5 KB · Views: 5
  • IMG_4883.jpg
    IMG_4883.jpg
    33.5 KB · Views: 5
  • IMG_4878.jpg
    IMG_4878.jpg
    36.2 KB · Views: 5

MJ Maven

Member
Day 3 - Built a bulkhead around my ventilation access points and sealed up the construction access door. Added a 165 cfm inline fan to each ventilation pathway ... giving me 330 cfm forced intake for the flower room.

Clustered utility space with intake fans and custom built intake vents:

attachment.php


Installed the exhaust port too. The aluminum flextube is my dryer exhaust.

attachment.php


Sealed up the utility space with panelling, and covered the vents with furnace intake and duct covers ... this is the only really obvious sign that something is going on back there ;) I have had a furnace repair man and meter readers (also had external meters installed) within 2' of the utility wall and no one has ever even glanced at it funny :D

attachment.php
 

Attachments

  • IMG_4922.jpg
    IMG_4922.jpg
    44.6 KB · Views: 6
  • IMG_4925.jpg
    IMG_4925.jpg
    42.3 KB · Views: 6
  • IMG_5056.jpg
    IMG_5056.jpg
    28.4 KB · Views: 5
  • IMG_4894.jpg
    IMG_4894.jpg
    40.4 KB · Views: 7

guineapig

Active member
Veteran
Welcome to the forums.....:woohoo: :jump:

Happy you joined:
59182502058.gif
(new welcome dance....)

:ying: kind regards from guineapig :ying:
 

MJ Maven

Member
Day 4 - Cut new access door and hung lights, ventilation and separate the flower and veg chamber. Flower room gets 10' x 2' ... veg side gets 5' x 2'.

Modified a 10" 510 cfm fan to suit my needs:

attachment.php


Used a 8" to 6" reducer and than shaped some sheet metal to make the reduction from 10" to 8". I know ... I wrote that backwards ... cut me some slack ... I'm baked from that joint :D

attachment.php


You can build your own turbine engine too :D

attachment.php


Attached new fan to a 6" y connection... and used each end of the y to draw warm air from around the lights:

attachment.php
 

Attachments

  • IMG_4904.jpg
    IMG_4904.jpg
    45.2 KB · Views: 6
  • IMG_4700.jpg
    IMG_4700.jpg
    36.2 KB · Views: 9
  • IMG_4687.jpg
    IMG_4687.jpg
    39.5 KB · Views: 5
  • IMG_4701.jpg
    IMG_4701.jpg
    44.6 KB · Views: 7

MJ Maven

Member
Day 5 - Installed carbon filter (Can 66) and main exhaust fan (465 cfm).

In an attempt to reduce noise ... everything that generates a lot of vibration is suspended by bungees. Flower side ventilation dumping it's air into the veg room:

attachment.php


Carbon filter and fan is suspended by bungee too. In the top right of the pic you can see the flower room vent coming into the veg room:

attachment.php


The carbon filter then clears both rooms of the hot air.

attachment.php


The access point as of day 5:

attachment.php
 

Attachments

  • IMG_4907.jpg
    IMG_4907.jpg
    34 KB · Views: 10
  • IMG_4891.jpg
    IMG_4891.jpg
    26.8 KB · Views: 6
  • IMG_4890.jpg
    IMG_4890.jpg
    35.7 KB · Views: 7
  • IMG_4899.jpg
    IMG_4899.jpg
    41.2 KB · Views: 11

MJ Maven

Member
Day 90-ish LOL ... yeah ... I stalled out for a while :p

Time to build the stealthy bookshelf door! :D

Notice the extinguisher that no grow room should be without! I took this ...

attachment.php


... and built this! :D

attachment.php


Remove the casing pieces, disengage the lock ...

attachment.php


... and you get a secret bookshelf door! :D It's no batcave back there ... but it is where I do my best work ;)

attachment.php
 

Attachments

  • IMG_6182.jpg
    IMG_6182.jpg
    50.8 KB · Views: 5
  • IMG_6181.jpg
    IMG_6181.jpg
    53.3 KB · Views: 7
  • IMG_6179.jpg
    IMG_6179.jpg
    45.7 KB · Views: 7
  • IMG_6166.jpg
    IMG_6166.jpg
    40.6 KB · Views: 6
M

medi-useA

A most Impressive Home renovation MJ Maven!

I noticed that you had 2 sets of ducting in the last pics...are they both intakes or an intake/outtake combo?... {damn professional look to the construction man...I love to construct and/or tinker but I only have the skills of a monkey...I can bash things, screw things, glue things and hack things all very very badly...and they LOOK LIKE IT!...but your work in construction so far is looking impeccable.}

Correct me if I'm wrong, but those 4"x4" posts you mentioned earlier,
are they accessways to the plants?...Your area is limited for access...what method are you growing with in that area?...

OH BUGGRIT!...I just had my morning medi-cone and got gibbering...You've shown the bud shot at the beginning...are walking us through the construction phase...you've obviously got a plan for your posts to roll out....ignore my prevoius ??? and I'll sit back and follow this.....

muA
 

MJ Maven

Member
I eventually stained the bookshelf ... and it has been smooth sailing ever since :D

Those 4" x 4" posts I mentioned earlier ... those are important ... I needed them to support the weight of the bookshelf door when it is open. I was worried that a 2" x 4" would not be strong enough to hold the weight of the bookshelf and books.

A couple family shots ...

attachment.php


Assorted strains. SWAK, NL x Blueberry, Purple Kush

attachment.php


Veg side in full swing ... I root clones for two weeks, veg for four weeks, and flower for eight. I run everything two weeks apart ... so I get two plants to harvest every 14 days.

attachment.php


Flower side :D

attachment.php
 

Attachments

  • IMG_1348.jpg
    IMG_1348.jpg
    61.5 KB · Views: 5
  • IMG_1084.jpg
    IMG_1084.jpg
    57.4 KB · Views: 6
  • IMG_1942.jpg
    IMG_1942.jpg
    82.6 KB · Views: 6
  • IMG_1058.jpg
    IMG_1058.jpg
    82.8 KB · Views: 4

MJ Maven

Member
Teeg420 ---> Thank you for coming by :) Big is beautiful ;)

guinea pig ---> Thank you for the kind welcome ... and the welcome dance :)

medi-useA ---> In that ventilation pic ... both are air-in pathways to which I attached 165 cfm fans :) I have 330 cfm forced air going in ... and 465 going out ... the rest is passive intake to ensure a negative pressure environment (and no leaking odors). At this point, I only have door#1 ... but will be building door#2 soon. For now, door#1 gives me access directly to the flower side ... and through a partition, the veg side. Door#2 will be a direct access to the veg side :) And ... gibber away my friend ... we all do it from time to time :)

Maven:smoke:
 

Capn

Member
amazing spot you got there. loving the diy inline fan and pretty much everything else about this grow lol.
 
D

Deaner

Love the stealthiness! Great grow brother.

How much investment would you say is here?
 
J

JackTheGrower

That deserves an Award.. Can we get a "Crafty F'kr" leaf.

Damn fine job.. I would be proud to own one!
 

MJ Maven

Member
Megas ---> It took many mistakes, many banged thumbs, and many more lessons learned for me to get these "skills" ... anyone can do it once they have the experience :yes:

Capn ---> Thank you for the kind words :) I love DIY projects :D

Deaner ---> Thanks :) I am a little embarrassed to say ... but it cost a lot. The entire space ... from framing, to lighting, and hinges ... everything ... was about $4400 Canadian :yoinks:

JackTheGrower ---> Thank you sir :) I like that title "Crafty F'kr" :chin: :D

Maven
 

MJ Maven

Member
I don't type fast enough when I'm baked! :)

I don't type fast enough when I'm baked! :)

ourcee ---> Thank you for your flattering words :) I have had years to think about this growroom... and to come up with clever, and always expensive, ideas. I finally bought my own property last year and this was the first reno :yes:

madassimi ---> Thank you :) Stealth was the priority.

Maven:joint:
 
Top