What's new
  • Happy Birthday ICMag! Been 20 years since Gypsy Nirvana created the forum! We are celebrating with a 4/20 Giveaway and by launching a new Patreon tier called "420club". You can read more here.
  • Important notice: ICMag's T.O.U. has been updated. Please review it here. For your convenience, it is also available in the main forum menu, under 'Quick Links"!

Room inna Room ontha CHEAP!!

What shakes ICmag? :jump:

Imma lone ranger who just blew into town. I know its kosher to kick around the forums and introduce yourself and pander around to get some posts up but I'll prefer to get straight to business!!!

Stealth is the ultimate form of security. Fool the eye, hide in plain sight, dissolve into the background. For this reason I have long leaned towards grow cabs. Inconspicuous boxes that are easy to secure and can loaf around in plain sight without fear. This has long since colored my grow style.

Therefore its gonna take some getting used to these swanky new digs!:abduct:

Much as I love grow boxes they have a built-in flaw. You gotta stand there like a right knob with the damn things hanging open when you work on them. I dunno about you guys but I spend a lot of time with my baby girls. I use heavy training methods and just hang out with them in general.

This makes a closet sound nice. But they are a bastard to ventilate, work with and secure in general And they're just so fecking conspicuous. And the more you work to secure it and lock it down the more apparent it becomes that you're hiding something.

I have longed for a comprimise and I think I've found the answer. A camoflauged grow-box that you can stand in. A fully-stealthed Room-In-A-Room!

And now I have it! Some may consider its dimensions fairly meager. 224 cubic feet.

But they're MY 244 cubic feet. My private little slice of the universe. I have run a ton of hackneyed cabinets and annoying setups. I am tired of that! I've wanted to build this thing right the first time. That means the size and capability of the finished box is gonna exceed the supplies I use to run the first set of plants. Consider it growing room.

The project is well underway but I'm gonna limit the scope of my images to help me sleep at night. No-landmark intirior shots only, sorry guys! Stealth is stealth because what you do to get it is known only by you. Can't do any pics and instructionals of that!

Instead I'm gonna post pics of my various interior steps! The room is still under construction and plus I like to tease! :biglaugh:

So here we go!

An early part of construction should be surface prep. You want to do this to whatever pre-existing mounting surfaces you have to work with. Its just better this way.

picture.php


Primer
is amazing stuff. You mustn't think of it as paint. Just clear the surface of any standing dirt and large chunky stuff. The rest can be painted right over. Good quality primer will seal up dirt and grime. It preps the surface nicely for something we'll be seeing later: Elastomeric Paint

A perennial problem with grow boxes and one complicated by my situation is sealing. Getting the whole bad boy as light and air tight as possible seems like a never-ending quest. I've battled leaks for years but now I think they've finally met their match:

picture.php


Combine these supplies with ordinary 2x4s of the desired length! Securely fasten that bad boy to just about anything! Like so:

picture.php


picture.php

When pinned to concrete these fuckers are not only a perfect seal but also Fort Knox strong! They are great for securely mounting swing-in doors. They make pre-existing mounting points that where crooked into a nice square surface. They are very nice for butting plywood sheet against. This is a process you will see shortly.

Many more build tips to come! Gonna close out the first post with a teaser pic of a key component in my up-coming grow:

picture.php


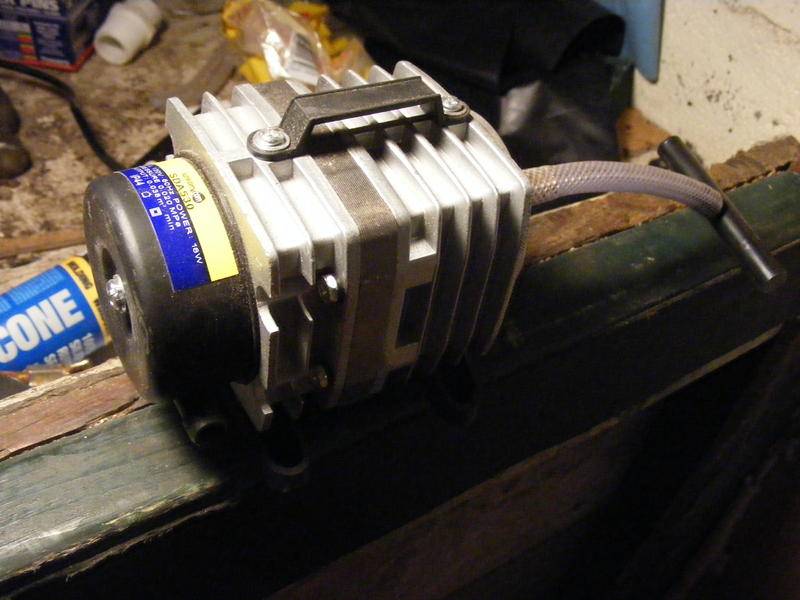
DUN, DUN, DUUUUUUUUN!!!

Until next time viewers! :laughing:

*EDIT* PS Srry about the big images. Couldn't make the thumnail system thingy work! :wallbash:
 
M

micro gro

Nice job. :yes:

With what, and how are you framing the box? 2x4's all the way through? One tip that someone gave me is to use treated lumber for the bottom pieces, in case of water damage. Not sure how much of a difference, if any, it will make in a smaller setup.

What type of paneling material will you be using? Will you be using any form of decoupling to reduce sound, since stealth is high priority?

Key component being air pump... DWC grow? How will you muffle or otherwise reduce the noise & vibration generated by the pump? I see it is a fairly small 16w version, but I imagine it might still make noise even with air stones attached.
 
J

JackTheGrower

Thanks for the Grow Room Porn!

The major benefit I see so far is the cool cement!

I take it you need to have people stand right next to it and not know?

Cool on the Private Universe thing.. I love going with the dream enthusiasm myself..

So have you planned on what to do about fan noise?

I find there are two noise components to my centrifugals' the actual fan noise and the air noise.

Take the 8 inch Vortex for example, It needs a length of duct after it to allow the noise to disperse.

Just some random thoughts..

Jack
 
Thanks for the Grow Room Porn!

Haha, if you thought that was risque' just wait till the second act!

Hehe, I see I have some stealth enthusiasts checking in to see if I've taken correct measures.

Nice job. :yes:

With what, and how are you framing the box? 2x4's all the way through? One tip that someone gave me is to use treated lumber for the bottom pieces, in case of water damage. Not sure how much of a difference, if any, it will make in a smaller setup.

What type of paneling material will you be using? Will you be using any form of decoupling to reduce sound, since stealth is high priority?

Key component being air pump... DWC grow? How will you muffle or otherwise reduce the noise & vibration generated by the pump? I see it is a fairly small 16w version, but I imagine it might still make noise even with air stones attached.

The major benefit I see so far is the cool cement!

I take it you need to have people stand right next to it and not know?

Cool on the Private Universe thing.. I love going with the dream enthusiasm myself..

So have you planned on what to do about fan noise?

I find there are two noise components to my centrifugals' the actual fan noise and the air noise.

Take the 8 inch Vortex for example, It needs a length of duct after it to allow the noise to disperse.

Just some random thoughts..

Jack

The 'cool cement' is really nice but also a pain in the ass. Its very old and so was laid like 8 inches at a time. That means the faces left byhind are highly irregular. Sealing up against it has been a bastard which is why I resorted to expanding builder's foam and a fuckin power-nailer!

Construction is entirely 2x4s and chip-board (OSB). Flooding should never be an issue in a fully drained basement in a house that sits on a hill. If it is I'll have much bigger problems than musty old 2x4s. Im very lucky with my situation. The box is being built onto the inside of a pre-existing structure.

Sound deadening is an issue. OSB is great but it transfers noise like a motherfucker. My big-ole air pump will be problematic here. (NOT a DWC grow BTW, guess again! :nanana:) I have defeated the noise problem with some secret sauce! I will be sharing that particular trick with you guys as soon as I get more pics up.

As for fan muffling I've got that licked. I am using a very nice axial fan. What makes it unique is that the majority of it's construction is made of High Impact Polystyrine. This is a high-performance thermoplastic and building an axial fan from it creates one of the nicest stealth circulators ever. That means basically no noise comes from the unit itself. I'm combining it with a home-brewed can filter and an eggshell-foam-lined cardboard box-muffler to take care of the wooshing sound from the ducting. Pics of all this stuff will be up soon!

Thanks for all the interest guys! This motivates me to get the damn thing finished even sooner!
 
M

micro gro

Secret sauce, huh? Does it involve rubber-mounting/hanging the pump inside of a small sound insulated box?
 
Krusty style?

I see moldy walls in your future btw...just the vibe I'm gettin...hope I'm wrong about how this plays out.

Heh, wrong and wrong. Getting warmer with the Krusty guess but still no cigar.

As for moldy walls I find it adorable that you guys are helping me out by giving me a heads-up on newbie-headaches like mold and sound-proofing, but I've got these issues licked. This box is on lock-down! :sasmokin:

Secret sauce, huh? Does it involve rubber-mounting/hanging the pump inside of a small sound insulated box?

OoOo! Close! But I'm a little more high-tech than simple rubber tricks.

TODAY'S LESSON is about sound-proofing. Years of building grow cabs and various obscure micro boxes has taught me a lot about it. You can use foam or insulation or a lot of other tricks but you really have to sit down and think about the problem. What is noise?

Noise is vibration! In order to keep the noise down we need to reduce vibration. This can be hard to do when working with OSB and 2x4s, they transfer noise in an awful way. Time for some secret sauce! Today I'm gonna share with you kids a technique I've developed that I call

Shock Mounting:


Here's a piece of painted OSB. I'm about to mount it onto a solid mounting point. Normally this big thin piece of low-quality wood would pick up any vibrations in the air and transfer them to my mounting points. This in turn sends a vibration into the solid mounts. Sound travels fast and far through solids and this can give your grow that irritating, distant hum or buzz that it seems like you can hear through the whole house. We must eliminate this vibration. I use this:


THIS is called VE-1. I'll let it's propriaters explain it:

VE-1 was formulated for maximum damping efficiency over a broad frequency and temperature range. It is made of a mineral filled viscoelastic polymer that transforms vibrational energy into thermal energy (low level heat).

It comes on a roll and is 1/4 inch thick. Its a heavy, black flexible vinyl-like substance. It is often used to line the inside of speaker cabinets but is also used in the construction of sound-proof rooms. When sandwitched between two solid objects it will totally prevent vibration being transfered from one of them to the other!

So we apply the VE-1 to the areas around our mounting points like so:


Then pre-drill your mounting hardware and place it on the other side so that it will pierce and travel through the VE-1.


Now get yourself some of this stuff:


Ordinary black silicone. This wonderfully versitile substance is great for sealing cracks and gaps. It is best not to use it retrospectively. It is much MUCH more effective if you place it onto the mounting surface and then squish it in with the new piece to be put in. Don't assemble your pieces and then discover that you have a crack to fill. You can attempt to fill it in with this stuff or something similar after the fact but it will not be nearly as good. :noway:

So make sure to lay it down first like this:


Followed by the newly sound-proofed piece:


Screw in snugly and then wash, rinse, repeat.

I should mention that I am doing this backwards from how most of you would do it. Normally when you build a box like this you will construct a 2x4 skeleton and then attach the OSB to it. In this case you should be applying the VE-1 to the back-sides of the 2x4s and then screwing the OSB into place.

I'm lucky enough to have a pre-existing mounting surface and am therefore putting the VE-1 on the OSB and mounting it up that way. Make sure you apply a patch of VE-1 to EVERY SINGLE mounting point. Pushing a screw through the OSB in just one location that doesn't have VE-1 will negate the benefits of using it for that entire panel.

Successful shock-mounting like I have shown here knocks the noisyness of a box down to an incredible degree. I've started to get mine properly sealed up and the results are astonishing. Step into the room and close the door behind you and you become encased in an eerie muffled silence. Ordinary sounds like the centeral air system for your house or your neighbor's air conditioning unit or the cars outside on the street all dissapear. You are so used to these kinds of noises that you do not notice them until they are gone. Proper application of VE-1 makes this sort of isolation possible.

Oh, and another construction tip. We are talking about sealing up a box here and it is worth mentioning an old carpenter's adage:

Measure twice, cut once!

There is no better seal than a tight fit. Check all of your corners for squareness because they usually aren't. Taper the edge of your cuts on long boards so that it fits as perfectly as possible dry. The less filling is needed in the cracks the better. Be patient and thorough with your measurements and things should be looking like this:


Nice and tight!

So that's what I'm doing about noise. I'll show another VE-1 demo or two before we are finished here. It is especially critical for mounting the air pump and ventilation.

Next time I'll be showing you guys what I plan to do about mostiure. I fear no mold and you will see why soon enough.
 

globel

Member
I think VE-1 Is similar to dynamat. Its used to deaden sound inside cars. www.dynamat.com. I think the license plate kit would work for like 3 air pumps.


here is the description:

Dynamat Xtreme License Plate Kit
Contents: (1) 4"x10" (100mm x 254mm) pieces of Dynamat Xtreme
Total Coverage: 0.28 ft² (0.03 m²)

also here are the specs. I don't know how this compares to VE-1 yet ... BUT I WILL FIND OUT!!! =))

Acoustic Loss Factor @ Temperature (Using ASTM method E756@ 200 Hz):

0.081 @ +14F (-10C)

0.240 @ +32F (+0C)

0.257 @ +50F (+10C)

0.417 @ +68F (+20C)

0.259 @ +86F (+30C)

0.194 @ +104F (+40C)

0.140 @ +122F (+50C)

0.094 @ +140F (+60C)
 
do you have a link for ve-1 my google powers are weak today

Its a little obscure, I buy it here:

http://www.parts-express.com/pe/showdetl.cfm?Partnumber=268-035

That dyna-mat stuff sounds a lot like it. The main difference seems to be that dynamat is polystyrene-based and therefore a bit cushy and gaskety. VE-1 is vinyl-based and yields very little. It has sligthly better stability under changing temperatures and seems to do more dampening with less thickness. This is surely down to the higher density of the VE-1.

Dyna-mat should work just as well for shock-mounting. I'm sure there are one or two other products on the market that will do the job as well.

Two updates in one day, I am really rocking this box! At this rate I'll be done in no time.

Already some users have rightfully expressed concern that I would see mold with my soft, untreated wood interior. Soft wood like the pine that makes up normal 2x4 studs can succumb to molds in a matter of weeks.

I brushed these concerns off and that is because I have this:


Elastomeric roofing paint! This is the ultimate reflective paint and is so good that I have come to prefer it to mylar or black & white poly. It doesn't reflect visible light quite as well as those two but it does a better job at containing UV and IR energy. It is also extreemly mildew-resistant. Its less like paint and more like liquid rubber.

Mylar and other plastic sheet must be taken down regularly and cleaned when used to cover a wall. It also rapidly gets less efficient as it picks up dust and grime. This coating on the other hand is good for many years once applied. It repels dirt and dust and is very easy to clean if you do get it dirty.

Happily it is applied just like paint so all you need to use it is some supplies like this:


Apply evenly to the surface. Don't treat it like primer and try to lay it down thick the first time. Elastomeric coatings respond very well when used in multiple thin layers. Don't worry about getting perfect coverage the first time. First coat should look a lot like this:


..Not very good looking yet. This is fine. Get thin all-over coverage and wait for it do dry. I'll be posting pics as the additional coats go on and it starts to look very pretty.

As each coat goes on it starts to thicket up. The rubbery plastic-like consistency means that it fills gaps and goups over little holes quite nicely. Any tiny cracks that you didn't manage to fill with tight fits, builder's foam and black silicone will often be defeated by the final coats of paint.

That said my box is already light-tight. Sealed myself inside with the lights out. Waited 15 minutes for my eyes to adjust and still couldn't see my hand in front of my face. Absolute blackness. Perfect.

This can be hard to get, especially around the door. Due to my paranoia I can't show you guys the full extent of my door's construction but I can give you some pointers:


I call this an inward-swinging L-hinge. Check out the backing, I've sandwitched a layer of VE-1 between the door mount and the hinges. Note the location of the hinges. This type of door mechanism takes special hardware:


Dissapearing hinges. These guys are meant to fold in on themselves and be crushed between the door and the jam. I have used them to make this L-hinge. Doing it this way means you have the entire width of a 2x4 to get the thing sealed up. A little weatherstripping makes this easy. This sort of door lifts off and away from the surface it closes against very nicely as it opens. This means you can install it in a way that makes it look awfully convincingly like a wall on the outside. These doors are very easy to camoflauge.

And that's all for now. Check back to see how the paint looks after another coat or two. Things are starting to wind down and soon I'll be showing finishing touches like electrical, ventilation and the all-important shock-mounting of the air pump and fan. Until next time!
 

microgram

Member
I certainly have! I hope you show some "fully done" pics! I know you're about stealth, but if the DEA runs across your grow show, it surely wouldn't be because of this thread.. :smoke: even if they did, they have enough pixelation to totally prove that you're going to jail.

Im like a possible man, I want some skin! something more revealing!

haha.

ug.
 
J

JackTheGrower

I attach my fans on a torsion bar 2x2 across the equipment bay.

This isolates fan noise from the fan vibration..

That transfers to a solid mount on each end..

So the noise is in the bay and the equipment bay itself absorbs the vibration softly enough for my needs..

But yeah it helps to mount correctly.


Still waiting on the air noise.. That should be good!


Nice work.. I don't like all the chemicals tho..
 
Chemicals? What chemicals?

You gan get vibrations out a lot of different ways. What I have shown is one of the most compact. VE-1 takes up very little space for the incredible job it does.

We'll see about some more revealing finished picks. When its done I might be proud enough to risk showing a few. It will be another day or two before the next proper update. Gotta get a roof on my box and some other big irritating jobs to do.
 
FINALLY, its a box!

FINALLY, its a box!

:yoinks::woohoo:Huzzah!!:woohoo::yoinks:

Fully constrtucted. Sound-proofed, primered, painted, sealed. Tight as a drum and tough as Fort Knox. The biggest, stealthiest, most secure door I've ever gotten to work with. In fact the most real space I've had to grow in ever! Large in every way compared to what I'm used to. That's gonna show I'm afraid.

Through the course of constructing this leviathan, going overboard on security and sound-proofing and other niceties, I've used up all my grow funds! For this first round I will be limited to the grow supplies that I used for my last garden, which was much much smaller than what I could do in here.

Still, it will give me time to think about what I will do with all this room:


Electrical at the moment is present but basic. IE just a cord dangling down attached to a naked GFI socket. Just getting the damn wire in here near about killed me! It is beautiful through. Fully stealthed with it's very own 20 amp breaker. Redundantly grounded. 12 gauge double-insulated wire. It will eventually end up terminated in two GFI sockets and a switched line to run a couple of green bulbs up top.

Updates very soon to follow on what I'm filling the damn thing with. Sit down and strap in kids, the fun has just begun!! :joint::nanana::joint:

 
Top