I'd go 1/4 strength at first, work your way up from there.

You are using an out of date browser. It may not display this or other websites correctly.
You should upgrade or use an alternative browser.
You should upgrade or use an alternative browser.
150w HPS Club and Resource Guide......
- Thread starter Pipedream
- Start date
Divine Cosmos
Member
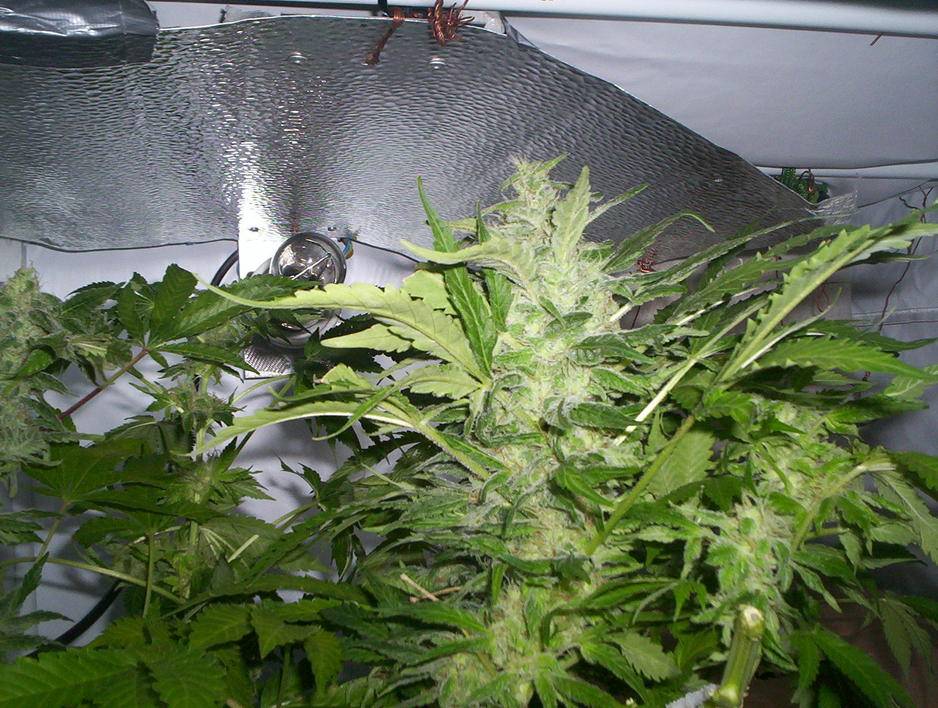
devine cosmos that light is close to those buds!!! but they look like they love it! how close are they and what are the temps at bulb hight? looking great tho! -bluebuds
Cheers bud

Most colas are anywhere from 3 to 5 inches away. The temp at the colas is in the high 20's, but some fan leaves stray a little closer and tolerate mid 30's - hence the folding around the edges. A little heat stress is good for them, and me

jasonk
Member
Hey everyone,
I'm having quite some problems getting temperatures in check in my veg box. Its currently vented with 3 120mm PC fans inside a closet in a 5.5cuft. The temperature is about 10°F warmer then ambient, reaching upwards of about 80-82°. Because this is in a closet in my bedroom, I'm thinking my main issue would be recirculating the exhaust air. I tried to separate the exhaust from intake more, but it didn't help very much.
I'm from the north, so temperatures don't get very hot, but with the summer coming, ambient room temp will get to around 76°.
I have 2 seedlings in there right now that are looking horrible, the bottom leaves are very yellow/brown and almost going to fall off, but if I fix the problem quickly, they look like they will make it.
For the next couple months temperatures outside will be no colder then 50 and no warmer then 70. But will the change from night/day time temperatures be worse then a warm room?
Thanks!
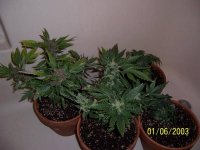
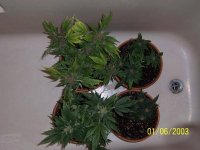
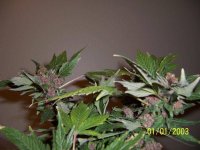
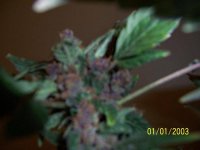
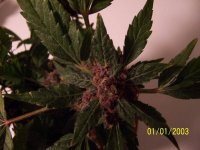
Just a couple pics from my first official grow. Thanks for everybody/s help for having this place available for people to get good information. I for one really appreciate it! Like I said this is my first grow and I'm still trying to get the hang of a few things (getting some bigger pots and a crafting a better light setup among others), but I guess for now I'm just happy to have anything at all you know  . Currently I have two 40 watt shop lights, (one is a 'sunshine 4500k and' the other is 'daylight' 6500k) and one 150w hps lamp in a vertical position in my growing area. While it's been an ok setup for my first time, I have a lot of room for improvement! Seeing people pulling quarter lbs off their 150's is mind boggling to me and definitely where I want to be some day. For the plants themselves, I'm finally allowing myself to get a little bit excited now that I can see the end of the road. So let me know what you all think, sorry for the crappy pics my camera is a digital dinosaur but its all I have right now. Also the date these were taken were taken was Friday 4/3/09
. Currently I have two 40 watt shop lights, (one is a 'sunshine 4500k and' the other is 'daylight' 6500k) and one 150w hps lamp in a vertical position in my growing area. While it's been an ok setup for my first time, I have a lot of room for improvement! Seeing people pulling quarter lbs off their 150's is mind boggling to me and definitely where I want to be some day. For the plants themselves, I'm finally allowing myself to get a little bit excited now that I can see the end of the road. So let me know what you all think, sorry for the crappy pics my camera is a digital dinosaur but its all I have right now. Also the date these were taken were taken was Friday 4/3/09Attachments

TraneRek,
Before I can help with the seedlings, need to know a bit more about your setup. First off, as I suggested, you want to make sure seedlings and eventually clones are kept moist. Not dripping wet, but moist. Plants that small I usually have a dome over to keep them from drying out, they could very well just be thirsty. Also, check your ph! It should be somewhere around 5.8-6.0.
As far as feeding goes, that all depends on your method of growing. DWC/hydro, you're basically feeding from the day you get the seeds wet until you're ready for the last week or so and doing a flush before harvesting.
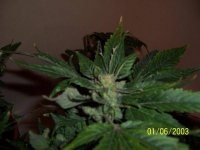
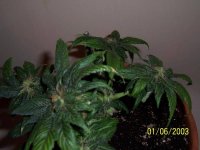
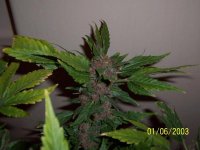
She got the chop on saturday 4/4 which was day 60 for the girls cause she was taking up space and wasn't getting much bigger. This one and her sister the other runt came from the same bag. They both ended up very stunted plants for some reason and I was the most disappointed out of these two. But whatever, they'll still smoke and I have two others to try Also if anyone cares to know, I'm water curing the "biggest" bud on this one to see what the difference between air and water cured bud will be. Will update
Also if anyone cares to know, I'm water curing the "biggest" bud on this one to see what the difference between air and water cured bud will be. Will updateAttachments

Well, I finally caught up with the whole thread! It took a few days to read all the posts since I visited. And the more I read, the more I'm starting to think I might have a few design flaws in my cabinet. I really wish I was good at drawing, even with paint shop, but even after serval attempts, it still looked like a painting piccaso did...after eating a few 'scrooms and washing that down with a bottle of asminthe.
Before I rehash my design, I would like to mention a few personal issues as to why I'm doing some things, or why I'm insisiting on doing certain things a certain way. First of all, I'm exceedingly paranoid about causing a fire. Rightfully so, I lived through one. If you go back and quickly go through all the posts of various boxes in this thread and even some of the threads in other forums, you have to admit some of these setups look like a fire in the making. The builders have wires hanging everywhere. Often things are just taped together. So, in my box I wanted a "clean" set up. All my wires mounted and properly insulated and so on.
So this leads me to my first issue. The ballast for the 150w hps. I remember the first time I seen BSG's grow box, he used of all things a bread pan to put his ballast in. Even then I thought to myself this didn't seem safe. When I pointed this out early on in this thread, Pipedream himself recommended stuffing the ballast and ignitor inside an electrial box. This would be safer, but I can't seem to figure out how to "mount" the transformer and ignitor to the bottom so they don't bounce around should I accidently bump it.
I have a reason for this concern. My very first attempt at a micro grow I used a rebuilt Lights of America 70w. I stuffed the ballast inside a metal experimmenter's box I bought from radio shack. then ran the cord to the a rigged clamp on light to the 70w hps lamp. (These have a medium base so it fight fine.) Well one day while checking my plants, I bumped the experimentor's box, there was a pop, I got zapped and the lamp blew. How close I was to being electricuted, I don't know, but I sure don't want to experience that again!
Even if I could figure a way to mount the ballast for a 150w in an electrical box, the issue then becomes one of heat. Sure, it was also suggest I mount this outside the box, but the room it's in has thick shag carpet with thick padding underneath. If you think it requires a spark and something to cause a fire...go research "spontanious combustion" sometime. Not withstanding, having the ballast outside the box makes it less stealthy.
So that leaves figuring some way to keep the ballast cool. I had hopped to use a muffin fan I just found online that's rated 500cfm's. But at 57db @ 1 yard, that is loud, even if I do have my home brewed comptuter near by. (six muffin fans inside the computer)
This is why I have been asking where I can get a digital ballast from. I takes the heat issue out of the equation for me. My only other option is to upgrade my exhaust to a panasonic whisper. Heck, even if I do get a digital ballast I'm really liking the idea on how quiet they are. But this is much larger then what I had planning on, so this is where I must go into describing my design once more.
Since I wanted this to be super stealthy, I'm going to be using 3/4" "furniture grade" red oak venieared plywood. Fortunilly, places like Home Depot, Lowes and a few local home improvement stores sell this type of plywood pre-cut in 2'x4' sections. From this I figured I could build a cabinet that's 4' tall and 4' across and 2' deep. In order to prevent light from entering the grow/flower chamber, I was going to place the "bottom" of the box 4" above the foor. In front I'd add a toe kick so nobody would notice the bottom hieght and in the back I'd add a vent behind the grow chamber. This would give me a grow chamber roughly 2'w x 2'd x 4't (4'sq 16' cubed).
The othe vertical side would be divided into 3 chamber hortizonally. The bottom 2' being the clone/mother chamber, the middle chamber being 12" for drying racks, and the top 12" for electronics. By strategically placing vents inside the clone chamber. Air on this side would flow from the back of the clone chamber to the front top...then enter the drying area, air from this area would then vent back out into the grow chamber from the back top of this chamber (basicall creating a Z shaped light trap between chambers). Further more to be on the safe side I'd paint the inside of the drying area flat black to absorb any light that could enter that chamber. Air would then flow from the grow/flower chamber out, through a charcoal scrubber into the electrical chamber, before being pumped out the back top of the box.
Just to be on the safe side, I was also concidering on putting a small room ozone generator in that chamber as well. But that's if I could get away with that 500cfm muffin fan. If I go with the whisper instead (as being recommended by several other members of this club), 12" won't be large enough to fit the fan in this area!
The reason I want to include drying racks into my design... Around where I live you can get good "up high" weed all day long. Heck, the price has even dropped! Use to go for $80-$100 an oz, last time I bought any, it was $60!!! Instead of trying to replicate what I can already get very easily, I was going to grow mainly some very stinky indica's. This way, the scrubber becomes dual purpose in that it keeps both my grow and my harvest from stinking up the neigborhood.
I could cut down on the size of the cloning chamber, but I want to keep some mother's for a future breeding program in there as well, and I'm not sure how small I can go and keep a bonsi mother living without it being detrimental to it's health. Eventually I hope to build a second box for holding mothers and crossing, but that's long after I hope to have this box up and running. But for now I need this area.
First order of buisness. Can some of you show me or give me ideas on how to make the stock ballast "safe". So the parts don't bounce around inside if you should bump it? I feel that if I can make this safe, I could then place this in the electrical chamber between the scrubber and the fan. The air flowing across it should keep it cool, especially if I go with a whisper that has a larger cfm rating then 80. Investing in a more expensive fan seems more logical to me then a digital ballast, but only if the stock ballast is safe... (sorry to repeat myself...my issue with fire strikes again!)
The next issue is how large of an intake do I require? As a whole, I have an area that's roughly 3 1/2" tall and 23" long. Doesn't nessarily mean I need to use all of it. If that's the case I'll leave everything below the "bottom open in the back, but that won't serve as much of a light trap then. If I place it too close to the wall, then I block air flow. The air will then enter the scrog chamber through 3" round "soffit" vents. Ya know the kind used in the eves of your house so air flows out of your attic. Two in the clone chamber (one in rear bottom, and another front top) Then a third going from rear common wall top of the drying chamber. Then finnally there's another type of roof venting that comes in sqaures in sizes from 4"x4" all the way up to 24"x24", made out of aluminum and already painted white. I figured on using either one or two 8"x8" or 10"x"10". Then placing the carbon scubber on the opposite side of this inside the electrical chamber.
Soooo, before I start cutting any plywood, I could use some suggestions on how to tweak this design. Most especially helping me get past my concerns about causing a fire with the ballast either shorting our or causing too much heat.
Thanks,
Jaxx
The purpose of the ballast box is two-fold. On one hand its to safely contain all of the components to prevent bodily contact & sparking from poor or loosened connections. While on the other hand it provides both heat insulation and acts as a heat-sink to cool the main core of the transformer. In order for the heat-sink function to properly work, the metal plates of the coil must be physically in contact with the box or housing. For this reason, many coils have holes that run right thru them to bolt them down. In the event that mounting holes are not provided, the core should be secured to the metal base by use of a steel strap that runs over the top of the coil and is then secured to the box with sheet-metal screws, rivits, or small bolts and nuts. The better your core can transfer its heat to the case, the cooler your ballast will run and the longer it will last.
Just as important as heat-sinking, grounding you light is critical. No HID lighting system should be operated without all of the components properly grounded. You must use a three-wire polarized plug at the wall end and ensure that the ground connection is securely attached to your ballast box and that the same ground connection is passed along to your lamp fixture and reflector.
When picking a ballast box you really can be quite imaginative. As long as the box is metal, allows enough room for safely containing all of the components and provides a bit of air-space within it will be fine. And remember, all of the metal will get warm, and as such will try to melt the insulation of any wire that is in contact with it expecially where wire passes thru the metal in tight holes. For this reason be sure to use rubber gromets or additional insulation where the wire passes thru the walls.
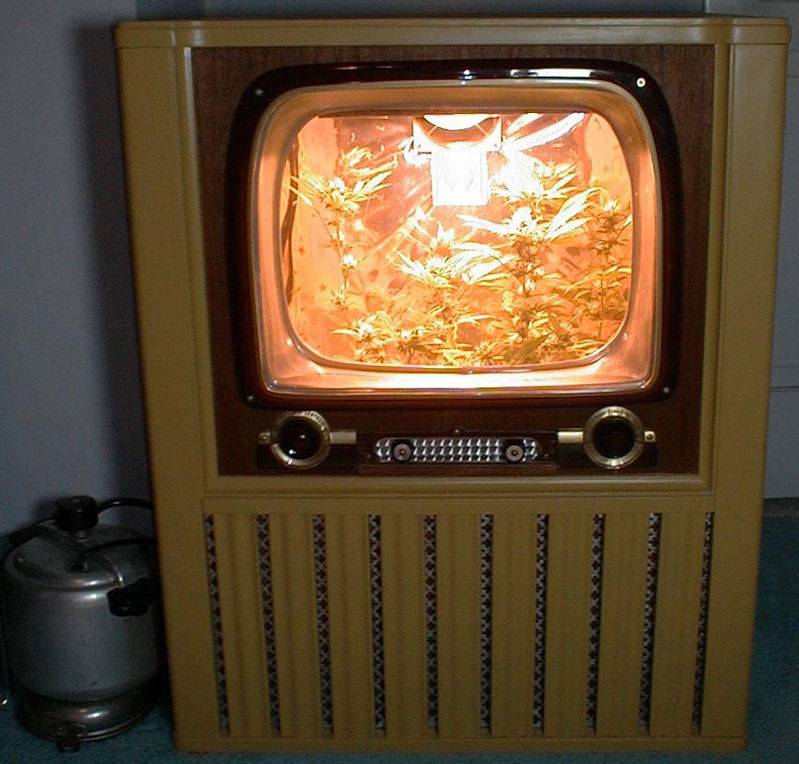
Here's a grow box I once made from an antique TV set. If you look on the floor next to it you'll see the ballast. For the container I used an antique Pressure Cooker/Cooking Pot. Made from heavy cast aluminum with a locking lid it worked perfect and added a bit of interest to the set-up.
Just as important as heat-sinking, grounding you light is critical. No HID lighting system should be operated without all of the components properly grounded. You must use a three-wire polarized plug at the wall end and ensure that the ground connection is securely attached to your ballast box and that the same ground connection is passed along to your lamp fixture and reflector.
When picking a ballast box you really can be quite imaginative. As long as the box is metal, allows enough room for safely containing all of the components and provides a bit of air-space within it will be fine. And remember, all of the metal will get warm, and as such will try to melt the insulation of any wire that is in contact with it expecially where wire passes thru the metal in tight holes. For this reason be sure to use rubber gromets or additional insulation where the wire passes thru the walls.
Here's a grow box I once made from an antique TV set. If you look on the floor next to it you'll see the ballast. For the container I used an antique Pressure Cooker/Cooking Pot. Made from heavy cast aluminum with a locking lid it worked perfect and added a bit of interest to the set-up.
Thanks for the reply Pipedream. That eases my mind a bit. That also has me thinking. I do have a mig welder out in the garage. Quite handy since I'm a certified welder! ")
I could knock together a home brewed box. I did notice some small holes on the bottom of the transformer for example. Just need to tack some chanel into the bottom to bolt it to. This would give me some space for airflow underneath the transformer. For bottom and sides of a box, 1/8" plate would suffice. But which would you suggest for a lid? More plate or one of my local home improvement stores sells perferated 1/8" plate too. Hot air coming off the transformer could then vent out the top. Or, I could use a solid top and tack "I" channel for fins and act more as a large heat sink.
Since my last post I've been researching whisper fans. I noticed they come in three different cfm ratings for the unlighted, with no heater versions. That's 80, 150 and 380cfms. I have yet to find a website that gives diamentions, so if someone knows of a website or could take a few quick measurements, I'd really apperciate that!
Since this is all inter related, I must remind everyone I'm gonna be growing mainly stinky indica's. Current gentics I have waiting to grow out are Aurora Indica, Citral and Snow White. To determine what cfm rating I'm going to need to keep my box cool I need to know how large of a scrubber I need to build.
I have a rough idea on how or what I need to do from examples provide in this thread. Unless it's advise to make it larger I'm figuring on a wooden frame that's 10" tall and 20" long. To this I will staple double layers of metal window screen to hold the activated charcoal. I'm just not so sure how deep it has to be in order to totally neutralize the stench from the grow and the drying harvest?
Jaxom, this thread might help:
http://www.icmag.com/ic/showthread.php?t=31679&highlight=dummies
edit: The 80 cfm is probably enough to cool your cab. I don't know if it's enough to suck through carbon. The 150 is more than enough to do the job. There's a scrubber DIY for whisper fans by Bulenath here somewhere. He has several of em and could answer your questions better than I can. Haven't seen him around lately though.
Here is Bulenath's Guide DB is talking about :]
http://www.icmag.com/ic/showthread.php?t=45196&page=1&highlight=carbon+screen
Bulenath's hasn't been around, but I just be able to answer any question with regards to the Panasonic Fans. That is, if your interested in maximizing silence!
Jaxom - What will be the room's ambient temperature year round? With the 80CFM whisper I'm doing about 5-8F higher than room temperature with my 150w.
Divine Cosmos
Member
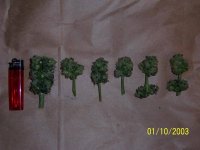
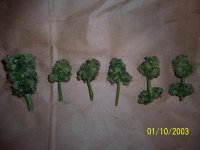
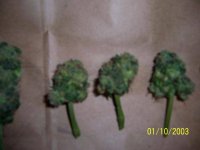
Hate to hog space here, but I just Harvested!
Hate to hog space here, but I just Harvested!
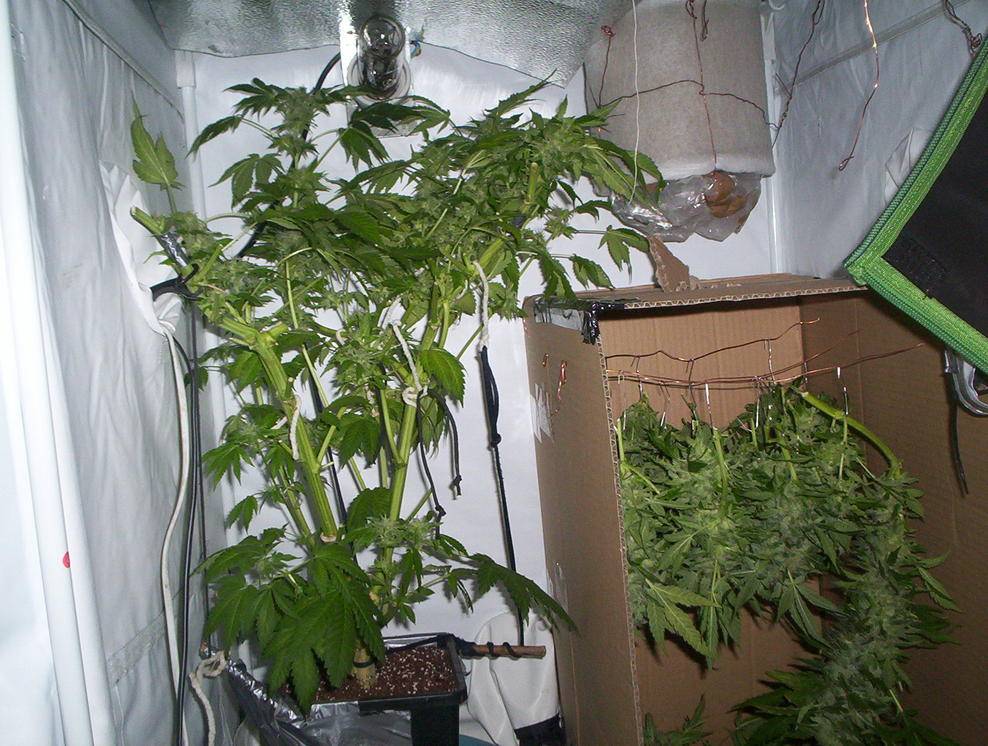
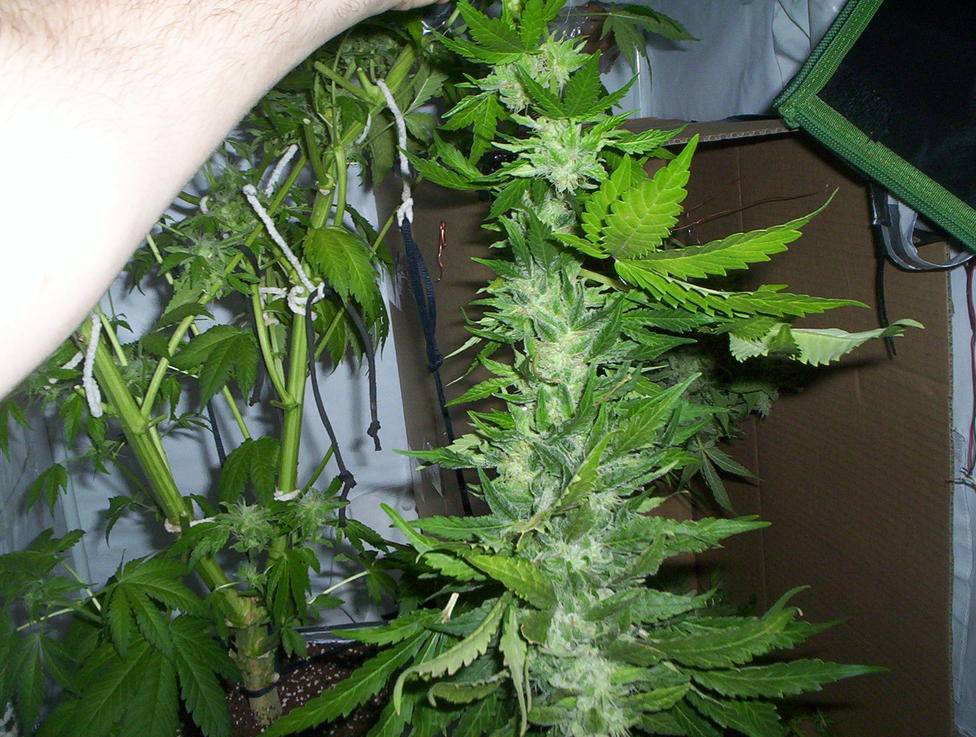
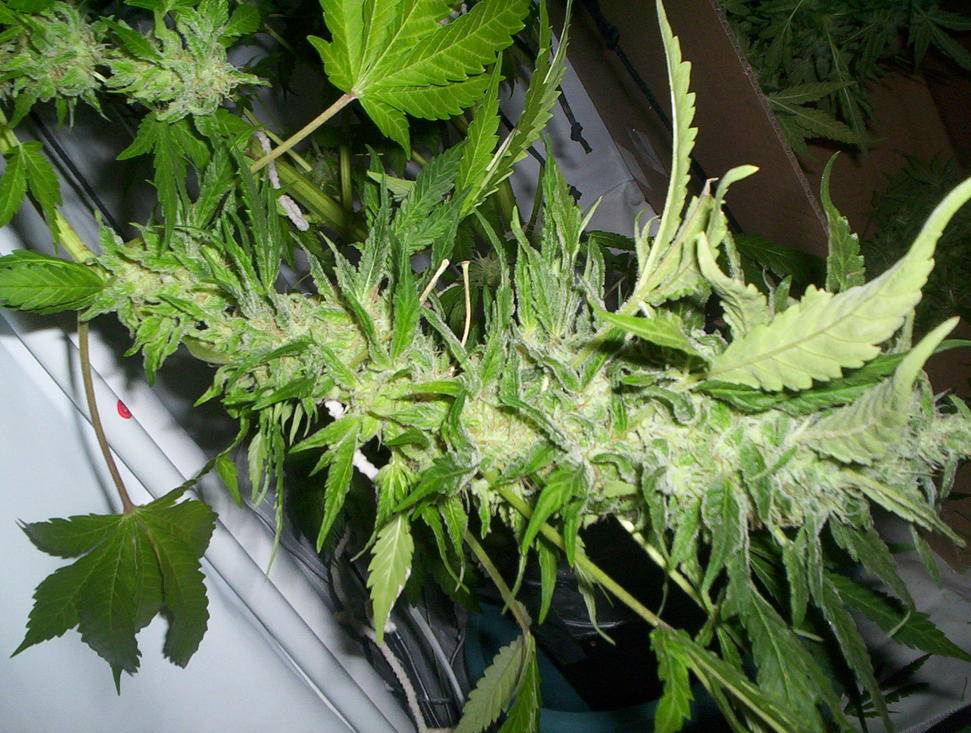
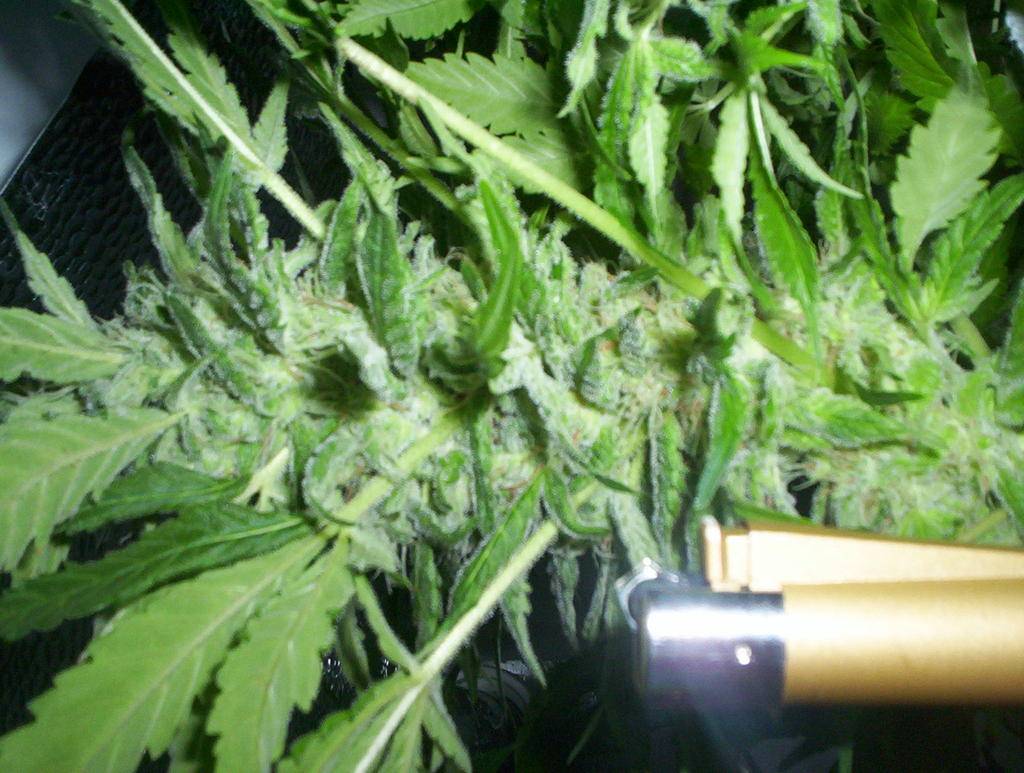
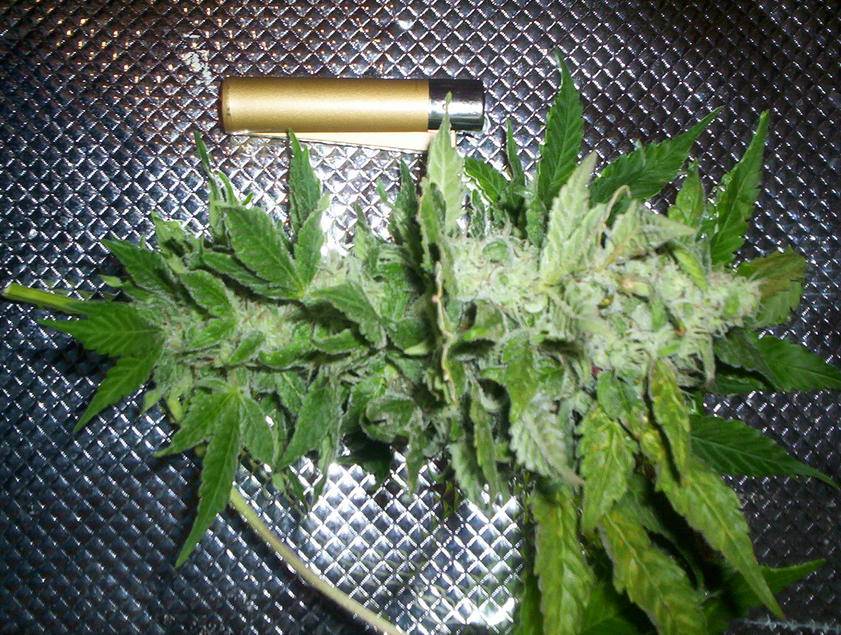
Hate to hog space here, but I just Harvested!
Looks like you might be a bit green? Did you let the trics amber? Nice harvest.
Pipedream, dewd.....
I expect to see much more respect given to Pipedream.
He rocks the house, folks.
I expect to see much more respect given to Pipedream.
He rocks the house, folks.
I'm so glad I went back and read all those posts. I feel much better about my design. I'm also feeling a bit better about just using the stock ballast for the hps. I'm sold on those whipser fans though. Can't beat the Somes rating vs CFM's over muffin fans.
Two more things I need to resolve then I think I can begin construction later this week or for sure next week. For those that have had their cabinets running for a while and have done a few harvests. How much space is required to allow your buds to dry? Remember I wanted to use an area between the clones and the electrical chambers for drying racks.
By basically taking some 1"x1" wood and making a frame and then stapling some window screen to this. As I've mentioned my orginal plan was to have an chamber that was 20" deep, and approximatly 23" across and 12" tall. But to squeeze that whisper into the electrical chmaber, I might have to tweak that a bit.
For proper air flow during drying, I was going to space those racks using pins in the walls one inch apart. But would 6 20" x 23" racks be enough to dry a dwc/scrog harvest, especially if I select good genetics like say Big Bud or such?
The other issue I could use some suggestions on are how to build a vertical scrubber. I've got some ideas on the general assembly. Using the same concept as Bulenath did using a wooden frame. Then attaching some wire mesh over that. To further help support and protect the activaged charcoal I can staple some wire window screen to both sides. Then on the vent side attach some airconditioner filter material using some velcro. The only thing I haven't figure out is how to open it so I can change the charcoal peridodically.
Hmmmm!?
You really don't need much room to dry at all. As long as the moisture can escape and you can get the air to refresh once in a while you're golden.
My favorite method, which has served me well for many years is just a plain old brown paper grocery bag. I fill the bottom with a couple inches of buds, fold-over and tape/staple the top shut, then take a regular hole-puncher and put about 6 or 7 holes down each corner catching both sides in the puncher. Let it stand in a cool dry spot and voila, perfectly dried buds.....
My favorite method, which has served me well for many years is just a plain old brown paper grocery bag. I fill the bottom with a couple inches of buds, fold-over and tape/staple the top shut, then take a regular hole-puncher and put about 6 or 7 holes down each corner catching both sides in the puncher. Let it stand in a cool dry spot and voila, perfectly dried buds.....
Bulénath
Member
Here is Bulenath's Guide DB is talking about :]
http://www.icmag.com/ic/showthread.php?t=45196&page=1&highlight=carbon+screen
Bulenath's hasn't been around, but I just be able to answer any question with regards to the Panasonic Fans. That is, if your interested in maximizing silence!
Jaxom - What will be the room's ambient temperature year round? With the 80CFM whisper I'm doing about 5-8F higher than room temperature with my 150w.
Aloha everyone, Catman, Pipedream my old friend!
I am back for a MERE few weeks, and leave the country in 21 days exactly. There are MANY IMPORTANT things I need to discuss with close ICMag friends, especially my old friends from Overgrow such and Pipedream and Sugabear among others....
Well, a while back I had some security problems, and personal issues which caused a three month absense. This account was almost willingly deleted, and to everyones relief, it wasn't. Why is that? Well, I solved my security issues through buying a one way ticket back to India and obtaining a 10 year visa to the country! Needless to say, America, and life in this country has come to a personall cross-road. Happiness from my life has vanished, and a crying heart for peace and true "living" has finally, for the better, tore me back toward the east. Torn and broken, but atleast, at the very, very least, back to India.
For that matter, I sent away for Pakistan visa today, and hope to travel the Hindu Kush, Hunza, and Kashmir, among other beautiful mountain cultures known for the world's best hash. To my close friends from ICMag and Overgrow, I offer you a link to my on-going journal of my solo adventures throughout the east.
Also, I offer you one more thing that I NEED to be assured on:
The preservation of my Genetics.
I have one or two ORIGINAL Sugabear's OB1, F1 seeds.

Two or three ORIGINAL 133 day flowering Nuclear Cloud Strain seeds.

And a couple hundred seeds which are a cross between the two...
There should be many, many phenos within those seeds!!
Also the pheno I kept is the "Tropical Rainbow", which is a 70-80day stativa dominant hybrid with thick indica like nugs. I got a couple dozen seeds from many perpetualy harvested female clones. Well, each female clone will usually grant one seed, no matter the strain!
So the offer is up there, and I really want Sugabear to have his OB1 genetics back, and I want Pipedream to have my 133 day stativa: Nuclear Cloud.
The rest can go to old friends and such, highly respected senior members, etc.... Just let me know!
Bulénath
Member
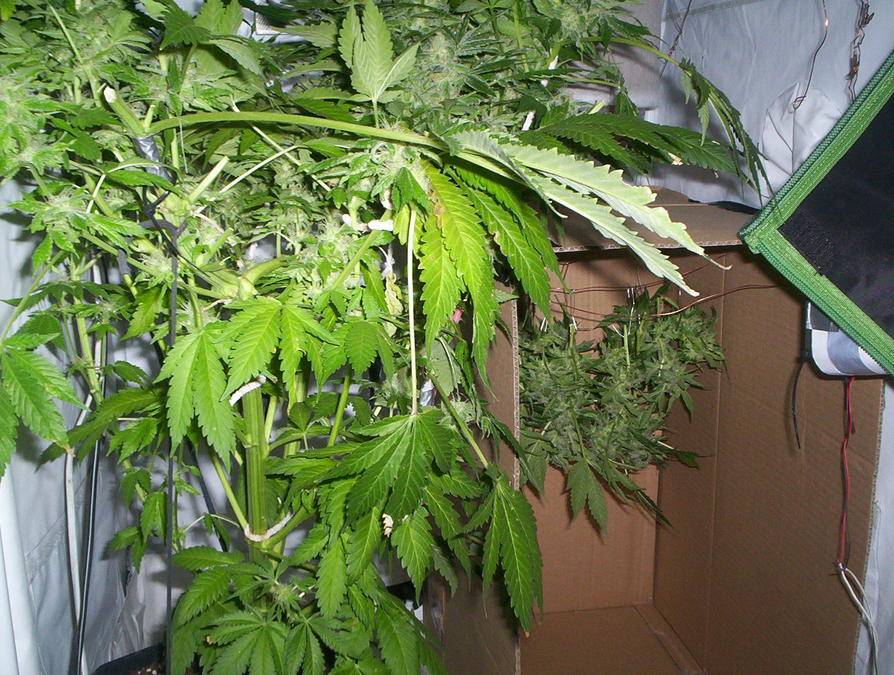
My Third and Final Scrog, Perfected!!!!
My Third and Final Scrog, Perfected!!!!
For this grow, three of the most seemingly important aspects of my small, white-flower-cabinet were changed. That is the small cabinet with 17-1/2" from the floor to the 150w HPS light bulb!!!
I removed the glass shield, and removed the fan from the Air-Cooled reflector, thus making it a regular reflector! The third change, if the first two were not bad enough, is the retirement of my window Air Condition, which kept the ambient temperatures low and humidity around 45%-55%.
Well, humidity ran wild, and averaged about 65% during lights off.
Regardless of changing all those aspects that were once thought invaluable to a sucessfull grow, this third attempt at scrog went perfectly, and I harvested about 70 grams of bud, and 10 grams of grade A trim, plus about 0.8 grams of hash from the fan leaves. Not too bad for such a small grow....
Oh and this is the Tropical Rainbow pheno spoken of in the last post.

