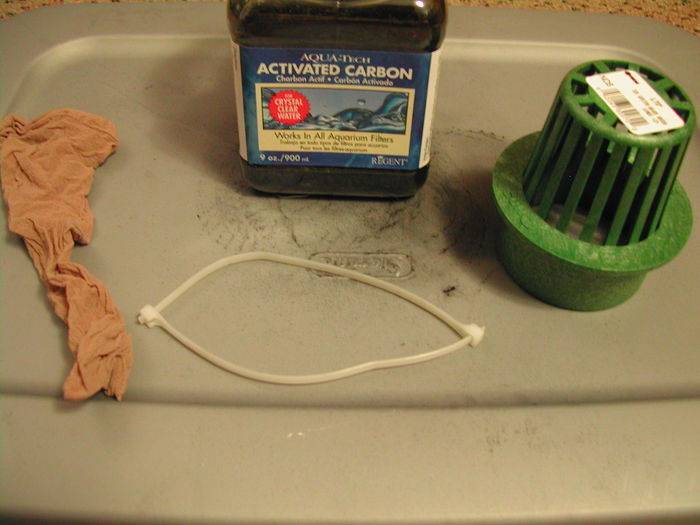
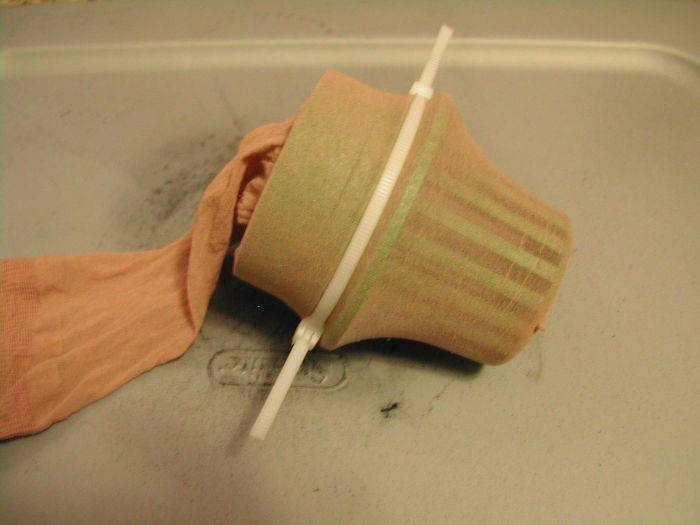
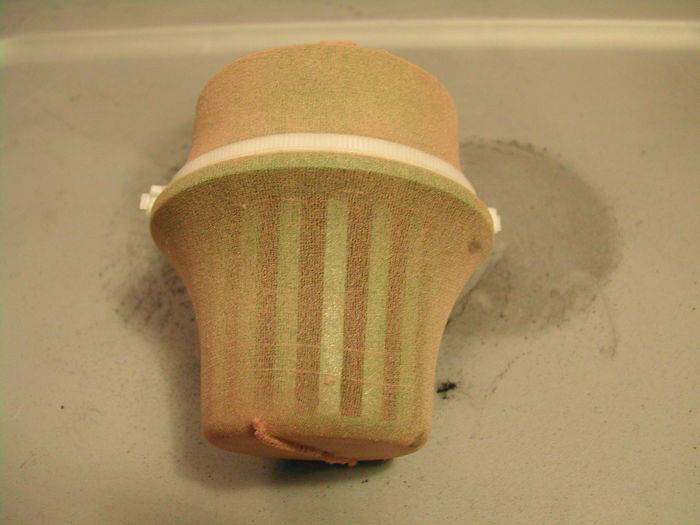
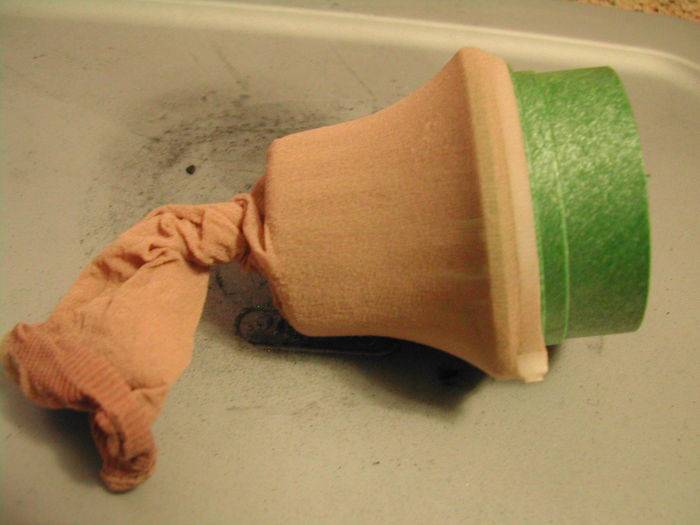
What's new

DIY Micro Carbon Filter; Cheap, Easy and Quick.

H

Hal

Pig-Pen said:
Pour some carbon in, work it around and even it out. Add more as needed and keep working until you have a good, even 1/2" or so layer. Tie the stocking off and again, trim da fat....


Sweet little solution Pigpen! Any chance you could explain how you went about that last "tie-off?" It seems like you've made a real tight knot, but not being a master of knots....I would love to know exactly how you did it.

Thanks for your help. :rasta:
 

Pig-Pen

Member
Hal said:
Sweet little solution Pigpen! Any chance you could explain how you went about that last "tie-off?" It seems like you've made a real tight knot, but not being a master of knots....I would love to know exactly how you did it.

Thanks for your help. :rasta:

Yeah, I'm not the best at explaining things sometimes. And I'm pretty bad with knots myself. :bashhead:

Once you've got all your carbon in and "packed into place", just stretch the stocking out as much you can and tie a basic "overhand knot" (google image it, just a basic knot) as close to the filter as you can. I'm sure there may be other knots that would work better in this case, some sort of sliding knot or whatnot, but I was never a boy scout so that's beyond me.

You want as much tension as you can possibly get so as to hold all the carbon in place.

Another option would be to use a rubber band or some sort of clip. An advantage here would be that you wouldn't have to completely rebuild when you have to change the carbon as you'll have to do with it tied up.
 
Last edited:

Pig-Pen

Member
I should add that the original one I made is still rockin' my veg cab and still no smell at all. So it's seen almost 6 months of 24/7 use and is yet to show signs of needing to be "recharged".

Also I filter my intakes to keep out dust that would clog the carbon more quickly.
 

Bush Grower

Member
dtoker said:
i would mate i love the design but i wouldnt have a clue where to get the duct in the uk?

It's found in the drainage/pvc/pipe section of a hardware store, it's not made for ventilation.
 

Squeeky

Member
I'm going to be building two of these tomorrow, and I'm curious what CFM fans are you using? Would 35CFM be ok, can I get by with less to decrease sound?
 

Pig-Pen

Member
Squeeky said:
I'm going to be building two of these tomorrow, and I'm curious what CFM fans are you using? Would 35CFM be ok, can I get by with less to decrease sound?

Not sure what the CFM is, but I've used these with a couple different 90mm fans.

The lower the CFM, the more slowly and evenly air will be pulled through the filter for a given filter size. That's a good thing. That's why I believe in using "oversized" filters.
 
I use pretty much the same design but I use a car/truck air filter that you can buy at wally world, pour carbon inside and used a pvc fitting with some screen to hold carbon in,


H

Hal

Any updates from folks who have actually used this design? I'll have one in about month or so, but would love to hear from others recent experiences :)
 

mjaxon

New member
Thank you pigpen! I have just made one of these in the 4" size. Instead of securing the nylon with zip ties, I used electrical tape stretched around a few times. This works great and allows me to mounth the scrubber deeper into my flange. I also tied a bow rather than a knot (a tight bow) on the end to make it easier in changing.
 

Ghostwolf

Pirate & Cherokee Warrior for Freedom and Cannabis
Veteran
Here's one for the Micro's. :headbange

This is based on an Atrium Grate from the hardware store, outdoor plumbing. They come in a range of sizes, 3", 4", 6", etc. The one pictured is 3". This is perfect for veg or dryer boxes, or PC-sized bloom boxes. For larger and/or stinkier applications you can easily "T"-together 2 or more using fittings from the HDWR store.

Takes only a few minutes and no real tools. :jump:

What you need:

- Atrium Grate
- single legging, the cheap ones that come in the "eggs" are perfect.
- zip tie, or two
- a few ounces (for the 3") activated carbon.

Total cost, ~ $10 :headbange (using a 3", they get more expensive as they get bigger.)

- scissors, fingernail clippers, snips or whatever to trim the zip-ties.
- a length of Duct or Foil (I prefer Foil tape) to mount it.

It's self explanatory but I'll walk you through it anyhow. :dance:

Arrange your things out in front of you, such as this....


Now stick the Grate down into the stocking, (or pull the stocking over the grate :bashhead:) as such....


Apply zip-ties just under the flange, tighten them down as much as you can without breaking them.....


"Cut the fat" .....


Pull the stocking back over the grate (or pull the grate out of the stocking..).... be careful not to snag and start a run on the edges of the zip-ties you just trimmed. You may want to put a piece of tape over it/them. Or just be careful.


Pour some carbon in, work it around and even it out. Add more as needed and keep working until you have a good, even 1/2" or so layer. Tie the stocking off and again, trim da fat....


I should add that before you tie it off, you need to pull the stocking as tight as you can get it. This tension will allow it to keep it's shape for the most part, otherwise it will just sag downward. This is also why you need to use zip-ties or a hose clamp; if you use rubber bands or anything flexible it will come right off when you are giving it the "final tensioning".
From the inside....


Tape it up and yer done! :jump:
Very cool filter design, here's a twist on that. If you can't get the mesh pots, you could use a liquid laundry detergent cap and drill holes in it. Just a wild and crazy thought.:joint:
 
L

LymphNode

Very interesting, might do this with the 6" ones. I'll let you know.
 
Top